Search icon CANCEL
Subscription
0
Cart icon
Your Cart (0 item)
Close icon
You have no products in your basket yet
Save more on your purchases! discount-offer-chevron-icon
Savings automatically calculated. No voucher code required.
Arrow left icon
Explore Products
Best Sellers
New Releases
Books
Videos
Audiobooks
Learning Hub
Free Learning
Arrow right icon
Arrow up icon
GO TO TOP
Internet of Things with Arduino Cookbook

You're reading from   Internet of Things with Arduino Cookbook Build exciting IoT projects using the Arduino platform

Arrow left icon
Product type Paperback
Published in Sep 2016
Publisher Packt
ISBN-13 9781785286582
Length 188 pages
Edition 1st Edition
Tools
Concepts
Arrow right icon
Author (1):
Arrow left icon
Marco Schwartz Marco Schwartz
Author Profile Icon Marco Schwartz
Marco Schwartz
Arrow right icon
View More author details
Toc

Table of Contents (9) Chapters Close

Preface 1. Connecting an Arduino to the Web FREE CHAPTER 2. Cloud Data Monitoring 3. Interacting with Web Services 4. Machine-to-Machine Interactions 5. Home Automation Projects 6. Fun Internet of Things Projects 7. Mobile Robot Applications Index

Making a simple Arduino clock


As the first project of this chapter, we are going to build a simple clock that gets the time from a cloud server, using Arduino. The time itself will actually be displayed on an OLED screen, also controlled by the Arduino board.

Getting ready

For this project, you will need an OLED screen to display the time that can be controlled via Arduino. I recommend using the 128x64 OLED screen from Adafruit (https://www.adafruit.com/products/938).

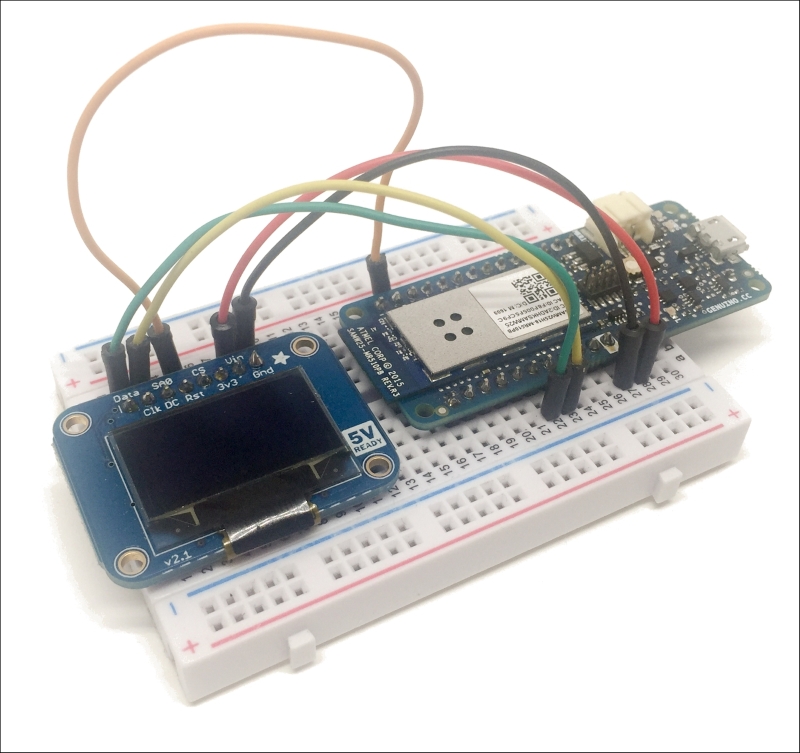
We can now assemble the project, which basically consists of simply connecting the Arduino board to the OLED screen. First, place both boards on a breadboard. Then, connect the VIN pin of the OLED board to the VCC of the Arduino board, and GND to GND. After that, connect the data and clock pins: data goes to the SDA of the Arduino board, and CLK goes to the SCL of the Arduino board. Finally, connect the RST pin of the OLED screen to pin 4 of the Arduino board.

This is the final result:
On the software side, you will need to download...

lock icon The rest of the chapter is locked
Register for a free Packt account to unlock a world of extra content!
A free Packt account unlocks extra newsletters, articles, discounted offers, and much more. Start advancing your knowledge today.
Unlock this book and the full library FREE for 7 days
Get unlimited access to 7000+ expert-authored eBooks and videos courses covering every tech area you can think of
Renews at $19.99/month. Cancel anytime
Banner background image