Sharing a canvas
Procreate lets you export a canvas directly from the gallery to several supported apps such as Google Drive, Twitter, and Instagram. There are two ways to do it: you can choose to either share a single canvas or share multiple canvases together.
Sharing a single canvas
To begin, perform the following steps:
- Open the gallery and find the canvas you want to export.
- Swipe left on it to reveal three buttons, Share, Duplicate, and Delete, as shown here:
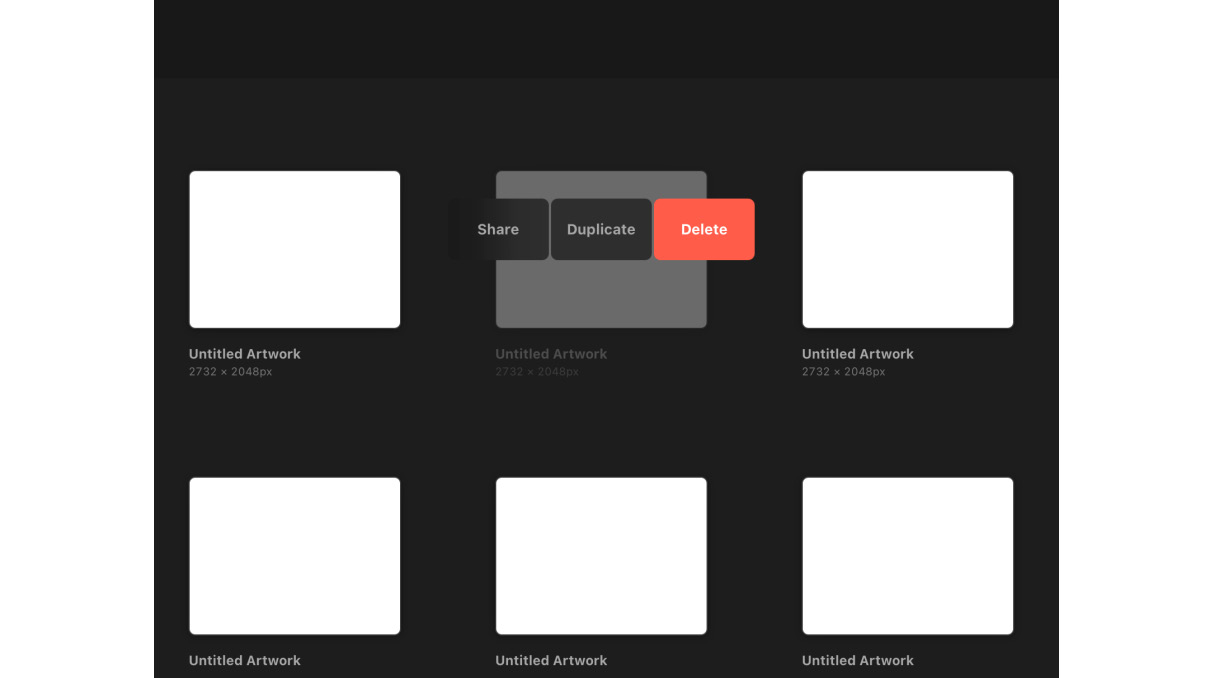
Figure 1.3: The canvas menu
- Tap on Share to reveal this menu, which has all the possible formats your file can be exported as:
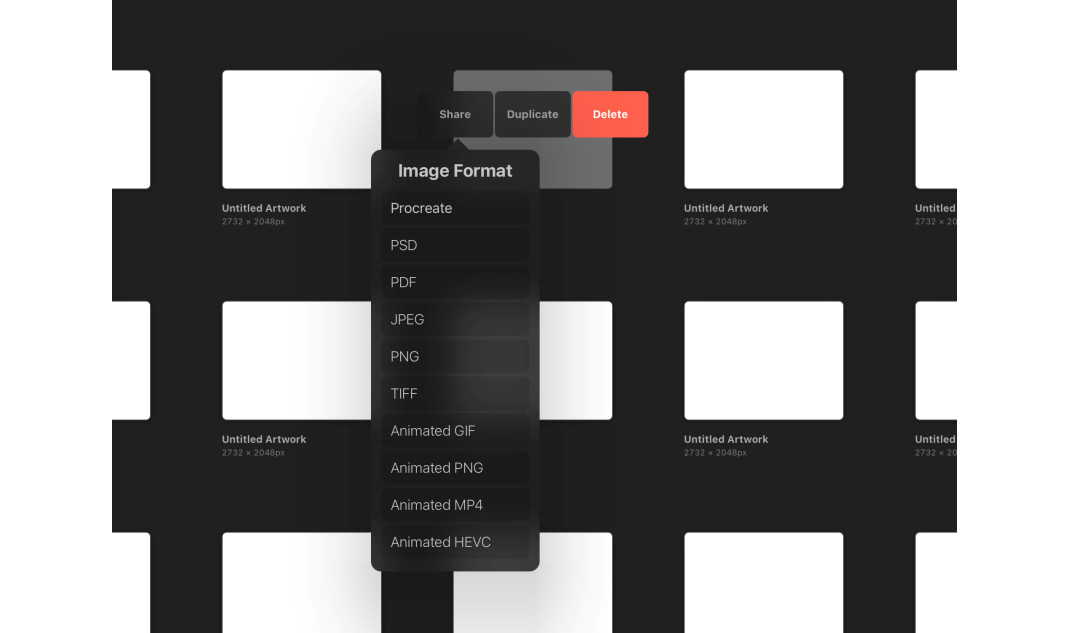
Figure 1.4: The export formats menu
- Once you have chosen your desired format, a dialog box will open. From here, you can choose the destination of your exported file, as shown here:
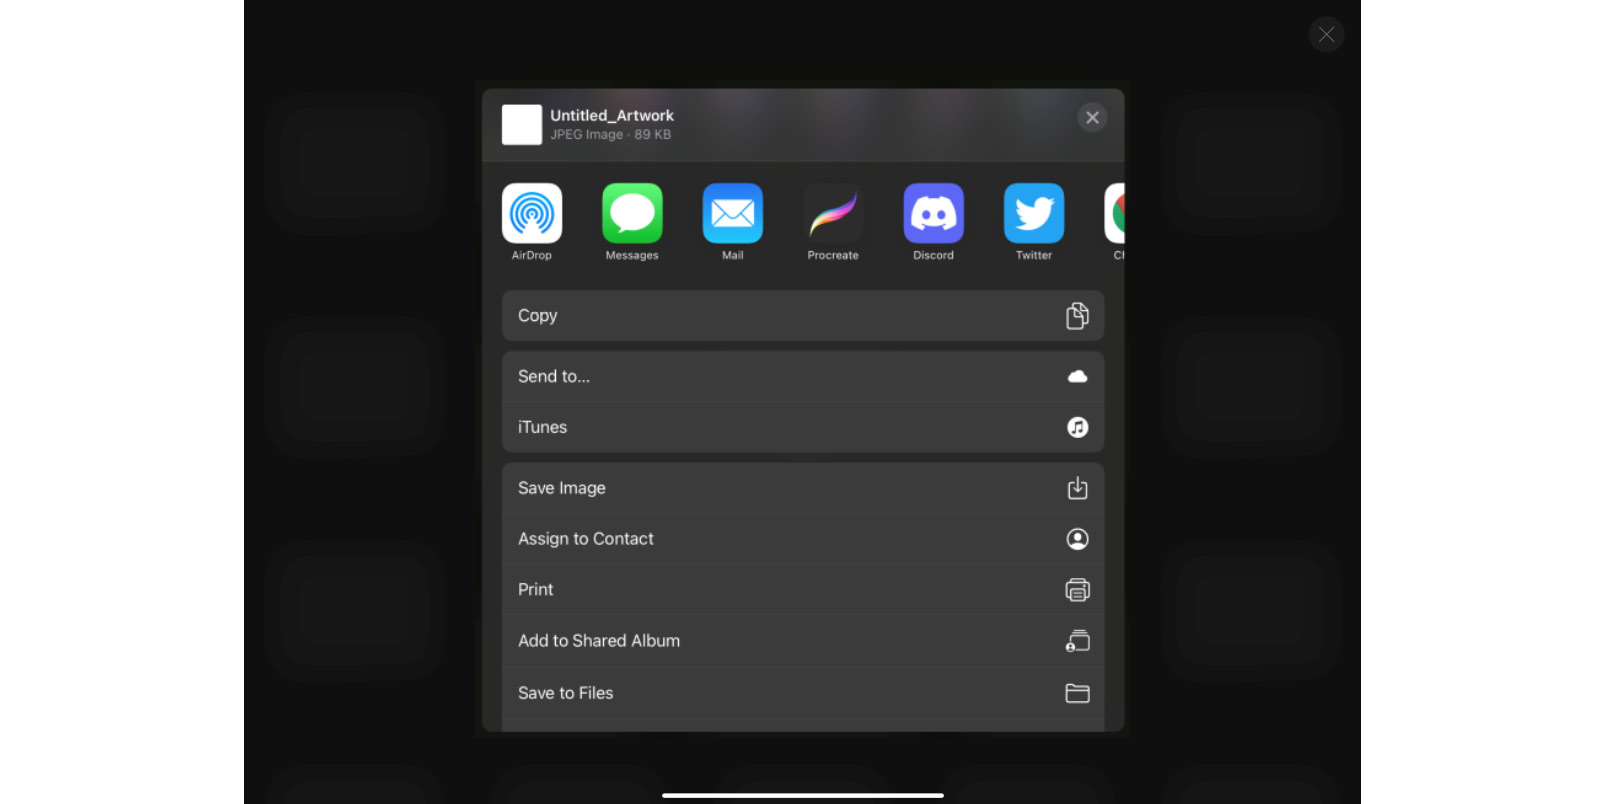
Figure 1.5: The Share menu
You can easily save the file to your device or send it to an app of your choice. It’s worth noting that sharing to an app does not mean that the image is saved to your device. You have to do that separately.
Sharing multiple canvases
Procreate also lets you export multiple canvases at once:
- From the gallery, tap on the Select option. A small circle will appear under each canvas.
- Tap on a canvas to check the circle and select it.
- Once you have selected all the canvases you want to export, you will notice that the upper-right menu has now changed, as shown here:
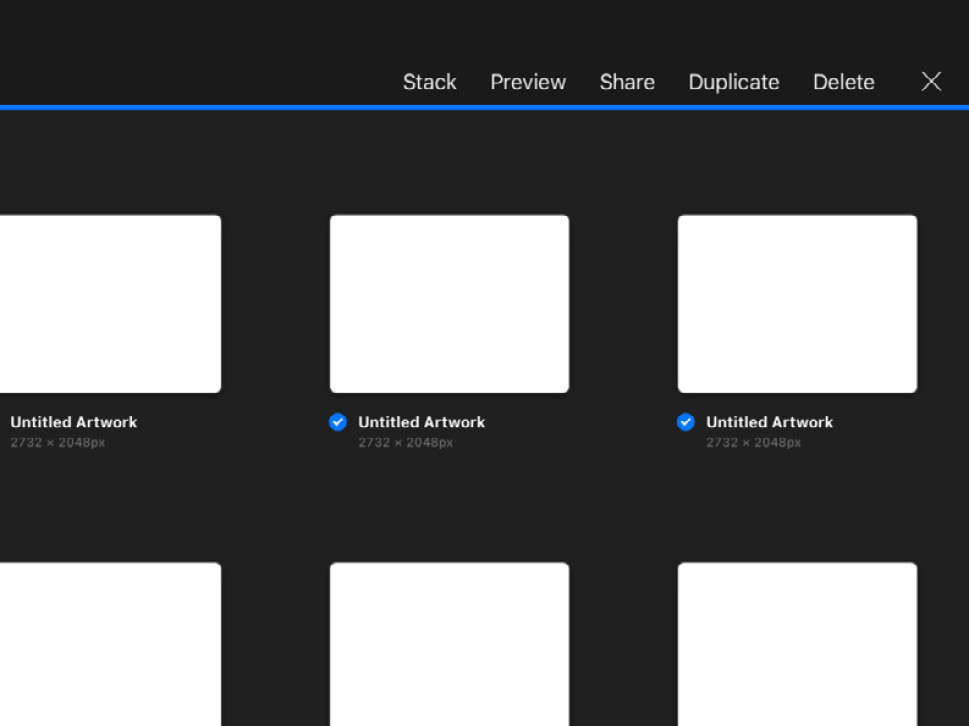
Figure 1.6: The canvas
- Out of those options, select Share.
Similar to the previous process, choose a format and destination for your files to complete the process and bulk export the selected canvases.
Sharing by dragging and dropping
A quicker and easier way to export files is by dragging and dropping a canvas into the intended destination. For this, you will need to use the Split View feature of your iPad. To activate Split View, follow these steps:
- Open Procreate.
- Gently push up the horizontal white bar at the bottom of your screen to reveal the Tab bar. From there, press and hold the Photos/Files app icon (or wherever you want to export to).
- Drag the icon to the left or right edge of the screen.
- Your screen will automatically split, with the two apps on either side of the app divider line. You can adjust the position of this line to decide how much screen space to allot to each app:
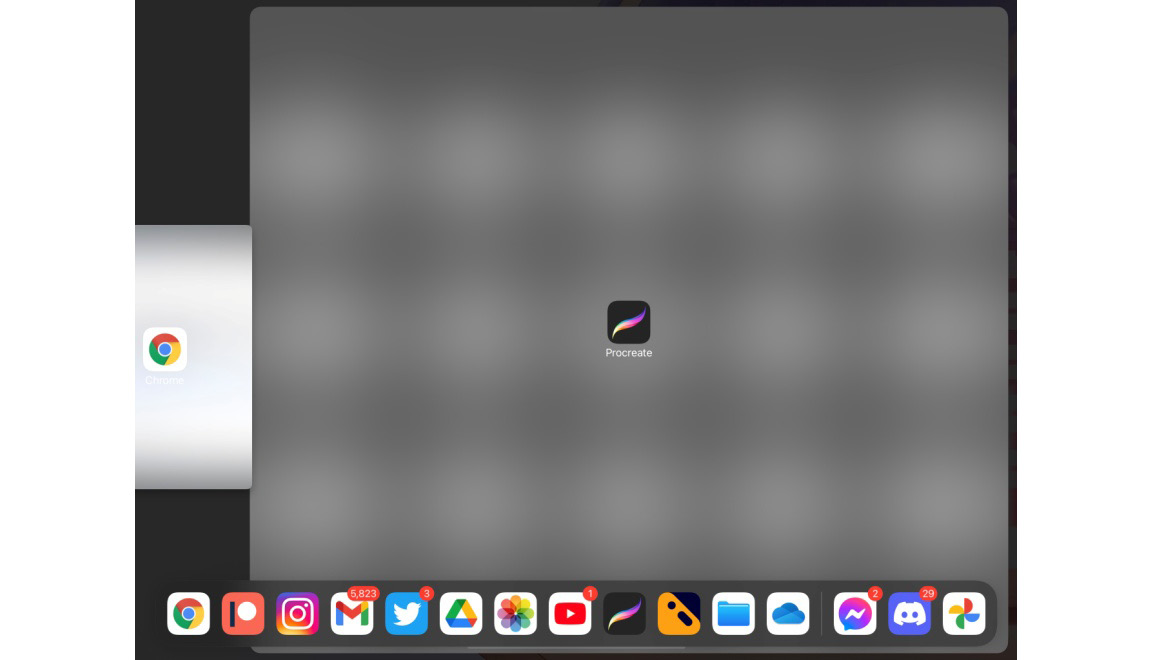
Figure 1.7: Activating the split view
- Next, simply select the canvases you’d like to export using the Select button from the previous section, and drag them into your destination app to export them automatically.
Important Note
The format of a file exported using drag and drop depends on the destination app. You can edit this via Open Procreate | Actions | Help | Advanced Settings | Drag and Drop Export. By default, the file type is set to .jpeg when exporting to Photos and .procreate when exporting to Files.
Now that we know how to create and export canvases, it’s useful to learn how to organize the gallery.


