Configuring contexts
So far, we have configured a tenant and created a bridge domain and context for it. A context, also known as a VRF (Virtual Routing and Forwarding) is a unique layer 3 forwarding domain. We can have multiple VRFs within a tenant, and VRFs can be associated with more than one bridge domain (but we cannot associate a bridge domain with more than one VRF).
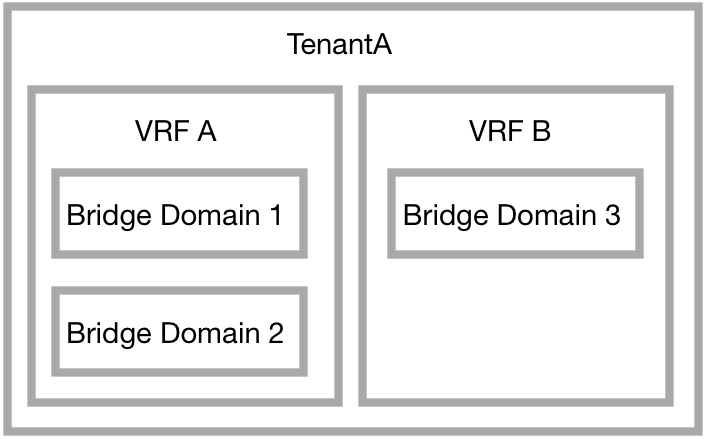
In this recipe, we will create a second VRF under TenantA and a new bridge domain.
How to do it...
- From the
Networkingmenu under the tenant, selectVRFs.
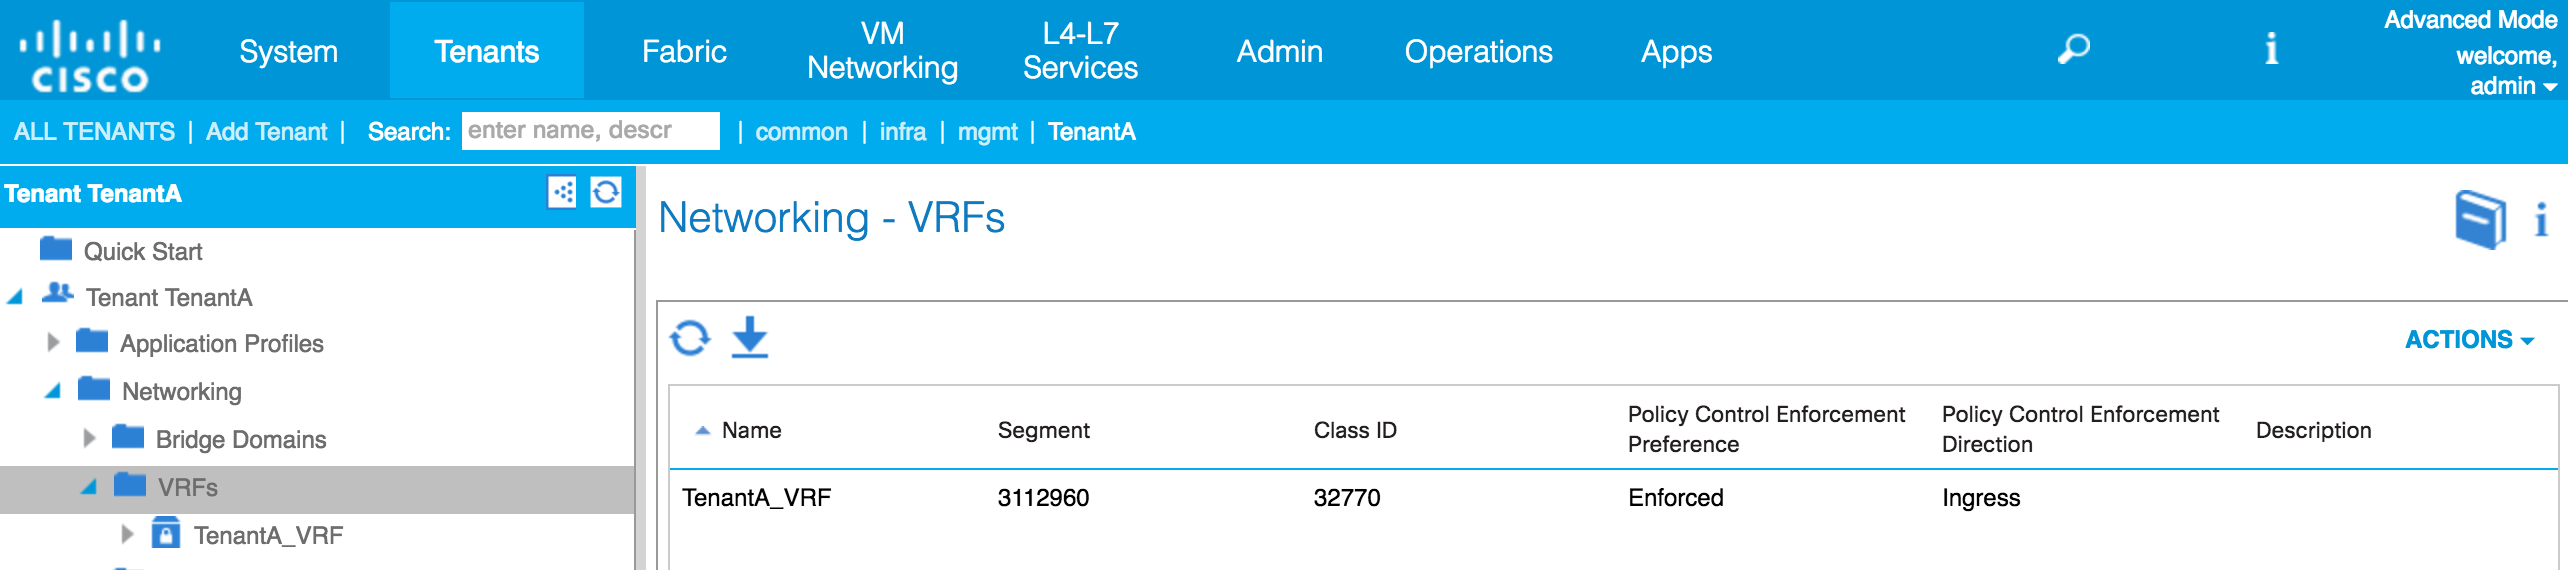
- From the
Actionsmenu, selectCreate VRF.

- Give the VRF a name, and select any applicable options. Here, I have chosen to add a DNS label of
VRF2. We can create a new bridge domain (this is the default option) at this stage as well.
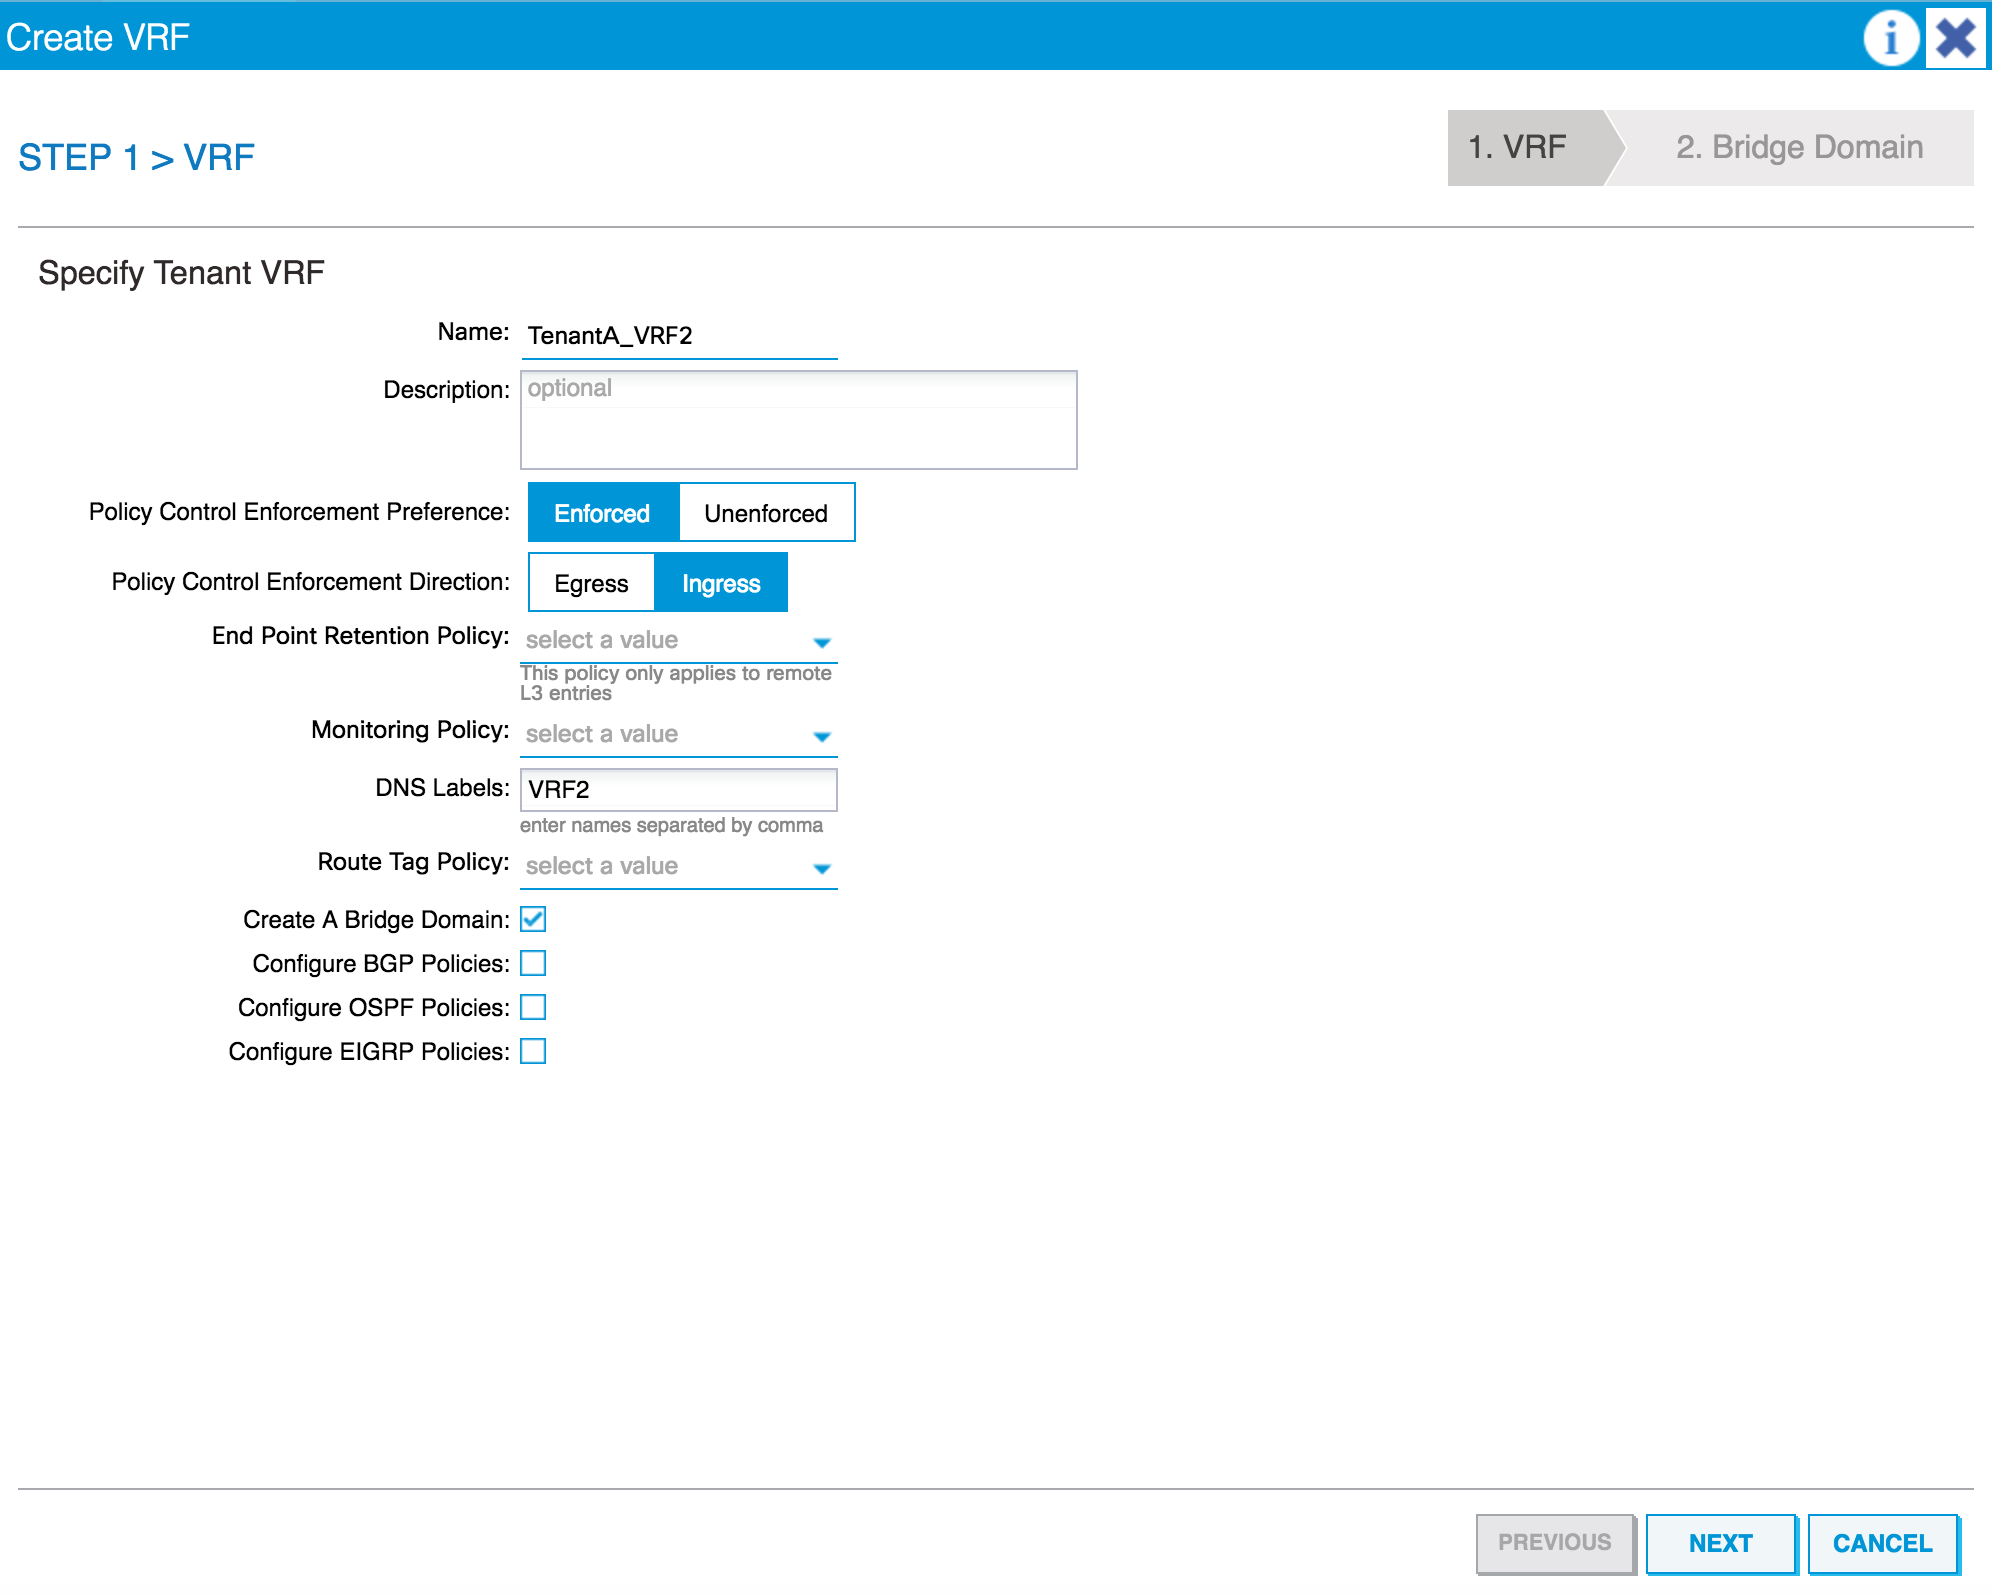
- Click on
NEXT, select theForwardingsetting (such as Optimize), and change any defaults (which I have not changed here).
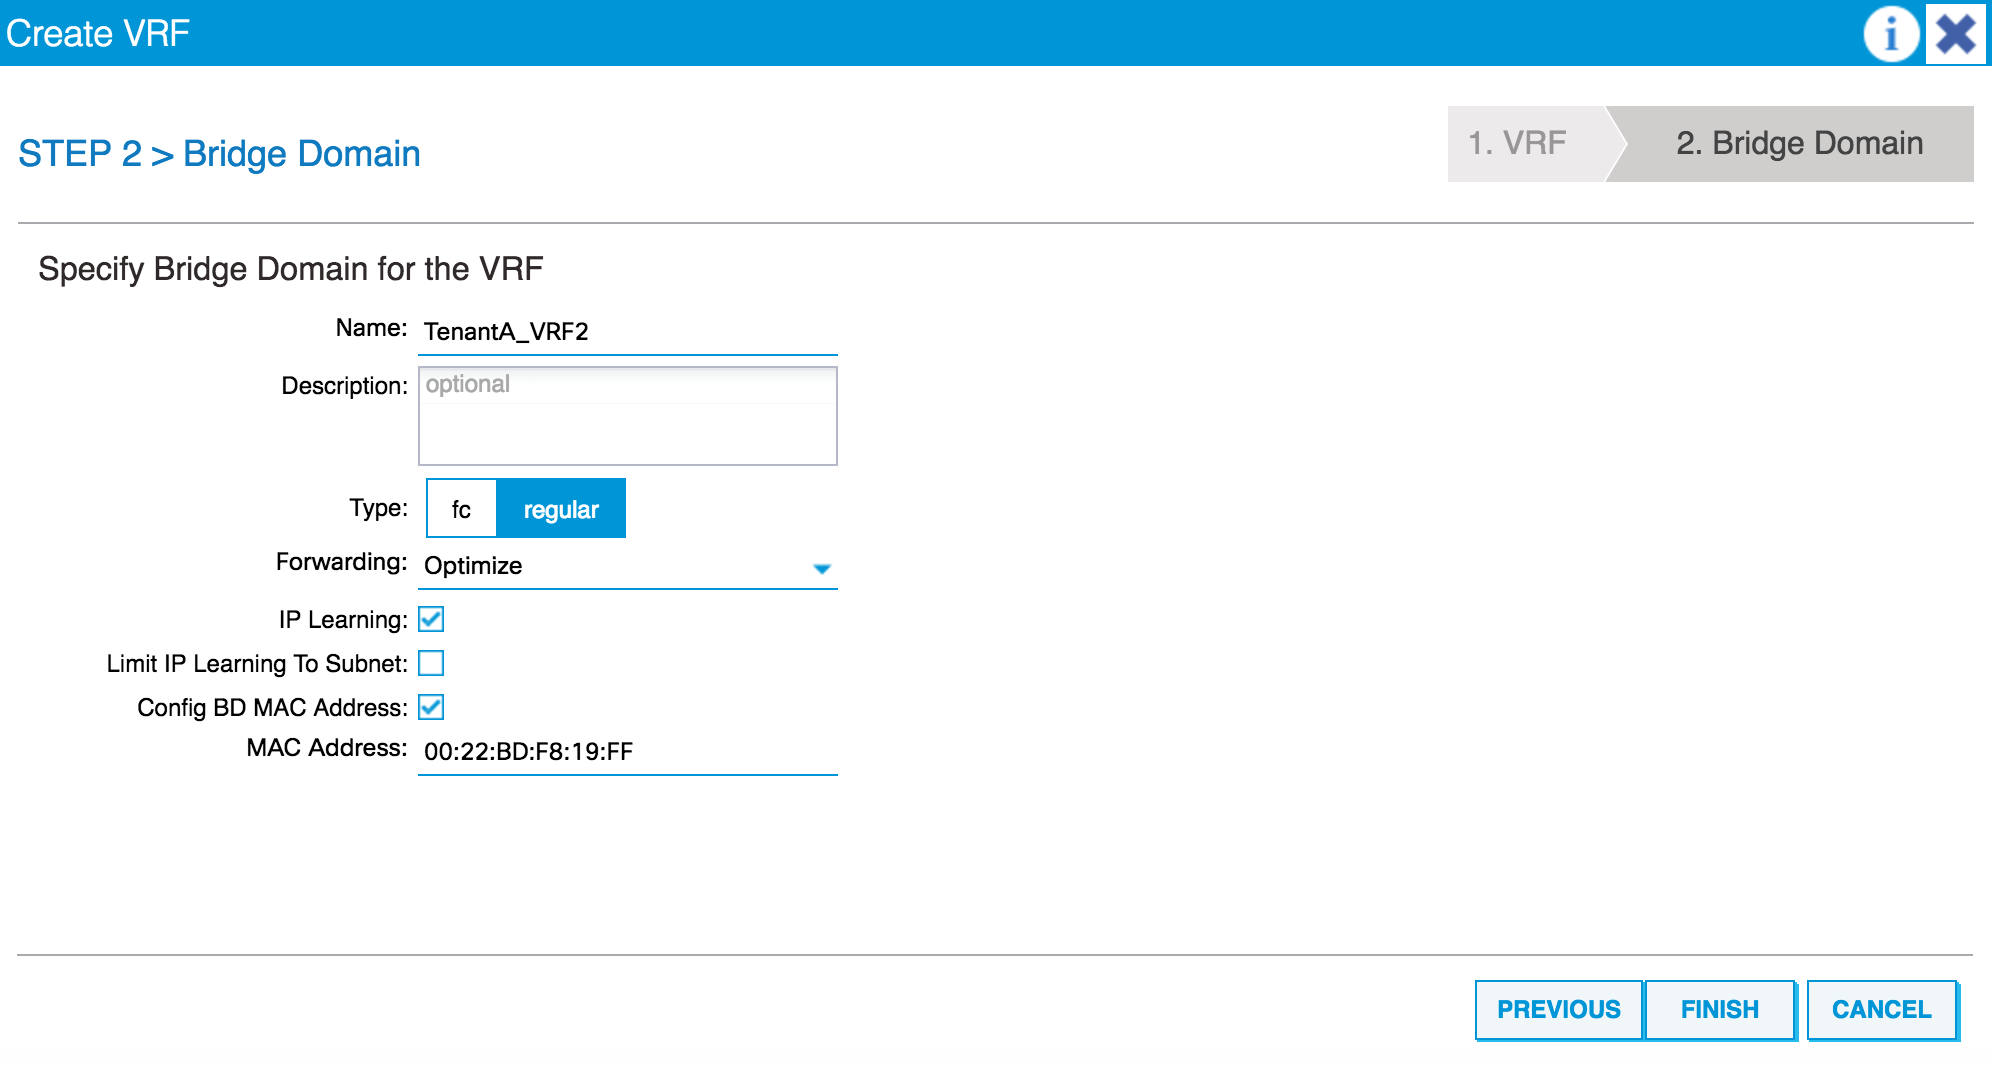
- When you have done this, click on
FINISH. The new VRF will be shown underneath the first VRF we created.