Creating your Azure subscription
You need an Azure subscription to work with examples in this book. In this section, you will learn about how to create an Azure subscription. Let’s get started with the steps:
- Open the browser, and navigate to https://azure.microsoft.com/en-in/free/.
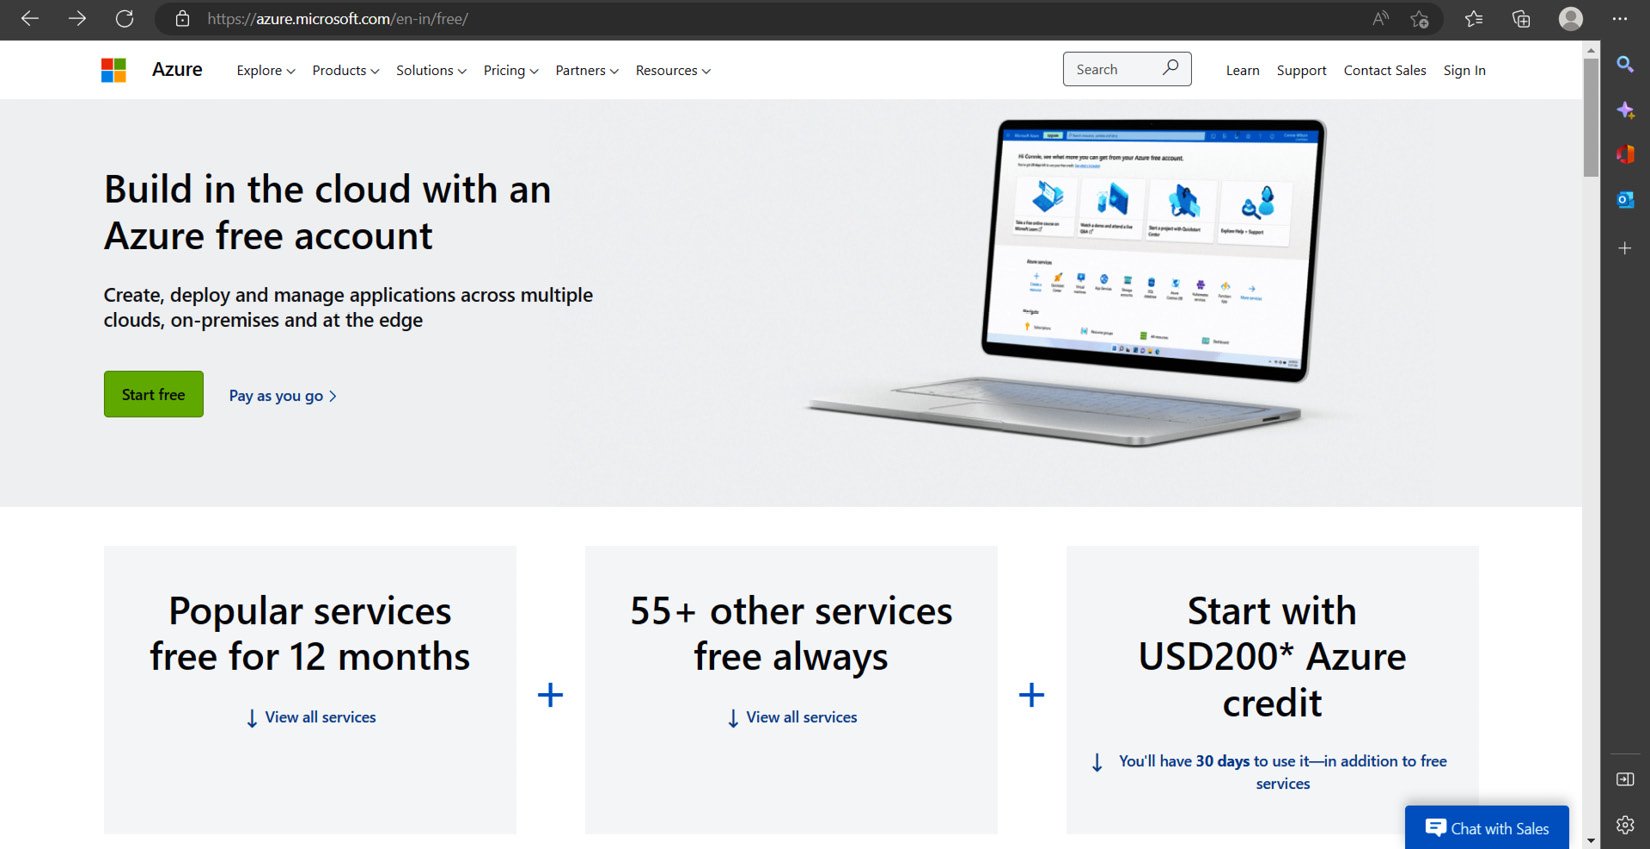
Figure 1.1 – Create your free Azure account screen
- Click on the Start free button. On the second screen, you need to create an account. Click on the Create one! link.
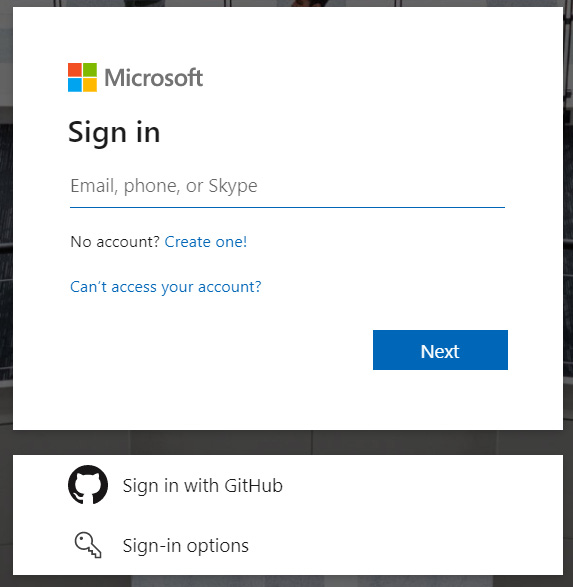
Figure 1.2 – Azure account setup – signing in with a live account/signing up for a live account
- You can use either your existing email address or you can create a new email address. We are using the existing email option.
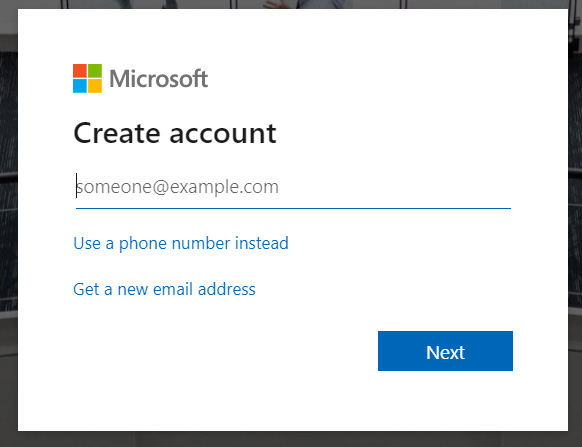
Figure 1.3 – Creating a live account – email address
- You need to create a password for your account and complete some CAPTCHA verification to create the account. Once it is completed, you will be redirected to an Azure account creation screen.
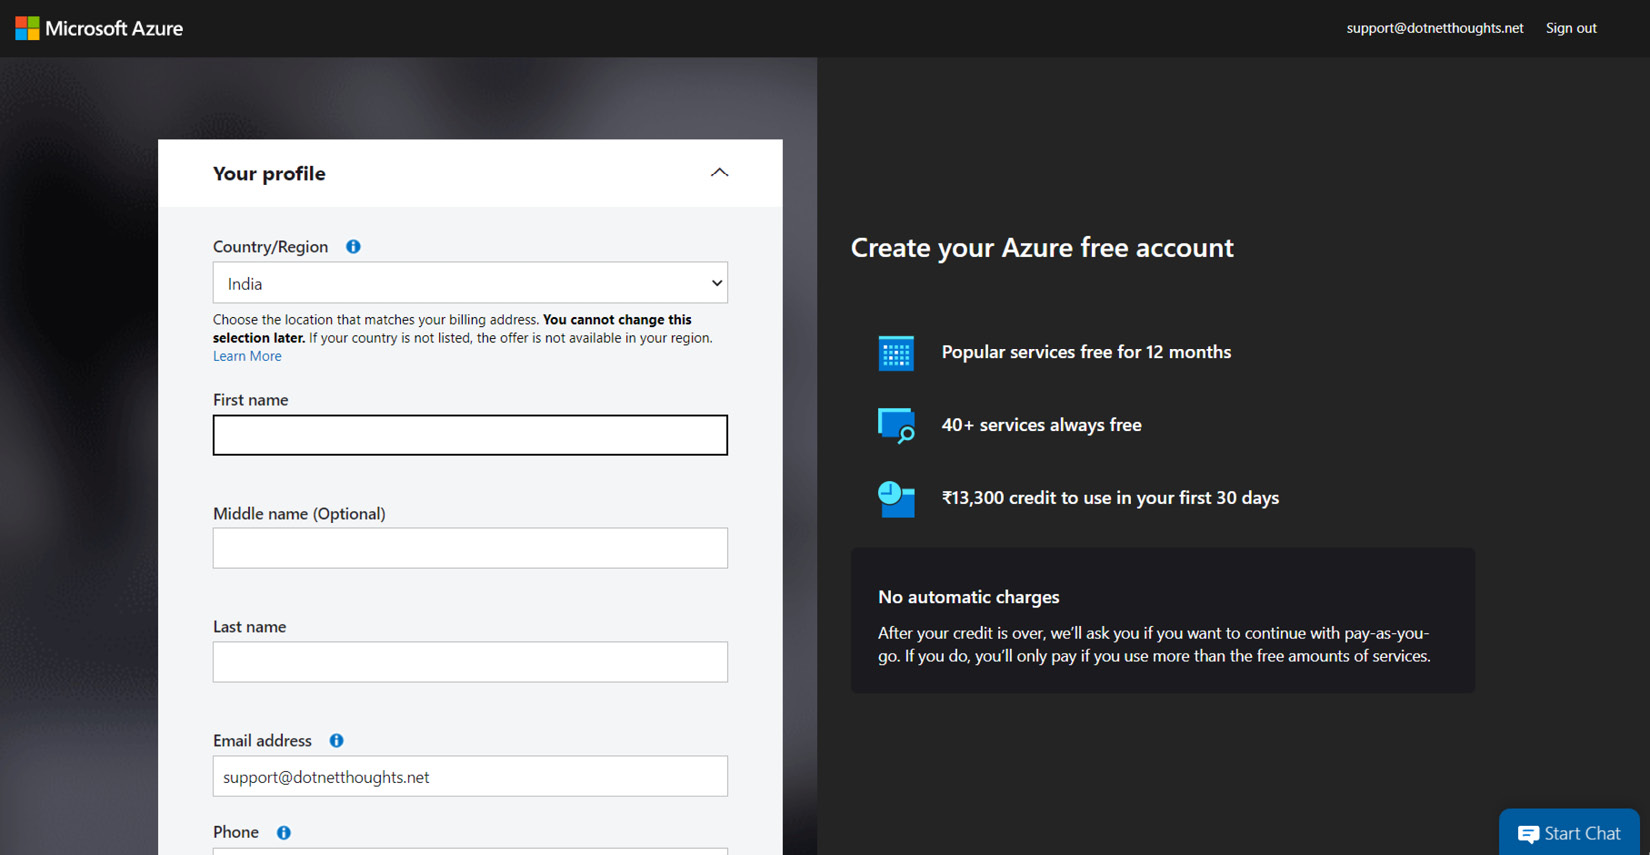
Figure 1.4 – Azure account profile creation
- On the screen, you need to provide your personal details, contact information, and your credit card information – for verification purposes. For verification purposes, $2 from your card will be charged and it will be credited to your card within one to two days.
Once the signup is successfully completed, you will be able to see the success page as follows. From this screen, you will be able to access the Azure portal.
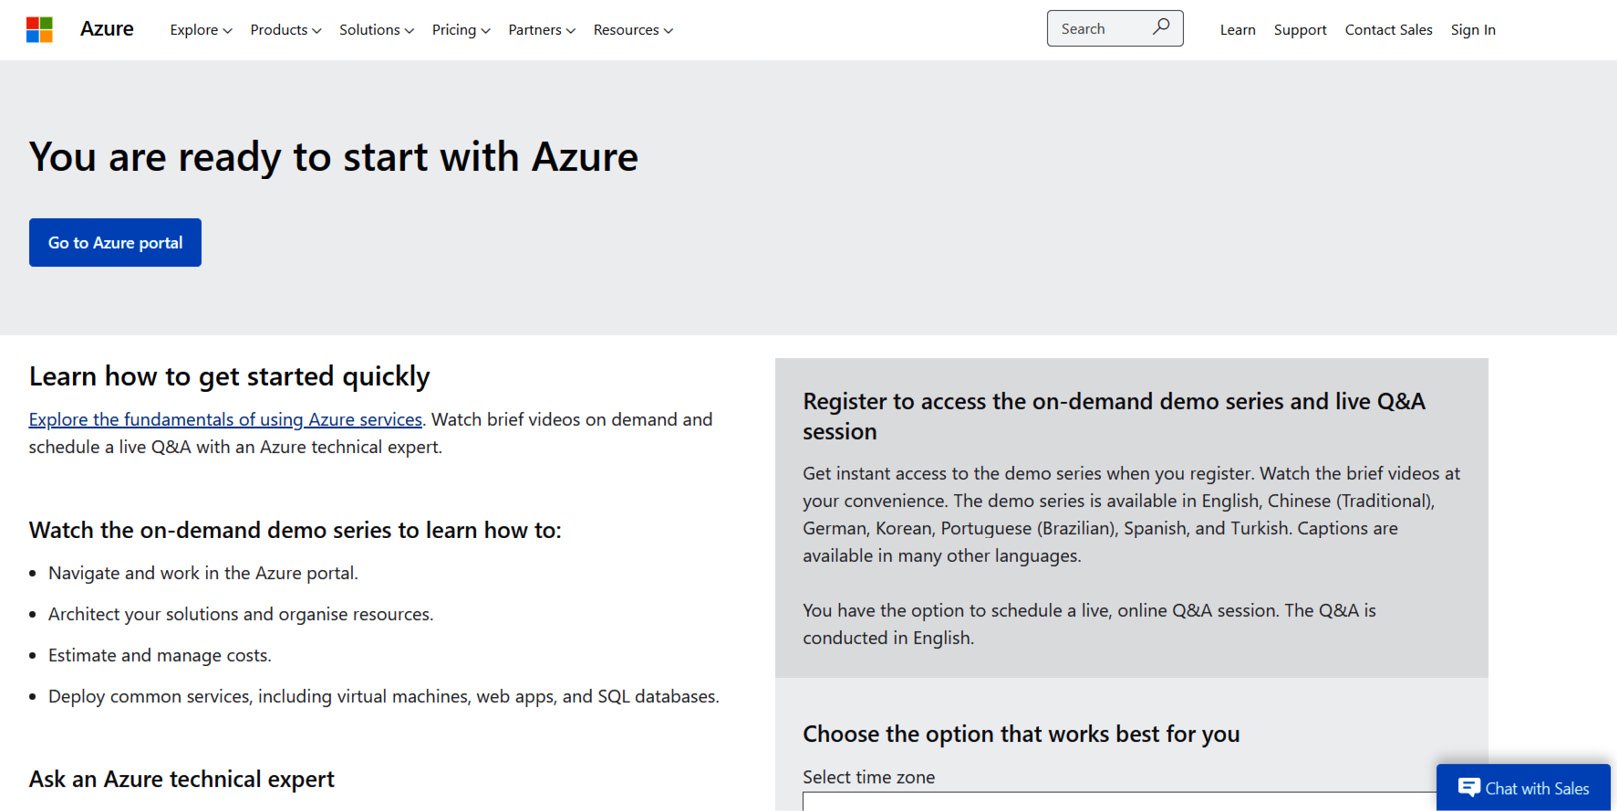
Figure 1.5 – Azure account creation – success page
- Click on the Go to Azure portal button to access the Azure portal and you will be able to see a screen like this.
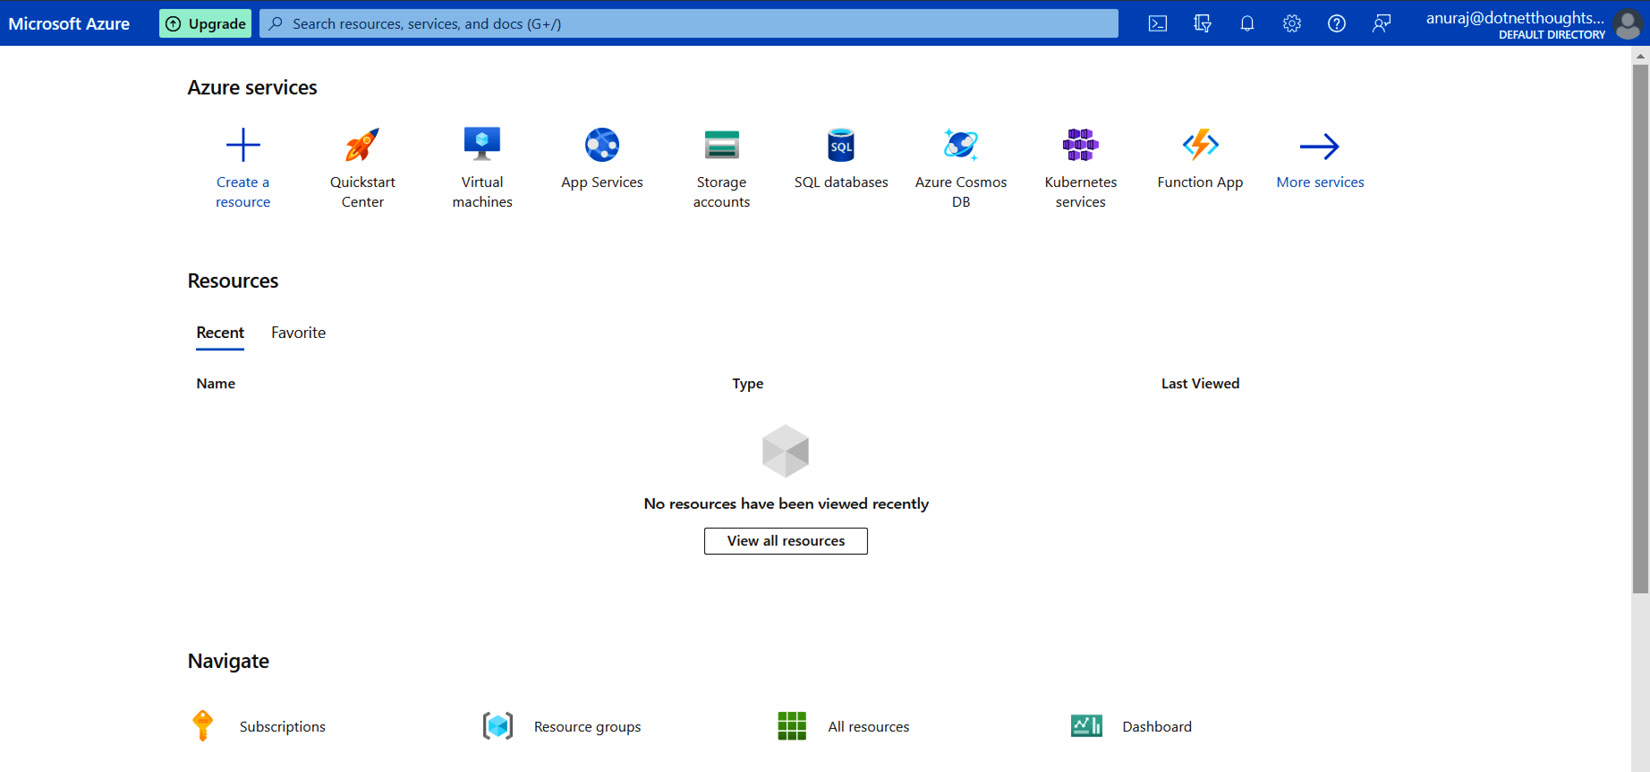
Figure 1.6 – Azure portal
The preceding screenshot shows the Azure portal where you can create and manage resources.
- In the portal, you can search for resources in the middle search bar, which will help you to search for resources have you created; the available Azure services that you can create; the Marketplace, which you can use to access resources from third-party providers; and documentation on the Azure service you are looking for.
- In this example, I am searching for
Storagesince there is no storage account created. It does not show any existing resources, but the portal shows me services such as Azure Storage Account and Storage browser, and then it shows some Marketplace suggestions and finally, the documentation related to theStoragekeyword.
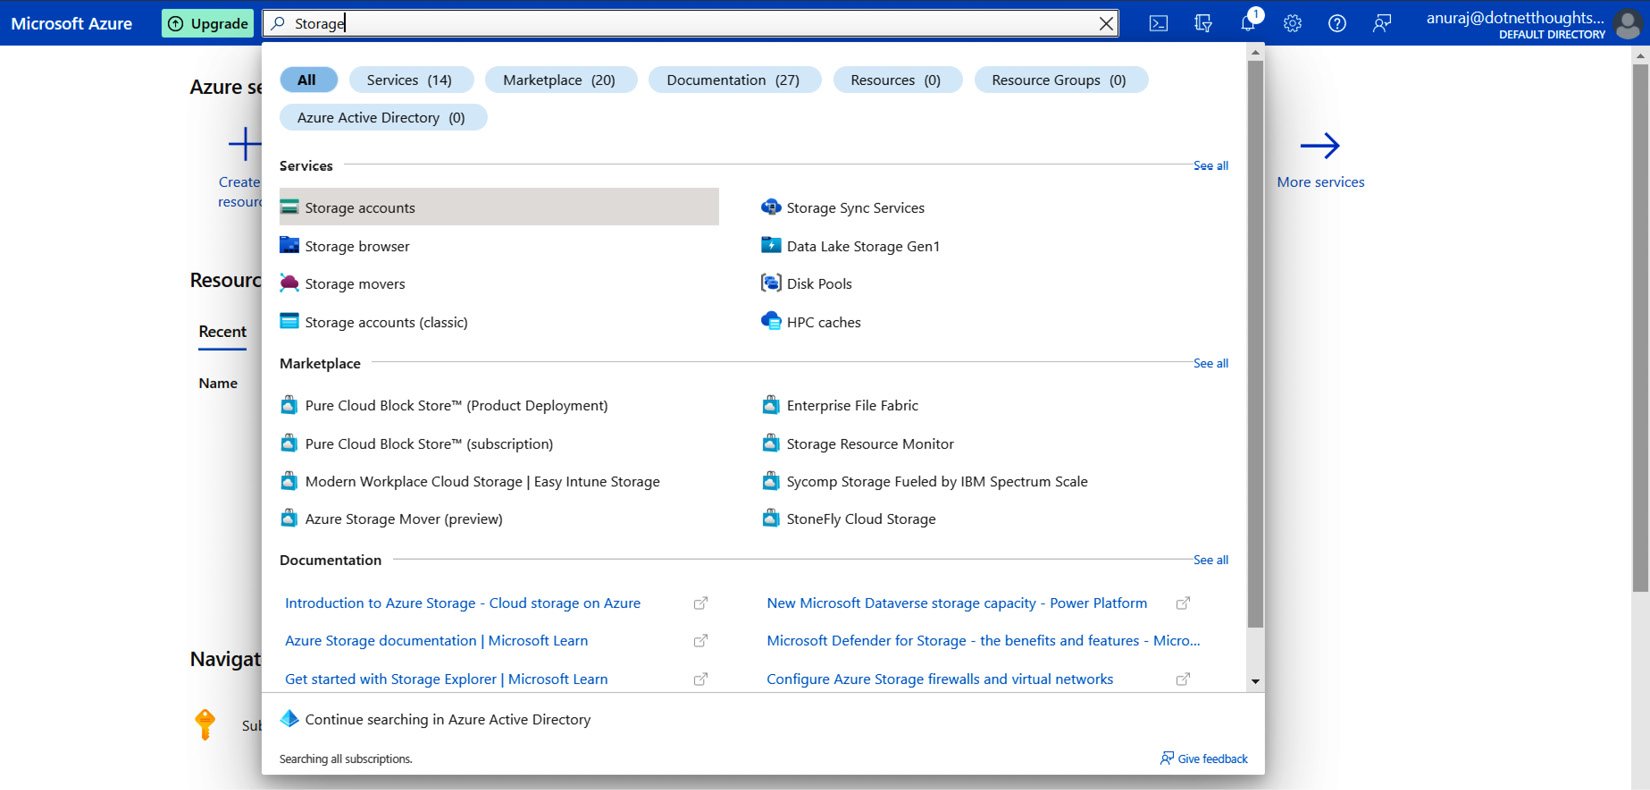
Figure 1.7 – Searching for resources – the Azure portal
- In the portal, after the search bar, you can see a Cloud Shell icon, which helps you execute commands in either PowerShell or Bash shell – you can use this feature to create resources using the command line.

Figure 1.8 – Cloud Shell icon – Azure portal
- The Directories + Subscriptions icon will help you switch between different active directories and subscriptions.

Figure 1.9 – Directories + Subscriptions – Azure portal
Once you click on the button, you will be able to see all directories.

Figure 1.10 – Directories + Subscriptions page – Azure portal
- In the portal, the notifications icon will show different notifications, such as remaining credit, resource provisioning status, and so on.

Figure 1.11 – Notifications – Azure portal
- Next is the settings icon, which helps you to customize the look and feel of the portal.

Figure 1.12 – Settings – Azure portal
Clicking on the settings icon will take you portal settings page where we have the following options:
- By default, it will open the Directories + Subscriptions page.
- You can click on the Appearance + startup views menu to configure the look and feel of the portal. In this section, you can also configure the first screen in terms of what you see on it when you log in.
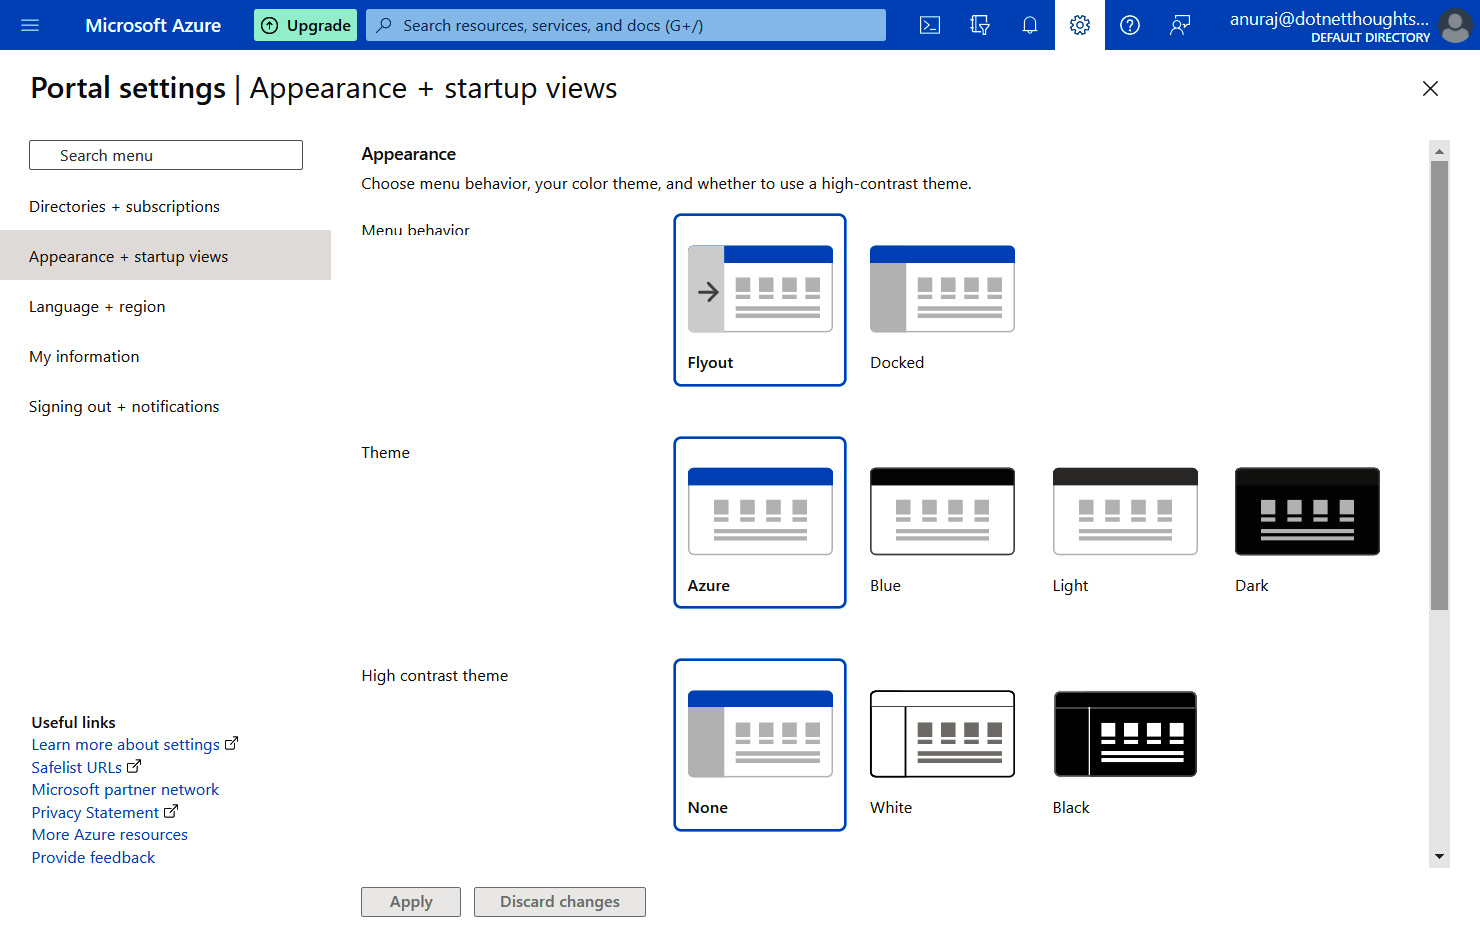
Figure 1.13 – Configure appearance and startup view – Azure portal
- The Language + region option helps you to configure the currency format and date/time value.

Figure 1.14 - Setting up language, date, and currency format – Azure portal
- The My information section displays your email address and helps you to subscribe to different emails from Microsoft. You will be able to Export settings, which helps to export your current Azure portal configuration as a JSON file. The Delete all settings and private dashboards option helps you to remove all the settings and dashboards created.

Figure 1.15 – My information – Azure portal
- Finally, the Signing out + notifications page helps you to configure notifications and sign-out options.

Figure 1.16 – Signing out and notifications configuration – Azure portal
- Click on the Support + troubleshooting icon to learn about the health status of different Azure services. Also, you will be able to see different links to access billing FAQs, documentation, and the technical community.
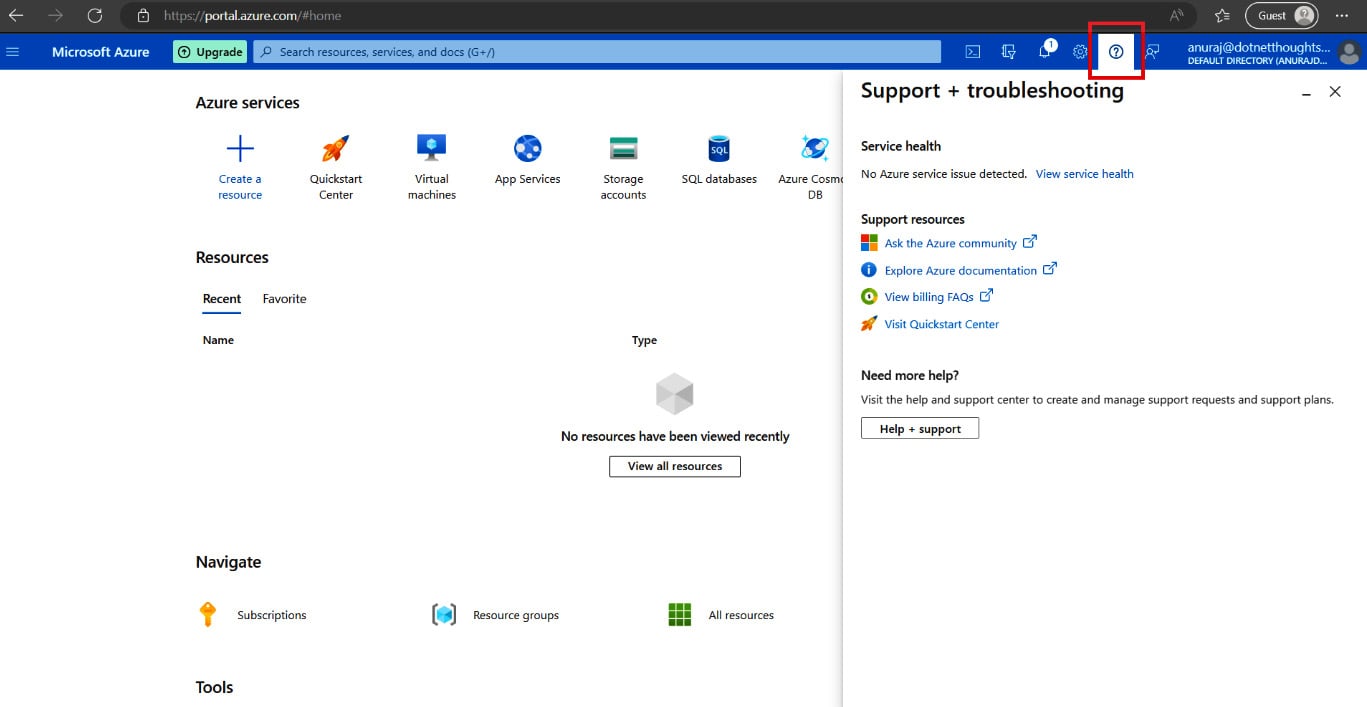
Figure 1.17 – The Support and troubleshooting option – Azure portal
- Click on the Feedback icon to share your experience with the Azure portal.
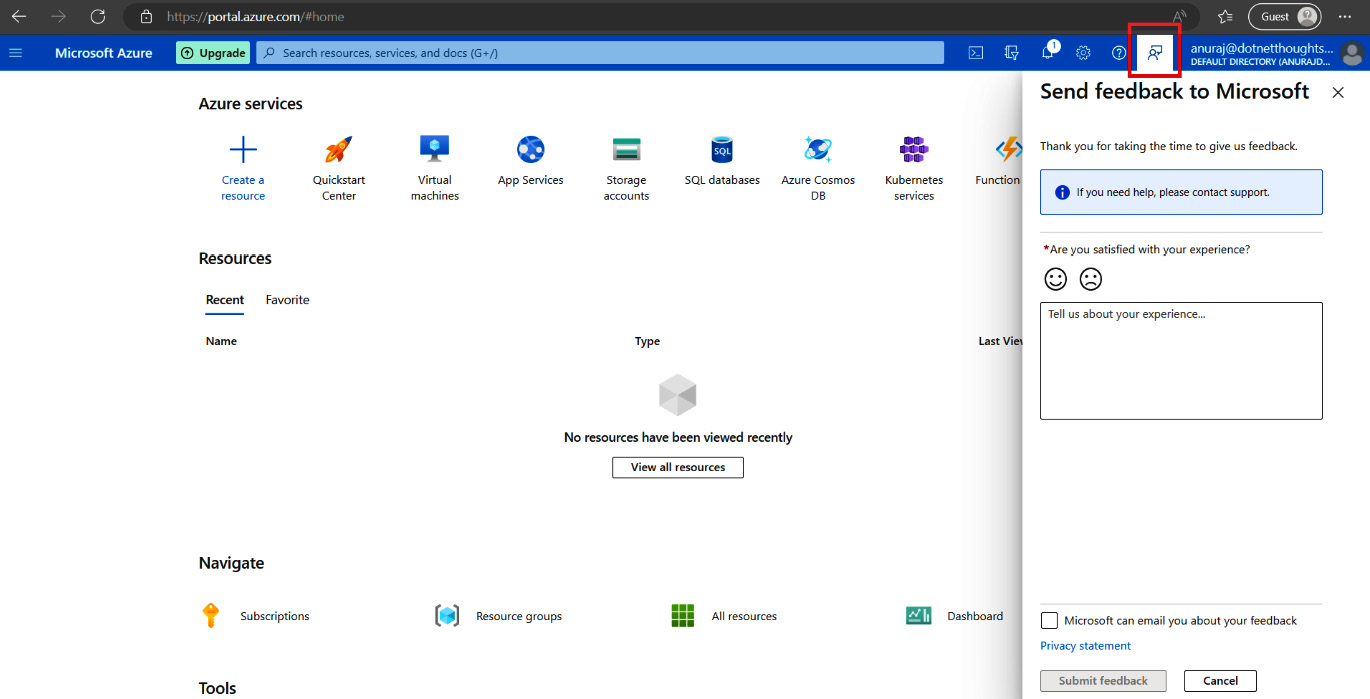
Figure 1.18 – Send feedback – Azure portal
- Click on the Show Portal Menu option to see the Azure portal menu.
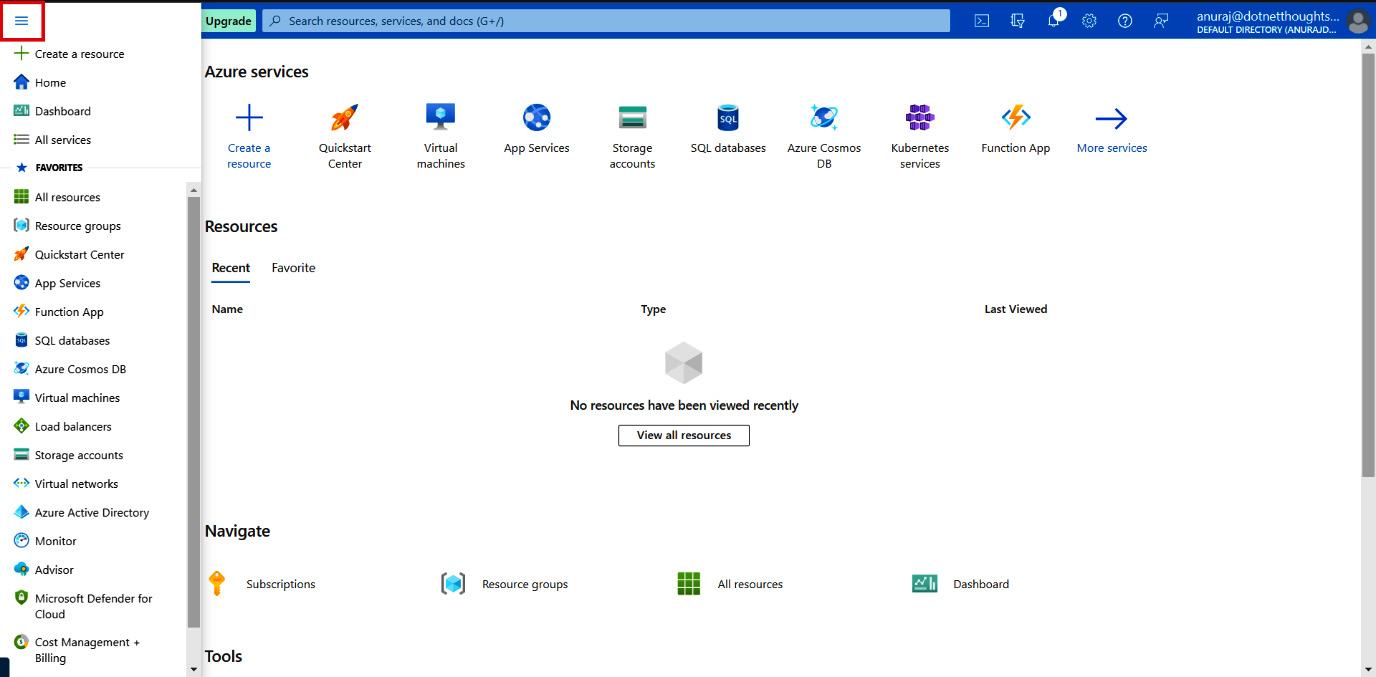
Figure 1.19 – Azure portal
You can customize this menu, which will help you to access different services quickly. The Azure portal comes with a Dashboard view as well. You will be able to create different dashboards and share them with your other team members.
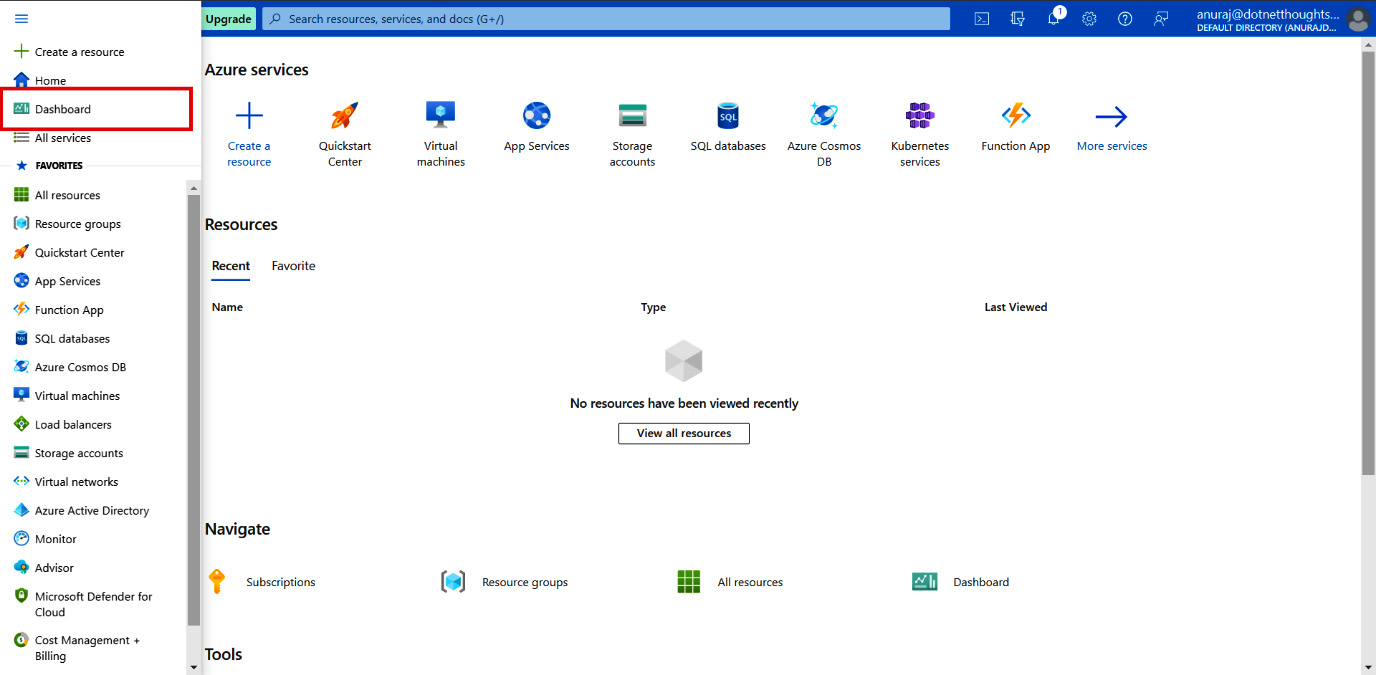
Figure 1.20 – Azure portal
- Click on the Dashboard button to see your private dashboard – by default, it will show as My Dashboard.
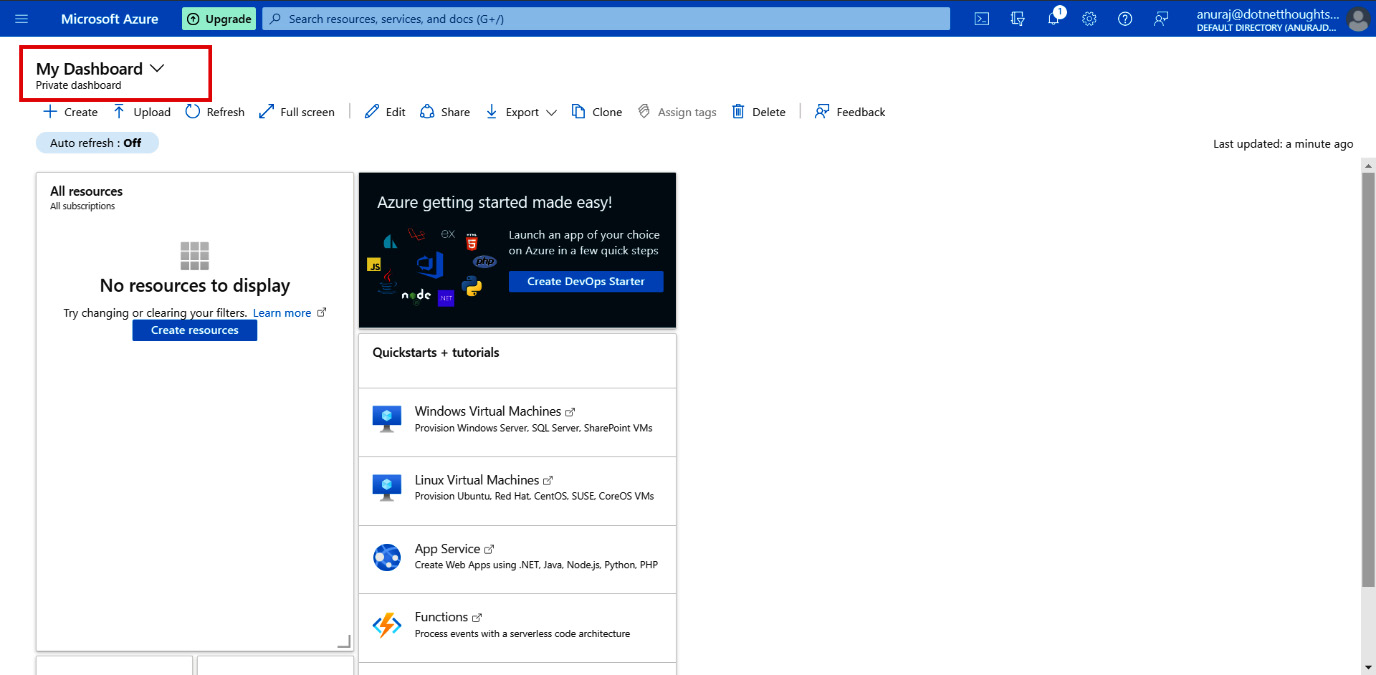
Figure 1.21 – Dashboard view – Azure portal
- You can customize the dashboard. You can click on the Edit button, and on the screen, you can remove existing widgets and add different widgets.
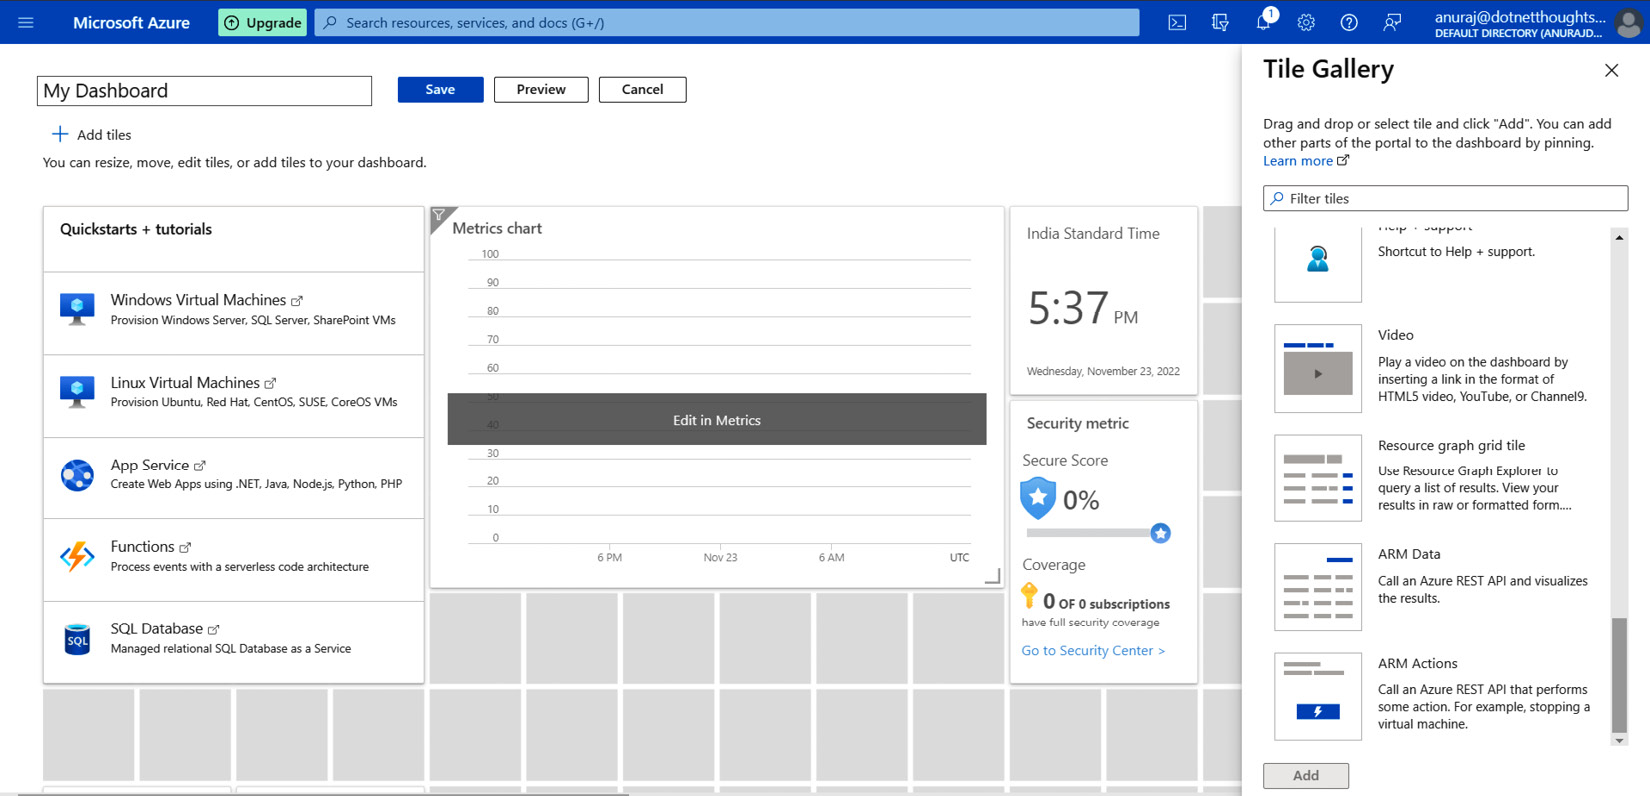
Figure 1.22 – Customizing the dashboard – Azure portal
- Upon completing the customization, you can preview the changes, and then you will be able to save the changes by clicking on the Save button. You can share the dashboard with other users in the subscription using the Share button.
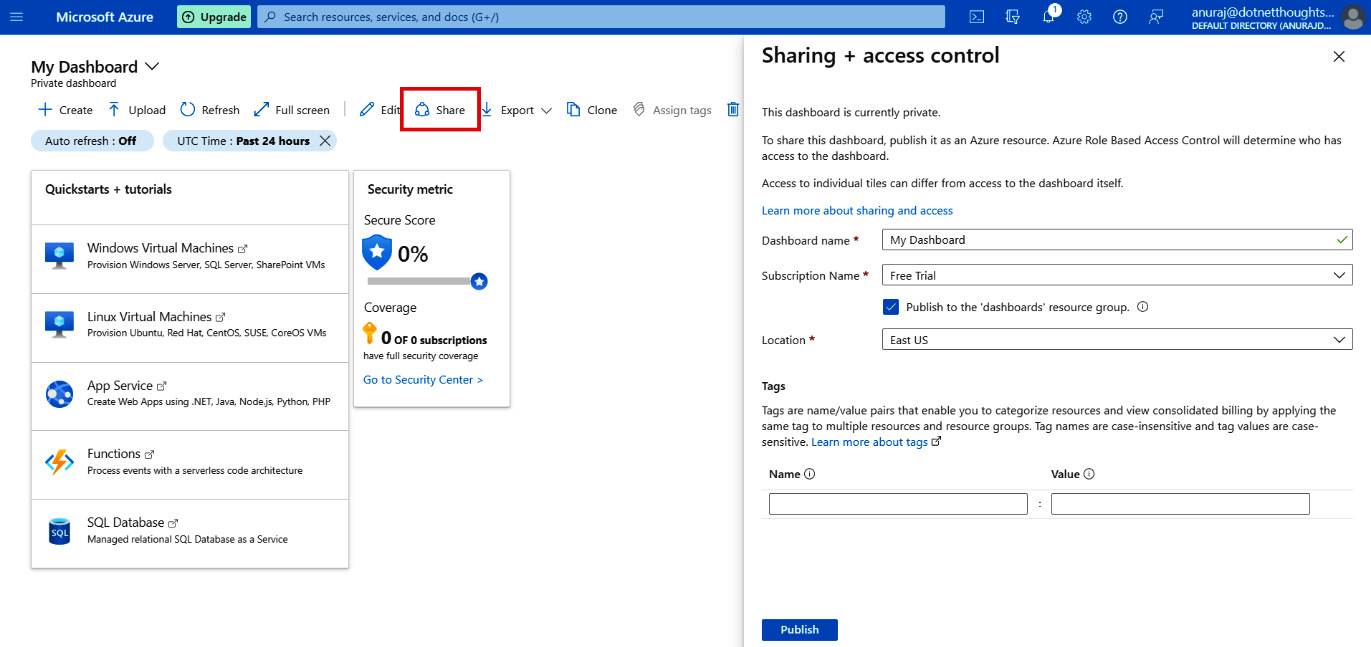
Figure 1.23 – Share dashboard – Azure portal
In this section, we learned about creating an Azure account and how to customize and configure the Azure portal. You will be able to create and manage different Azure resources from the Azure portal.
Creating resources in the Azure portal
Next, you will learn how to create a resource in the Azure portal:
- You need to click on the + Create a resource button.

Figure 1.24 – Azure portal – + Create a resource
- On the next screen, you need to choose the resource you want to create.
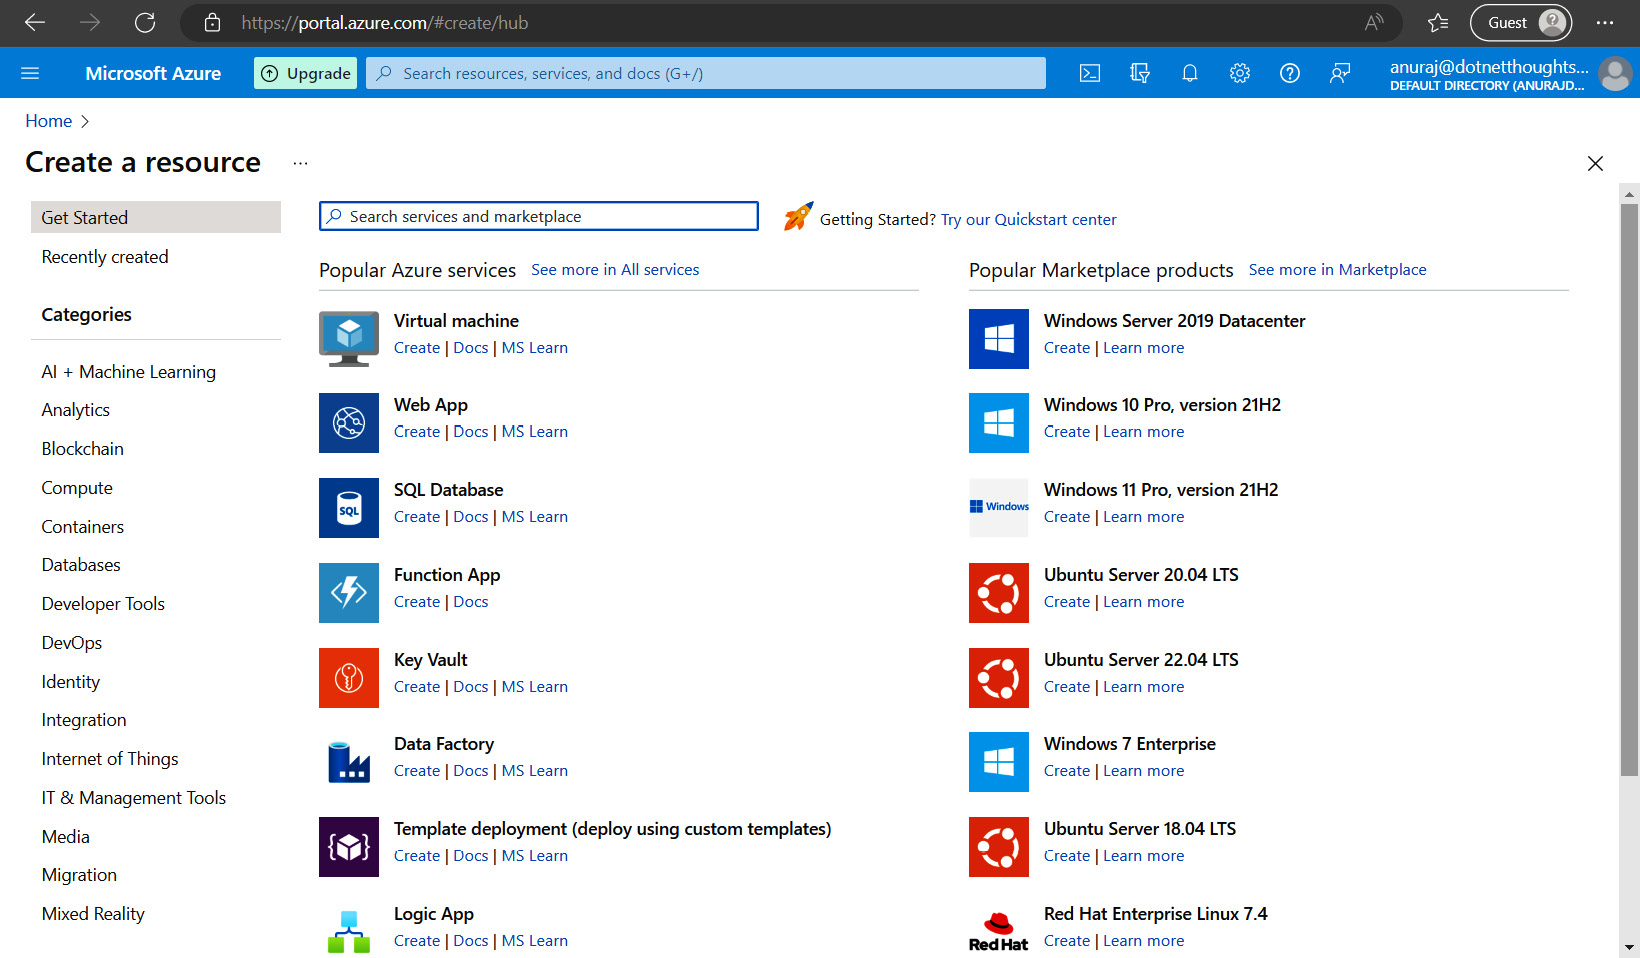
Figure 1.25 – Azure portal – Create a resource
For demo purposes, I will create a resource group. It’s a container that contains related resources in an Azure solution. It is a best practice to create resources related to a project or product in the same resource group. You can search for resource group and click on the first result. Then, you will be able to see the details of the service/resource you’re about to create.
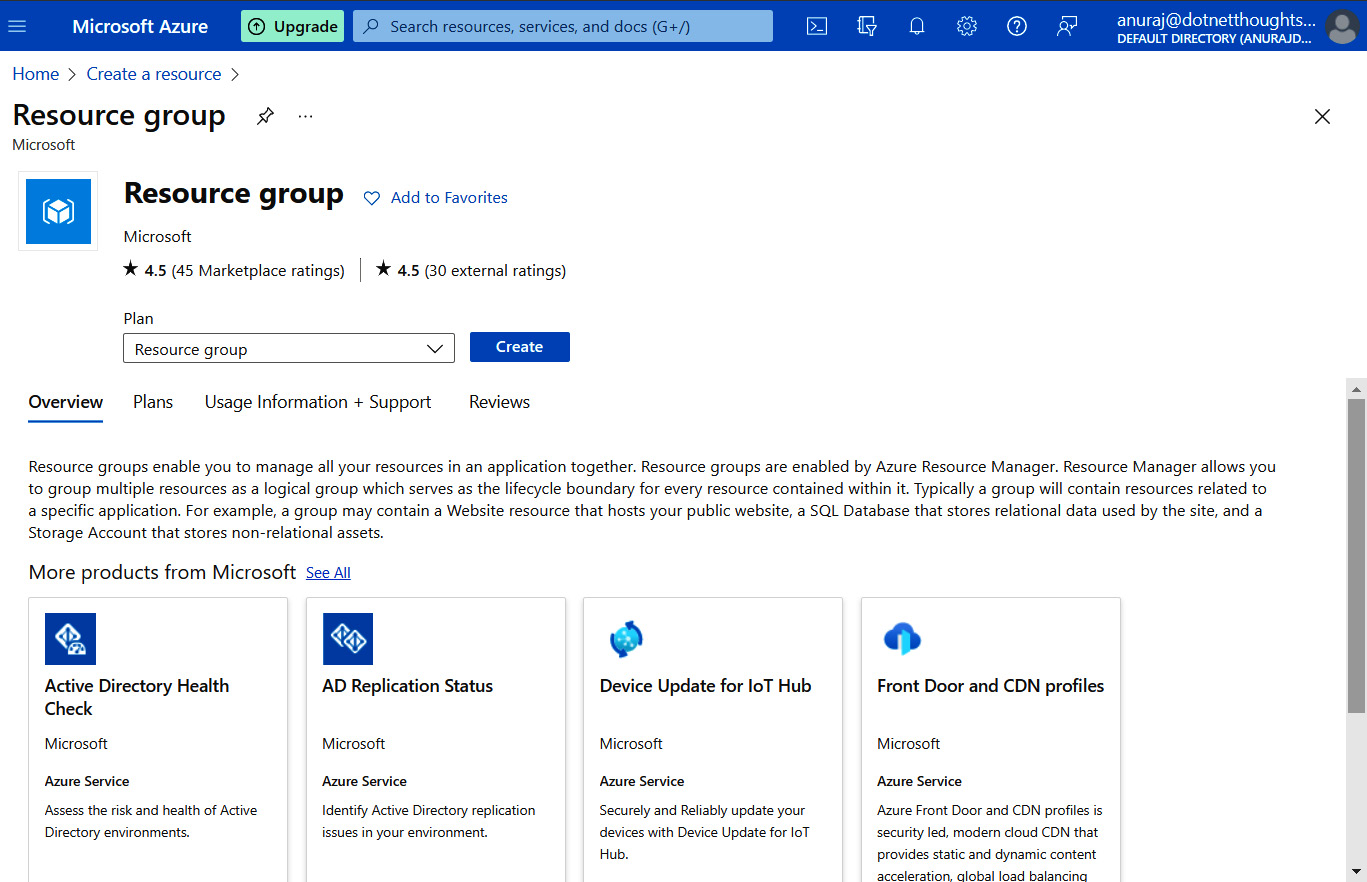
Figure 1.26 – Azure portal – new resource group
- Click on the Create button.
- On the Create a resource group screen, provide the name of the resource group –
HelloWorld– set Subscription to Free Trial, and set Region to a region near your location.
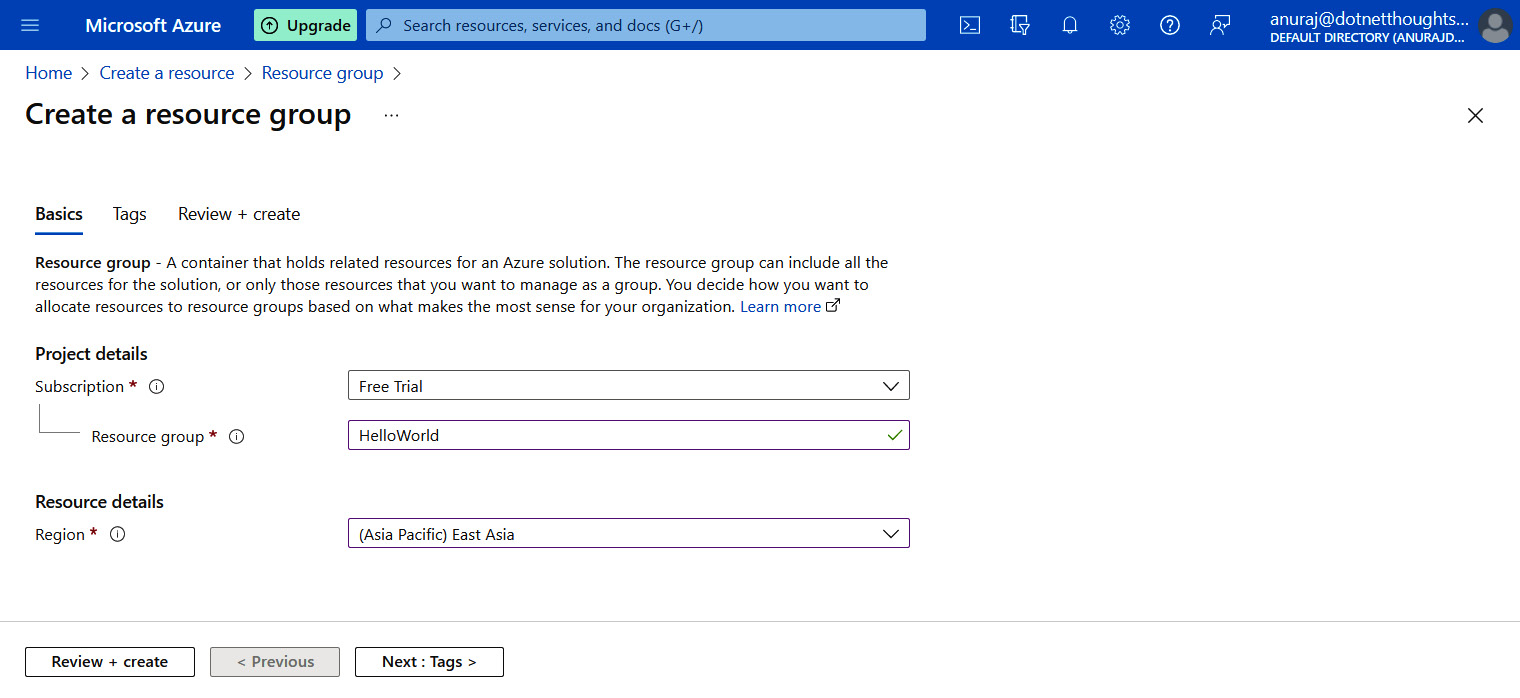
Figure 1.27 – Azure portal – Create a resource group – Basics screen
- Click on the Review + create button to view the details of the resource you’re going to create, and then create the resource upon confirmation by clicking the button again. In the case of a resource group, you will only see the configuration values you created, but in the case of certain resources such as virtual machines or app services, you need to configure mandatory fields – then, you can click on Review + create – in such a scenario, you will be able to see the default values on this screen.
Or you can assign tags to the resource on the Tags tab. Tags are key-value pairs that act as metadata for Azure resources, which helps you to identify resources. Tags are helpful for tracking, organizing, grouping, and analyzing costs for resources. It is a best practice to add tags to your Azure resources.
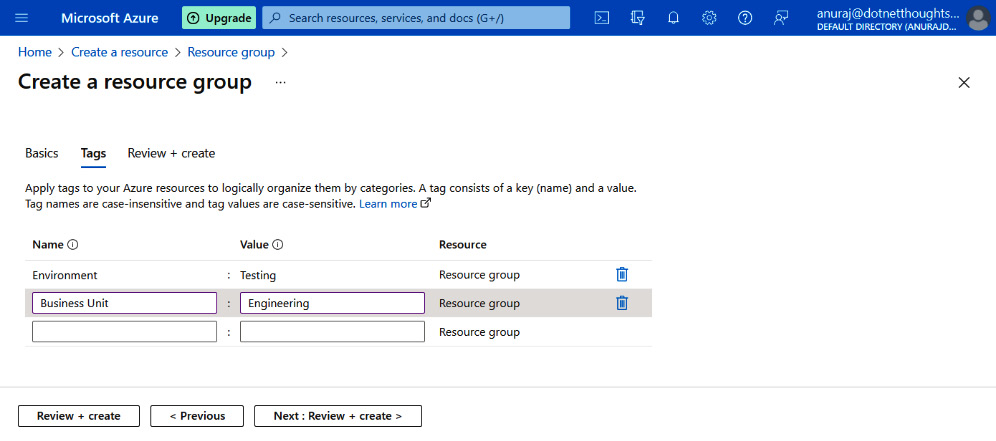
Figure 1.28 – Azure portal – associating tags
- Upon clicking the Review + create button again, you will be able to see the details of the resources and the tags:
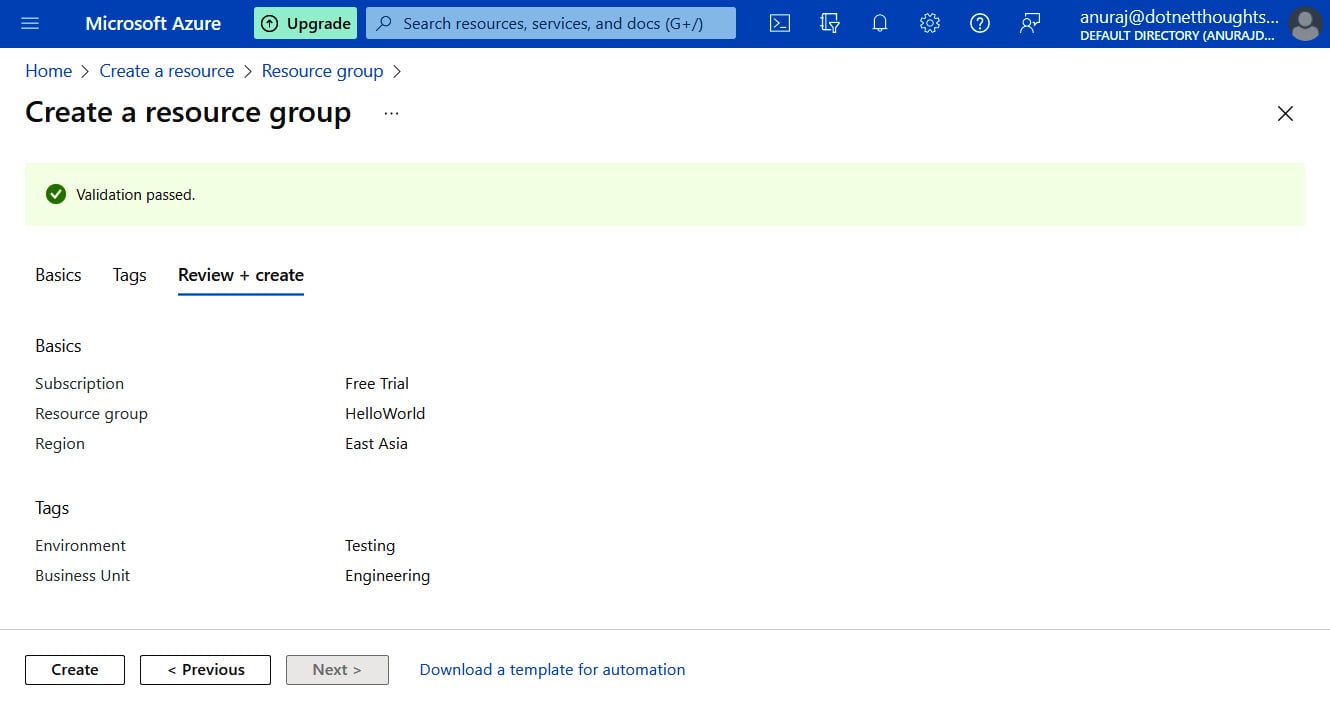
Figure 1.29 – Azure portal – Create a resource group confirmation screen
This screen will also help you to create an automation script. You can download the Azure Resource Management (ARM) script by clicking on the Download a template for automation link.
- Once you click on the Create button, Azure will create the resource group and you will get a notification.
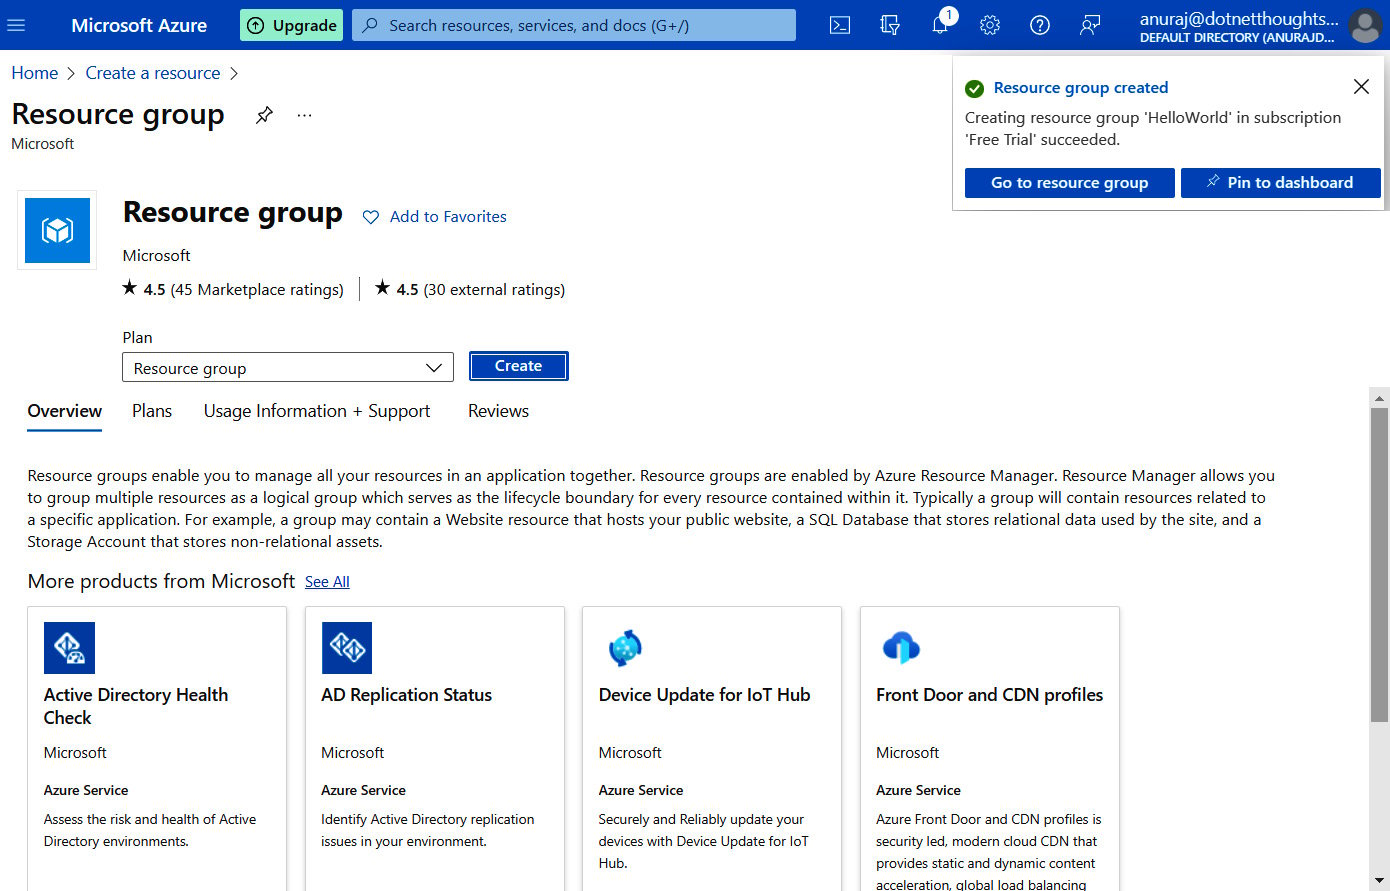
Figure 1.30 – Azure portal – Resource created notification
This way, you will be able to create resources in the Azure portal. Now you have learned how to create an account and create a free trial subscription in Azure portal. You also learned about how to create resources in Azure using the Azure portal. You will be able to create resources using the Azure CLI and Azure PowerShell as well. Next, you will learn about configuring your development environment.


