Customizing views as per tailored needs
Outlook provides a seamless and secure management system that will enable you to stay organized and connected in your personal and business life. You have the options to integrate it with other applications or use it as a standalone program. Whichever way you choose, you can customize the views to work for you. In these sections, we will discuss a few of the more advanced techniques that you can use and several you didn’t realize were even an option. We will start with the Quick Access Toolbar to customize your frequently used buttons, and then we will discuss setting up different views for your inbox by using multiple views, such as Outlook Today, Options, and Show Focused Inbox, all of which are available to you within Outlook.
The Quick Access Toolbar
Have you ever heard the phrase, “You don't know what you don't know”? That could apply to the Quick Access Toolbar. Even though you may have used Outlook for decades, you may have never noticed the toolbar in the top-left corner. This is the Quick Access Toolbar and is a customizable toolbar that displays your most frequently used. By default, this is what you will see on the Quick Access Toolbar:

Figure 1.14 – Quick Access Toolbar
The out-of-the-box default buttons on this toolbar are as follows:
- The Send/Receive All Folders button.
- Undo.
- The drop-down arrow to add a suggested button or an option to go to More Commands, which opens a dialog box to customize the Quick Access Toolbar. This also gives you the option to show this toolbar above or below the ribbon.
Follow these steps to customize this toolbar to fit your needs:
- Click the drop-down arrow at the right of the Quick Access Toolbar or click File | Options | Quick Access Toolbar:
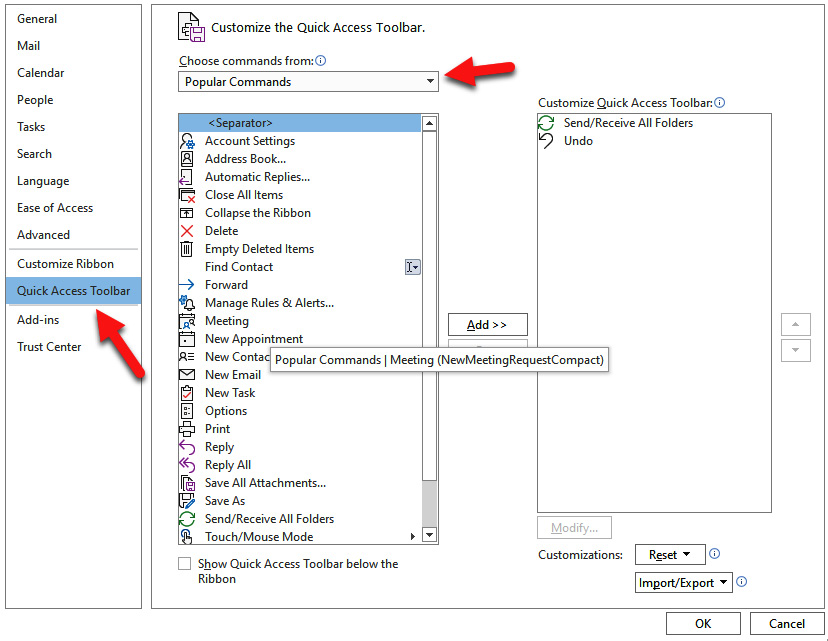
Figure 1.15 – Customizing the Quick Access Toolbar
- Click the dropdown by Popular Commands and select All Commands. This will give you access to all of the possible commands that are available to add to this toolbar. The buttons I would recommend that help me are as follows:
- Categories
- New Appointment
- My Computer
- Select a command on the left, and then click Add >> in the center between the Choose commands from box and the Customize Quick Access Toolbar box. The selected command will show in the list of commands to be shown on the toolbar.
- Click OK, and the buttons will now be on the toolbar, as shown here:

Figure 1.16 – The customized Quick Access Toolbar
You can also select a command and then use the up and down arrow to select the order of the buttons that appear on the toolbar. Top down button as shown:
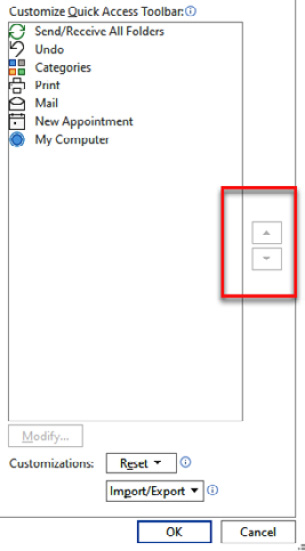
Figure 1.17 – The buttons for moving a selected item up and down
- Right-click on any of the buttons on the ribbon (any ribbon) to see a drop-down menu that will have the (if available) Add to Quick Access Toolbar option. This is a quick way to add the buttons instead of the preceding steps. In this example, I right-clicked on the Delete button:
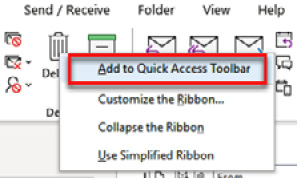
Figure 1.18 – The right-click menu of the Delete button
Outlook Today
Use the Outlook Today view to get a convenient, quick interactive view of your day. To access the Outlook Today View, click on the account name box located in the navigation pane. At the top right of this view, you will see the Customize Outlook Today link. This view allows you to customize the following items:
- Startup
- Messages
- Calendar
- Tasks
- Styles
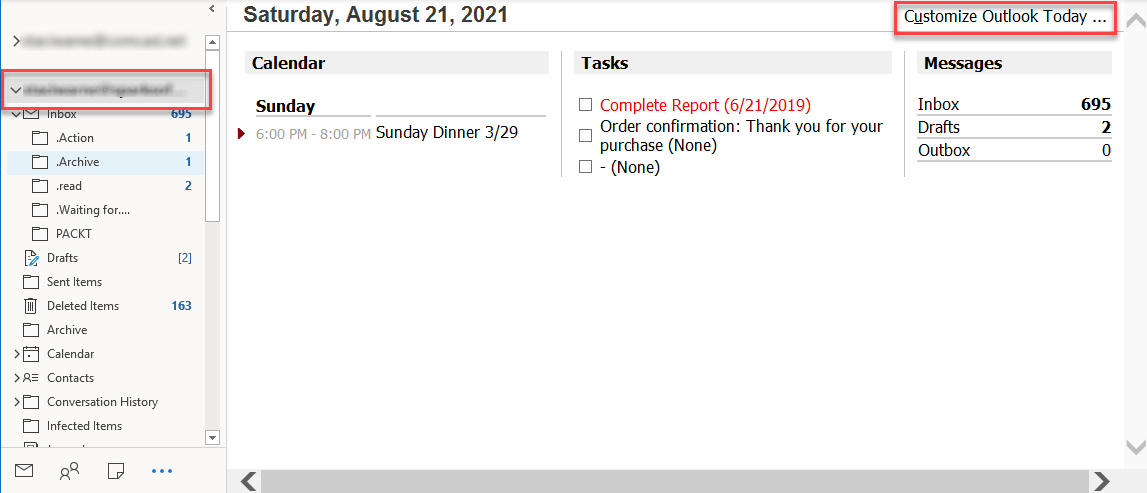
Figure 1.19 – Customize Outlook Today
Show Focused/Other view
The Show Focused Inbox button allows you to separate your email into two tabs, Focused and Other. Your most important emails will be in the Focused tab, and all the others will appear in the Other tab. You will have to watch this at first to determine how Outlook is assigning your emails to these folders.
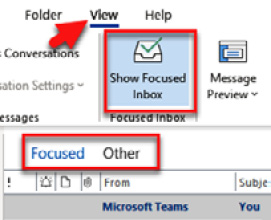
Figure 1.20 – The Show Focused Inbox button
It’s not perfect by any means, but it does a pretty good job determining where to put each email. To turn on this feature, click on View | Show Focused Inbox. If you identify emails appearing in the wrong folder, you can right-click on the email and select Move to Other or Move to Focused, depending on the location of the email. Over time, Exchange will begin to see your pattern and adjust emails between these folders accordingly.
Note
The Focused inbox is only available for Office 365, Exchange, and outlook.com.
If you do not see this button on your version of Outlook, then this feature is most likely not available to you. New features are usually rolled out to members of Microsoft’s insiders first, and then others are rolled out via updates to your Office programs. To check for any updates, select File | Office Account | Update Options | Update Now.
The Layout section
The Layout section of the View tab has commands available for you to customize the screen for how you choose to be productive. You can see the section in the following figure that represents the layout options for your screen. The Use Tighter Spacing command is used to reduce the amount of space between your messages to show more messages on your screen. The Folder Pane command has controls for how the navigation pane on the left side of the screen is viewed or not viewed. The Reading Pane command lets you control whether the message of the email is opened to view and where that window will open on the screen. The To-Do Bar command is my personal favorite, which allows you to view Calendar, People, or the Tasks list on the right side of your screen:
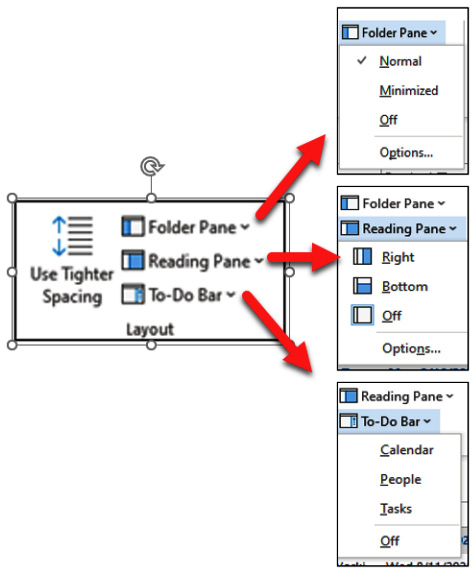
Figure 1.21 – The Layout options
Peek
Peeks was introduced to Outlook with the 2013 version. Peeks works with the To-Do Bar, but it allows you to take a peek at Calendar, People, or Tasks. You can view the Peek when you hover on the Calendar, People, or Tasks button at the bottom of the navigation bar. Once you hover over the button, the specific button’s window will show a snapshot view of it. Use the Dock the Peek button in the top-right corner to have this view docked on the To-Do Bar.
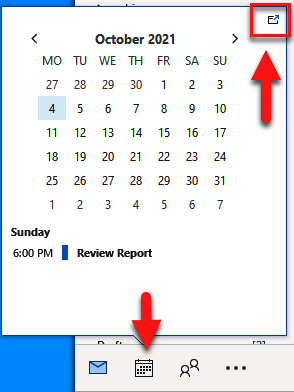
Figure 1.22 – Peek
Advanced View settings
The default view for Outlook is the Preview view; however, you can customize the view to your liking and set it up for your own way of working. You can either create, change, or customize a view:
- Select View | View Settings.
- Select Other Settings… in the Advanced View Settings box.
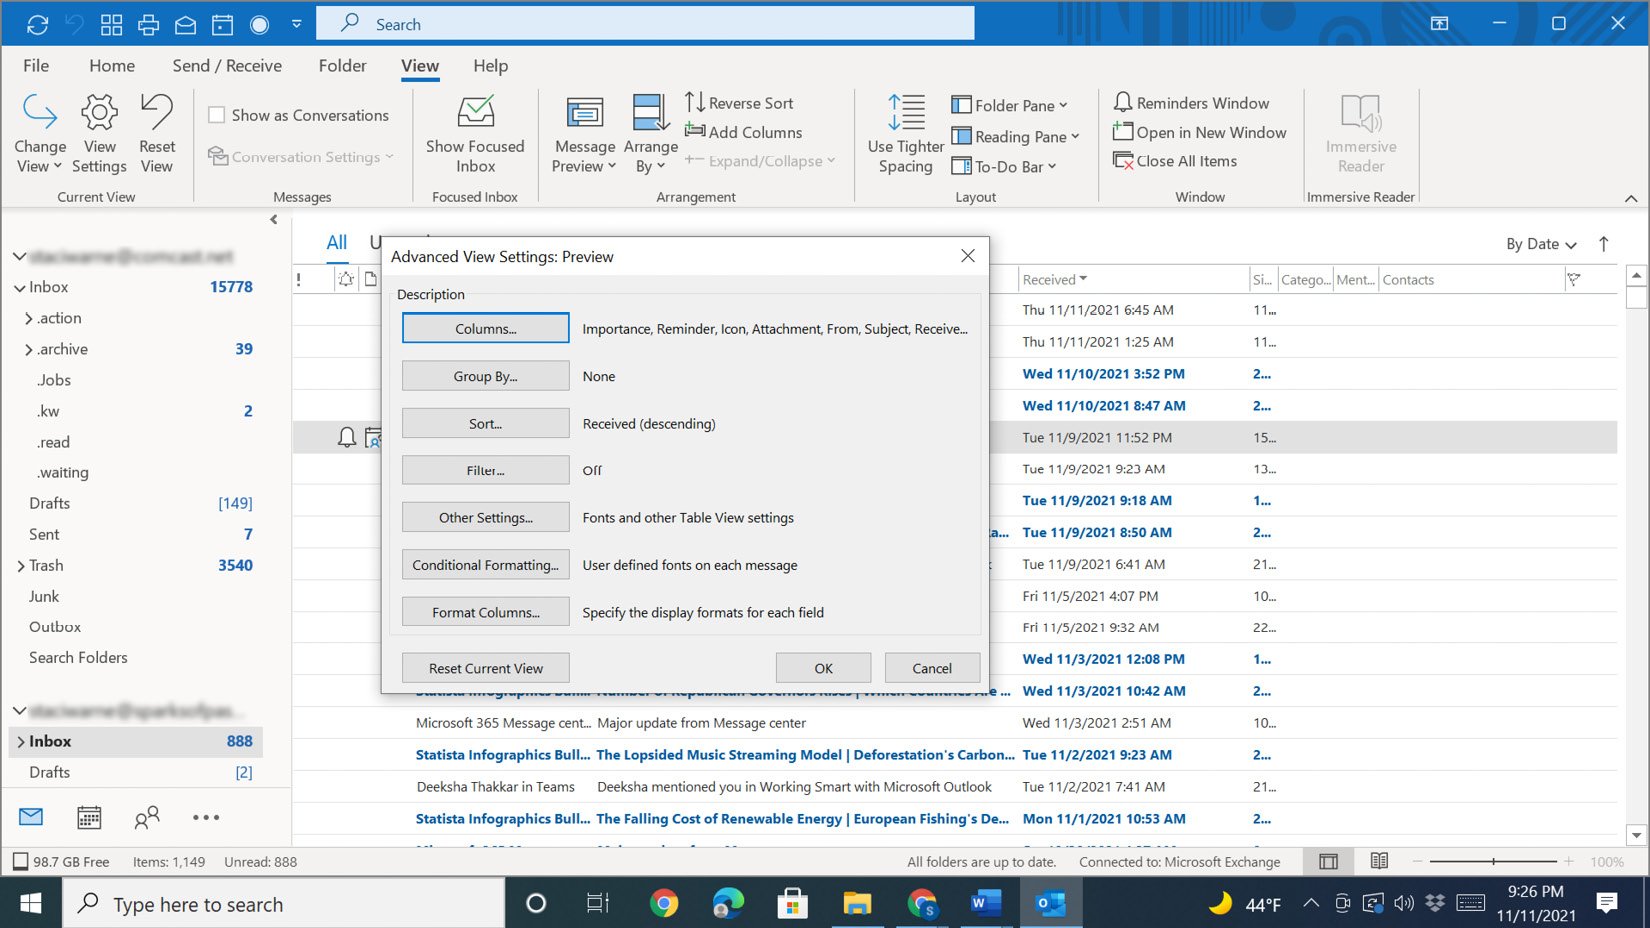
Figure 1.23 – The Advanced View Settings dialog box
Advanced views in Outlook are not the simplest of tasks to set up. The different options for customizing your views with this dialog box will be demonstrated in several topics in this book. Be patient in selecting the view that is right for you. The bottom of the Advanced View Settings dialog box has a button to reset the original fields back to the original views.
The Clipboard viewer
Most of you know how to use copy (Ctrl + C) and paste (Ctrl + V), but few people know that you can open the Clipboard viewer to copy multiple items and then paste them in multiple places without having to copy and paste each item separately. The Clipboard viewer is not available to you on the Home tab in Outlook as it is in other Microsoft applications. To use the Clipboard Viewer in Outlook, follow these steps:
- Get the clipboard history at any time by pressing the Windows logo key + V.
- If this is your first time accessing this, you will get the following box. Click the Turn On button to start a history of the items you will copy to accumulate in the clipboard.
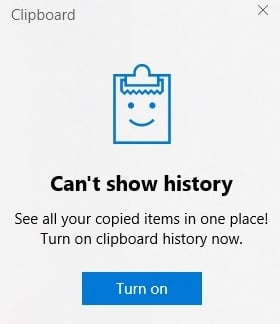
Figure 1.24 – The Turn on history
- As you copy items to the clipboard, the history will record them, and you will be able to paste and pin frequently used items by choosing an item from the clipboard menu.
After turning on the Clipboard setting, Windows will start keeping a record of the items that you copy so that you can look at the history and place items where you need to, whether that is within Outlook or another application on your computer.


