Lighting our scene with image-based lighting
This introductory chapter has so far laid out some of the foundations of the PBR workflow that Unreal introduces. With that pipeline as our main focus, we've already taken a look at several of its key components—namely the different material parameters and shading models.
However, as we've said in the past, PBR takes information from the lights in our scene to display and calculate how everything should look. So far, we've focused on the objects and materials that are being rendered, but that is only part of the equation. One of the other parts is, of course, the light emitters themselves.
Lights are crucial to the PBR workflow. They introduce shadows, reflections, and other subtleties that affect how the final image looks. They work alongside the materials that we've previously applied by giving value to some of the properties we set up. Roughness textures and normal maps work in tandem with the lights and the environment itself. And all of this combined is also an integral part of the pipeline we are looking at in this introductory chapter.
With that as our objective, let's create in this recipe different types of lights and see how they affect some of the materials we have previously created. We'll be taking a look at the all-important High-dynamic-range imaging (HDRi) maps, 32-bit textures, which include lighting information in them and that can be used to light up a scene. Let's get started!
Getting ready
You can use the scene we created at the beginning of the book, where we set up a studio environment. We took some time aside in the introduction to this book to set it up just so we could place several objects and visualize them. At that point, we just wanted to create something quick and useful, and one of the things we did was to use one of the already available resources of the Starter Content: the BP_Light Studio blueprint. Through that, we've already had access to HDRi lighting, the topic that we are going to be covering in this recipe.
With that in mind, we are now going to explore how to use this type of lighting to its full potential and create a realistic scene through it.
How to do it...
We will start this recipe by placing a reflective object in our default scene and looking at how certain aspects of the environment can be seen reflected in its surface. Take the following steps:
- Open the map named
01_05_HDRi Lighting, and take a look at the reflective sphere in the middle of the level:
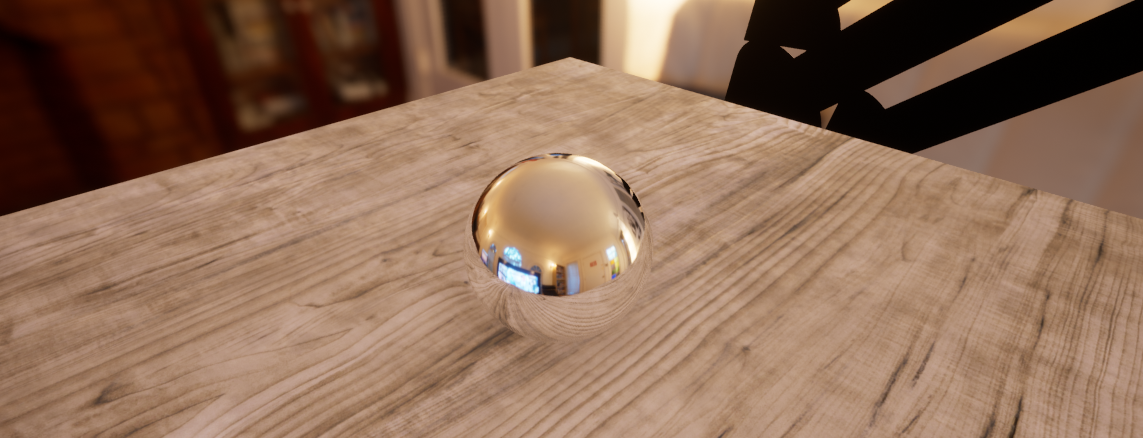
You can see that I've applied a material to the model, named M_Chrome. This is a copy of the material we created in our third recipe, named M_PBR_Metal, where we've modified the base color and the roughness value to make it more chrome-looking. Thanks to its reflective properties, we can see the environment clearly. This is happening thanks to the HDRi image we are using. We are now going to replicate this effect without using the blueprint that was already set up for us, and we will instead create our own.
One of the things that we want to move away from in the setup we are going to create is having the environment image visible at all times. You could be thinking that the metal ball is reflecting the image you see in the preceding screenshot and not the actual light—and that would be only natural as you are seeing that image in the background. This is, however, just a visual cue that the blueprint uses to better visualize from where the environment lighting is hitting an object. Having said so, let's start working with the basic building blocks and not with pre-made tools to better understand how things work.
DeletetheBP_LightStudioand theSphereReflectionCaptureand click on theBuildicon—we should now be looking at a completely dark scene.- From the
Modespanel, navigate to thePlacetab and to theLightssection within it. You should be able to find aSkylight, the type of light that we can use to illuminate with HDRi textures. Drag and drop it into the scene as follows:
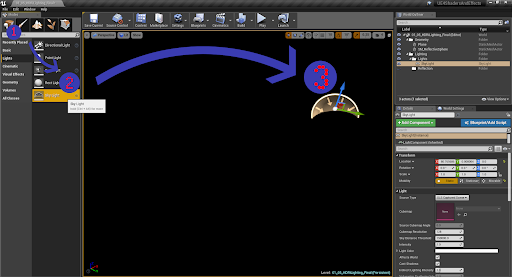
- With the newly created skylight selected, navigate to the D
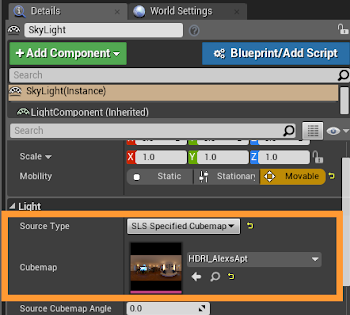
etailspanel and look at the options under theLightsection. The first option on the drop-down menu says SLS Captured Scene, which uses the already existing scene to create a light. We want to change that value to the other available option,SLS Specified Cubemap. Once that's done, select aCubemapfrom the next drop-down menu—let's go with the one we've used in the past,HDRI_AlexsApt, as follows:
- After selecting the texture, you will be able to check for yourself that nothing has changed; we are still looking at a black screen. This is because the default type that was spawned was one of the
Statictype and skylights of that type need to get built before we can see them. Click on theBuildicon again and see what happens:
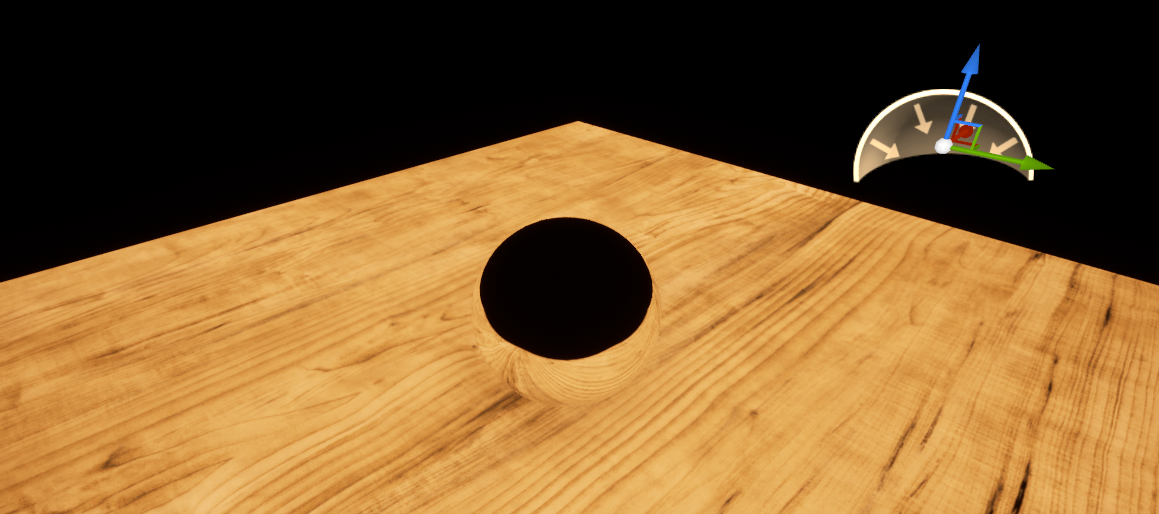
- We are now lighting our scene with the HDRi! However, we are still using a static light, which has its inconveniences regarding reflections (as you can see, there are none!). Let's change between static, stationary, and dynamic to see how the scene varies:
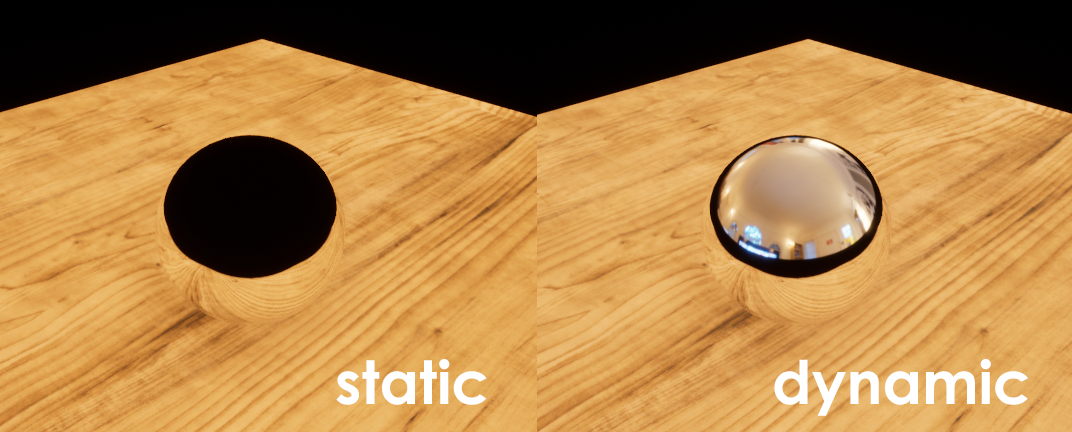
As you can see, going from a static type of light to a dynamic one gets us the reflections back. This is due to the fact that static lights only exist during the light baking process—that is, when we click on the Build button. In order to use HDRis to their full extent, we should be aiming for a dynamic or stationary type of light.
Let's focus once again on the metallic ball under this new dynamic skylight that we now have. There might be a bit of a problem, if we look closely:
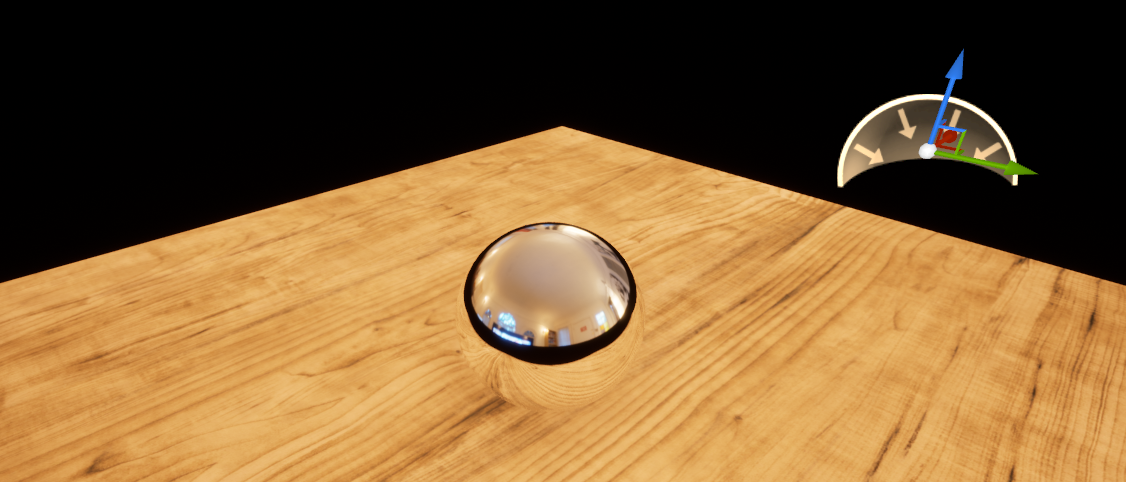
You can see that there's a black edge going on across the surface of the ball, which is happening because the skylight is by default only using half of a sphere to project the selected texture. This is happening because objects are usually not lit from underneath, and we might be fine with that sometimes. However we can solve that by selecting the next option:
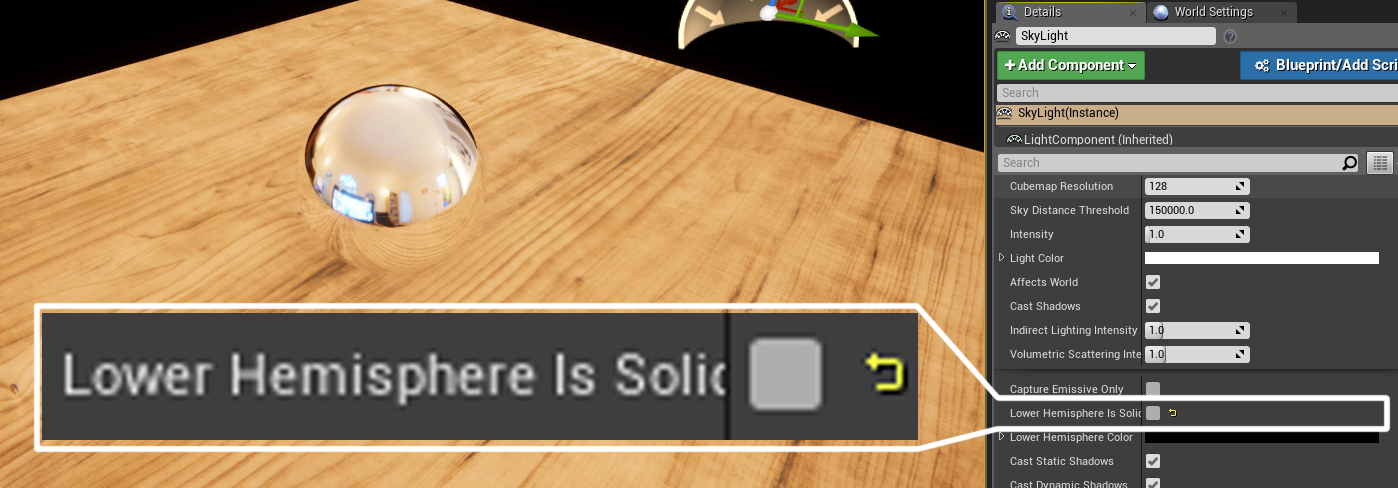
- As you saw in the previous picture, select the
Skylightand expand theLightsection on theDetailspanel. In there you will be able to see that the setLower Hemisphere Is Solidsetting is ticked by default—unticking it will make the light use a full sphere to project the HDRi.
Note
You might be inclined to fill your scene with geometry so as to obscure the emptiness that is being reflected in the chrome ball. However, Unreal doesn't render the objects that the camera can't see—so the reflections that should be happening thanks to the objects that would be behind it won't show at all. This is one of the sacrifices that real-time rendering has to make in order to be so efficient, so keep that in mind! We can solve that by placing a reflection capture, as we'll see next.
However useful having a full spherical HDRi skylight lighting our scene might be, it can also introduce some undesired effects that we don't want to see. For instance, we might want to use the actual geometry of our level to affect the lower part of the chrome ball and not the HDRi. If that's the case, tick again the Lower Hemisphere Is Solid setting and let's try something different.
- Place some planes around the level, in a similar fashion to what I'm doing in the next screenshot. This is just to mimic a scenario where we would have more geometry throughout the level, which could be used for reflections, so we don't have that black band across the reflective ball we saw before. Assign those planes a different material—I'm using
M_Basic_Wallfrom the Starter Content pack:
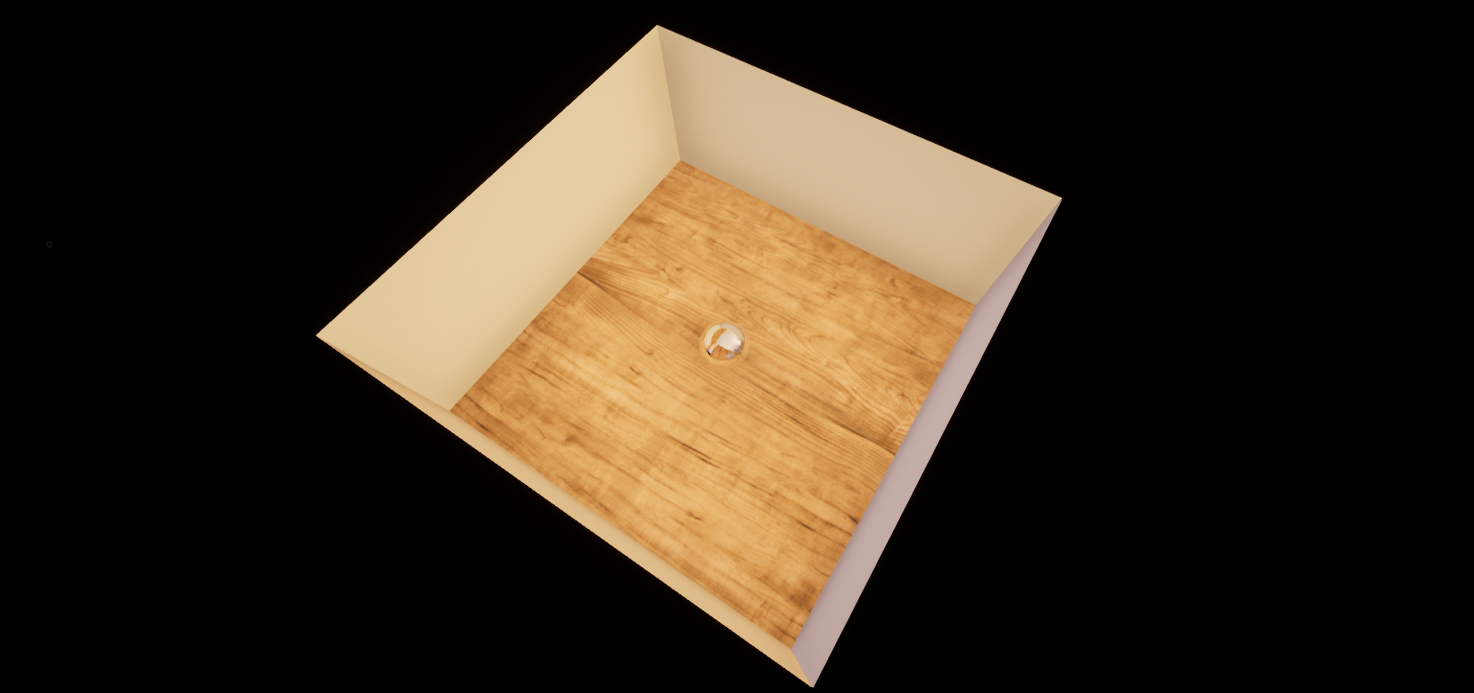
- Place the camera somewhere close to the reflective ball so we can see it clearly. We are still seeing the previous reflections, and not the current ones:
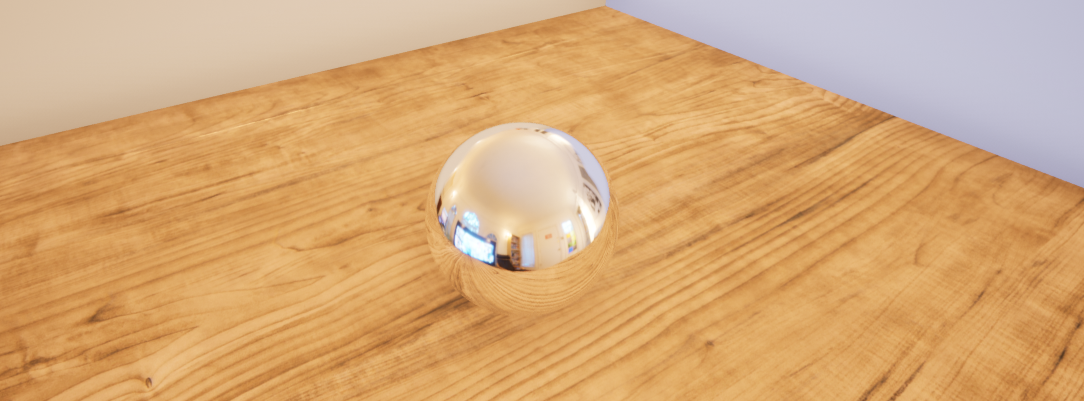
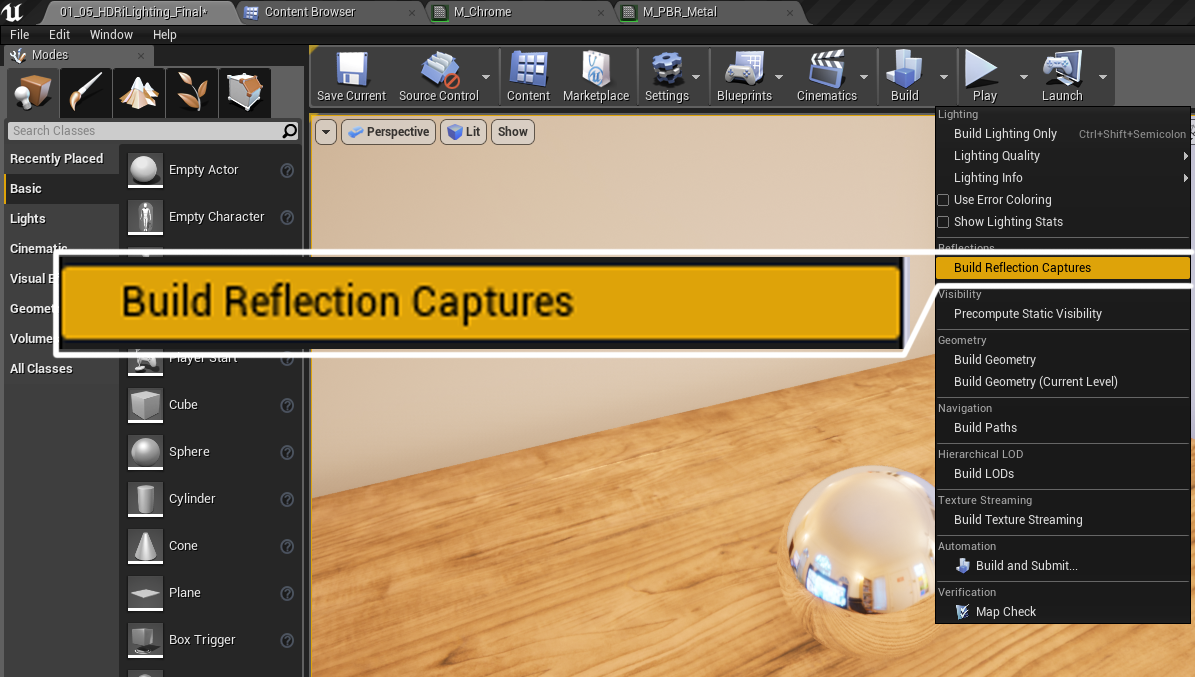
- In order to fix this, go to the drop-down menu to the right of the
Buildicon and select the optionBuild Reflection Captures:
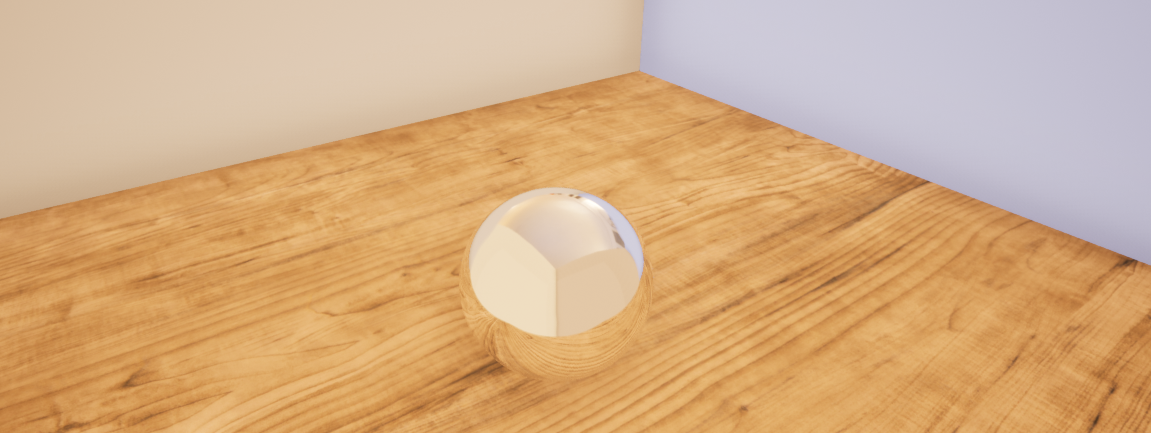
With that done, you should now be looking at your recently created planes in the reflections of the chrome ball as follows:
How it works...
Throughout the current recipe, we've had the opportunity to work with HDRi lighting. The lights that make use of this technique are usually of the Skylight type in Unreal Engine 4, a particular kind that allows for the input of the necessary textures that contain the photon information.
As we've said before, HDRi images capture the lighting state of a particular scene in order to be able to use that information in a 3D environment. The way they do this is by sampling the same environment multiple times under different exposure settings. Taking multiple pictures this way allows for their combination at a post process stage, where the differences in lighting can be interpolated to better understand how the scene is being lit.
What's important to us it that we need to be on the lookout for the right type of textures. HDRi images need to be in a 32-bit format, such as .EXR or .HDRi, as each pixel contains multiple layers of information condensed into itself. You might find HDRi images in a non-32-bit format, but these don't contain as much lighting information as the real ones because of the format they use.
Another parameter to take into consideration is the number of f-stops that a given HDRi image is composed of. This number indicates the amount of different pictures that were taken under different exposures to be able to compose the HDRi. A value of five means that the HDRi was created out of five interpolated images, and a value of seven indicates that said number was instead used. More pictures mean a wider range of values and the consequent increase of information. It is a case of the more, the better, as seen in the next screenshot:
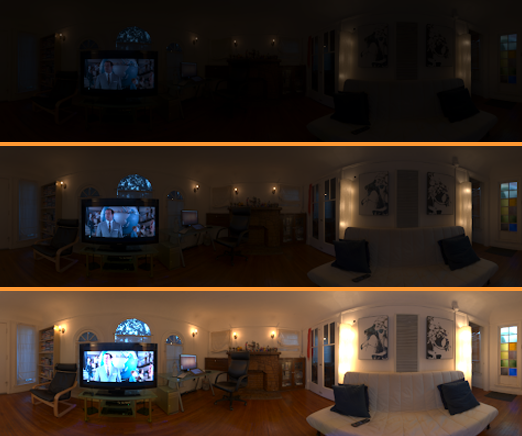
These photographs are a sequence of different images that make up an HDRi. HDRi by HDRi labs.
In this recipe, we've taken a look at several key concepts in the PBR workflow—image-based lighting, reflections, and the different mobility types a light can belong to. These elements, while not a part of the material pipeline themselves, are an essential part of the whole physically based approach at rendering that Unreal has at its core. They work hand-in-hand with the materials we create, expanding their capabilities and complementing the base properties we define them to have. Think about it—there's not much use having a highly reflective material if we don't tell the engine how to treat those reflections. Hope you found this useful!


