Getting more out of Move
Don’t worry, this is not the part of the book where the author encourages you to stand up and stretch before proceeding (but if you feel the need, go ahead, I will be right here when you are done). This is the part of the chapter where we do a deeper dive into using a few of the Modify tools.
More to Move than you remember
One of the biggest parts of moving from a beginner user to an intermediate user is learning to use the basic commands beyond their basic functions. Many new users only scratch the surface of what they can do with tools such as Move, Select, or Rotate.
The first thing you will need is a couple of pieces of geometry:
- Draw a rectangle on the ground.
- Use Push/Pull to create a box.
- Triple-click on the box to select all geometry.
- Right-click and select Make Group.
This will be a good piece of geometry to work with, but you will need to create a different group to work with as well. Next to the box, let’s create a cylinder.
- Draw a circle on the ground.
- Use Push/Pull to create a cylinder.
- Triple-click on the box to select all geometry.
- Right-click and select Make Group.
Now, you have some things to move! Let’s start by exploring the Move and Rotate options of a group.
- Use Select to highlight the new group.
- Select the Move command and move the cursor over the selected group.
At this point, you have a couple of options for moving this box. You can click anywhere on the highlighted group and use that point as a handle to move by. Clicking and releasing on any point will connect the group to the cursor by that point. Clicking and releasing a second time will place the group at the new cursor location. You can use any geometry in the group as an arbitrary move point, but if you pay attention, you can be much more exact in your selection.
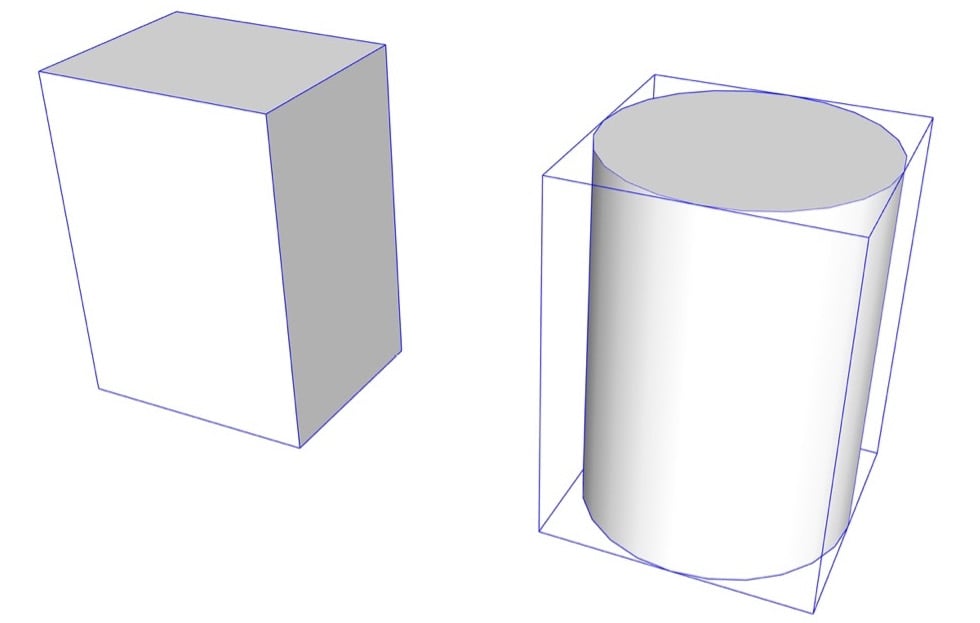
Move your cursor over the cylinder group and look at the corners of the group. Notice how there is a circle on every corner? Clicking on one of these points will allow you to use the corner as a point by which to move the group. If you orbit to a three-quarter or isometric view of the group, you should see a point on the seven corners of the group that you can see. You should also notice that there is one more point that represents the corner of the group that you cannot see. If you move your cursor over that point, the geometry in the group will temporarily become transparent, allowing you to see and select the back corner.
This is great for geometry such as this cylinder that does not have geometry filling in the corner of the group as the box does:

Figure 1.6 – The bounding box wraps tightly around the box while the cylinder does not reach the corners
But wait, there’s more! Look at the modifier keys listed in the status bar. If you press the key to toggle through grip types (Alt on Windows or Command on macOS), you can change the points visible on your group. Tapping the modifier key will toggle between the following point sets:
- Corners of group
- Midpoints of group edge
- Middle of group sides
- Center of group
Modifier Keys
We will be talking a lot more about using modifier keys in Chapter 3, Modifying Native Commands, which includes a comprehensive list of every modifier key for all commands!
Careful selection of the point you use to move items can save you a lot of time and energy. Clicking the correct start point when you are moving can allow you to complete the move in one go, rather than performing multiple moves to get your selected geometry exactly where it needs to be.
Copies and arrays
Move, like many SketchUp tools, can be used to perform more than just one action. For example, Move can be used to create an array of the selected item. Odds are good that you have learned to use the Modify command to copy before, but just to make sure, we will cover it quickly here:
- Use the Move tool to select the box.
- Move the box to the side (away from your cylinder).
- Tap the Copy modifier key (Ctrl on Windows or Option on macOS).
- Click on the new location and receive a copy of your box at this location.
- Now, before you click anything else, type
5Xand hit Enter.
Now, you have a total of five copies of your box. Each box is spaced the exact same distance as your first copy. This is referred to as an array in SketchUp.
Now, let’s say that you were hoping to have a total of five boxes. Typing 5X gave you five copies plus the original for a total of six. The good news is that as long as you do not start a different command or select different geometry, you are still in the array-making process! Let’s get rid of that extra copy.
- Type
4xand press the Enter key.
The extra copy is now gone! You can increase or decrease the number of copies by typing NUMBERX and hitting Enter as many times as you like, as long as you stay in the command.
This is the process of creating an external array. That is, the copies are placed one after another, external to the original move. Next, let’s create an internal array.
- Select the cylinder group and use the Copy modifier to move a copy a long way from the original in the opposite direction of the box group.
- Immediately after placing the copy, type
/4and press the Enter key.
In this case, the number of copies specified is placed, evenly spaced between the original and the copy. Just like an external array, you can change the number of copies by simply typing a new number.
- Type
/8and press Enter. - Type
/3and press Enter.
Using the native Move command with a few simple modifier keys makes it easy to quickly create a series of geometry. Just imagine how much more work it would be to place each copy in an array or, worse yet, recreate the geometry over and over! Understanding how and when to modify commands will help you become a faster, more efficient SketchUp modeler.
Radial arrays
This same process can be used with the Rotate command as well. Start a new model and let’s give this a try:
- Create a box and put it in a group.
- Use Move with the grip toggle to move the box so that its front bottom edge is at the origin.
- Then, move the box up the green axis.
- With the box still highlighted, select the Rotate tool.
- Select the origin as the center point of rotation.
As you start to rotate the box around the origin, press the Copy modifier key (Ctrl on Windows or Option on macOS).
- Rotate the copy around to the green axis on the far side of the origin (180 degrees) and click to place the copy.
- Type
/6and press the Enter key.
With that, you have created an internal radial array. The same rules apply here, as you can change the number of copies between the original and copy by simply entering a new number at any point.
The process of making an external radial array is just as simple.
- Use Undo to remove the copies from the previous step.
- Use Rotate to make your first copy 30 degrees from the original.
- Type
11xand press Enter.
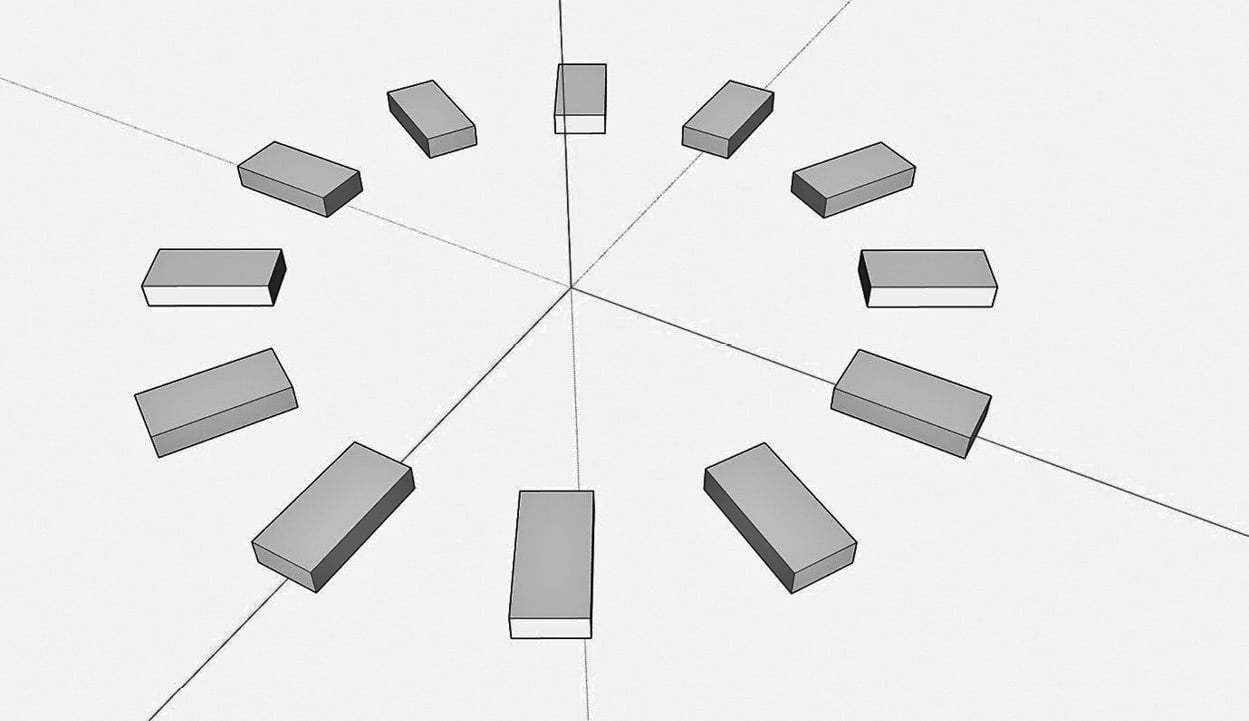
Now, you know how to make a clock face!

Figure 1.7 – A dozen boxes in an array around a central point is exactly how you would make a clock
The important thing to take away here is that the basic commands can be used to do more than their name will imply. Creating things such as copies of arrays using the Move or Rotate commands are simple ways to get more out of a single command. Before worrying about what extensions are out there to expand how you model, remember to explore everything that the native commands are capable of. We will be diving much deeper into this idea in Chapter 3, Modifying Native Commands. Up next, let’s take a look at how we can use Move and a few other native commands to create some organic geometry.


