NAV presents its development capabilities through its own integrated development environment: Client/Server Integrated Development Environment (C/SIDE).
Introducing the Object Designer
C/SIDE and application objects
The Dynamics NAV Development Environment is accessed from the Windows Start menu. If you just installed Microsoft Dynamics NAV, the development environment will open the database that was specified during installation. If for some reason the database does not open automatically, choose the Database | Open option from the File menu. This will invoke the open Database dialog, where you can specify the name of your development server and the database.
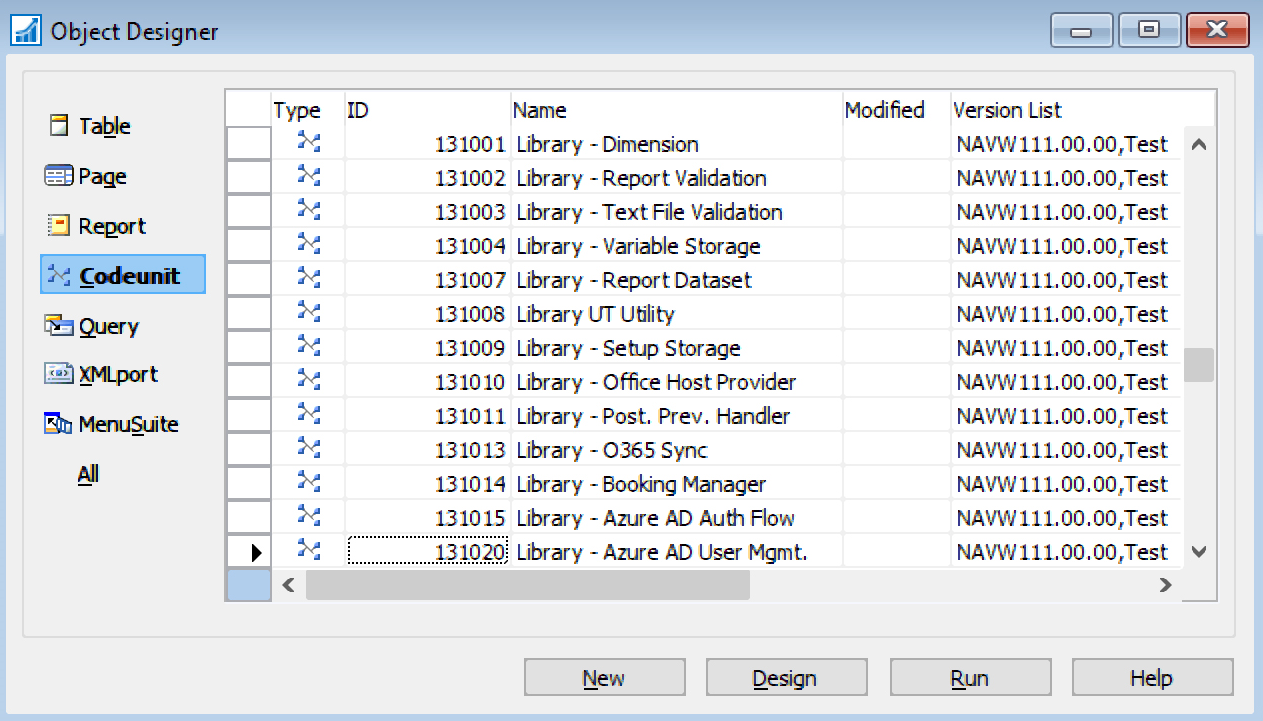
The first thing you see after starting the development environment is the Object Designer. On first start, the development environment connects to the database specified during the installation. If this does not happen, and all you see is a blank window, choose File | Database | Open from the main menu and select the SQL Server and the database name where the development database was created:

Although these application elements are called objects, they should not be confused with objects in object-oriented programming. C/SIDE does not actually support OOP. Developers can create new objects of existing types, but cannot create new object types or classes.
The following table gives an overview of NAV object types and their functions:
|
Object |
Description |
|
Table |
NAV table objects are mapped to SQL Server tables and used to access database data. Tables provide interfaces to read and manipulate data. Table objects are covered in detail in Chapter 3, Tables - Creating Data Structure. |
|
Page |
The primary method of presenting data to the user is to show it on a page. Nearly everything you see in the client interface is a page. Chapter 4, Designing User Interface, covers the development of the user interface, and pages in particular. |
|
Report |
Use reports to add reporting capabilities to your application and present user data in a structured way. Read more about reports in Chapter 7, Presenting Data in Reports. |
|
Codeunit |
A codeunit can be considered as a collection of functions of code that can be used by other objects. This is the equivalent of a library in many other languages. Almost all C/SIDE objects can contain program code, but codeunits are designed solely for this purpose. codeunits are explained in Chapter 2, Codeunits - Structuring C/AL Code. |
|
Query |
C/SIDE provides developers with a toolbox for designing database queries without the need to write SQL code. Queries help improve the performance of the application when it comes to joining tables to select related records from different sources. Queries are not covered in this book. |
|
XMLport |
XMLports provide a simple interface for configuring hierarchical data structures in XML format for data exchange. They supply a quick method of exporting and importing data with the minimum amount of programming. More on XMLports in Chapter 5, Exchanging Data with XML Ports. |
|
MenuSuite |
Links to application areas, pages, and reports are presented in the user interface in a structured user menu through a set of MenuSuite objects. You will design your own user menu in Chapter 4, Designing User Interface. |
All objects are identified by the object type, ID, and name. A sample object created in the next section demonstrates how to create an application object and assign a name and ID to it.
Hello World example
To demonstrate how to design objects in C/SIDE, we will follow a traditional example and write a simple Hello World application. In Dynamics NAV, this is going to be a line of code in the OnRun trigger of a codeunit. To create a codeunit, switch to the codeunits list in the Object Designer window. Click Alt + C, or choose the codeunit icon in the left pane, to select codeunits. To create a new object, press Ctrl + N (or choose File | New action in the main application menu).
The MESSAGE function is used to display a UI message; we will use it to display the greeting. The OnRun trigger is automatically added to the object by the editor, so the only thing to do now is to write a code line that shows the message:
OnRun()
MESSAGE('Hello World');
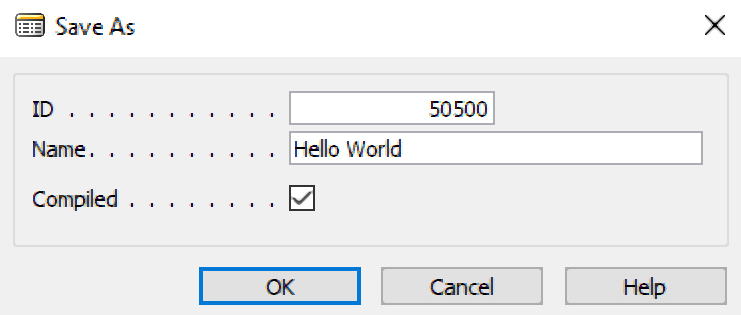
Now, save the object (File | Save). The new object does not have a name and ID yet, so the first time it is saved, you will be prompted to name the codeunit. Enter 50500 as the ID and Hello World for the codeunit name.
The object name is a string, up to 30 characters long, that should describe the object's function to the developer. It must be unique for each object type. ID is a positive integer number used internally by the system. A NAV developer license allows you to create objects with IDs ranging from 50000 to 50999, and all objects described in this book will receive IDs starting from 50500:

Apart from two fields identifying the object, the dialog contains a Compiled flag that specifies whether the object should be compiled before saving. An uncompiled object cannot be executed, so leave the flag checked and click OK.
Running objects from the Object Designer
To execute the new codeunit, select it in the Object Designer and click the Run button located under the list of objects. This action will start the role-tailored client and execute the object code displaying the Hello World message box.
This method of executing object code is not intended to be employed by users to perform their daily tasks. Normally, objects are invoked from a user menu (we will learn how to do this in one of the following chapters). But it is very useful for debugging and testing purposes to quickly run an object during development. Any object, except MenuSuites, can be executed this way.


