Search icon CANCEL
Subscription
0
Cart icon
Your Cart (0 item)
Close icon
You have no products in your basket yet
Save more on your purchases now! discount-offer-chevron-icon
Savings automatically calculated. No voucher code required.
Arrow left icon
Explore Products
Best Sellers
New Releases
Books
Videos
Audiobooks
Learning Hub
Conferences
Free Learning
Arrow right icon
Arrow up icon
GO TO TOP
Implementing Palo Alto Networks Prisma® Access

You're reading from   Implementing Palo Alto Networks Prisma® Access Learn real-world network protection

Arrow left icon
Product type Paperback
Published in May 2024
Publisher Packt
ISBN-13 9781835081006
Length 346 pages
Edition 1st Edition
Arrow right icon
Author (1):
Arrow left icon
Tom Piens Aka 'Reaper' Tom Piens Aka 'Reaper'
Author Profile Icon Tom Piens Aka 'Reaper'
Tom Piens Aka 'Reaper'
Arrow right icon
View More author details
Toc

Table of Contents (17) Chapters Close

Preface 1. Part 1:Activate and Configure Prisma Access
2. Chapter 1: Designing and Planning Prisma Access FREE CHAPTER 3. Chapter 2: Activating Prisma Access 4. Chapter 3: Setting Up Service Infrastructure 5. Chapter 4: Deploying Service Connections 6. Part 2:Configure Mobile User and Remote Network Security Processing Nodes
7. Chapter 5: Configuring Remote Network SPNs 8. Chapter 6: Configuring Mobile User SPNs 9. Chapter 7: Securing Web Gateway 10. Chapter 8: Setting Up Your Security Policy 11. Part 3:Advanced Configuration and Best Practices
12. Chapter 9: User Identification and Cloud Identity Engine 13. Chapter 10: Advanced Configurations and Insights 14. Chapter 11: ZTNA Connector 15. Index 16. Other Books You May Enjoy

Setting up the connector VM

We can find the VM in the marketplace of our preferred cloud provider. There are a few flavors available:

  • 1 Arm has a single network interface for both ingress and egress connections
  • 2 Arm uses two interfaces: one to reach public resources such as Prisma Access, and an internal interface to reach internal resources
  • 1 Arm Auto Scale uses the 1 Arm design but comes with the autoscaling feature:
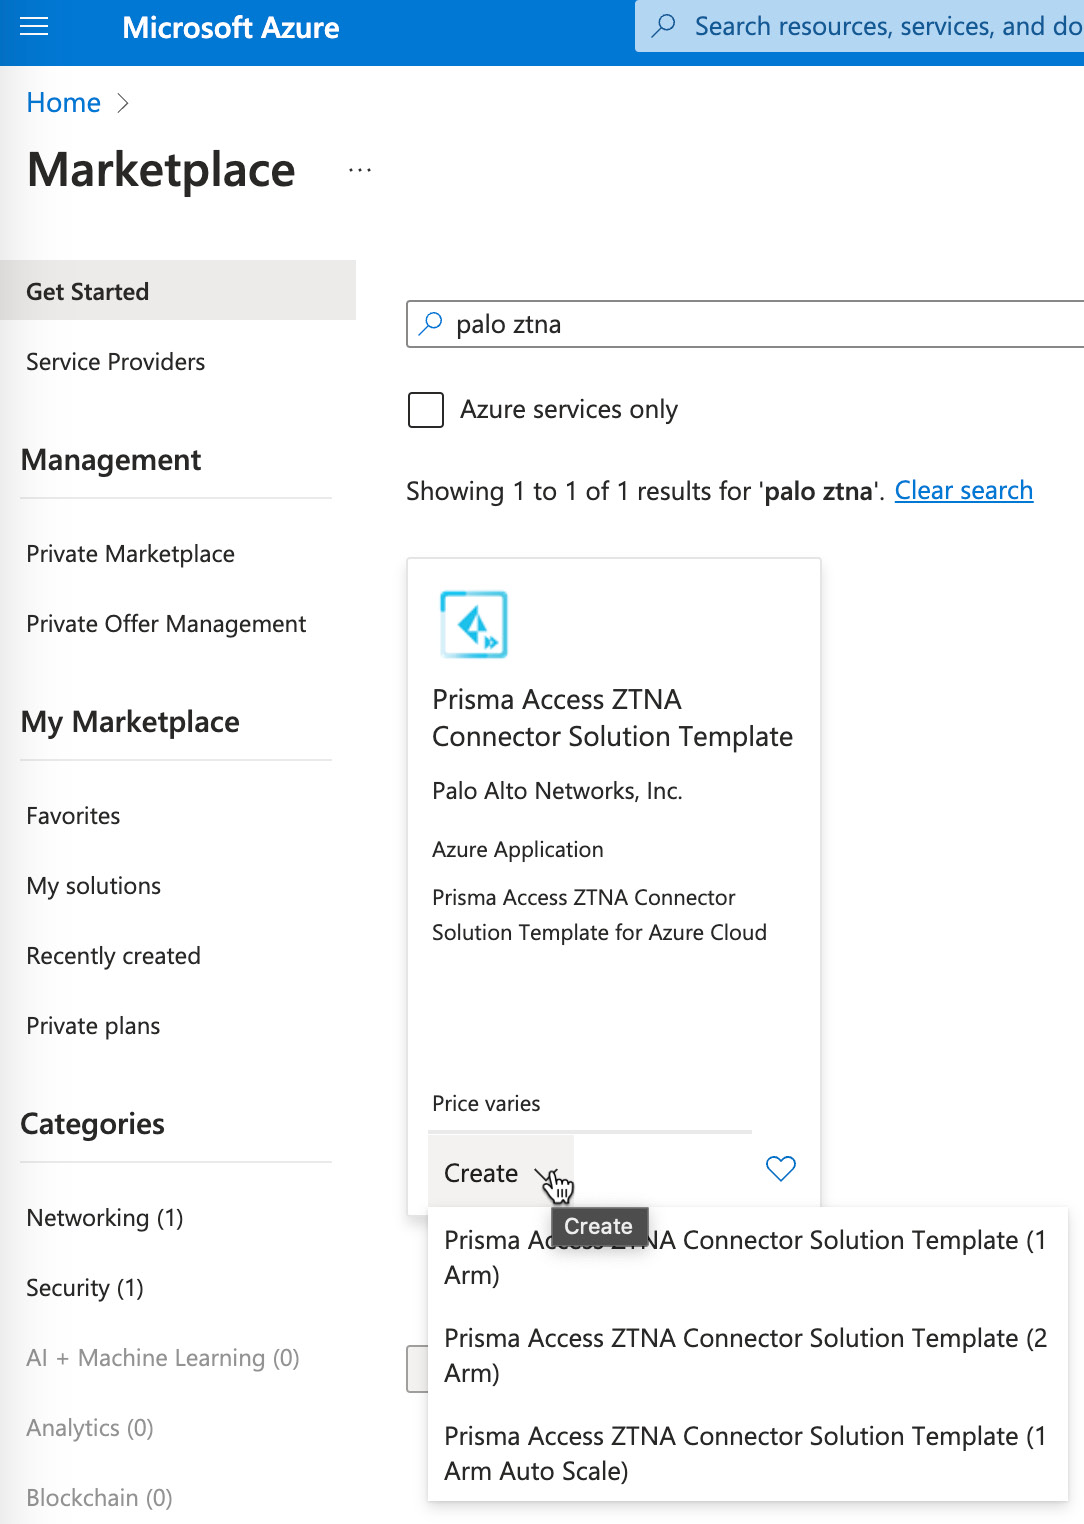
Figure 11.13 – ZTNA connector VM in the marketplace

Figure 11.13 – ZTNA connector VM in the marketplace

Go ahead and place the connector in a resource group, and click Next:
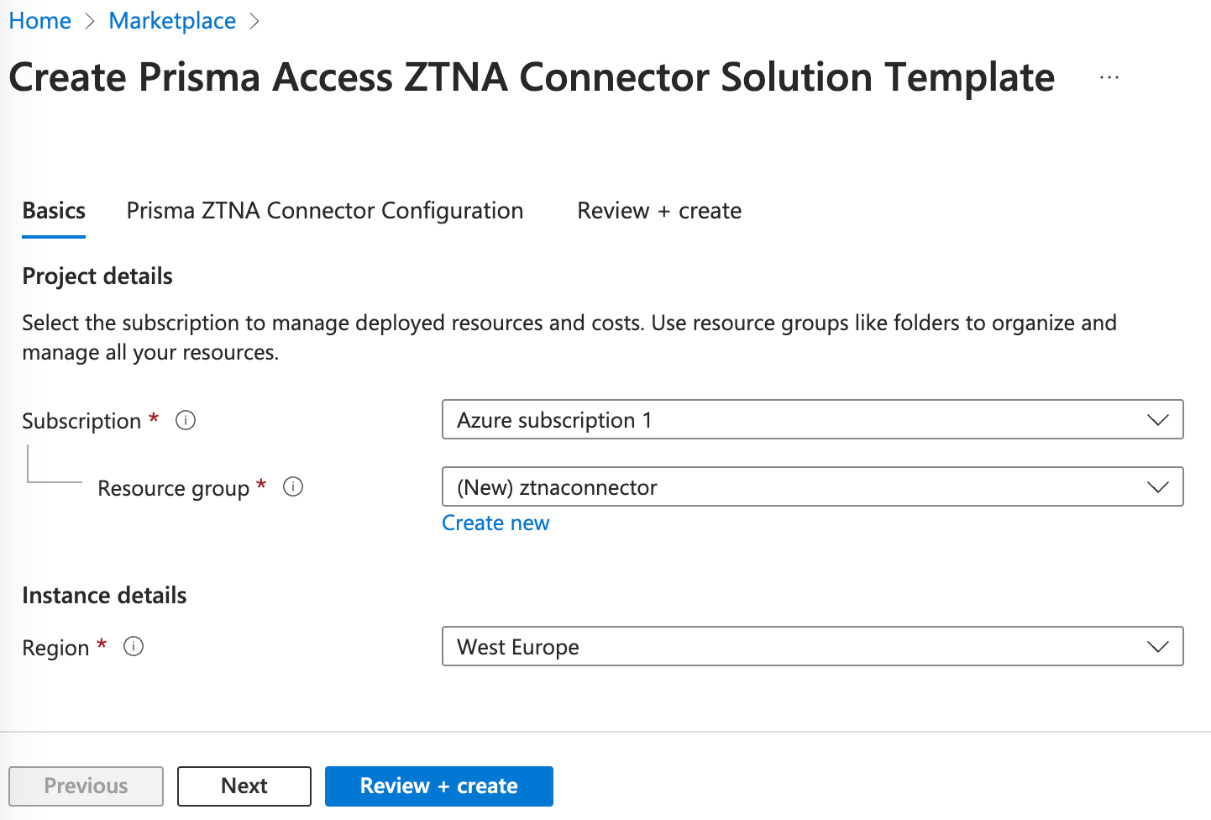
Figure 11.14 – Creating a connector VM

Figure 11.14 – Creating a connector VM

In the Prisma ZTNA Connector Configuration tab, we need to assign a subnet to the connector and provide the key and secret we copied earlier in Figure 11.9. Once those are filled in, go ahead and click Next and Create:
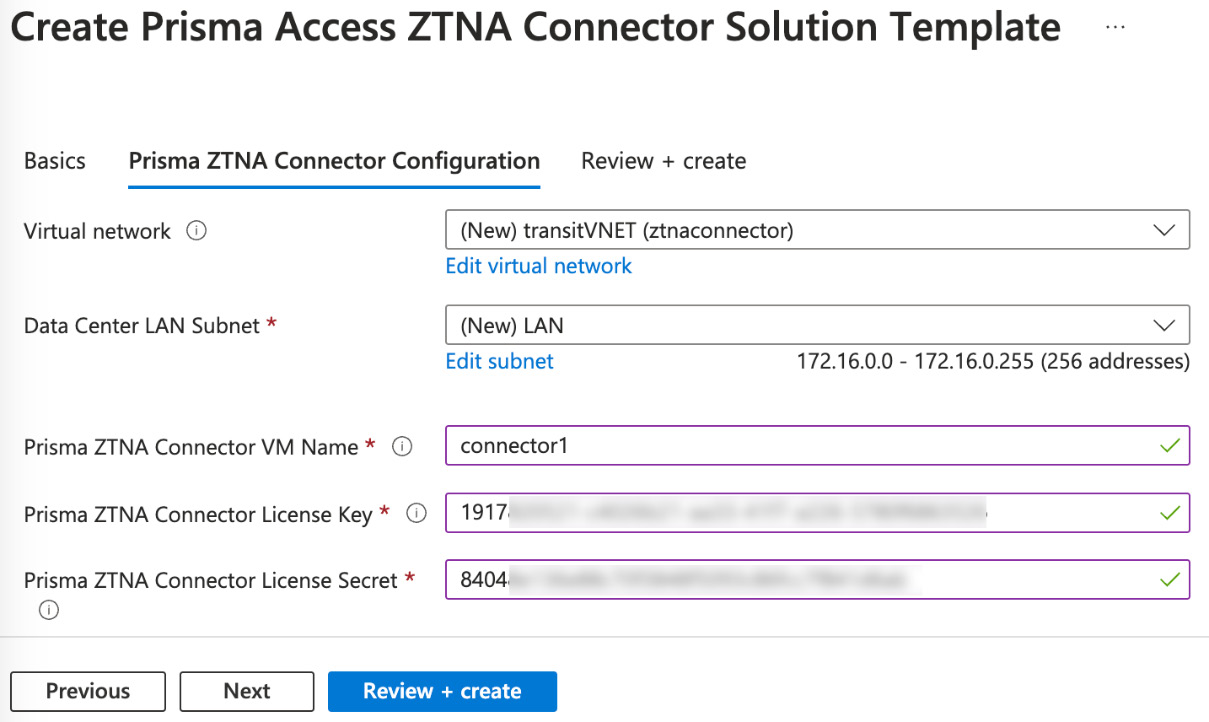
Figure 11.15 – Configuring subnet key and secret

Figure 11.15 – Configuring subnet key and secret

Once the deployment...

lock icon The rest of the chapter is locked
Register for a free Packt account to unlock a world of extra content!
A free Packt account unlocks extra newsletters, articles, discounted offers, and much more. Start advancing your knowledge today.
Unlock this book and the full library FREE for 7 days
Get unlimited access to 7000+ expert-authored eBooks and videos courses covering every tech area you can think of
Renews at €18.99/month. Cancel anytime