Threading text frames
In some documents, you might only require a few lines of text—for example, with single-page flyers—but there are many other documents where you have many pages of content such as magazines, books, large reports, tender documents, and so on. In such documents, it can be really useful to thread your text frames together into a single story. This enables all the frames in the story to function as one, allowing text to flow from one frame to another seamlessly as though it were in a single frame.
In this recipe, we are going to learn how to thread text frames together, view text threads to check the order of flow, add frames to a story, remove frames from a story without losing the text, and change the flow of the story, as well as thread text using the semi-auto and auto flow modifiers.
Getting ready
In order to complete this recipe, simply open InDesign on your system and create a new document with 12 pages and facing pages enabled, as shown in the Creating a new document recipe in Chapter 1. Facing pages are not required for threading text frames, but they will make it easier for us to demonstrate how text threads can run across multiple pages. During this exercise, you will also need to be able to create text frames and add placeholder text, as shown in the Creating text frames and adding placeholder text recipe.
How to do it…
In order to work with text threading in InDesign, follow these steps:
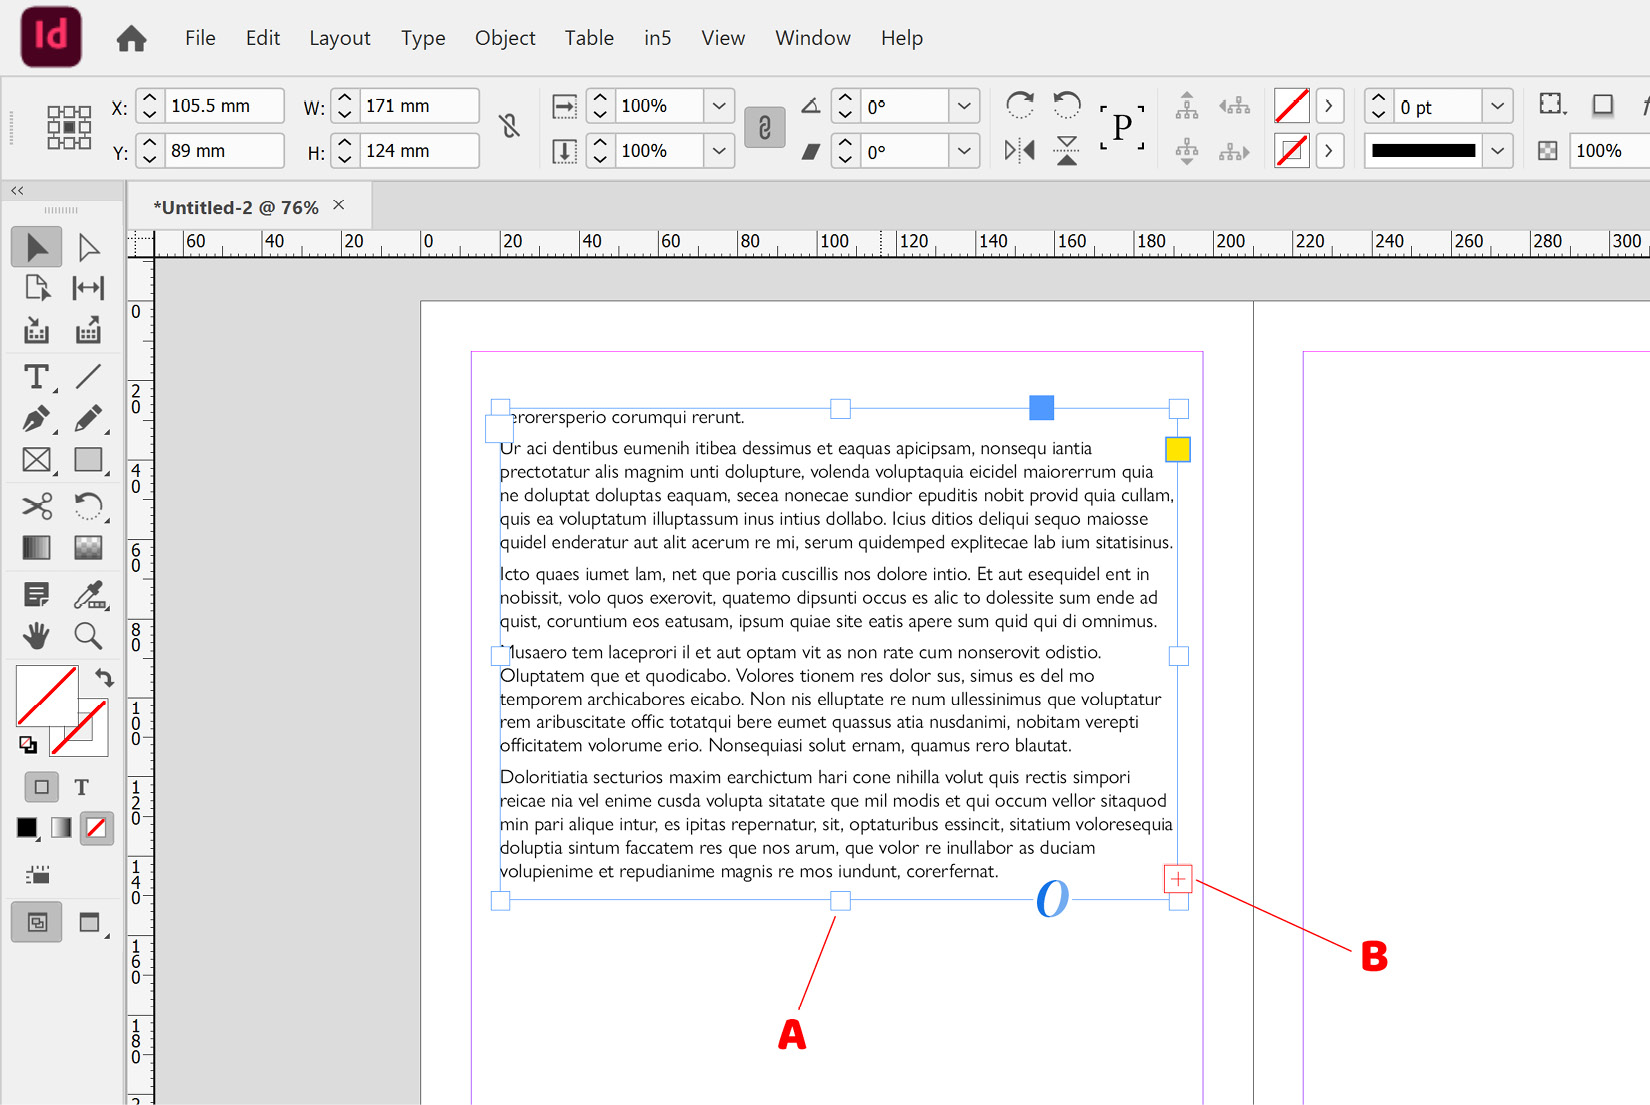
- Scroll down to a double-page spread, and on the left-hand page, create a text frame that fills the page, then fill it with placeholder text. Now, make the frame shorter by dragging up from the handle at the bottom of the frame (marked as A in Figure 2.38) to roughly the halfway point, and you will notice there is a small box at the bottom right of the frame that turns red (marked as B in Figure 2.38). This is the out port for the frame; when it goes red, it means you have what is called overset text. Overset text is text that still exists; it hasn’t been deleted, but it isn’t visible because there is no space currently available to display it within the text frame at its current size.
- Next, add a new text frame at the top of the right-hand page in which we can continue our story. Switch to the Selection tool and select the text frame we created in step 1. Now, click once on the out port for that frame (marked as B in Figure 2.38), which happens to be red as we currently have overset text, and you will notice the cursor changes at this point. Move your cursor over to the right-hand page and click into the new frame you just created at the top of the right-hand page:

Figure 2.38: Text frame with overset text before threading
Note
When threading text frames, be sure to just click once on the out port, then click into the new frame. I often see people try to click and drag the out port across onto the new frame, which doesn’t work.
I am using facing pages (as shown in the Creating a new document recipe in Chapter 1) in order to make this easier to show here, but that isn’t necessary for this to work. You could just as easily thread 2 frames together that are 20 or 30 pages apart.
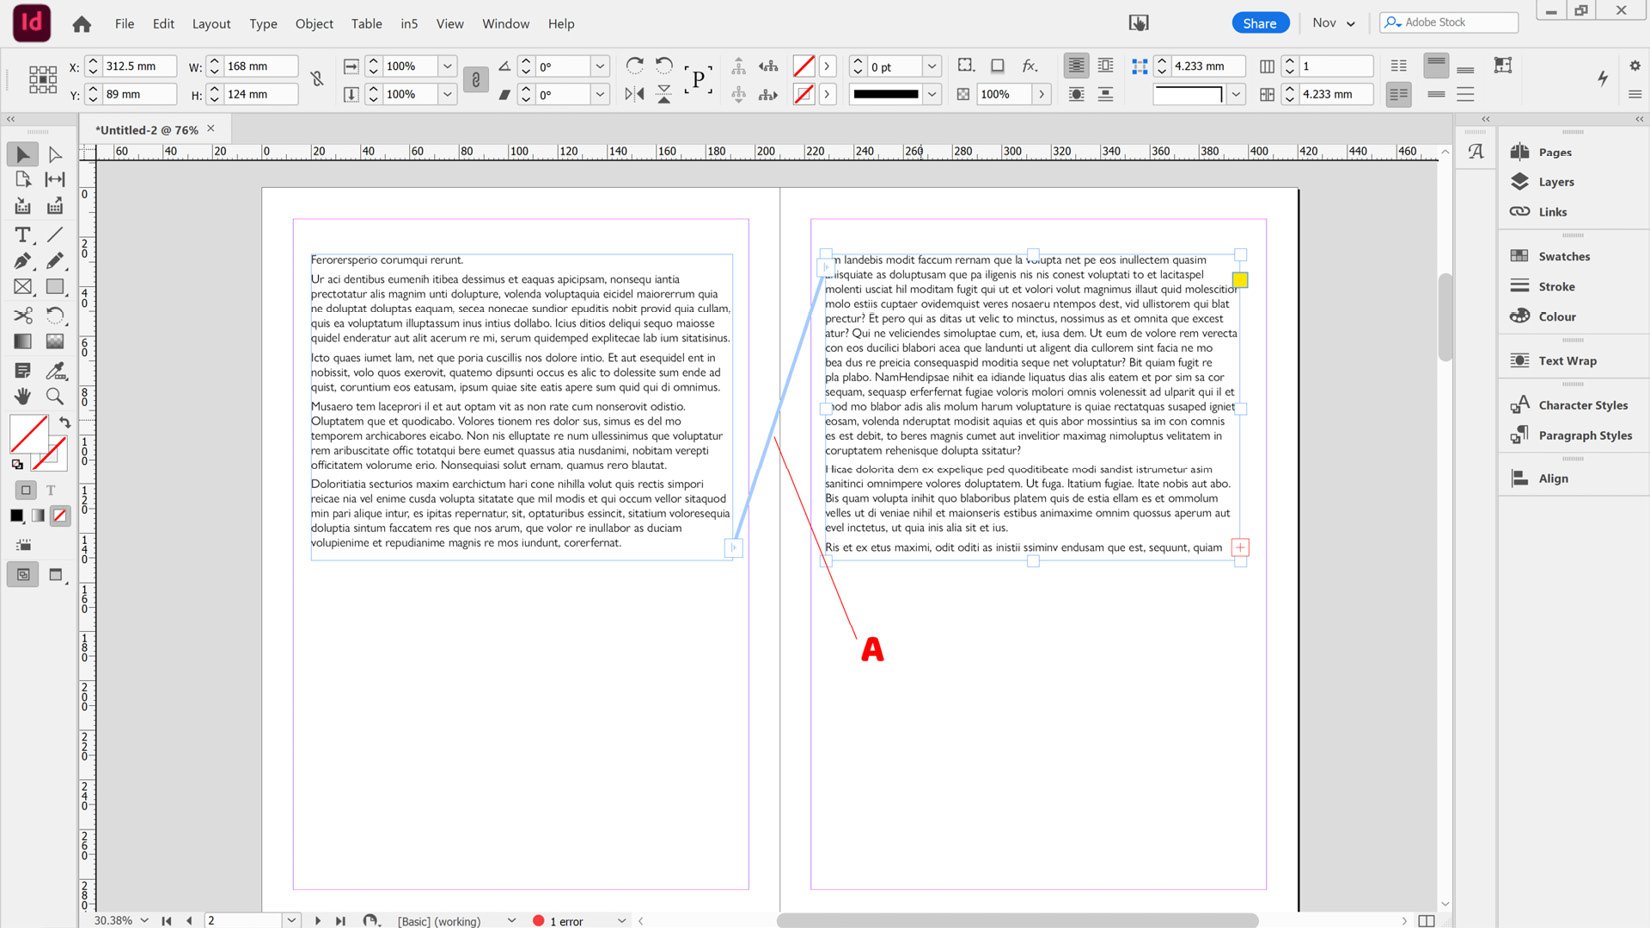
- Having done this, you will see the text that was previously overset now appears over in the second frame, but you may not immediately see the actual text threads (a line between the two frames, marked as A in Figure 2.39). Go to the View menu, and toward the bottom, you will see a flyout menu called Extras. Within this menu, select Show Text Threads. If the option here says Hide Text Threads, it means they are already enabled and you don’t need to select it:

Figure 2.39: Two frames threaded with Show Text Threads enabled
If you don’t immediately see the threads, one reason might be you don’t have any of the frames in the story selected. Simply switch to the Selection tool and click on one of the frames, and you should then see the threads.
If you still aren’t seeing the threads, one other reason for this could be you are working in Preview mode rather than Normal mode, in which case you should switch to Normal mode (which is what you should generally use when working), as shown in the Change the screen mode recipe in Chapter 1.
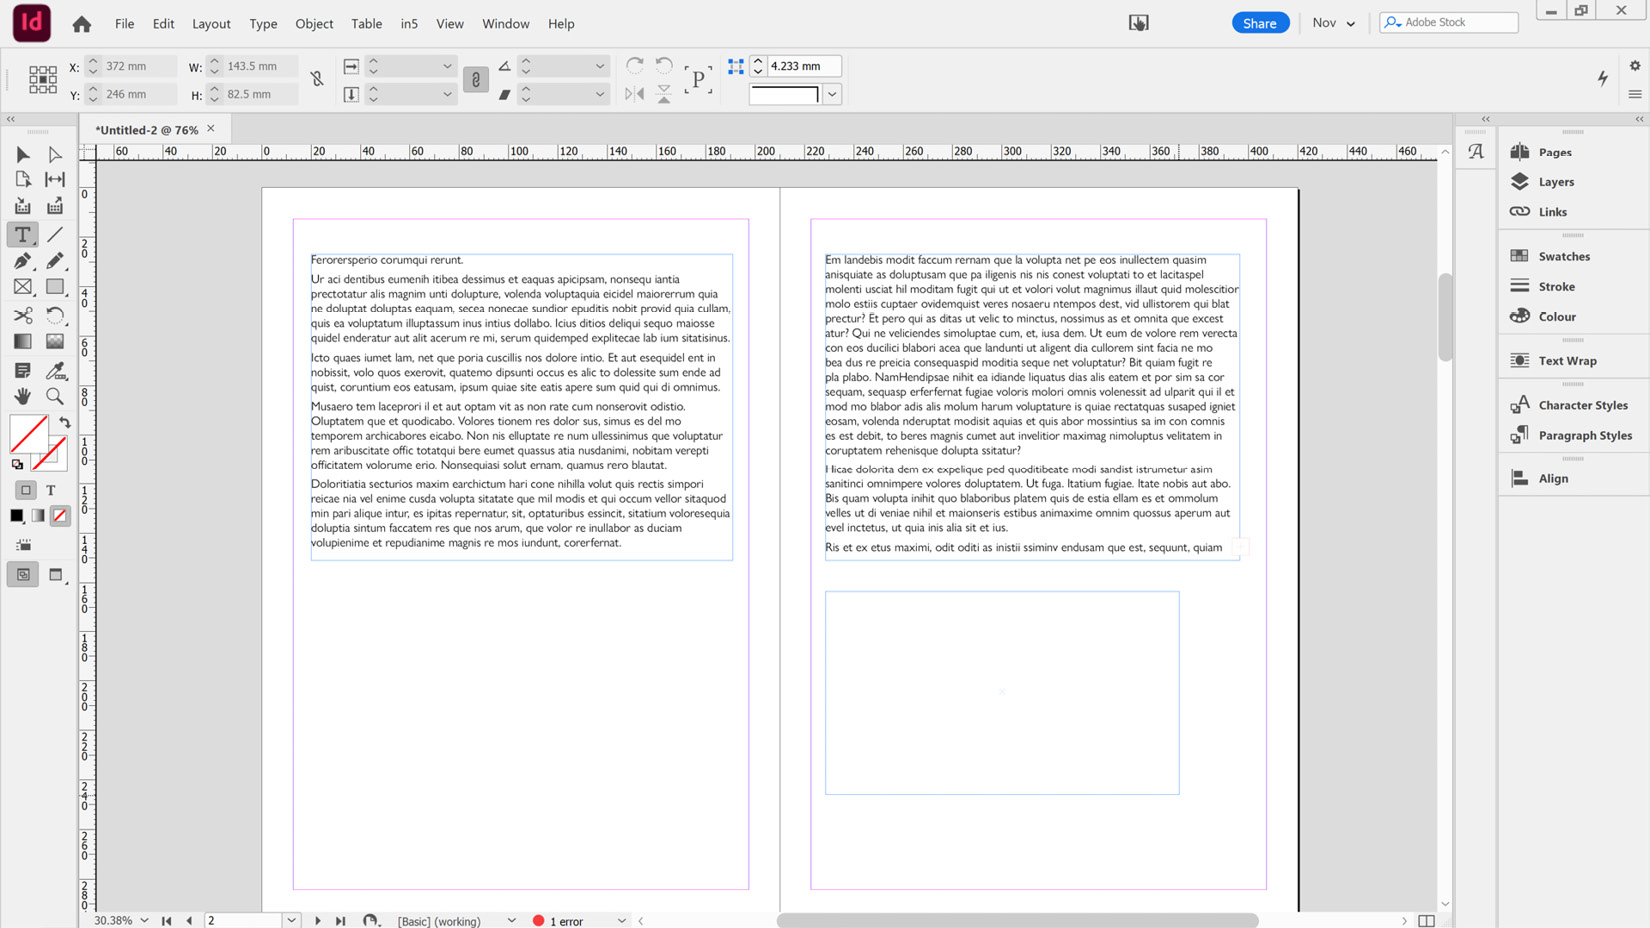
- Having added an existing frame to the story, we would now like to create a third frame as part of the story, as shown in Figure 2.40. Switch to the Selection tool and select the top-right frame that we created in step 2. Now, click once on the out port, which may or may not be red, and then click and drag on the document exactly where you would like the new frame to be created. This new frame will be automatically included in the story:

Figure 2.40: Adding a new frame at the end of a story
- Having threaded together three frames, create a fourth frame below the first frame on the left-hand page.
- We now want to insert this frame into the middle of the story, and it makes the most sense to do so after the top-left frame but before the right-hand frames in this instance. This would result in the story flowing down the left-hand page before then continuing down the right-hand page.
To insert the new frame into the middle of the story, select the frame that you would like to insert it after—in this case, the frame at the top of our left-hand page—and click the out port of that frame (marked as B in Figure 2.38). Your cursor will now change, and you should click into the new frame, which will cause InDesign to insert the frame at that point in the story, continuing the rest of the story afterward.
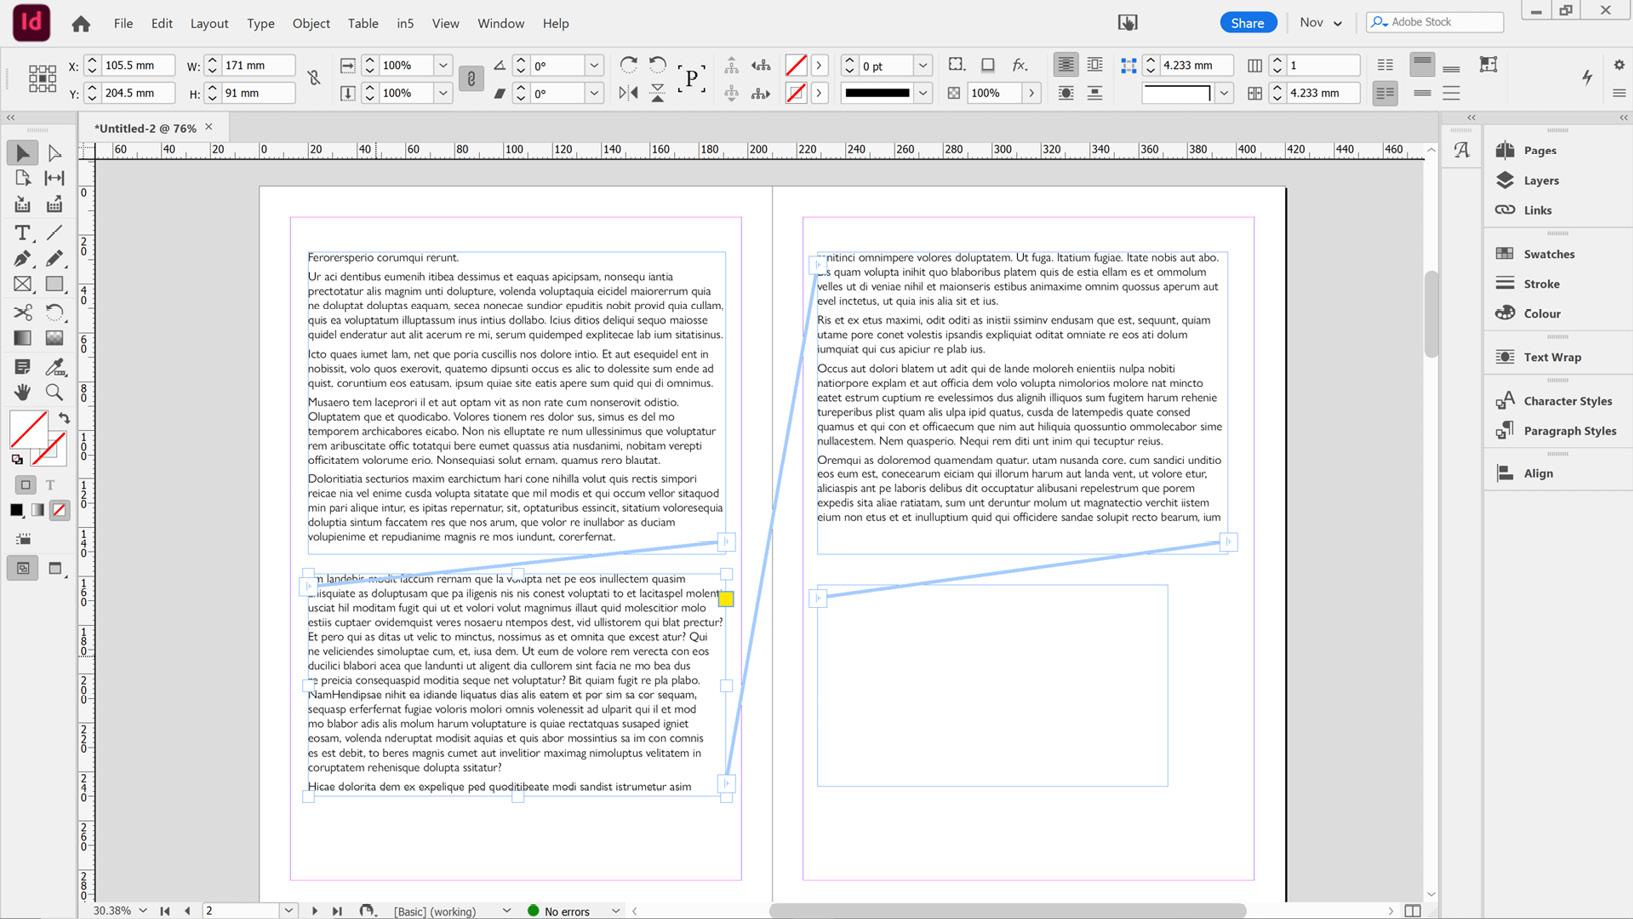
In Figure 2.41, I have added the bottom-left frame to the story, causing the threads to update and include the bottom-left frame in the middle of the story:

Figure 2.41: Inserting a text frame into the middle of an existing story
- Having now threaded four frames over two pages, we might decide we would like the second page to be an independent story from the first page. To achieve this, we need to first break the thread at the end of page 1. To do this, select the last frame you want in the first story, and then double-click the out port of that frame. This breaks the threading at that point, with any text beyond that being brought into that second frame as overset text.
- You now have a story on page 1 with two frames, and a second story on page 2 with two frames; however, all the text is currently in the first story, with nothing in the second. To correct this, we will place the cursor at the end of the first story, and on the keyboard hit Ctrl (PC)/Cmd (Mac) + Shift + End. This is a useful shortcut that selects all text from that point through to the end of the story, including overset text. Having selected the text, you can select Cut from the Edit menu to cut it out, and then click into the new story and select Paste from the Edit menu to copy the text into the new frames.
In order to reverse this, let’s now thread our second and third frames back together by clicking the out port in frame 2 and clicking into frame 3.
Advanced quick tip
Would you like to remove a single frame from a story and have it retain its own text, while automatically reflowing the other frames? If so, go to the Window menu, and under Utilities open the Scripts panel. In the Scripts panel, expand the Application section, then expand the Samples section, followed by the JavaScript section. Select the frame you want to separate out and now double-click the BreakFrame.jsx extension listed in the panel. Job done.
- One thing you might want to do when working with stories is completely remove a single frame from a thread while retaining its content within the story. In this case, we will remove the top-right frame from the story. Simply select it and hit Delete, and you will find that while the frame is deleted, the text remains as part of the story.
Having done this, let’s now delete all but the first frame.
- When threading frames, sometimes you might want to thread multiple frames together without having to select each frame and click on the out port to individually thread them. To do this, select the frame and click the out port ready to thread your text. Now, hold down the Alt (PC)/Option (Mac) key while creating your new frame. When you let go of the mouse button, you will find not only has the text threaded into the new frame, but you can carry straight on and do more frames, and as long as you keep holding down the Alt (PC)/Option (Mac) key, it will let you keep creating new frames, all of which are threaded.
Tip
Would you like to unthread a whole story? Simply select a frame in the story and go to the Window menu, then under Utilities, open the Scripts panel. In the Scripts panel, expand the Application section, then expand the Samples section, followed by the JavaScript section. Select a frame in the story, and now double-click the SplitStory.jsx extension listed in the panel.


