Choosing the right App Service plan and exploring what its features are
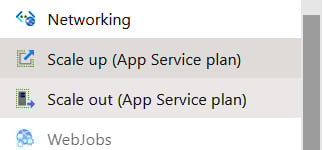
We touched on this topic at the beginning of this chapter, so you should have an idea of what we are going to cover now. As you remember, when an App Service resource is created, you must select (or create) an App Service plan, which defines both available performance and additional features. Let's cover all three categories, this time focusing on the differences between each tier. To see your options without going to an Azure App Service creation screen, go to the Scale up (App Service plan) blade, as illustrated in the following screenshot:

Figure 1.31 – Scale up blade
You will see a screen where all available tiers for the App Service plan will be displayed.
Dev / Test App Service plans
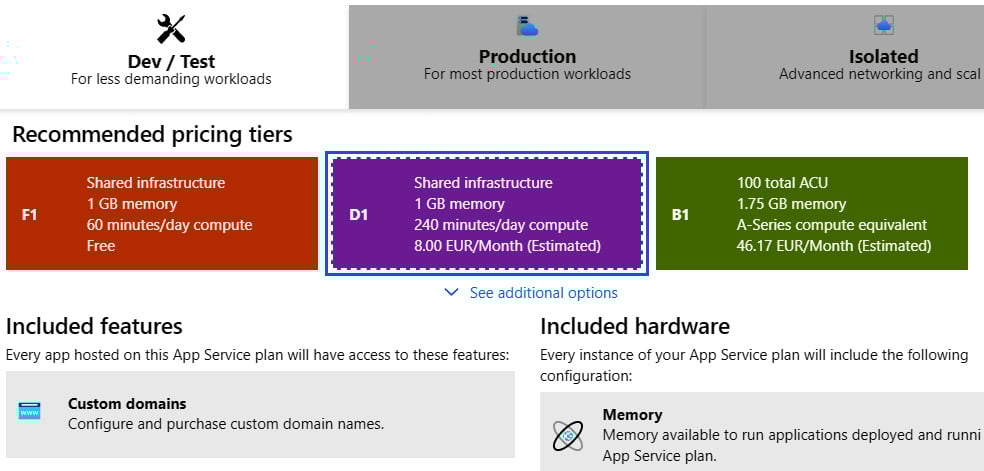
App Service plans designed for development and testing environments can be found in the Dev / Test category, as illustrated in the following screenshot:

Figure 1.32 – Selecting a tier
We have three different tiers available, as follows:
- Free (F1): The most basic option, with shared infrastructure, 1 gigabyte (GB) of memory available, and 60 minutes of compute per day. When using shared tiers, some features of App Service are unavailable (such as Always on). F1 is perfect for quick-testing or deploying an application for a presentation or demonstration. You will not be charged for using this App Service plan.
- Shared (D1): Like F1, but this also allows for setting a custom domain for your App Service resource. What is more, you can run your application four times longer than when using the Free tier. Still, this is a shared infrastructure, so some features cannot be used, and there will be other Azure customers on the same machine. Unfortunately, it's not available for Linux.
- Basic (B1): This is the first tier that can be considered for running production workloads. It guarantees dedicated A-series machines, and more memory and storage. It is also the first tier that you can scale—though only manually. The Basic tier comes with additional versions (B2 and B3), which provide more compute power.
Note
If you are obligated to run your application in Azure in services defined by a service-level agreement (SLA), remember that you cannot use the Free or Shared tiers, as they do not support this.
Production App Service plans
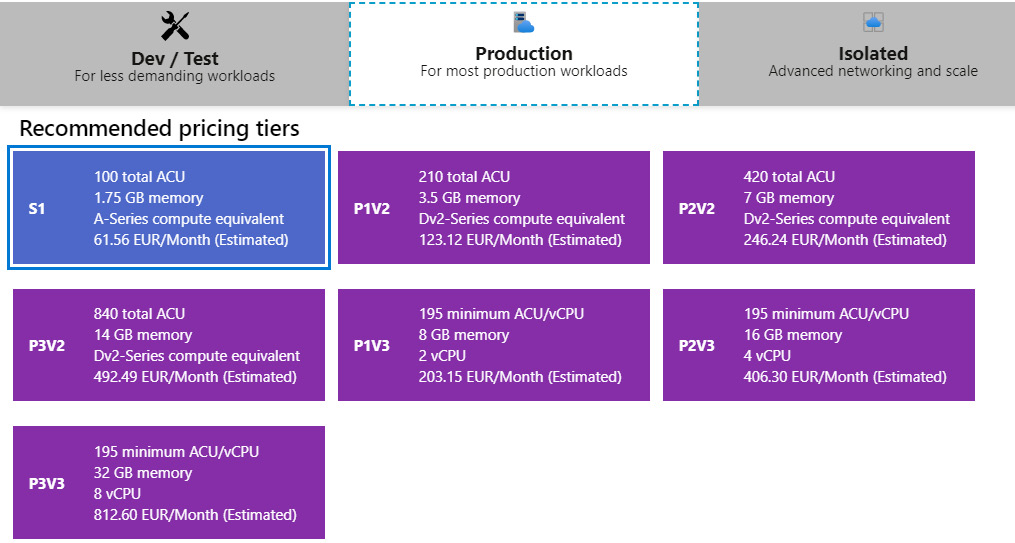
In this category, there are many more options when it comes to choosing different features available. Remember that, in terms of hardware, the Basic tier offers the very same performance as the Standard tier. You can see a list of the Production category tiers here:

Figure 1.33 – List of production tiers
Here, we can choose between the following:
- Standard (S1): The same A-series as B1. What we are getting here is autoscaling, staging slots, backups, and the possibility to use Traffic Manager (which will be described in the coming chapters). This used to be the best tier for most production applications, as it supports blue-green deployment scenarios and can handle a bigger load (thanks to integration with Traffic Manager). Currently, the price/value ratio is in favor of Premium tiers.
- Premium (P1v2): Offers better performance and higher limits when it comes to scaling (a maximum of 20 instances, compared to 10 in Standard) and staging slots. You also have the option to choose P2 or P3. If you need the best price/value ratio, this is the tier you are looking for.
Tip
Remember that the maximum number of instances when scaling out in particular tiers is subject to availability. In most cases, these are only soft limits that can be raised after contacting support.
In general, Standard should meet most requirements when it comes to performance, reliability, and automation possibilities. However, if you are going to run a very popular website in Azure, you may need Premium, as this offers more flexibility and better scalability.
Note
One of the most important things to remember is how scaling affects pricing. In general, you have two options: either you scale up (changing tier to a higher one) or scale out (by deploying multiple instances of the same application). If you are paying, for example, $40 for an S1 instance, when you scale out to 10 instances, you will pay $400 in total—$40 for each instance running.
Isolated App Service plans
Sometimes, you need even more than the Premium tier has to offer. Maybe you must isolate your application from an external network. Maybe you would like to isolate it on a hardware level. Maybe 20 instances are still not enough. Therefore, Microsoft introduced the Isolated category, which is a slightly different tier as it requires you to deploy the Azure App Service environment first and then provision isolated instances that will use it. This category is shown in the following screenshot:

Figure 1.34 – Isolated tiers for App Service plan
In this category, we have only one tier divided into three versions, as follows:
- Isolated (I1V2/I2V2/I3V2): It has the same virtual machines (VMs) as in the Premium tier (DV2). It also includes huge storage to store your files (1 terabyte (TB)), private app access, an integrated virtual network (so that you can access, for example, internal applications), and a more stable environment. This is the most expensive tier but offers the most when it comes to functionality and the range of features provided.
Tip
In general, the Isolated tier is the most stable one when it comes to handling a huge load. While Standard or Premium tiers become unresponsive quickly when utilization hits 100%, Isolated App Service resources need more time to return the HTTP 503 Service Unavailable response. Take this into account if you need a reliable service that cannot be broken easily.
However, there is one thing worth remembering here—besides paying for each isolated instance, purchasing an Isolated plan will also require paying a stamp fee. A stamp fee is a price for isolating your hardware from other Azure customers. As of now, the cost is ~$1,071/month.
Isolated V2 plan
To avoid paying the stamp fee, you can buy an upgraded Isolated V2 plan. This eliminates additional costs due to the redesign of the underlying infrastructure. As for now, the cost for an I1 instance of the upgraded plan is ~$412.45/month.
After describing details of different tiers of Azure App Service plans, we can now switch our attention to security providers that web apps offer and how they can integrate with your application.


