Search icon CANCEL
Subscription
0
Cart icon
Your Cart (0 item)
Close icon
You have no products in your basket yet
Save more on your purchases! discount-offer-chevron-icon
Savings automatically calculated. No voucher code required.
Arrow left icon
Explore Products
Best Sellers
New Releases
Books
Videos
Audiobooks
Learning Hub
Newsletter Hub
Free Learning
Arrow right icon
timer SALE ENDS IN
0 Days
:
00 Hours
:
00 Minutes
:
00 Seconds
Arrow up icon
GO TO TOP
3D Game Design with Unreal Engine 4 and Blender

You're reading from   3D Game Design with Unreal Engine 4 and Blender Combine the powerful UE4 with Blender to create visually appealing and comprehensive game environments

Arrow left icon
Product type Paperback
Published in Jun 2016
Publisher Packt
ISBN-13 9781785881466
Length 252 pages
Edition 1st Edition
Tools
Arrow right icon
Author (1):
Arrow left icon
Jessica Plowman Jessica Plowman
Author Profile Icon Jessica Plowman
Jessica Plowman
Arrow right icon
View More author details
Toc

Table of Contents (11) Chapters Close

Preface 1. Unreal, My Friend, I'd Like You to Meet Blender FREE CHAPTER 2. Starting Our First Project 3. It's Time to Customize! 4. Getting the Assets to the Level 5. Taking This Level Up a Notch 6. Monster Assets – The Level Totally Needs One of These 7. Let's Dress to Impress! 8. Lights, Camera, Animation! 9. Bang Bang – Let's Make It Explode Index

Rigging and using keyframes


Now that we have a good idea what tools we will need, let's talk about creating keyframes!

The Timeline is used to add keyframes in a similar fashion to Timelines in Unreal 4

Similar to Unreal 4, the keyframes we create will be displayed in the Timeline. This area is located directly under the 3D viewport. Keyframes are represented as simple yellow lines, and the amount of time we are viewing can be adjusted by using the mouse wheel.

Now let's start with a basic cube and create some keyframes:
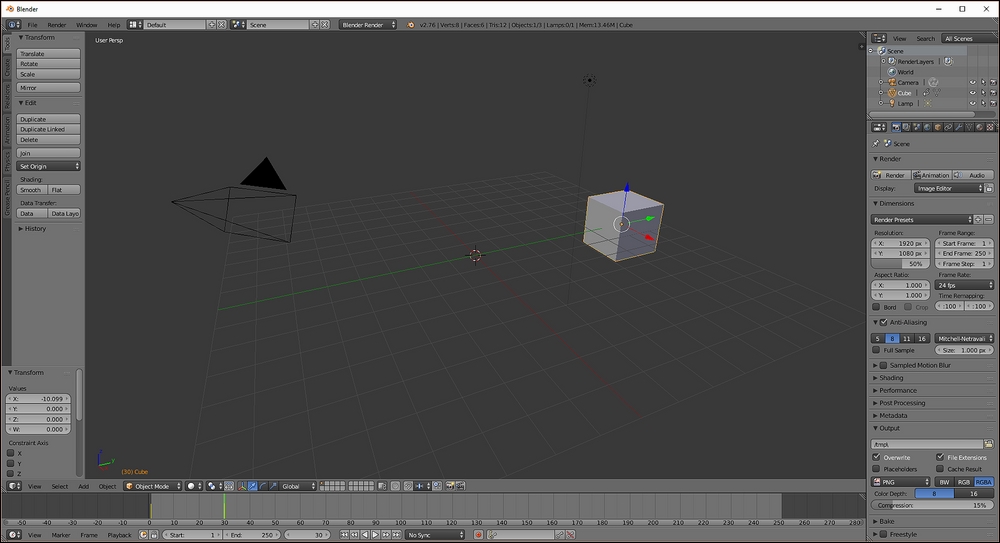
A simple animation of a sliding box

To make a simple animation where our cube moves, we need to create two keyframes:

  1. Create the first keyframe by selecting the cube, pressing I to open the Insert Keyframe Menu, and selecting Location at the top of the list.

  2. Now slide the time slider in the Timeline window to frame 30. This can be done by right clicking on the Timeline near 30 and then holding the button to slide it along the Timeline. The box highlighted in the image shows the...

lock icon The rest of the chapter is locked
Register for a free Packt account to unlock a world of extra content!
A free Packt account unlocks extra newsletters, articles, discounted offers, and much more. Start advancing your knowledge today.
Unlock this book and the full library FREE for 7 days
Get unlimited access to 7000+ expert-authored eBooks and videos courses covering every tech area you can think of
Renews at $19.99/month. Cancel anytime
Banner background image