Search icon CANCEL
Subscription
0
Cart icon
Your Cart (0 item)
Close icon
You have no products in your basket yet
Save more on your purchases! discount-offer-chevron-icon
Savings automatically calculated. No voucher code required.
Arrow left icon
Explore Products
Best Sellers
New Releases
Books
Videos
Audiobooks
Learning Hub
Newsletter Hub
Free Learning
Arrow right icon
timer SALE ENDS IN
0 Days
:
00 Hours
:
00 Minutes
:
00 Seconds
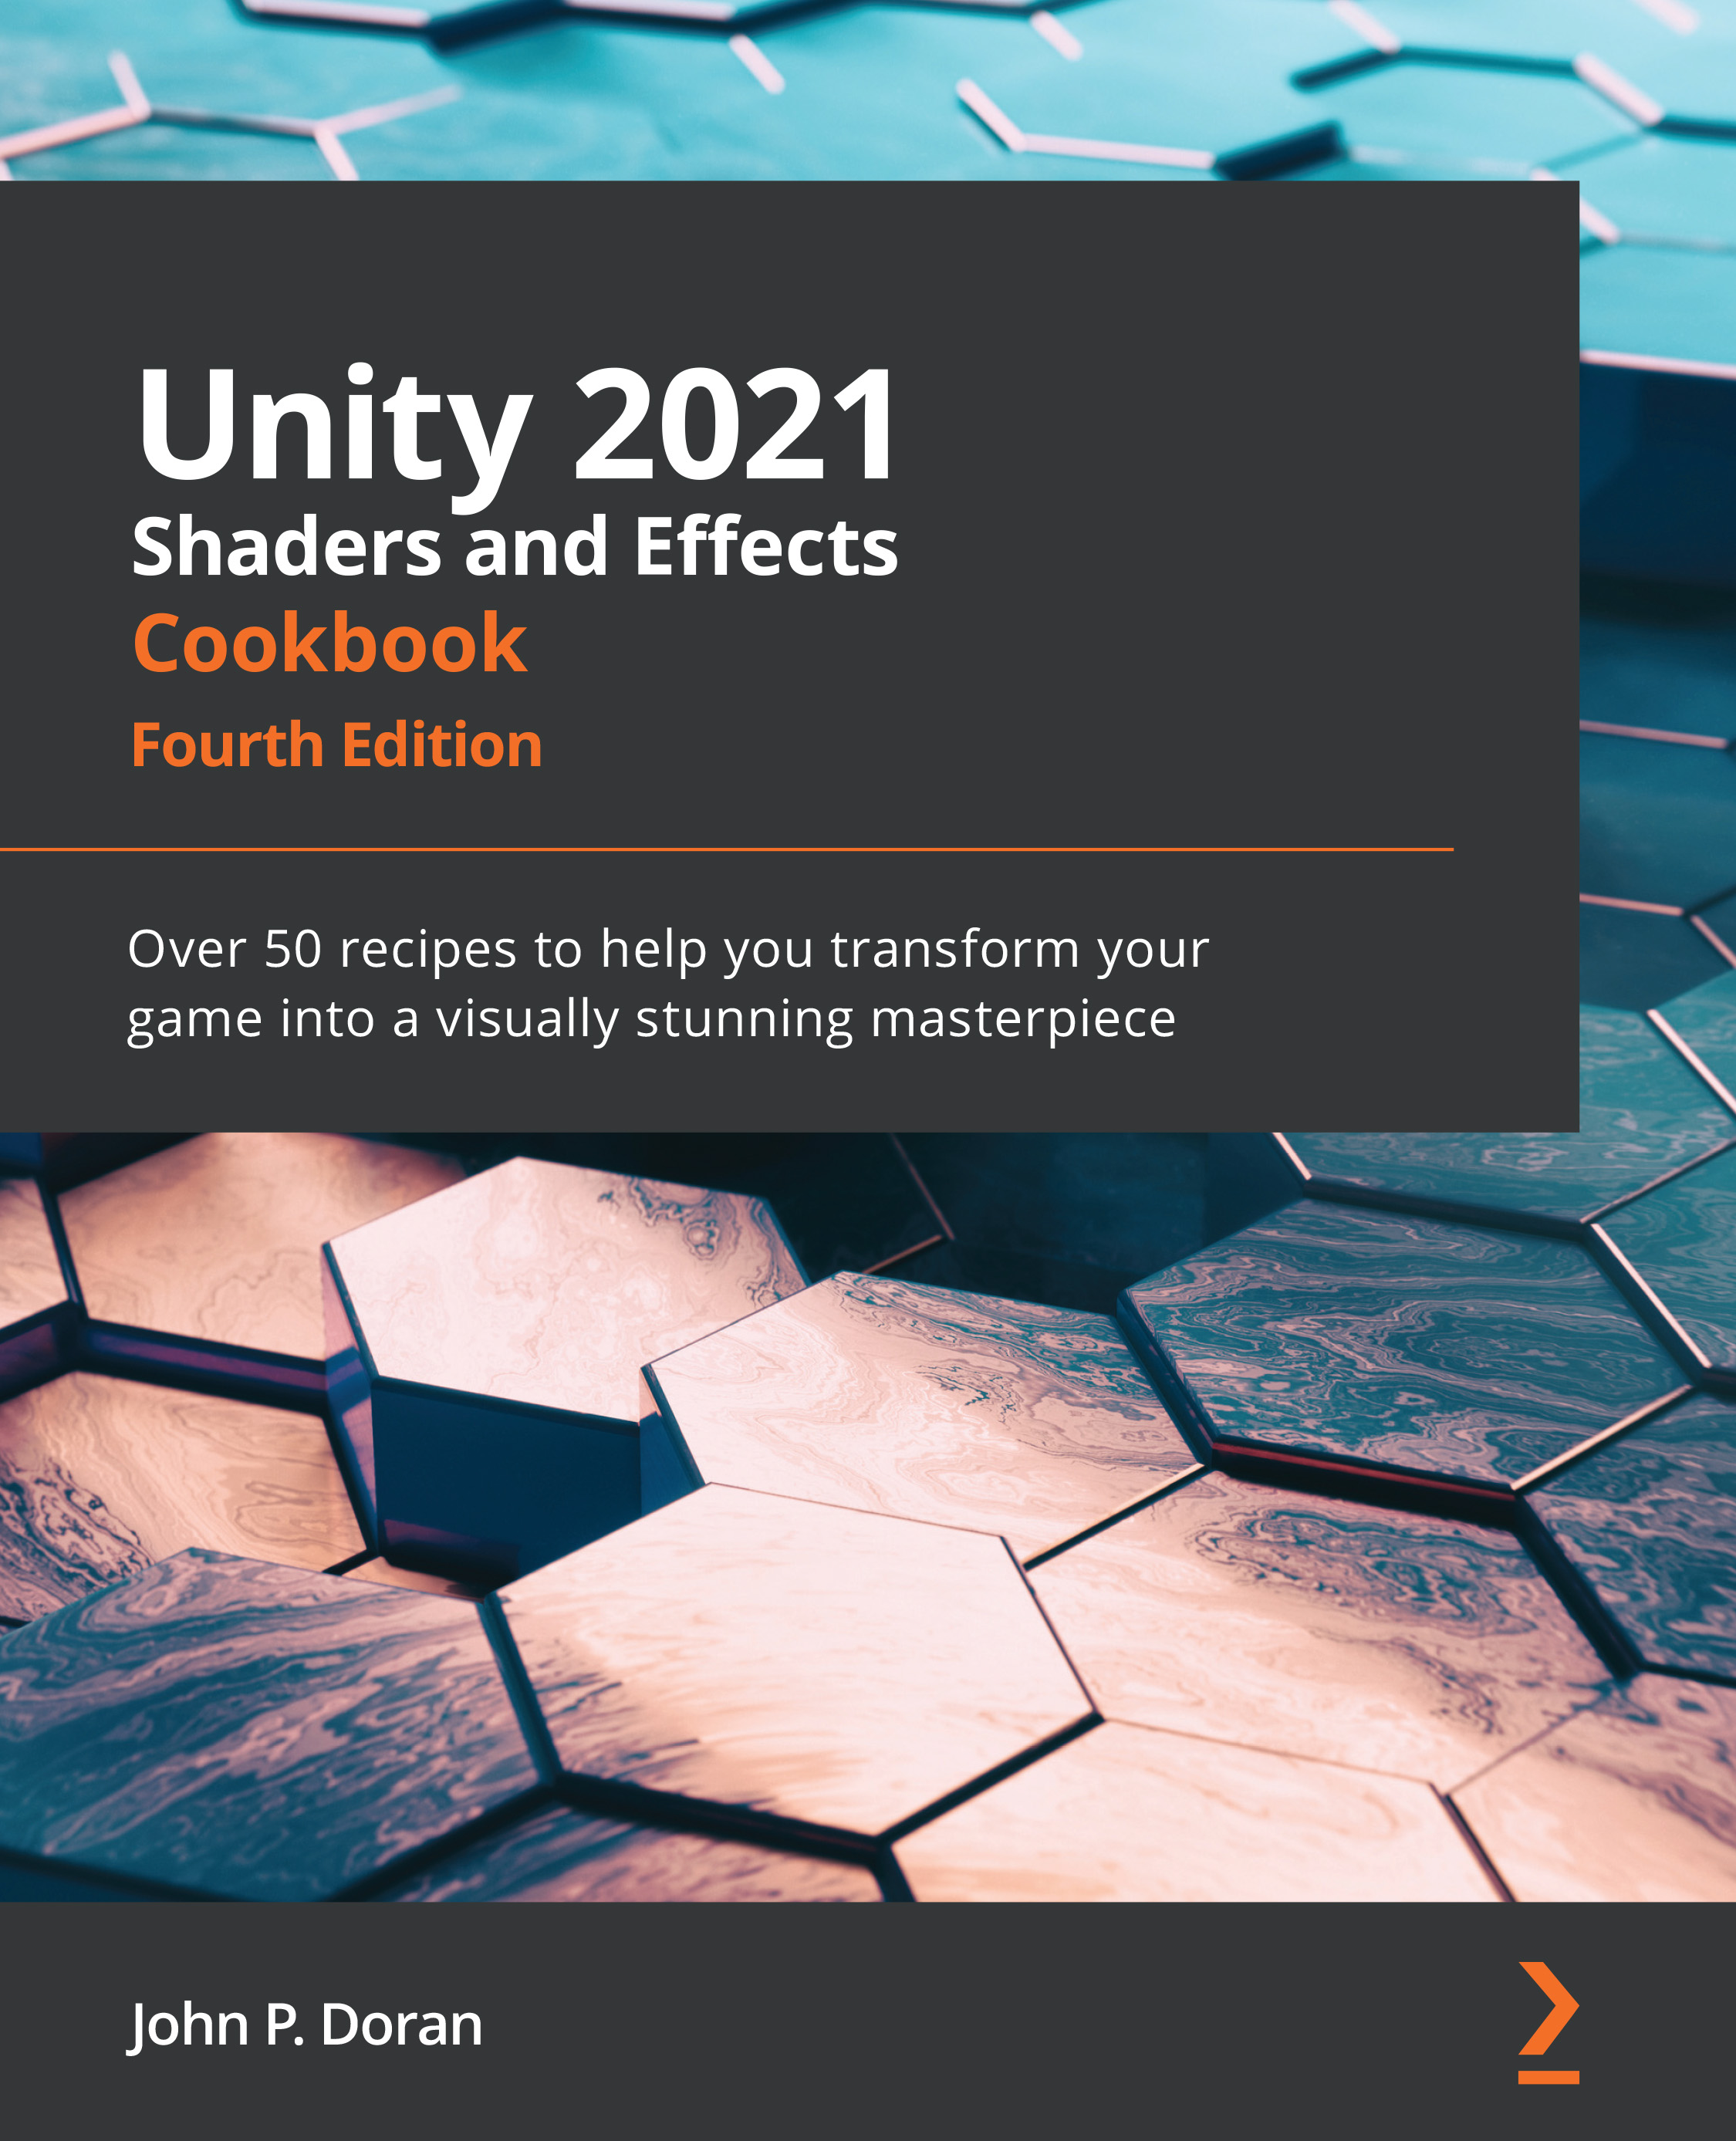
Unity 2021 Shaders and Effects Cookbook

Unity 2021 Shaders and Effects Cookbook: Over 50 recipes to help you transform your game into a visually stunning masterpiece , Fourth Edition

eBook
€8.99 €26.99
Paperback
€32.99
Subscription
Free Trial
Renews at €18.99p/m

What do you get with Print?

Product feature icon Instant access to your digital eBook copy whilst your Print order is Shipped
Product feature icon Paperback book shipped to your preferred address
Product feature icon Download this book in EPUB and PDF formats
Product feature icon Access this title in our online reader with advanced features
Product feature icon DRM FREE - Read whenever, wherever and however you want
Product feature icon AI Assistant (beta) to help accelerate your learning
OR
Modal Close icon
Payment Processing...
tick Completed

Shipping Address

Billing Address

Shipping Methods
Table of content icon View table of contents Preview book icon Preview Book

Unity 2021 Shaders and Effects Cookbook

Chapter 2: Creating Your First Shader

This chapter will cover some of the more common diffuse techniques found in today's game development shading pipelines. Let's imagine a cube that has been painted white uniformly in a 3D environment with directional light. Even if the color that's been used is the same on each face, they will all have different shades of white on them, depending on the direction that the light is coming from and the angle that we are looking at it from. This extra level of realism is achieved in 3D graphics through the use of shaders, special programs that are mostly used to simulate how light works. A wooden cube and a metal one may share the same 3D model, but what makes them look different is the shader that they use.

This chapter will introduce you to shader coding in Unity. If you have little to no previous experience with shaders, this chapter is what you need to understand what shaders are, how they work, and how to customize them. By the end of this chapter, you will have learned how to build basic shaders that perform basic operations. This chapter also covers some debugging information to help in case there are errors in your shaders. Armed with this knowledge, you will be able to create just about any Surface Shader.

In this chapter, we will cover the following recipes:

  • Creating a basic Standard Shader
  • Adding properties to a shader
  • Using properties in a Surface Shader

Creating a basic Standard Shader

In Unity, when we create a GameObject, we attach additional functionality through the use of components. Every GameObject is required to have a Transform component; there are several components included in Unity already, and we create components of our own when we write scripts that extend from MonoBehaviour.

All the objects that are part of a game contain several components that affect their look and behavior. While scripts determine how objects should behave, renderers decide how they should appear on the screen. Unity comes with several renderers, depending on the type of object that we are trying to visualize; every 3D model typically has a MeshRenderer component attached to it. An object should have only one renderer, but the renderer itself can contain several materials. Each material is a wrapper for a single shader, which is the final ring in the food chain of 3D graphics. The relationships between these components can be seen in the following diagram:

Figure 2.1 – Relationship between shaders, models, materials, and objects

Figure 2.1 – Relationship between shaders, models, materials, and objects

Note that the preceding diagram mentions Cg code. Cg is only the default for the built-in renderer. URP/HDRP defaults to using HLSL code.

Understanding the difference between these components is essential for understanding how shaders work.

Getting ready

To get started with this recipe, you will need to have Unity running and must have a project opened using the built-in renderer. (In my case, I am using the 3D template. If you're using Unity Hub 3, go to Core | 3D.) As we mentioned previously, a Unity project has been included with this cookbook, so you can use that one as well and simply add custom shaders to it as you step through each recipe. Once you've done this, you will be ready to step into the wonderful world of real-time shading!

Note

If you are using the Unity project that came with this cookbook, you can open the Chapter 2 | Scenes | Starting Point scene instead of completing the Getting ready section as it has been set up already.

Before we create our first shader, let's create a small scene for us to work with:

  1. Let's create a scene by navigating to File | New Scene. A dialog window will appear, asking what template should be used. Select 3D and then click on the Create button:
    Figure 2.2 – New Scene window

    Figure 2.2 – New Scene window

  2. Once you've created the scene, create a plane that will act as the ground by going to the Unity Editor and selecting GameObject | 3D Object | Plane from the top menu bar:
    Figure 2.3 – Creating a Plane

    Figure 2.3 – Creating a Plane

  3. Next, select the object in the Hierarchy tab and then go into the Inspector tab. From there, right-click on the Transform component and select the Reset Property | Position option:
    Figure 2.4 – Resetting the position of the object

    Figure 2.4 – Resetting the position of the object

    This will reset the Position property of the object to 0, 0, 0, which is the center of our game world.

  4. To make it easier to see what our shaders will look like when applied, let's add some shapes to visualize what each of our shaders will do. Create a sphere by going to GameObject | 3D Object | Sphere. Once created, select it and go to the Inspector tab. Next, change Position to 0, 1, 0 so that it is above the origin of the world (which is at 0, 0, 0) and our previously created plane:
    Figure 2.5 – Adding a sphere

    Figure 2.5 – Adding a sphere

  5. Once this sphere has been created, create two more spheres and place them to the left and right of the sphere at -2, 1, 0 and 2, 1, 0, respectively:
    Figure 2.6 – Completing our scene

    Figure 2.6 – Completing our scene

    Note

    One quick way to do this is to duplicate the objects by hitting the Ctrl + D keys while having the object selected in the Hierarchy window. You can rename the objects via the top textbox in the Inspector window.

  6. Confirm that you have directional light (it should be in the Hierarchy tab). If not, you can add it by selecting GameObject | Light | Directional Light to make it easier to see your changes and how your shaders react to light.
  7. The example code for this book can be found in a folder called Chapter 2. This folder holds all the code for this chapter. To organize your code, create a folder by going to the Project tab in the Unity Editor, right-clicking, and selecting Create | Folder. Rename the folder Chapter 2.

How to do it...

With our scene generated, we can start writing the shader:

  1. In the Project tab in the Unity Editor, right-click on the Chapter 2 folder and select Create | Folder.
  2. Rename the folder that you created to Shaders by right-clicking on it and selecting Rename from the drop-down list, or by selecting the folder and hitting F2 on the keyboard.
  3. Create another folder and rename it Materials. Place this folder inside the Chapter 2 folder as well.
  4. Right-click on the Shaders folder and select Create | Shader | Standard Surface Shader. Then, right-click on the Materials folder and select Create | Material.
  5. Rename both the shader and material to StandardDiffuse.
  6. Launch the StandardDiffuse shader by double-clicking on the file. This will automatically launch a scripting editor for you (Visual Studio, by default) and display the shader's code.

    Note

    You will see that Unity has already populated our shader with some basic code. This, by default, will get you a basic shader that accepts one texture in the Albedo (RGB) property. We will be modifying this base code so that you can learn how to quickly start developing custom shaders.

  7. Now, let's give our shader a custom folder that it can be selected from. The very first line of code in the shader is the custom description that we have to give the shader so that Unity can make it available in the shader drop-down list when assigning it to materials. We have renamed our path to Shader "CookbookShaders/Chapter 02/StandardDiffuse", but you can name it whatever you want and rename it at any time, so don't worry about any dependencies at this point.
  8. Save the shader in your script editor and return to the Unity Editor. Unity will automatically compile the shader when it recognizes that the file has been updated. This is what the top of your shader file should look like at this point:
    Shader "CookbookShaders/Chapter 02/StandardDiffuse"
    {
        Properties
        {
            _Color ("Color", Color) = (1,1,1,1)
            _MainTex ("Albedo (RGB)", 2D) = "white" {}
            _Glossiness ("Smoothness", Range(0,1)) = 0.5
            _Metallic ("Metallic", Range(0,1)) = 0.0
        }
        SubShader
        {
            // Rest of file…
  9. Technically speaking, this is a Surface Shader based on physically based rendering (PBR). As the name suggests, this type of shader achieves realism by simulating how light physically behaves when hitting objects.
  10. Once you've created your shader, you need to connect it to a material. Select the StandardDiffuse material that we created in Step 4 and look at the Inspector tab. From the Shader drop-down list, select CookbookShaders/Chapter 02/StandardDiffuse (your shader path might be different if you chose to use a different pathname):
    Figure 2.7 – The StandardDiffuse shader has been set as the shader to use on this material

    Figure 2.7 – The StandardDiffuse shader has been set as the shader to use on this material

  11. This will assign your shader to your material so that you can assign it to an object.

    Note

    To assign a material to an object, you can simply click and drag your material from the Project tab to the object in your scene. You can also drag the material to the Inspector tab of an object in the Unity Editor to assign it.

The following screenshot shows what we have done so far:

Figure 2.8 – The created material

Figure 2.8 – The created material

There's not much to look at at this point, but our shader development environment has been set up, which means we can start to modify the shader so that it suits our needs.

How it works...

Unity has made the task of getting your shader environment up and running very easy. It is simply a matter of a few clicks and you are good to go. There are a lot of elements working in the background concerning the Surface Shader itself. Unity has taken the Cg shader language and made it more efficient to write by doing a lot of the heavy Cg code lifting for you. The Surface Shader language is a more component-based way of writing shaders. Tasks such as processing texture coordinates and transformation matrices have already been done for you, so you don't have to start from scratch anymore. In the past, we would have to start a new shader and rewrite a lot of code over and over again. As you gain more experience with Surface Shaders, you will want to explore more of the underlying functions of the Cg language and how Unity is processing all of the low-level graphics processing unit (GPU) tasks for you.

Note

All the files in a Unity project are referenced independently from the folder that they are in. We can move shaders and materials from within the editor without the risk of breaking any connections. Files, however, should never be moved from outside the editor as Unity will not be able to update their references.

So, by simply changing the shader's pathname to a name of our choice, we have got our basic diffuse shader working in the Unity environment, along with lights and shadows, just by changing one line of code!

There's more...

The source code of the built-in shaders is typically hidden in Unity. You cannot open this from the editor as you do with your own shaders. For more information on where to find a large portion of the built-in Cg functions for Unity, go to your Unity install directory (visible in the Installs section of Unity Hub, if you have it installed; select the three dots next to Installs (a gear icon in Unity Hub 3) and select the Show in Explorer option):

Figure 2.9 – The Show in Explorer option

Figure 2.9 – The Show in Explorer option

From the installation location, navigate to the Editor | Data | CGIncludes folder:

Figure 2.10 – The location of the CGIncludes folder

Figure 2.10 – The location of the CGIncludes folder

In this folder, you can find the source code for the shaders that were shipped with Unity. Over time, they have changed a lot; you can visit the Unity download archive (https://unity3d.com/get-unity/download/archive) if you need to access the source code of a shader that's been used in a different version of Unity. After choosing the right version, select Built in shaders from the drop-down list, as shown in the following screenshot:

Figure 2.11 – Unity download archive

Figure 2.11 – Unity download archive

There are three files that that are important at this point: UnityCG.cginc, Lighting.cginc, and UnityShaderVariables.cginc. Our current shader is making use of all these files at the moment. In Chapter 12, Advanced Shading Techniques, we will explore how to use CGInclude for a modular approach to shader coding.

Adding properties to a shader

The properties of a shader are very important for the shader pipeline as you use them to let the artist or user of the shader assign textures and tweak your shader values. Properties allow you to expose GUI elements in a material's Inspector tab, without you having to use a separate editor, which provides us with visual ways to tweak a shader. With your shader open in your IDE of choice, look at lines three through nine. This is called the Properties block of the script. Currently, it will have one texture property called _MainTex.

If you look at your material that has this shader applied to it, you will notice that there is one texture GUI element in the Inspector tab. These lines of code in our shader are creating this GUI element for us. Again, Unity has made this process very efficient in terms of coding and the amount of time it takes to change your properties.

Getting ready

Let's see how this works in our current shader, called StandardDiffuse, by creating some properties and learning more about the syntax involved. For this example, we will refit the shader we created previously. Instead of using a texture, it will only use its color and some other properties that we will be able to change directly from the Inspector tab. Start by duplicating the StandardDiffuse shader. You can do this by selecting it from the Inspector tab and pressing Ctrl + D. This will create a copy called StandardDiffuse 1. Go ahead and rename it StandardColor.

Note

You can give a friendlier name to your shader in its first line. For instance, Shader "CookbookShaders/StandardDiffuse" tells Unity to call this shader StandardDiffuse and move it to a group called CookbookShaders. Adding additional groups, as we did in our previous example, works similarly to how folders work within a project. If you duplicate a shader using Ctrl + D, your new file will share the same name. To avoid confusion, make sure that you change the first line of each new shader so that it uses a unique alias in this and future recipes.

How to do it...

Once the StandardColor shader is ready, we can start changing its properties:

  1. In the first line of the script, update the name to the following:
    Shader "CookbookShaders/Chapter 02/StandardColor" 

    Downloading the example code

    As we mentioned at the beginning of this chapter, it is possible to download the example code from this book via this book's GitHub page at https://github.com/PacktPublishing/Unity-2021-Shaders-and-Effects-Cookbook-Fourth-Edition.

  2. In the Properties block of our shader, remove the current property by deleting the following code from our current shader:
    _MainTex ("Albedo (RGB)", 2D) = "white" {} 
  3. After removing this, we should remove all of the other references to _MainTex as well. Let's remove this other line inside of the SubShader section:
    sampler2D _MainTex;
  4. The original shader used _MainTex to color the model. Let's change this by replacing the first line of code of the surf() function with this:
    fixed4 c = _Color;

    Just like you may be used to the float type being used for floating-point values when writing code in C# and other programming languages, fixed is used for fixed-point values and is the type that's used when writing shaders. You may also see the half type being used as well, which is like the float type but takes up half the space. This is useful for saving memory but is less precise in how it is presented. We will discuss this in much greater detail in the Techniques to make shaders more efficient recipe in Chapter 9, Mobile Shader Adjustment.

    Note

    For more information on fixed-point values, check out https://en.wikipedia.org/wiki/Fixed-point_arithmetic.

    4 in fixed4 stands for the fact that the color is a single variable that contains four fixed values: red, green, blue, and alpha. You will learn more about how this works and how to modify these values in more detail in the next chapter, Chapter 3, Working with Surface Shaders.

  5. When you save and return to Unity, the shader will compile. Now, we will need to create a material that will use our new shader. From the Project window, go to the Chapter 02 | Materials folder, duplicate the StandardDiffuse material, and rename the newly created material StandardColor. From the Inspector window, change the shader to CookbookShaders/Chapter 02/StandardColor:
    Figure 2.12 – The Standard Color (Material) shader

    Figure 2.12 – The Standard Color (Material) shader

  6. As you can see, our material's Inspector tab doesn't have a texture swatch anymore. To refit this shader, let's add one more property to the Properties block and see what happens. Go back into your code editor of choice and enter the following code shown in bold:
    Properties
    {
        _Color("Color", Color) = (1,1,1,1)
        _AmbientColor("Ambient Color", Color) = (1,1,1,1)
        _Glossiness("Smoothness", Range(0,1)) = 0.5
        _Metallic("Metallic", Range(0,1)) = 0.0
    }
  7. We have added another color swatch to the material's Inspector tab. Now, let's add one more to get a feel for other kinds of properties that we can create. Add the following code to the Properties block:
    _MySliderValue ("This is a Slider", Range(0,10)) = 2.5 
  8. With that, we have created another GUI element that allows us to visually interact with our shader. This time, we created a slider called This is a Slider, as shown in the following screenshot:
Figure 2.13 – Properties added to the shader

Figure 2.13 – Properties added to the shader

Properties allow you to tweak shaders without having to change the values in the shader code itself. The next recipe will show you how these properties can be used to create a more interesting shader.

Note

While properties belong to shaders, the values associated with them are stored in materials. The same shader can be safely shared between many different materials. On the other hand, changing the property of a material will affect the look of all the objects that are currently using it.

How it works...

Every Unity shader has a built-in structure that it is looking for in its code. The Properties block is one of those functions that is expected by Unity. The reason behind this is to give you, the shader programmer, a means of quickly creating GUI elements that tie directly into your shader code. These properties (variables) that you declare in the Properties block can then be used in your shader code to change values, colors, and textures. The syntax for defining a property is as follows:

Figure 2.14 – Properties syntax

Figure 2.14 – Properties syntax

Let's take a look at what is going on under the hood here. When you first start writing a new property, you will need to give it a variable name. The variable name is going to be the name that your shader code is going to use to get the value from the GUI element. This saves us a lot of time because we don't have to set up this system ourselves.

The next elements of a property are the inspector GUI name and the type of the property, which are contained within parentheses. The inspector GUI name is the name that is going to appear in the material's Inspector tab when the user is interacting with and tweaking the shader. The type is the type of data that this property is going to control. There are many types that we can define for properties inside Unity shaders.

The following table describes the types of variables that we can have in our shaders:

Finally, there is the default value. This simply sets the value of this property to the value that you placed in the code. So, in the previous example diagram, the default value for the _AmbientColor property, which is of the Color type, is set to a value of 1, 1, 1, 1. As this is a Color property expecting a color that is RGBA or float4 or r, g, b, a = x, y, z, w, this Color property, when it's created, is set to white.

Note

Default values are only set the first time a shader is assigned to a new material. After that, the material's values are used. Changing the default value will not affect the values of existing materials that use the shader. This is a good thing, of course, but often forgotten. So, if you change a value and notice something not changing, this could be the reason for this.

See also

These properties are documented in the Unity manual at http://docs.unity3d.com/Documentation/Components/SL-Properties.html.

Using properties in a Surface Shader

Now that we have created some properties, let's hook them up to the shader so that we can use them as tweaks and make the material process much more interactive. We can use the Properties values from the material's Inspector tab because we have attached a variable name to the property itself, but in the shader code, you have to set up a couple of things before you can start calling the value by its variable name.

How to do it...

The following steps show you how to use the properties in a Surface Shader:

  1. Continuing from the previous example, let's create another shader called ParameterExample. Remove the _MainTex property, just like we did in the Adding properties to a shader recipe of this chapter:
    // Inside the Properties block
    _MainTex ("Albedo (RGB)", 2D) = "white" {} 
    // Below the CGPROGRAM line
    sampler2D _MainTex; 
    // Inside of the surf function
    fixed4 c = tex2D (_MainTex, IN.uv_MainTex) * _Color; 
  2. Afterward, update the Properties section so that it contains the following code:
    Properties
    {
        _Color("Color", Color) = (1,1,1,1)
        _AmbientColor("Ambient Color", Color) = (1,1,1,1)
        _Glossiness("Smoothness", Range(0,1)) = 0.5
        _Metallic("Metallic", Range(0,1)) = 0.0
        _MySliderValue("This is a Slider", Range(0,10)) = 
            2.5
    }
  3. Next, add the following lines of code to the shader, below the CGPROGRAM line:
    float4 _AmbientColor;
    float _MySliderValue;
  4. With Step 3 complete, we can now use the values from the properties in our shader. Let's do this by adding the value from the _Color property to the _AmbientColor property and giving the result of this to the o.Albedo line of code. So, let's add the following code to the shader in the surf() function:
    void surf(Input IN, inout SurfaceOutputStandard o) 
    {
        // We can then use the properties values in our
        // shader 
        fixed4 c = pow((_Color + _AmbientColor),
                       _MySliderValue);
        // Albedo comes from property values given from 
        // slider and colors
        o.Albedo = c.rgb;
        // Metallic and smoothness come from slider
        // variables
        o.Metallic = _Metallic;
        o.Smoothness = _Glossiness;
        o.Alpha = c.a;
    }
  5. Finally, your shader should look like the following shader code. If you save your shader and reenter Unity, your shader will compile. If there were no errors, you will now have the ability to change the ambient and emissive colors of the material, as well as increasing the saturation of the final color, using the slider value. This is pretty neat:
    Shader "CookbookShaders/Chapter 02/ParameterExample"
    {
        Properties
        {
            _Color("Color", Color) = (1,1,1,1)
            _AmbientColor("Ambient Color", Color) = 
                (1,1,1,1)
            _Glossiness("Smoothness", Range(0,1)) = 0.5
            _Metallic("Metallic", Range(0,1)) = 0.0
            _MySliderValue("This is a Slider",
                           Range(0,10)) = 2.5
        }
        SubShader
        {
            Tags { "RenderType" = "Opaque" }
            LOD 200
            CGPROGRAM
            float4 _AmbientColor;
            float _MySliderValue;
            // Physically based Standard lighting model,
            // and enable shadows on all light types
            #pragma surface surf Standard 
                fullforwardshadows
            // Use shader model 3.0 target, to get nicer 
            // looking lighting
            #pragma target 3.0
            struct Input
            {
                float2 uv_MainTex;
            };
            half _Glossiness;
            half _Metallic;
            fixed4 _Color;
            // Add instancing support for this shader. You
            // need to check 'Enable Instancing' on 
            // materials that use the shader.
            // See https://docs.unity3d.com/Manual/
            // GPUInstancing.html  for more information 
            // about instancing.
            // #pragma
            // instancing_optionsassumeuniformscaling
            UNITY_INSTANCING_BUFFER_START(Props)
                // put more per-instance properties here
            UNITY_INSTANCING_BUFFER_END(Props)
            void surf(Input IN, inoutSurfaceOutputStandard
                       o) 
            {
                // We can then use the properties values 
                // in our shader 
                fixed4 c = pow((_Color + _AmbientColor),
                              _MySliderValue);
                // Albedo comes from property values given 
                // from slider and colors
                o.Albedo = c.rgb;
                // Metallic and smoothness come from 
                // slider variables
                o.Metallic = _Metallic;
                o.Smoothness = _Glossiness;
                o.Alpha = c.a;
            }
            ENDCG
        }
    FallBack "Diffuse"
    }

    Note

    The pow(arg1, arg2) function is a built-in function that will perform the equivalent math function of power. So, the arg1 argument is the value that we want to raise to a power, while the arg2 argument is the power that we want to raise it to.

    To find out more about the pow() function, look at the Cg tutorial. It is a great free resource that you can use to learn more about shading. There is also a glossary of all the functions available to you in the Cg shading language: http://http.developer.nvidia.com/CgTutorial/cg_tutorial_appendix_e.html.

  6. When you save and return to Unity, the shader will compile. Now, we need to create a material that will use our new shader. From the Project window, go to the Chapter 02 | Materials folder, duplicate one of the previous materials, and rename the newly created material ParameterExample.
  7. From the Inspector window, change the shader to the CookbookShaders | Chapter 02 | ParameterExample option. Then, assign the material to the spheres in the scene by dragging and dropping the material on top of them in the Scene view and releasing the mouse:
    Figure 2.15 – Attaching the ParameterExample shader

    Figure 2.15 – Attaching the ParameterExample shader

  8. After doing this, modify the parameters of the material and see how it affects the objects within the scene.

    The following screenshot shows the result that was obtained by using our properties to control our material's colors and saturation from within the material's Inspector tab:

Figure 2.16 – Tweaking the ParameterExample properties

Figure 2.16 – Tweaking the ParameterExample properties

How it works...

When you declare a new property in the Properties block, you are allowing the shader to retrieve the tweaked value from the material's Inspector tab. This value is stored in the variable name portion of the property. In this case, _AmbientColor, _Color, and _MySliderValue are the variables where we are storing the tweaked values.

For you to be able to use the value in the SubShader block, you need to create three new variables with the same names as the property's variable name. This automatically sets up a link between these two so that they know they have to work with the same data. Additionally, it declares the type of data that we want to store in our SubShader variables, which will come in handy when we look at optimizing shaders in a later chapter. Once you have created the SubShader variables, you can then use the values in the surf() function. In this case, we want to add the _Color and _AmbientColor variables together and take it to a power of whatever the _MySliderValue variable is equal to in the material's Inspector tab. The vast majority of shaders start as Standard Shaders and are modified until they match the desired look. With that, we have created the foundation for any Surface Shader you will create that requires a diffuse component.

Note

Materials are assets. This means that any changes that are made to them while your game is running in the editor are permanent. If you have changed the value of a property by mistake, you can undo it using Ctrl + Z.

There's more...

Like any other programming language, Cg does not allow mistakes. As such, your shader will not work if you have a typo in your code. When this happens, your materials will be rendered in unshaded magenta:

Figure 2.17 – Example of ErrorShader

Figure 2.17 – Example of ErrorShader

When a script does not compile, Unity prevents your game from being exported or even executed. Conversely, errors in shaders do not stop your game from being executed. If one of your shaders is magenta, it is time to investigate where the problem is. If you select the incriminated shader, you will see a list of errors in its Inspector tab:

Figure 2.18 – Errors example

Figure 2.18 – Errors example

Note

Shader errors are also shown within the Console window.

Despite showing the line that raised the error, this rarely means that this is the line that must be fixed. The error message shown in the previous screenshot was generated by deleting the sampler2D _MainTex variable from the SubShader{} block. However, the error is raised by the first line that tries to access such a variable. Finding and fixing what's wrong with code is a process called debugging. The most common mistakes that you should check for are as follows:

  • A missing bracket. If you forgot to add a curly bracket to close a section, the compiler is likely to raise errors at the end of the document, at the beginning of the document, or in a new section.
  • A missing semicolon. This is one of the most common mistakes but luckily one of the easiest to spot and fix. When looking at the error definition, check whether the line above it contains a semicolon or not.
  • A property that has been defined in the Properties section but has not been coupled with a variable in the SubShader{} block.
  • Compared to what you might be used to in C# scripts, the floating-point values in Cg do not need to be followed by an f. It's 1.0, not 1.0f.

    Tip

    The error messages raised by shaders can be very misleading, especially due to their strict syntactic constraints. If you are in doubt about their meaning, it is best to search the internet. The Unity forums are filled with other developers who are likely to have encountered (and fixed) your problem before.

See also

More information on how to master Surface Shaders and their properties can be found in Chapter 3, Working with Surface Shaders.

If you are curious to see what shaders can do when they're used at their full potential, have a look at Chapter 12, Advanced Shading Techniques, for some of the most advanced techniques that will be covered in this book.

Left arrow icon Right arrow icon
Download code icon Download Code

Key benefits

  • Discover practical recipes for mastering post-processing effects and advanced shading techniques
  • Learn the secrets of creating AAA quality shaders without writing long algorithms
  • Create visually stunning effects for your games using Unity's VFX Graph

Description

Shaders enable you to create powerful visuals for your game projects. However, creating shaders for your games can be notoriously challenging with various factors such as complex mathematics standing in the way of attaining the level of realism you crave for your shaders. The Unity 2021 Shaders and Effects Cookbook helps you overcome that with a recipe-based approach to creating shaders using Unity. This fourth edition is updated and enhanced using Unity 2021 features and tools covering Unity's new way of creating particle effects with the VFX Graph. You'll learn how to use VFX Graph for advanced shader development. The book also features updated recipes for using Shader Graph to create 2D and 3D elements. You'll cover everything you need to know about vectors, how they can be used to construct lighting, and how to use textures to create complex effects without the heavy math. You'll also understand how to use the visual-based Shader Graph for creating shaders without any code. By the end of this Unity book, you'll have developed a set of shaders that you can use in your Unity 3D games and be able to accomplish new effects and address the performance needs of your Unity game development projects. So, let's get started!

Who is this book for?

This book is for game developers who want to start creating their first shaders in Unity 2021 and take their game to a whole new level by adding professional post-processing effects. The book assumes intermediate-level knowledge of Unity.

What you will learn

  • Use physically based rendering to fit the aesthetic of your game
  • Create spectacular effects for your games by testing the limits of what shaders can do
  • Explore advanced shader techniques for your games with AAA quality
  • Use Shader Graph to create 2D and 3D elements for your games without writing code
  • Master the math and algorithms behind the commonly used lighting models
  • Get to grips with the Post-Processing Stack to tweak the appearance of your game
Estimated delivery fee Deliver to Greece

Premium delivery 7 - 10 business days

€17.95
(Includes tracking information)

Product Details

Country selected
Publication date, Length, Edition, Language, ISBN-13
Publication date : Oct 15, 2021
Length: 484 pages
Edition : 4th
Language : English
ISBN-13 : 9781839218620
Vendor :
Unity Technologies
Languages :
Tools :

What do you get with Print?

Product feature icon Instant access to your digital eBook copy whilst your Print order is Shipped
Product feature icon Paperback book shipped to your preferred address
Product feature icon Download this book in EPUB and PDF formats
Product feature icon Access this title in our online reader with advanced features
Product feature icon DRM FREE - Read whenever, wherever and however you want
Product feature icon AI Assistant (beta) to help accelerate your learning
OR
Modal Close icon
Payment Processing...
tick Completed

Shipping Address

Billing Address

Shipping Methods
Estimated delivery fee Deliver to Greece

Premium delivery 7 - 10 business days

€17.95
(Includes tracking information)

Product Details

Publication date : Oct 15, 2021
Length: 484 pages
Edition : 4th
Language : English
ISBN-13 : 9781839218620
Vendor :
Unity Technologies
Languages :
Tools :

Packt Subscriptions

See our plans and pricing
Modal Close icon
€18.99 billed monthly
Feature tick icon Unlimited access to Packt's library of 7,000+ practical books and videos
Feature tick icon Constantly refreshed with 50+ new titles a month
Feature tick icon Exclusive Early access to books as they're written
Feature tick icon Solve problems while you work with advanced search and reference features
Feature tick icon Offline reading on the mobile app
Feature tick icon Simple pricing, no contract
€189.99 billed annually
Feature tick icon Unlimited access to Packt's library of 7,000+ practical books and videos
Feature tick icon Constantly refreshed with 50+ new titles a month
Feature tick icon Exclusive Early access to books as they're written
Feature tick icon Solve problems while you work with advanced search and reference features
Feature tick icon Offline reading on the mobile app
Feature tick icon Choose a DRM-free eBook or Video every month to keep
Feature tick icon PLUS own as many other DRM-free eBooks or Videos as you like for just €5 each
Feature tick icon Exclusive print discounts
€264.99 billed in 18 months
Feature tick icon Unlimited access to Packt's library of 7,000+ practical books and videos
Feature tick icon Constantly refreshed with 50+ new titles a month
Feature tick icon Exclusive Early access to books as they're written
Feature tick icon Solve problems while you work with advanced search and reference features
Feature tick icon Offline reading on the mobile app
Feature tick icon Choose a DRM-free eBook or Video every month to keep
Feature tick icon PLUS own as many other DRM-free eBooks or Videos as you like for just €5 each
Feature tick icon Exclusive print discounts

Frequently bought together


Stars icon
Total 122.97
Unity 2021 Cookbook
€41.99
Unity 2021 Shaders and Effects Cookbook
€32.99
Learning C# by Developing Games with Unity 2021
€47.99
Total 122.97 Stars icon
Banner background image

Table of Contents

15 Chapters
Chapter 1: Post Processing Stack Chevron down icon Chevron up icon
Chapter 2: Creating Your First Shader Chevron down icon Chevron up icon
Chapter 3: Working with Surface Shaders Chevron down icon Chevron up icon
Chapter 4: Working with Texture Mapping Chevron down icon Chevron up icon
Chapter 5: Understanding Lighting Models Chevron down icon Chevron up icon
Chapter 6: Physically Based Rendering Chevron down icon Chevron up icon
Chapter 7: Vertex Functions Chevron down icon Chevron up icon
Chapter 8: Fragment Shaders and Grab Passes Chevron down icon Chevron up icon
Chapter 9: Mobile Shader Adjustment Chevron down icon Chevron up icon
Chapter 10: Screen Effects with Unity Render Textures Chevron down icon Chevron up icon
Chapter 11: Gameplay and Screen Effects Chevron down icon Chevron up icon
Chapter 12: Advanced Shading Techniques Chevron down icon Chevron up icon
Chapter 13: Shader Graph – 2D Chevron down icon Chevron up icon
Chapter 14: Shader Graph – 3D Chevron down icon Chevron up icon
Other Books You May Enjoy Chevron down icon Chevron up icon

Customer reviews

Top Reviews
Rating distribution
Full star icon Full star icon Full star icon Full star icon Empty star icon 4
(12 Ratings)
5 star 50%
4 star 16.7%
3 star 25%
2 star 0%
1 star 8.3%
Filter icon Filter
Top Reviews

Filter reviews by


benradd Jan 12, 2022
Full star icon Full star icon Full star icon Full star icon Full star icon 5
This is an essential book for anyone looking to create beautiful imagery in Unity. This book covers everything an artist or programmer needs to create customer shaders and effects and really raise the quality and visual fidelity of your project. Great for both Artists and Programmers this book has something for everyone. Breaks down complex topics and makes them easy to understand but also takes on some more advanced projects. I am a professional Unity Artist with 20 years of CG experience and I really enjoyed working through this book!
Amazon Verified review Amazon
beth Feb 10, 2022
Full star icon Full star icon Full star icon Full star icon Full star icon 5
Bought as a gift, recipient was very please with it
Amazon Verified review Amazon
Roshan Dec 30, 2021
Full star icon Full star icon Full star icon Full star icon Full star icon 5
Extraordinary book, for those of you hoping to get familiar with some shader programming and if you don't know where to begin then this book is for you, I like how it takes you through setting up and furthermore gives demo materials which you can use as an aide.
Amazon Verified review Amazon
Tanvee Dec 31, 2021
Full star icon Full star icon Full star icon Full star icon Full star icon 5
This book is the thing I've been searching for. It covers each subject I needed to find out about in addition to some more. After reading the initial chapters I was at that point composing my own shaders, in any event, coming up myself with thoughts that were really canvassed later in the book.To comprehensively get shaders and compose your own, this book is most certainly worth reading.
Amazon Verified review Amazon
046 Dom Feb 10, 2022
Full star icon Full star icon Full star icon Full star icon Full star icon 5
Great book to learn ! Great for those of you looking to learn some shader programming and are like me where you don't know where to start then this book is for you.
Amazon Verified review Amazon
Get free access to Packt library with over 7500+ books and video courses for 7 days!
Start Free Trial

FAQs

What is the delivery time and cost of print book? Chevron down icon Chevron up icon

Shipping Details

USA:

'

Economy: Delivery to most addresses in the US within 10-15 business days

Premium: Trackable Delivery to most addresses in the US within 3-8 business days

UK:

Economy: Delivery to most addresses in the U.K. within 7-9 business days.
Shipments are not trackable

Premium: Trackable delivery to most addresses in the U.K. within 3-4 business days!
Add one extra business day for deliveries to Northern Ireland and Scottish Highlands and islands

EU:

Premium: Trackable delivery to most EU destinations within 4-9 business days.

Australia:

Economy: Can deliver to P. O. Boxes and private residences.
Trackable service with delivery to addresses in Australia only.
Delivery time ranges from 7-9 business days for VIC and 8-10 business days for Interstate metro
Delivery time is up to 15 business days for remote areas of WA, NT & QLD.

Premium: Delivery to addresses in Australia only
Trackable delivery to most P. O. Boxes and private residences in Australia within 4-5 days based on the distance to a destination following dispatch.

India:

Premium: Delivery to most Indian addresses within 5-6 business days

Rest of the World:

Premium: Countries in the American continent: Trackable delivery to most countries within 4-7 business days

Asia:

Premium: Delivery to most Asian addresses within 5-9 business days

Disclaimer:
All orders received before 5 PM U.K time would start printing from the next business day. So the estimated delivery times start from the next day as well. Orders received after 5 PM U.K time (in our internal systems) on a business day or anytime on the weekend will begin printing the second to next business day. For example, an order placed at 11 AM today will begin printing tomorrow, whereas an order placed at 9 PM tonight will begin printing the day after tomorrow.


Unfortunately, due to several restrictions, we are unable to ship to the following countries:

  1. Afghanistan
  2. American Samoa
  3. Belarus
  4. Brunei Darussalam
  5. Central African Republic
  6. The Democratic Republic of Congo
  7. Eritrea
  8. Guinea-bissau
  9. Iran
  10. Lebanon
  11. Libiya Arab Jamahriya
  12. Somalia
  13. Sudan
  14. Russian Federation
  15. Syrian Arab Republic
  16. Ukraine
  17. Venezuela
What is custom duty/charge? Chevron down icon Chevron up icon

Customs duty are charges levied on goods when they cross international borders. It is a tax that is imposed on imported goods. These duties are charged by special authorities and bodies created by local governments and are meant to protect local industries, economies, and businesses.

Do I have to pay customs charges for the print book order? Chevron down icon Chevron up icon

The orders shipped to the countries that are listed under EU27 will not bear custom charges. They are paid by Packt as part of the order.

List of EU27 countries: www.gov.uk/eu-eea:

A custom duty or localized taxes may be applicable on the shipment and would be charged by the recipient country outside of the EU27 which should be paid by the customer and these duties are not included in the shipping charges been charged on the order.

How do I know my custom duty charges? Chevron down icon Chevron up icon

The amount of duty payable varies greatly depending on the imported goods, the country of origin and several other factors like the total invoice amount or dimensions like weight, and other such criteria applicable in your country.

For example:

  • If you live in Mexico, and the declared value of your ordered items is over $ 50, for you to receive a package, you will have to pay additional import tax of 19% which will be $ 9.50 to the courier service.
  • Whereas if you live in Turkey, and the declared value of your ordered items is over € 22, for you to receive a package, you will have to pay additional import tax of 18% which will be € 3.96 to the courier service.
How can I cancel my order? Chevron down icon Chevron up icon

Cancellation Policy for Published Printed Books:

You can cancel any order within 1 hour of placing the order. Simply contact customercare@packt.com with your order details or payment transaction id. If your order has already started the shipment process, we will do our best to stop it. However, if it is already on the way to you then when you receive it, you can contact us at customercare@packt.com using the returns and refund process.

Please understand that Packt Publishing cannot provide refunds or cancel any order except for the cases described in our Return Policy (i.e. Packt Publishing agrees to replace your printed book because it arrives damaged or material defect in book), Packt Publishing will not accept returns.

What is your returns and refunds policy? Chevron down icon Chevron up icon

Return Policy:

We want you to be happy with your purchase from Packtpub.com. We will not hassle you with returning print books to us. If the print book you receive from us is incorrect, damaged, doesn't work or is unacceptably late, please contact Customer Relations Team on customercare@packt.com with the order number and issue details as explained below:

  1. If you ordered (eBook, Video or Print Book) incorrectly or accidentally, please contact Customer Relations Team on customercare@packt.com within one hour of placing the order and we will replace/refund you the item cost.
  2. Sadly, if your eBook or Video file is faulty or a fault occurs during the eBook or Video being made available to you, i.e. during download then you should contact Customer Relations Team within 14 days of purchase on customercare@packt.com who will be able to resolve this issue for you.
  3. You will have a choice of replacement or refund of the problem items.(damaged, defective or incorrect)
  4. Once Customer Care Team confirms that you will be refunded, you should receive the refund within 10 to 12 working days.
  5. If you are only requesting a refund of one book from a multiple order, then we will refund you the appropriate single item.
  6. Where the items were shipped under a free shipping offer, there will be no shipping costs to refund.

On the off chance your printed book arrives damaged, with book material defect, contact our Customer Relation Team on customercare@packt.com within 14 days of receipt of the book with appropriate evidence of damage and we will work with you to secure a replacement copy, if necessary. Please note that each printed book you order from us is individually made by Packt's professional book-printing partner which is on a print-on-demand basis.

What tax is charged? Chevron down icon Chevron up icon

Currently, no tax is charged on the purchase of any print book (subject to change based on the laws and regulations). A localized VAT fee is charged only to our European and UK customers on eBooks, Video and subscriptions that they buy. GST is charged to Indian customers for eBooks and video purchases.

What payment methods can I use? Chevron down icon Chevron up icon

You can pay with the following card types:

  1. Visa Debit
  2. Visa Credit
  3. MasterCard
  4. PayPal
What is the delivery time and cost of print books? Chevron down icon Chevron up icon

Shipping Details

USA:

'

Economy: Delivery to most addresses in the US within 10-15 business days

Premium: Trackable Delivery to most addresses in the US within 3-8 business days

UK:

Economy: Delivery to most addresses in the U.K. within 7-9 business days.
Shipments are not trackable

Premium: Trackable delivery to most addresses in the U.K. within 3-4 business days!
Add one extra business day for deliveries to Northern Ireland and Scottish Highlands and islands

EU:

Premium: Trackable delivery to most EU destinations within 4-9 business days.

Australia:

Economy: Can deliver to P. O. Boxes and private residences.
Trackable service with delivery to addresses in Australia only.
Delivery time ranges from 7-9 business days for VIC and 8-10 business days for Interstate metro
Delivery time is up to 15 business days for remote areas of WA, NT & QLD.

Premium: Delivery to addresses in Australia only
Trackable delivery to most P. O. Boxes and private residences in Australia within 4-5 days based on the distance to a destination following dispatch.

India:

Premium: Delivery to most Indian addresses within 5-6 business days

Rest of the World:

Premium: Countries in the American continent: Trackable delivery to most countries within 4-7 business days

Asia:

Premium: Delivery to most Asian addresses within 5-9 business days

Disclaimer:
All orders received before 5 PM U.K time would start printing from the next business day. So the estimated delivery times start from the next day as well. Orders received after 5 PM U.K time (in our internal systems) on a business day or anytime on the weekend will begin printing the second to next business day. For example, an order placed at 11 AM today will begin printing tomorrow, whereas an order placed at 9 PM tonight will begin printing the day after tomorrow.


Unfortunately, due to several restrictions, we are unable to ship to the following countries:

  1. Afghanistan
  2. American Samoa
  3. Belarus
  4. Brunei Darussalam
  5. Central African Republic
  6. The Democratic Republic of Congo
  7. Eritrea
  8. Guinea-bissau
  9. Iran
  10. Lebanon
  11. Libiya Arab Jamahriya
  12. Somalia
  13. Sudan
  14. Russian Federation
  15. Syrian Arab Republic
  16. Ukraine
  17. Venezuela