Upgrading the database
In the previous recipe, we configured the database migration tool. In this recipe, we will run the migration tool so that we can migrate parts from a Magento 1 shop to a Magento 2 shop.
Getting ready
You need a Magento 1 website and a Magento 2 website. The Magento 2 website needs to have the database migration tool installed and configured as described in the previous recipe.
In this recipe, we will do a migration from a clean Magento 1 site, to a Magento 2 site without sample data.
We did a migration from a clean Magento 1 database with some test products. Make sure you have a cleanly installed Magento 1 shop with some test data (products, orders, and so on) in it.
How to do it...
- First we need to make sure that the database settings are correct in the
vendor/magento/data-migration-tool/etc/ce-to-ce/packt-migration/config.xmlfile. Open that file and check that the database credentials are correct. We created this file in the previous recipe:<source version="1.9.1"> <database host="localhost" name="magento1_migration" user="root"/> </source> <destination version="2.0.0.0"> <database host="localhost" name="magento2_migration" user="root"/> </destination>
Note
If you have a database prefix in your source or destination database, you can optionally configure
source_prefixanddest_prefixin the<options>section of the same configuration file.Tip
Test the migration first with a clean Magento 1.9 database. The mapping that we will use in this recipe is for a clean Magento 1.9 installation. With an existing shop, you will have custom attributes and entities that need more configuration to make the migration work.
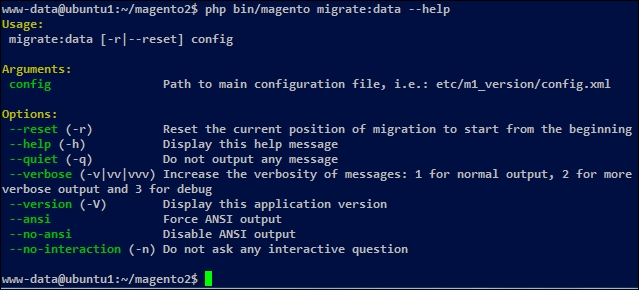
- If these settings are correct, we can run the upgrade tool. Run the following command:
php bin/magento migrate:data --help - This gives us the following output:

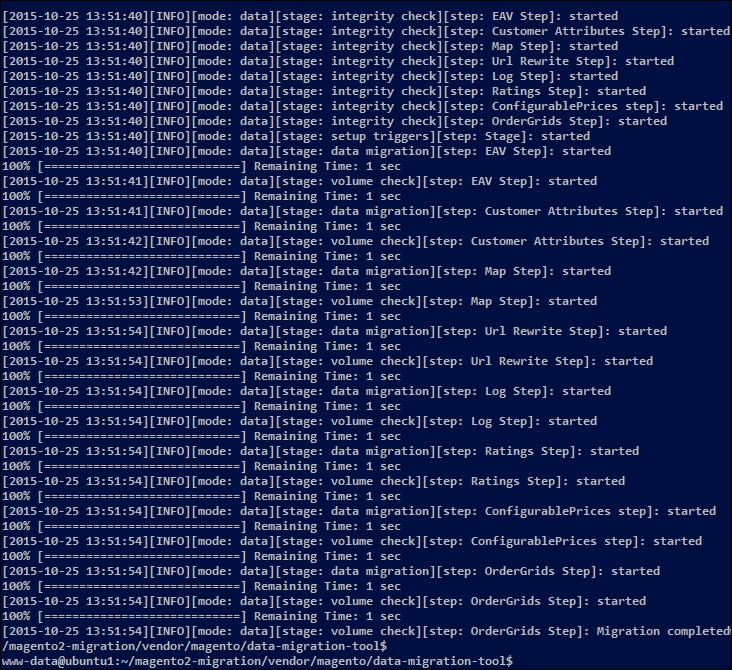
- To start or test a migration, we have to run the following command:
php bin/magento migrate:data vendor/magento/data-migration-tool/etc/ce-to-ce/packt-migration/config.xml - The migration will start and will give the following output:

- The migration is now complete. If you check your database for the Magento 2 website, you will see that the data (products, categories, and so on) is migrated from Magento 1.
Tip
If you want to rerun the migration tool, you have to remove the
var/migration-tool-progress.lockfile. - We can also migrate the settings from the Magento 1 website. To do this, you have to replace the
dataparameter in the command usingsettings. - To check if the upgrade works, you have to look at the data of the Magento 2 installation. We can check the following things in the backend:
- The orders (Sales | Orders)
- The products (Products | Catalog)
- The customers (Customers | All Customers)
- You can also check in the database if you look at the following tables:
sales_ordercustomer_entitycatalog_product_entityurl_rewrite
How it works...
When the migration tool starts, it starts checking all the configurations that are in the configuration files of the migration tool. If there are more things available in the Magento 1 database than the things that are configured, the migration tool will give a notification and stop the migration.
It's likely that every existing Magento 1 shop works with custom attributes, custom entities, and so on. Each entity, attribute, and so on needs to be declared in the configuration files.
The most time-consuming part of a migration is to create a good configuration file so that the migration tool won't fail on missing stuff. It is on you to decide what to ignore and what to migrate. If the configuration files are valid, the migration will start and the data will come into the Magento 2 database. The same principle applies when migrating the settings, but you have to think about whether you want it.
Note
With the migration tool, it is only possible to migrate data and settings. The code of Magento 1 modules will not work in Magento 2. So for your modules, you need to see if there is a Magento 2 version/alternative available.
There's more...
In this recipe, we did a migration of a clean Magento 1 installation to a clean Magento 2 installation. However almost every running Magento 1 shop is not clean. It contains custom attributes, custom modules, and a custom configuration.
When migrating such a shop to a new shop, the migration is a bit more complex. The first question is: What needs to be migrated? With the tool, you can migrate every entity, from products, customers, and orders to reviews, settings, and more.
If you want to skip data that must be migrated, you can use the map.xml file. If you open the file vendor/magento/data-migration-tool/etc/ce-to-ce/packt-migration/map.xml, you see that a lot of entities are ignored in the map/source/document_rules tag.
Tip
If you want to change something in the map.xml file, you have to make sure that the right map.xml file is loaded. This file is configured in the config.xml file (where you did your database configuration). In that file, you have to look for the XML tag config/options/map_file.
If you have an error such as Source documents not mapped, you have to add the configuration for these entities in the map/source/document_rules tag of the map.xml file. If the error is something like Destination documents not mapped, you have to add configuration in the map/destination/document tag of the map.xml file.
To solve errors such as Source fields not mapped you have to add configuration in the map-eav.xml file.
See also
Migrating configuration files is the most time consuming part of a data migration. If you want more information on the migration tool, you can have a look at the Magento Migration Whitepaper, available at http://magento.com/resources/magento-2-migration-whitepaper.


