Editing the geodatabase in ArcMap
We have authored our Bestaurants geodatabase and created the food and drinks venues' feature classes. However, these classes are empty, and until they have some features, we can't visualize them; it is time to populate them with features. To do that, we need an editing tool, and ArcMap can help with this. However, before we can start editing our geodatabase, we need to know where we can add these features. We can't just place them anywhere in the world. We need a reference to base our editing on, Basemap. I have already prepared a map document and saved it to the extent of Belize. You can find it in the supporting files for this chapter, 8648OT_01_Files, which can be downloaded from www.packtpub.com.
Note
Basemap is a background map that usually references imagery and land information.
Browse to 8648OT_01_Files\MapDocuments and open the Belize_BaseMap.mxd file; this will open ArcMap. You will need an Internet connection for this exercise since the document connects to an online basemap. We will start by adding the Restaurants feature class. To do this, perform the following steps:
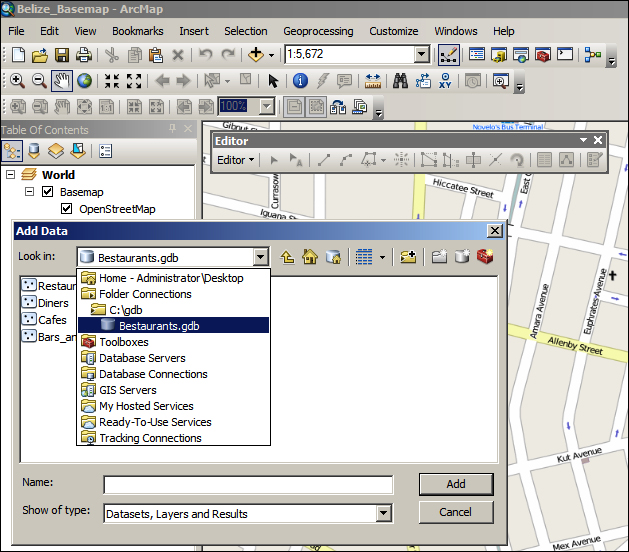
- From the ArcMap menu, point the cursor to File, then Add Data, and click on Add Data....
- From the Add Data dialog box, expand the Look in drop-down list and select the
Bestaurantsgeodatabase inc:\gdb. - Double-click on the
Restaurantsfeature class to add it to ArcMap, as shown in the following screenshot:
Notice that a new layer is added with the alias name of the feature class that we specified while creating it. Also, a default red point is added as a symbology for our feature class. Let's change it to a more relevant symbol by performing the following steps:
Note
A layer is an ArcMap object and a visual representation of a physical feature class. A layer does not exist by itself and must have a source dataset to read data from.
A symbology is a notation for the features in a feature class. A given feature class might have multiple symbologies based on its attributes.
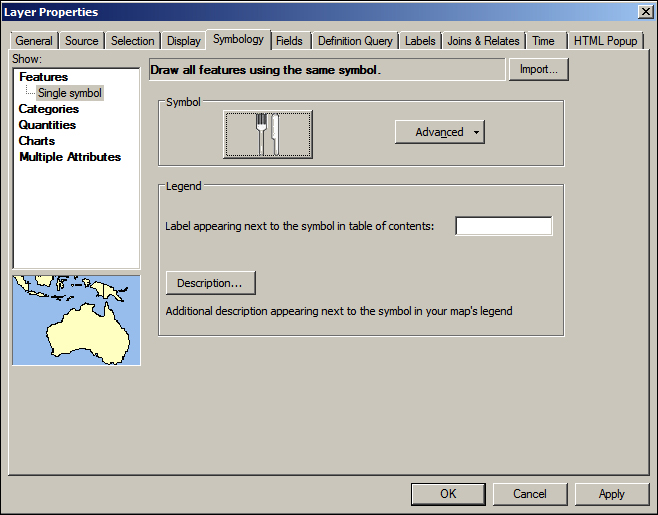
- Double-click on the Belize Restaurants layer to view the Layer Properties dialog box.
- Click on the Symbology tab.
- In the Symbol section, click on the red dot and select a restaurant icon; type
Restaurantin the filter box. The dialog box will look like the following screenshot:
- Close the Layer Properties dialog.
Now, it is time to add some features. Before we do so, make sure that you close ArcCatalog and that you do not have any connections to your geodatabase. Now, to display the Editor toolbar, perform the following steps:
- Right-click on an empty area in the menu and select the Editor toolbar to activate it.
Note
The Editor toolbar will be displayed only if you have standard and advanced licenses. For details, refer to http://www.esri.com/software/arcgis/about/gis-for-me.
- On the Editor toolbar, point the cursor to Editor and click on Start Editing.
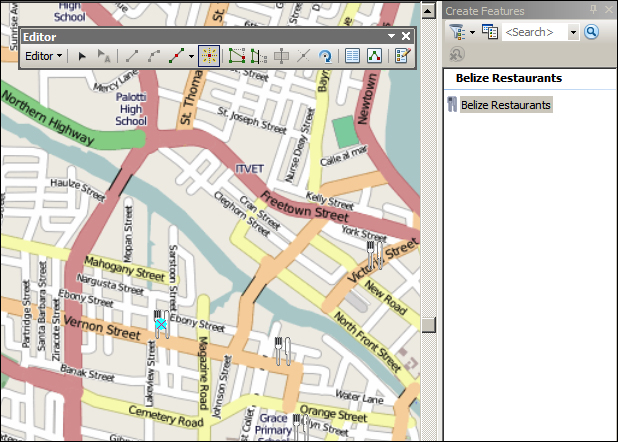
- Click on the Create Features button in the Editor toolbar, and you will see the Create Feature window pop up on the right-hand side.
- Click on Belize Restaurant and add some restaurants on the Belize map; you don't have to be accurate at this stage. You should get something like what is shown in the following screenshot:

You can set the attributes for each feature you add by selecting that feature and clicking on the Attribute tool in the Editor toolbar. You can populate the rest of your geodatabase feature classes by adding the feature classes to the same map.
- From the Editor toolbar, point the cursor to Editor and click on Save Edits if you wish to save your edits.
- Close ArcMap.


