Search icon CANCEL
Subscription
0
Cart icon
Your Cart (0 item)
Close icon
You have no products in your basket yet
Save more on your purchases! discount-offer-chevron-icon
Savings automatically calculated. No voucher code required.
Arrow left icon
Explore Products
Best Sellers
New Releases
Books
Videos
Audiobooks
Learning Hub
Newsletter Hub
Free Learning
Arrow right icon
timer SALE ENDS IN
0 Days
:
00 Hours
:
00 Minutes
:
00 Seconds
Arrow up icon
GO TO TOP
Kali Linux 2018: Windows Penetration Testing

You're reading from   Kali Linux 2018: Windows Penetration Testing Conduct network testing, surveillance, and pen testing on MS Windows using Kali Linux 2018

Arrow left icon
Product type Paperback
Published in Oct 2018
Publisher
ISBN-13 9781788997461
Length 404 pages
Edition 2nd Edition
Arrow right icon
Authors (2):
Arrow left icon
Wolf Halton Wolf Halton
Author Profile Icon Wolf Halton
Wolf Halton
Bo Weaver Bo Weaver
Author Profile Icon Bo Weaver
Bo Weaver
Arrow right icon
View More author details
Toc

Table of Contents (12) Chapters Close

Preface 1. Choosing Your Distro FREE CHAPTER 2. Sharpening the Saw 3. Information Gathering and Vulnerability Assessments 4. Sniffing and Spoofing 5. Password Attacks 6. NetBIOS Name Service and LLMNR - Obsolete but Still Deadly 7. Gaining Access 8. Windows Privilege Escalation and Maintaining Access 9. Maintaining Access on Server or Desktop 10. Reverse Engineering and Stress Testing 11. Other Books You May Enjoy

Configuring Kali to be your Daily Driver

Kali has come a long way since it was first developed. It was first a stripped-down version of Linux designed to be run as a VM or from a USB or CD. Your tools for normal computing just were there. You will notice that Kali is designed to run under the root account. During the setup, there isn't the normal Set up a user account section in the install like most other distros. Of course, this is normally a big security no-no. A normal user should never have root-level access to the system. Today on most Linux distros, the root account is basically disabled from interactive logins, and instructions written on administration of the system tell you to use sudo to gain access to system-level files. GUI-based administration applications require a user to sudo in and use their credentials to open and save a configuration change to the system. This is a great idea for a system set up for normal use, but when pen testing you need direct hardware and system-level access. Using sudo in front of every command just isn't a useful option.

The next screenshot is of the desktop from the machine on which Bo wrote this chapter. Since he was writing a document, looking up information on the internet, and checking his email, he used his basic unprivileged user account. Note his personal photo on the desktop. When using more than one account on a system (especially when one of the accounts is root), you might want to have a different wallpaper for each account. This helps remind you how you are logged in and keeps you from doing something stupid when in the root account. This also helps protect you from the nasties on the internet:
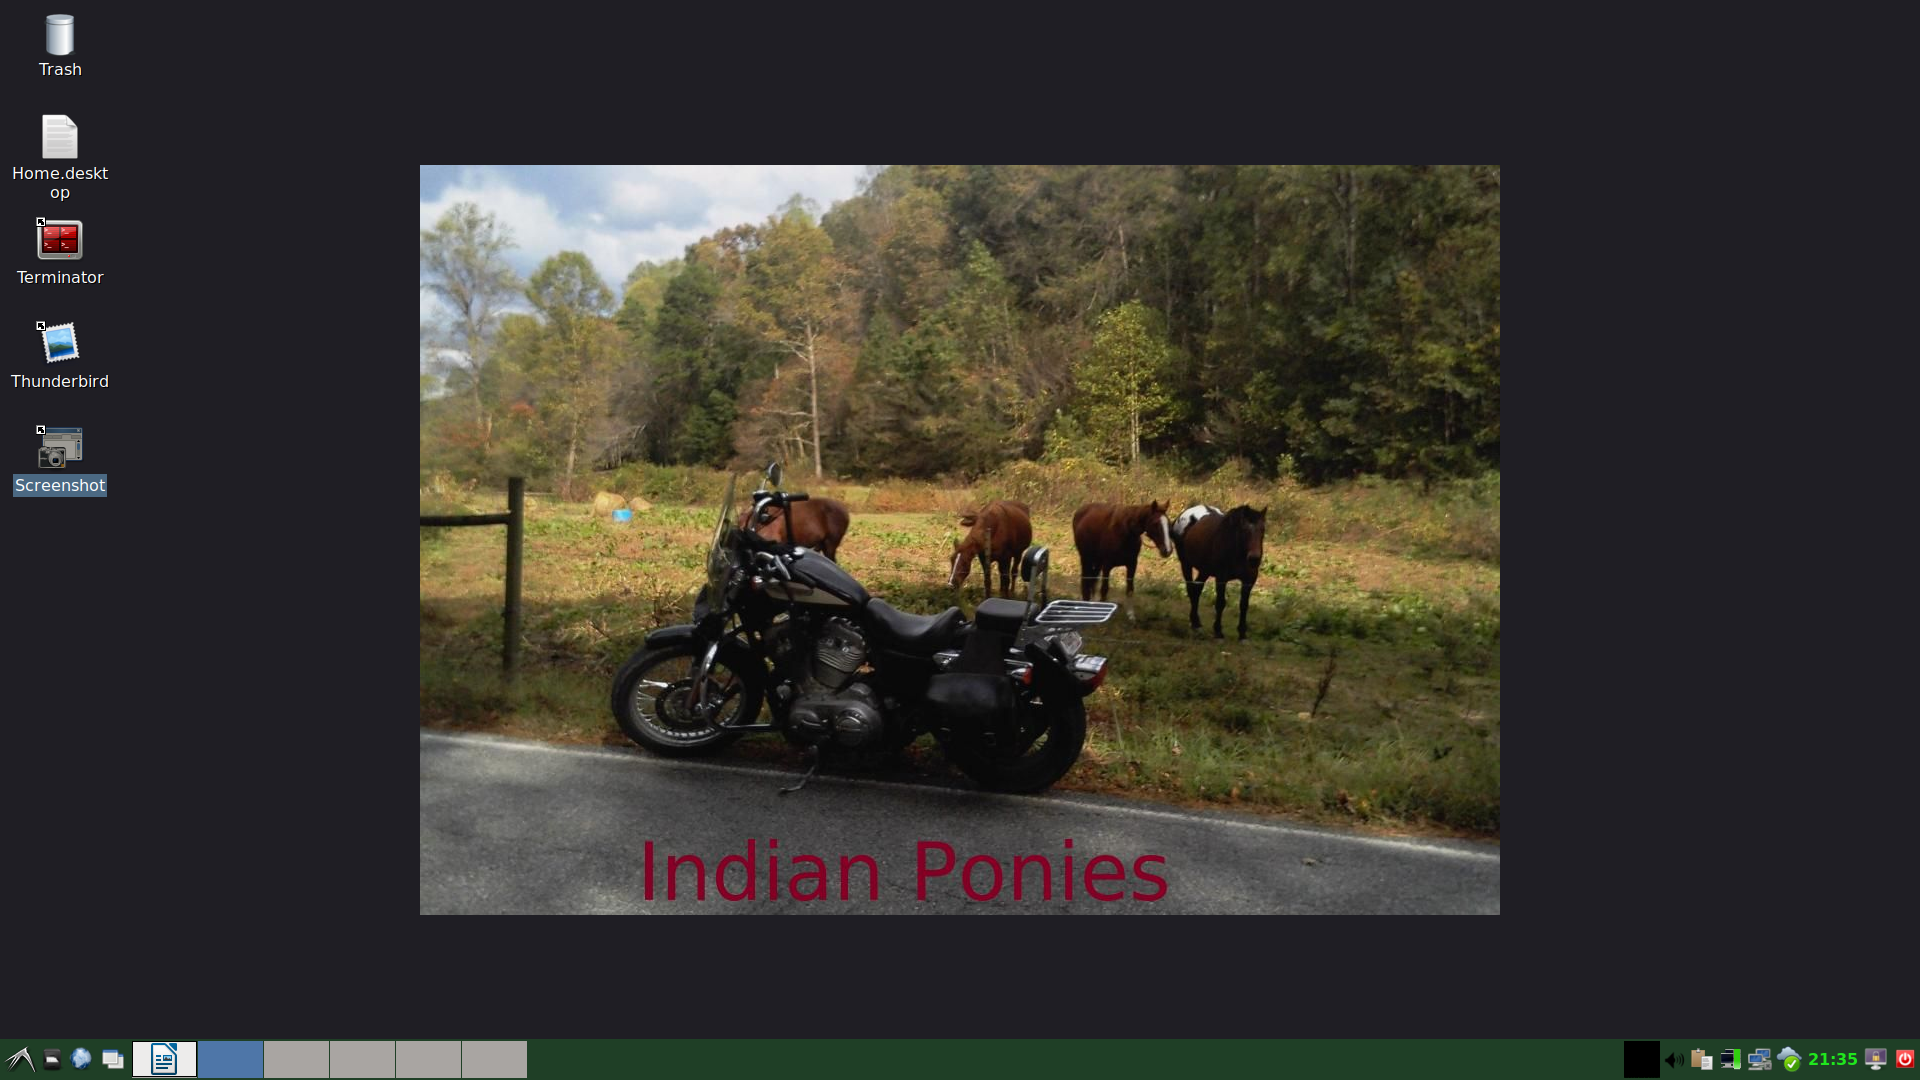
Bo Weaver's desktop

The following screenshot is the root desktop for this machine. There's no doubt where you're at when you are using this wallpaper:

Bo Weaver's root desktop

User account setup

After you have Kali set up and running, you'll need to add the normal user account to the system to make it your Daily Driver. The User Manager applications were not loaded with most of the Kali distros. They can be installed, but the easiest method and the one that works on all distros is the good old useradd command from the Terminal, as shown in the next screenshot.

The user for this and all other user processes is root:

Adding an admin user

To break down the meanings of the command options, the following is an example of adding user fred with a password of Password. Be sure to change the username and password to your unique account; we won't allow fred on our networks anymore:

useradd -m -U -G sudo -p LamePassword fred  

The flags we are using with this command are as follows:

  • -m: Sets up a home directory for the user in the /home directory.
  • -U: This flag sets up a unique user group for the new user, with the group name the same as the username.
  • -G sudo: This adds the new user to more than his own group. You will want your normal user account to have sudo access, so we are adding the user to the sudo group.
  • -p LamePassword: This flag sets up the password for the account. Please don't use something lame here.
  • fred: We end the command with the new username for the account.
  • Next, just hit the Enter key and the new user account is set up.

There are a couple of applications you'll want to load to have a working desktop: either LibreOffice or Apache OpenOffice, and an email client. OpenOffice is not in the Kali repos, so for this demo we will use LibreOffice. Mozilla Thunderbird is a useful email/scheduling tool. We'll use this for our demo. Kali doesn't come with an email client installed by default since it is designed to run under root. A word of warning: never open emails under a root account. Bad things can happen!

First, make sure your package list is up to date, so run this:

apt-get update  

Next, install OpenOffice and Thunderbird:

apt-get -y install libreoffice thunderbird  

Or, use this:

apt install libreoffice thunderbird  

The -y flag will answer yes to installing the packages. At this point, get a cup of coffee or take a little walk, as this will take a bit to install. The second command does the same thing, but it lets us look at the packages to be installed and upgraded. An abridged readout of the results of the second command are shown in the next screenshot. This screenshot shows wavy lines between the major sections of the install, to fit it all into the image window from the three screens of detail that are actually there. There are dozens of suggested packages, and you can ignore these and just hit the Y key for yes. You can also go back later, copy all the suggested package names from the Terminal window, and run this command:

apt install [all those names you just copied]  

Add them into your installation:

Installing mail client and Office apps

So, now you are ready. Change your root desktop to something that reminds you that you are logged in as root. Log out of root and, at the login screen, enter the new user's credentials. Once you are in, you now have a running account with the full security of a normal user account. Using this account, you are safe to browse the internet, read email, and do all the other things you normally do with a system. When you need to do a little pen testing, just log in as root.

You have been reading a chapter from
Kali Linux 2018: Windows Penetration Testing - Second Edition
Published in: Oct 2018
Publisher:
ISBN-13: 9781788997461
Register for a free Packt account to unlock a world of extra content!
A free Packt account unlocks extra newsletters, articles, discounted offers, and much more. Start advancing your knowledge today.
Unlock this book and the full library FREE for 7 days
Get unlimited access to 7000+ expert-authored eBooks and videos courses covering every tech area you can think of
Renews at $19.99/month. Cancel anytime
Banner background image