Point light
Point light is a light source that emits light equally in all directions. A good example for cases where a point light should be used is for an exposed light bulb, lit torch, and any other light source that emits light evenly in all directions.
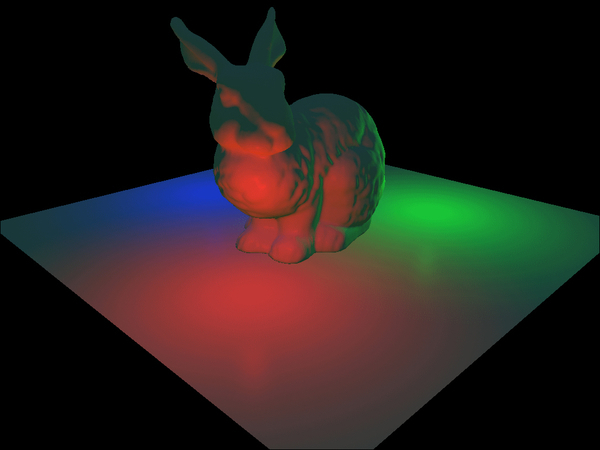
The following screenshot shows the bunny with a point light in front of its chest:

Looking at the previous screenshot, you may be wondering why you can't see the actual light source. With the exception of an ambient light, all the light sources featured in this chapter only calculate the first light bounce. Because we don't calculate the effect of rays hitting the camera directly from the light source, the light source is invisible. It is a common practice to render a mesh that represents the light source with a shader that outputs the light's color of multiplayer by its intensity. This type of shader is commonly known as an emissive shader.
Getting ready
Point lights extend the directional light calculation by making the direction between each pixel and the light source based on the pixel and light position (unlike the fixed direction used in directional light).
Instead of the direction value used by directional light, point lights use a position and the range values. The position should be the center of the light source. The range should be the edge of the point light's influence (the furthest distance light can travel from the source and affect the scene).
How to do it...
Similar to directional light, the point light is going to use the pixel position and the material structure. Remember that the normal has to be normalized and that the diffuse color has to be in linear space.
Instead of the direction vector used by directional light, point light requires a position in world space and a range in world space units. Inside the point light calculation, we need to divide the point lights range value. Since the GPU handles multiplication better than division, we store the Range value as 1/Range (make sure that the range value is bigger than zero), so we can multiply instead of divide.
Note
1 / Range is called the reciprocal of Range.
We declare the position and reciprocal range inside the pixels header as follows:
cbuffer DirLightConstants : register( b0 )
{
  float3 PointLightPos  : packoffset( c0 );
  float PointLightRangeRcp  : packoffset( c0.w );
}
Here is the code for calculating the point light:
float3 CalcPoint(float3 position, Material material)
{
   float3 ToLight = PointLightPos.xyz - position;
   float3 ToEye = EyePosition.xyz - position;
   float DistToLight = length(ToLight);

   // Phong diffuse
   ToLight /= DistToLight; // Normalize
   float NDotL = saturate(dot(ToLight, material.normal));
   float3 finalColor = PointColor.rgb * NDotL;

   // Blinn specular
   ToEye = normalize(ToEye);
   float3 HalfWay = normalize(ToEye + ToLight);
   float NDotH = saturate(dot(HalfWay, material.normal));
   finalColor += PointColor.rgb * pow(NDotH, material.specExp) * material.specIntensity;

   // Attenuation
   float DistToLightNorm = 1.0 - saturate(DistToLight * PointLightRangeRcp);
   float Attn = DistToLightNorm * DistToLightNorm;
   finalColor *= material.diffuseColor * Attn;

   return finalColor;
}
This function takes the pixel's world position and material values, and outputs the pixel's lit color value.
How it works…
As with the directional light, the Blinn-Phong model is used for point light calculation. The main difference is that the light direction is no longer constant for all the pixels. Since the point light emits light in a sphere pattern, the light direction is calculated per pixel as the normalized vector from the pixel position to the light source position.
The attenuation calculation fades the light based on distance from the source. In the featured code, a squared attenuation is used. Depending on the desired look, you may find a different function more suitable.
Tip
You can get a different attenuation value for each light source by using the HLSL pow function with a per-light source term.


