In this section, we are going to introduce the concept of 3D sound and show how this is implemented at the basic level within Unity. Since the introduction of virtual reality, there has been other implementations of 3D or spatial sound, which Unity can support through plugins, but that is outside the scope of this section. Either way, perhaps it is best to start with a definition of 2D and 3D sound using the following diagram:
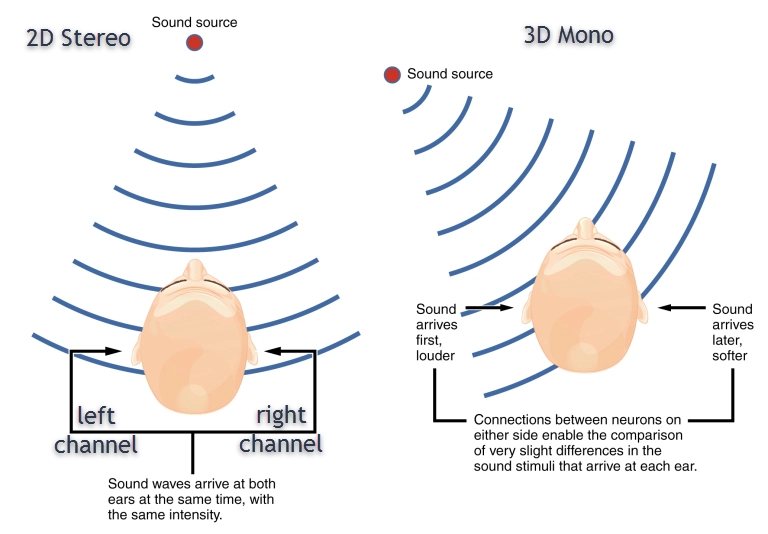
In Unity, the basic simulation of 3D sound is achieved by reducing the audio to a single channel and then attenuating (altering the volume), depending on the distance and location to the listener. There are several variables that allow us to customize how an Audio Source is spatialized in Unity, which we will cover when we convert our lake waves 2D ambient sound to 3D in the exercise here:
- Continuing from the last section, be sure the Ambient_lake-shore-waves object is selected in the Hierarchy window.
- Go to the Inspector window and scroll the component list to the bottom so that all of the Audio Source component is visible.
- Drag the Spatial Blend slider all the way to the right in order to make the sound entirely 3D as shown in the following screenshot:
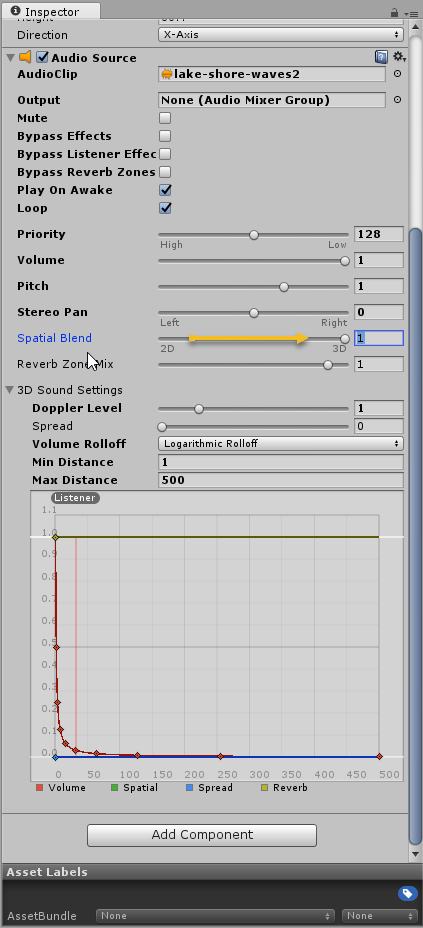
- At this point, we won't make any other changes to the Audio Source but take note of the 3D sound settings and especially the graph at the bottom of the component. Observe the line representing the listener position on the graph. Pay particular attention to that line, and press the Play button to run the game.
- Move around the scene and move to the water down the boardwalk. Notice how the sound does get louder as you approach the water or if you turn the direction will also change to represent where the Audio Source is. However, the sound probably isn't quite as loud as we want and the falloff is just too gradual.
- Stop the scene from running by pressing Ctrl+P (command + P on Mac).
- Let's alter the 3D settings on our Audio Source. Change the Max Distance on the 3D Sound Settings of the Audio Source to 100. Notice how this changes the graph as shown in the following screenshot:
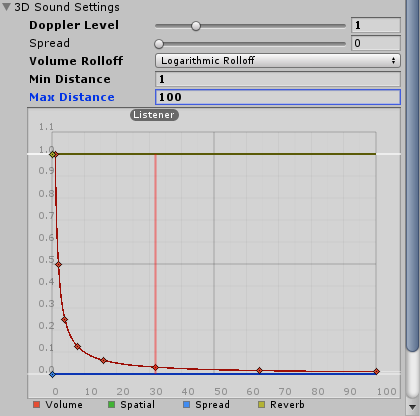
- Press play and move around the scene again. Notice how the sound now attenuates better as you move close to the shore. Feel free to change the various 3D sound settings and see what effect they have on the audio playback.
- When you are finished altering the Audio Source settings stop the scene. At this point, if you find a combination of different audio settings, you think, might work better, feel free to set those values now. After you are done making the changes, be sure to save the scene by selecting File - Save Scene from the menu.
As you can appreciate, now there are numerous ways to configure a sound to be 2D, 3D, or some mixture of both. How about we add another ambient sound for all the torches in our village by following this exercise:
- Switch your attention to the Hierarchy window and click on the search type dropdown on the left of search field. Then, be sure to select by Name as shown in the following screenshot:

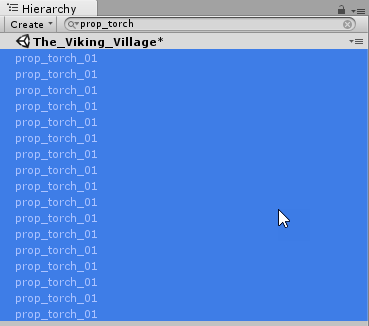
- Enter prop_torch in the search field. Notice how the Hierarchy window filters the objects to just display those with the matching name. Select all the objects in the window by clicking on the top item and then while holding the Shift key, select each of the remaining items in the list. So, all the torch items are selected as shown in the following screenshot:
- Making sure that all the objects are still selected, go to the Inspector window and click on the Add Component button at the bottom of the window. Then, as you did before, type audio in the search field to filter the list to audio components. Select the Audio Source component from the list to add it to all the prop_torch GameObjects.
- After the Audio Source is added to the objects, set the properties on the component to match those in the following screenshot:
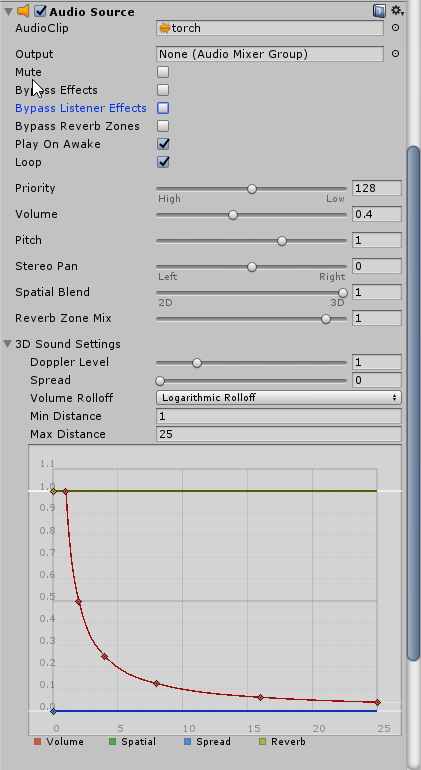
- If you find yourself struggling to set any of the properties on the Audio Source component, refer to the preceding sections in this chapter. After you are done making the edits, press the Play button to run the scene.
- Be sure to explore the scene and be sure to move close to the water and around the torches. Feel free to make changes to the Audio Source settings as you explore. As always, if you find some settings sound better, remember those and make those edits again after you exit the play mode.
- When you are done testing and tweaking audio, be sure to the save the scene and project.
Well, that completes this section and our introduction to 3D sound in Unity. We covered this material quickly and did not go into details of the 3D Sound Settings. There will be plenty of time to cover additional details about those settings in upcoming chapters.


