Adding a background theme
Artistic design is an important part of creating a presentation. You want people's eyes to be attracted to your presentation, and even more importantly, you want it to hold their attention. That's pretty much impossible to do if your presentation isn't attractive.
You also want your presentation to provide some identity with the subject matter and/or your company's brand. Whether designing a presentation for a training session, corporate proposal, or sales, you need to be able to tie the whole thing together, providing visual continuity so that the viewer understands that it is all part of one continuous theme.
At this point, the theme we are creating only deals with the presentation and not the skin. That will be done at another time. For the best possible results, you want your presentation theme and your skin theme to go together. It is helpful to keep your skin theme colors in mind while creating your presentation theme.
There are actually several ingredients in creating this visual theme, such as the background image, the placement of objects on the slides, and the text size, style, and color. For this reason, it is very useful to start the creation of your presentation by applying a theme to the slides in the presentation. Microsoft PowerPoint has this capability built-in along with a number of themes that are available for its use.
How to do it…
Themes are created using PowerPoint's capability rather than Articulate's. However, the skin theme is created in Articulate:
To access these themes, you need to click on the Design tab at the top of the PowerPoint screen. Your ribbon should change to show the following screenshot:

Selecting from PowerPoint's installed themes only requires clicking on the theme's thumbnail on the ribbon.
Note
Please note that not all the themes are visible at once. Clicking on the scroll bar to the right-hand side of the shown themes allows you to scroll through all the themes you have installed on your system. The arrow with the line at the bottom of the scroll bar is for opening the drop-down that shows all the installed themes at once.
How it works…
Selecting a theme for a presentation gives us the following:
Background options
Text styles
Color pallets
There's more…
The themes themselves are fully customizable. There are three buttons located to the right-hand side of the shown themes, which provide for the customization of the colors, fonts, and effects in the theme.
Changing theme colors
By clicking on the Colors button in the Themes section of the ribbon, a drop-down appears that allows the selection of the existing color themes. This may be divided into two separate areas depending upon the selected theme, the upper section showing the color themes that are available for that particular theme, and the lower section listing all of the color themes that are built-in to Microsoft Office.
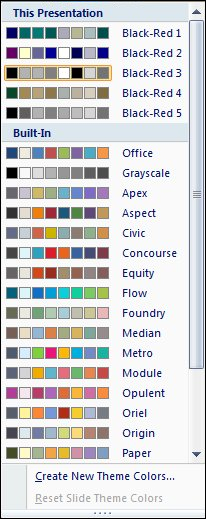
For most themes, selecting a color theme doesn't affect the background color; it affects the text and bullet point colors. However, there are a few themes that change to match the color scheme selected. You'll have to play with the theme you are using to see what changes it allows you to make. If none of the included color themes satisfy your need, you can modify them by selecting Create New Theme Colors… from the bottom of the drop-down list. This opens a dialog box for creating a new color theme.
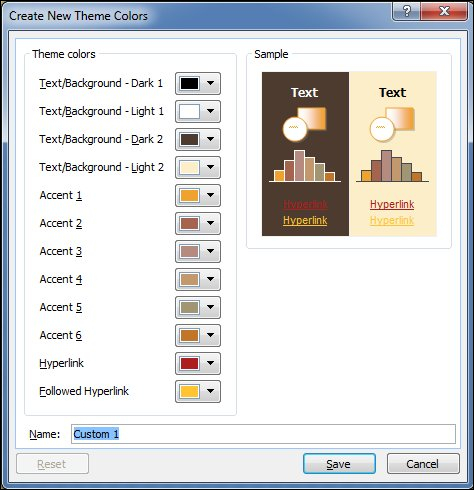
By selecting one of the existing color themes, you can use it as your starting point for creating your new color theme. The theme shown in the screenshot of the dialog box is the "Text" theme. Each type of Text, Accent, and Hyperlink theme can be individually changed. Your new color theme can then be saved under whatever name you choose.
To change the background color, one would need to select Background Styles in the Background section of the ribbon. Since in many cases the backgrounds are pictures, you are somewhat limited to the amount of color change that you can make. However, there are some themes that are not images, but rather are designs that are appropriate for being used as the background. In these cases, you can change colors, add a texture, or change from a solid fill to a gradient. This varies from theme to theme, depending upon what is built in to that theme.
Changing theme fonts
Selecting Fonts from the Themes section on the ribbon allows you to select any of the standard Microsoft Office font style sets. These are the same font style sets that are used in Microsoft Word and other office applications.
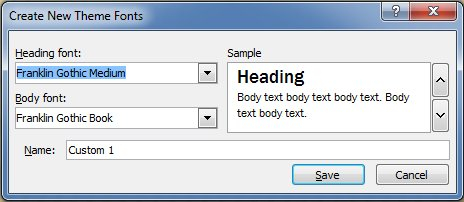
Just as with the color themes, the font themes are fully customizable. Selecting Create New Theme Fonts… at the bottom of the Fonts drop-down opens a dialog box for selecting the heading and body fonts that you want to use in your theme. These can then be saved as a new font theme.
Note
The reason that you can only select the heading and body fonts rather than select a variety of different fonts is that, artistically speaking, it is not recommended to use more than two fonts in a document. You still have the availability to individually change the font of a specific word, line, or page of text if you so desire, but that would not be a part of the font theme.
Changing theme effects
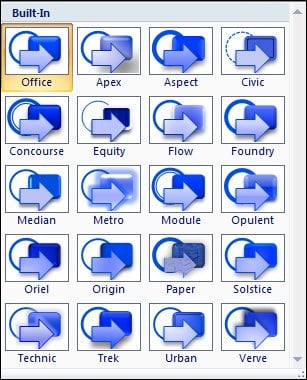
The final area of customization available for your theme is the effects, selectable by clicking on the Effects button in the Themes section of the ribbon. The Effects drop-down provides a selection of the different effects that can be used in the theme. These effects are automatically applied to buttons and other objects in the presentation as a part of the theme.
Saving your changed theme
Once you make changes to a theme, you can save that modified theme under a new name. This would be especially useful if you needed to create a series of presentations and wanted to maintain branding throughout the series.
To save your new theme, open the Themes dropbox by clicking on the button at the bottom of the scroll bar to the right-hand side of the theme thumbnails. At the bottom of the dropbox it will say Save Current Theme…. Clicking on this opens the standard, Windows Save As… dialog box, which will be open to the themes folder on your computer.
Adding a theme from Microsoft.com or third-party websites
Although Microsoft PowerPoint comes with a number of themes preinstalled, it may not have the theme that you want for the presentation you are trying to produce. Never fear, that has already been considered, and the ability to add themes has been built right into PowerPoint.
You can find themes on Microsoft's website and a large number of third-party websites who produce them both for free and for sale. Both of these sources can be used and added to your personal copy of PowerPoint.
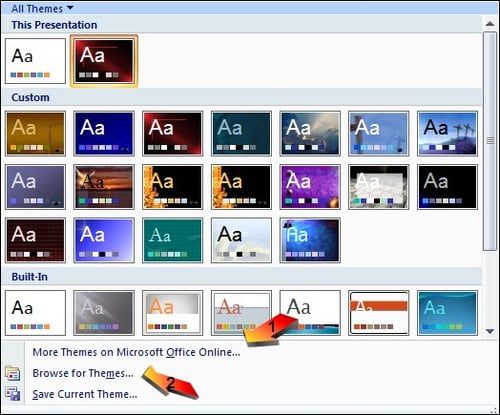
To search for and add themes from Microsoft, click on the button at the bottom of the scroll bar to the right-hand side of the themes thumbnails to open the themes drop-down list. On the bottom of this drop-down, you will see the words More Themes on Microsoft Office Online.... Clicking on that legend will take you to the themes page on the Microsoft website.
The web page will show you a variety of themes for all of the Microsoft Office products. Since we are working in PowerPoint, you will want to select the PowerPoint themes by using the button on the left-hand side of the screen.
Selecting a theme allows you to download it to your computer. This is essentially the same procedure you would use to select and download a theme from a third-party website. While the details will vary with the website, the idea is the same.
Themes consist of several files, so they are downloaded as a .zip file. You will need to unzip the file to a location on your hard drive in order to input it into a PowerPoint or Articulate presentation. Once the theme is downloaded and unzipped, you will need to find the theme, bring it into PowerPoint, and click on the legend Browse for Themes… on the themes drop-down list. This will open a standard Windows dialog box, allowing you to search for and select the theme and follow the prompts to install the new theme. It will show up immediately in PowerPoint without restarting.


