Learning about the hardware you'll interface with
The best way to learn about interfacing Android software with hardware is to learn while having real hardware components connected to your BBB. This way, your software will talk to actual hardware and you can directly observe how your apps respond to physical interaction with your system. We have selected a variety of electronic components that will be used throughout the book to demonstrate various aspects of hardware interfacing. You are welcome to use as many or as few of these components as your interests and budget permit. It can be expensive to purchase all of these components at once, but make sure to buy all of the components necessary for each chapter if you are interested in implementing the examples in that chapter.
General-purpose components
In Chapter 3, Handling Inputs and Outputs with GPIOs, and Chapter 6, Creating a Complete Interfacing Solution, you will use a variety of electronic components such as pushbuttons, LEDs, and resistors to interface with the BBB. Many of these items can be purchased from any electronics supplier, such as DigiKey (www.digikey.com), Mouser Electronics (www.mouser.com), and SparkFun (www.sparkfun.com). Both Digikey and Mouser offer so many variants of each available component that it can be difficult for an inexperienced hardware hacker to pick the right components to buy. Because of this, we will recommend a few products from SparkFun that will give you suitable components needed to complete the exercises in this book. You are welcome to select your components from another supplier if using a different one is more convenient for you.
Our examples require only three components: a resistor, a pushbutton switch, and an LED. We suggest purchasing a 1K ohm, 1/6 (or 1/4) watt resistor (part #COM-08980), a 12 mm push button switch (part #COM-09190), and any small LED (3–10 mm in size) that can be triggered by around 3 volt or less (part #COM-12903 is a good assortment of 5 mm LEDs).
The AdaFruit memory breakout board
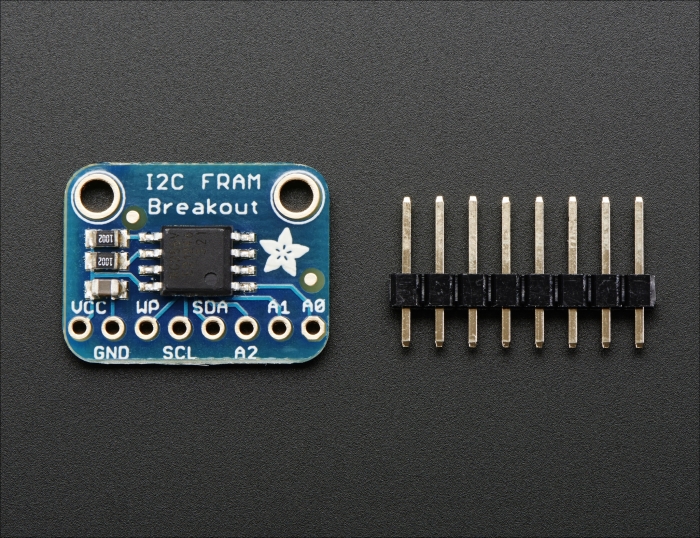
In Chapter 4, Storing and Retrieving Data with I2C, and Chapter 6, Creating a Complete Interfacing Solution, you will interface with a 32 KB Ferroelectric Random Access Memory (FRAM), which is a nonvolatile memory IC, to store and retrieve data. We have selected AdaFruit Breakout Board (product ID 1895) that contains this IC. The breakout board already contains all of the necessary components to interface the IC to the BBB, so you need not worry about many of the low-level details involved in creating a clean, noise-free connection between each IC and the BBB.

The FRAM Breakout Board with its header strip (source: www.adafruit.com)
The AdaFruit sensor breakout board
In Chapter 5, Interfacing with High-speed Sensors Using SPI, and Chapter 6, Creating a Complete Interfacing Solution, you will interface with a sensor IC to receive environmental data. We have selected an AdaFruit breakout board (product ID 1900) that contains these ICs. These breakout boards already contain all of the necessary components to interface the ICs to the BBB, so you need not worry about many of the low-level details involved in creating a clean, noise-free connection between each IC and the BBB.
Preparing the breakout boards
Each breakout board comes with a header strip. This header strip must be soldered into each breakout board so that they can be easily connected to the breadboard. This is the only soldering that is required to complete the exercises in this book. If you are unfamiliar with soldering, there are numerous tutorials online that explain techniques for effective soldering. If you feel uncomfortable soldering the header strips, ask a friend, instructor, or colleague to assist you with the process.
Note
A few online soldering tutorials that we suggest that you check out are:


