Enhancing a scanned image through OCR
Scanned pages and saved images may be enhanced in many ways. This section will guide you through those choices.
The process begins with clicking the File | Create PDF From File… option. Then, select and open the desired file.
The file is in the process of conversion at this point. Until it is saved, the title bar area filename is only temporary. You may also open a file that was already converted to PDF but no enhancements have been applied yet. It is a good idea to know what you’re working with before you begin the process. Here are two methods to find out whether any enhancements have been applied to a document:

Figure 2.3 – Acrobat selection and hand grabber tools
The Acrobat default options from the Select & Zoom Toolbar displayed at the top of the screen are the Selection (the black arrow) and Panning (the hand grabber) tools, similar but meant for specific functions. The Selection tool (the arrow) changes its appearance as you move it over different areas of a page. We will use it to examine the page using one of these methods:
- Method #1: Use a selection tool and move it over the page. If it is an image-only file, your cursor will have the shape of a crosshair even when positioned over the text area. When you click anywhere on the page, the entire page will be selected, since it is only a bitmap image at this point. This means that no enhancements have been applied yet.
- Method #2: We can test searching the text from the Edit | Find menu options or use the Ctrl + F keyboard shortcut (or Command + F on Mac). A search dialog box will open, as in this screenshot:
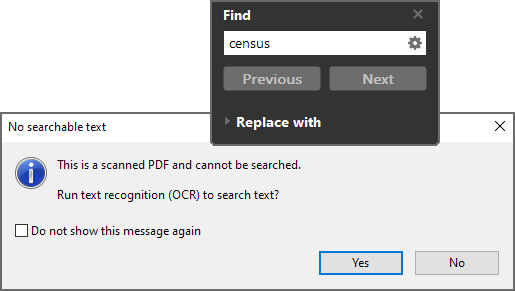
Figure 2.4 – Scan .pdf alert
Type a word of text that you see on the page in the Find field and click the Next button. The No searchable text alert appears giving you a choice to run text recognition (OCR):
- Choosing Yes will automatically perform the scan.
- Choosing No will give another alert saying Adobe Acrobat has finished searching the document. No matches were found for the phrase that you searched.
The alerts appear only when no enhancements have been applied to the scanned document and the page still contains only an image of text.
Important note
Acrobat offers to begin OCR immediately after you use the search function. Choosing the No option at this point is the better choice. Rather than depending on default settings, you will have access to options and more precise control of the scanning process using the Scan & OCR tool.
Now that we confirmed that the page is only a bitmap image, we can begin the process of applying enhancements using the Scan & OCR tool options.
If the tool is not visible in the Tools column on the right, open Tools in the bar directly below the menu:
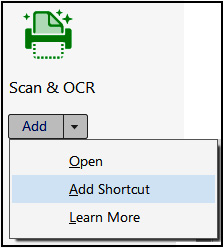
Figure 2.5 – Scan & OCR tool options
- Adding a shortcut will place the tool in the column of other tools from now on
- Clicking on the shortcut will open a toolbar at the top of the screen:

Figure 2.6 – Scan & OCR toolbar options
The Insert dropdown allows you to add another page using the From File… or From Scanner option.
The Enhance dropdown gives the Scanned Document and Camera Image options. Enhancement choices and their meaning are consistent with options covered in detail in the earlier discussion on scanner settings in the Scanning document pages section:
- The Scanned Document settings let you choose which page to enhance if you work with a multipage document. Optimization Options gives separate output settings for color or grayscale images and monochrome, typically text pages. Filters and Text Recognition Options can also be changed.
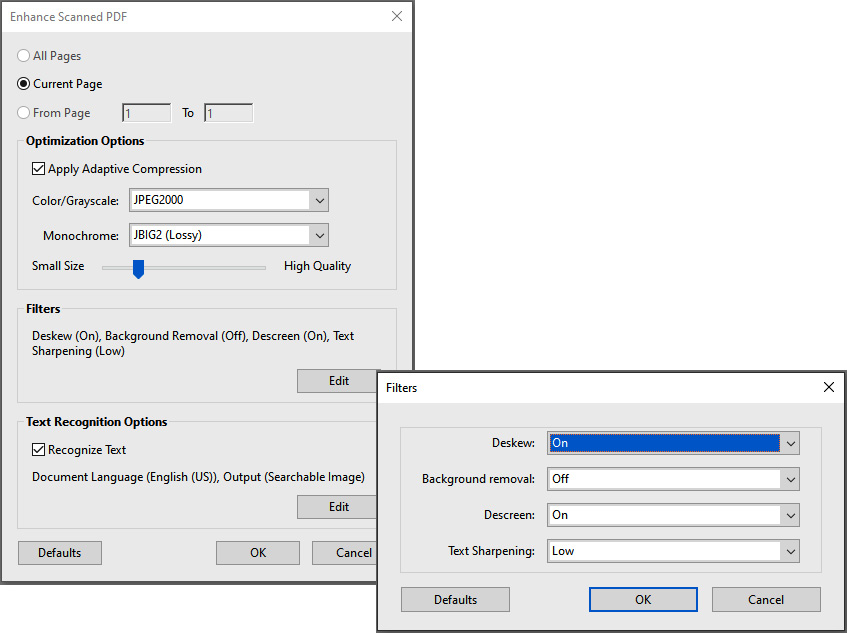
Figure 2.7 – Scan & OCR | Enhance | Scanned Document | Filters options
- The Camera Image choice gives you more options. In addition to recognizing text, it adjusts the contrast level of the background image. Settings contained in this function are especially useful when a document is a photo with skewed edges, a typical problem when taking pictures rather than scanning pages (Image 1):
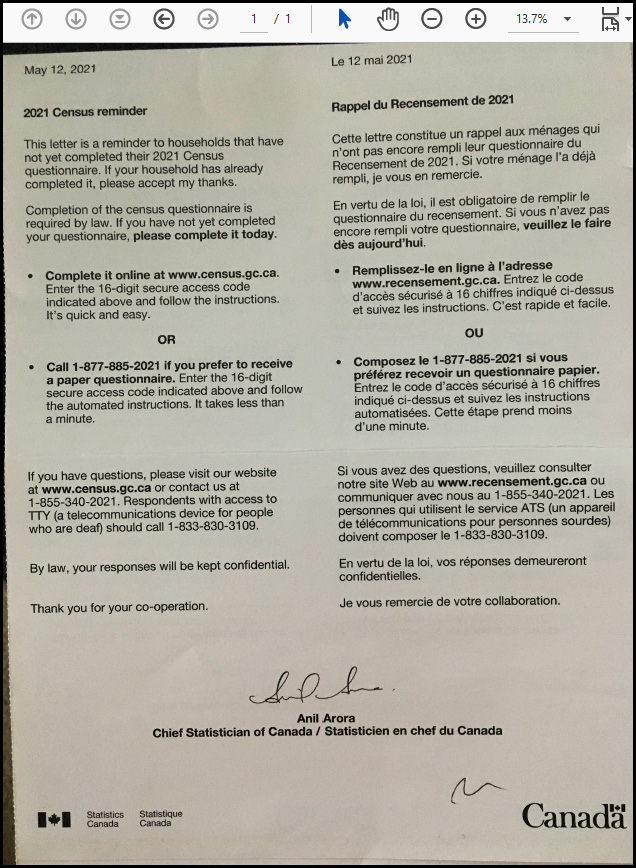
Figure 2.8 – Image 1: page with no enhancements
- Choosing the Whiteboard setting will give you the highest contrast for text pages with no photo images: white background for black text, as in forms or memos. Selecting the Auto Detect or Document options balances the contrast between text and images on the page. You can manually adjust the edges by sliding the corner blue handles (Image 2):
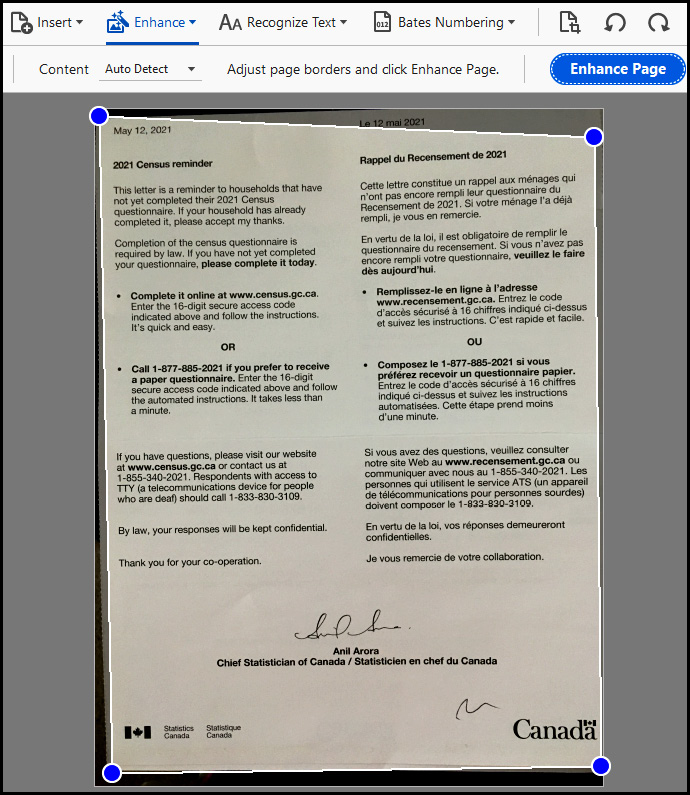
Figure 2.9 – Image 2: manual adjustment of page edges using blue handles
- After you click Enhance Page, the contrast is greatly improved, and the edges of the page are adjusted and aligned as a true rectangle (Image 3). The Adjust enhancement level slider at the top allows you to further control the level of contrast helpful to improve the quality of the visible text while balancing the quality of photos on the page. Ready for the next step?
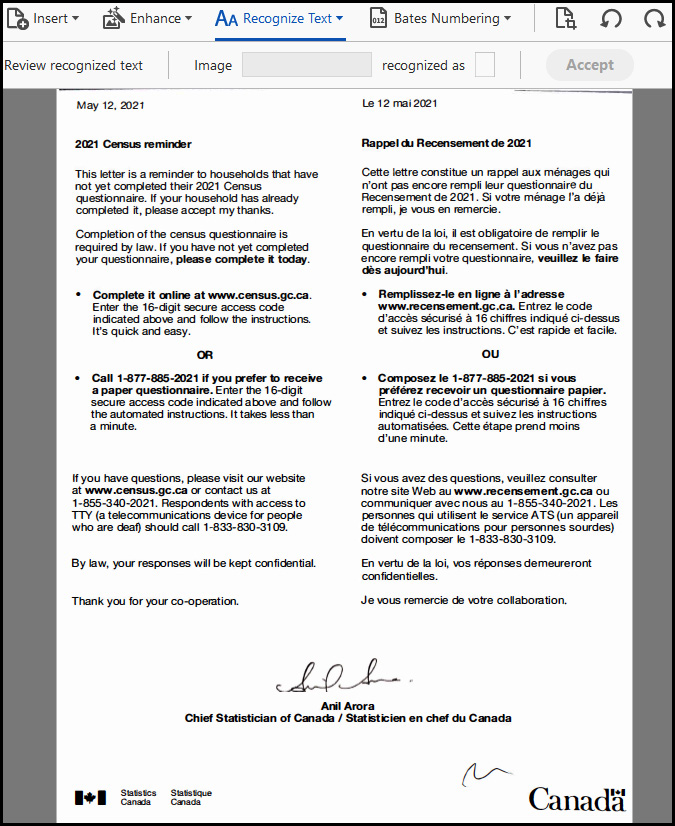
Figure 2.10 – Image 3: result after enhancement and OCR
You can now click on Recognize Text, which will give you choices for one or multiple files. After you make a selection, another toolbar opens with more options:
- You can select a language for the OCR engine to identify the characters. Not all text is in English. Can you see French on the sample page? In fact, you can expand the language choices to use Asian languages and right-to-left Hebrew if needed. Normally, the locale chosen at the time of installation determines the local language.
- You can adjust settings for output and resolution for this document only. When you click the Recognize Text button, OCR analyzes bitmaps of text and substitutes those areas with words and characters. If it is uncertain, the phrase is marked as suspect. Suspects appear in the
.pdffile as the original bitmap of the word, but the live text is included on an invisible layer and highlighted by red-bordered temporary rectangles, making it easy to spot problem areas, as seen in this screenshot:
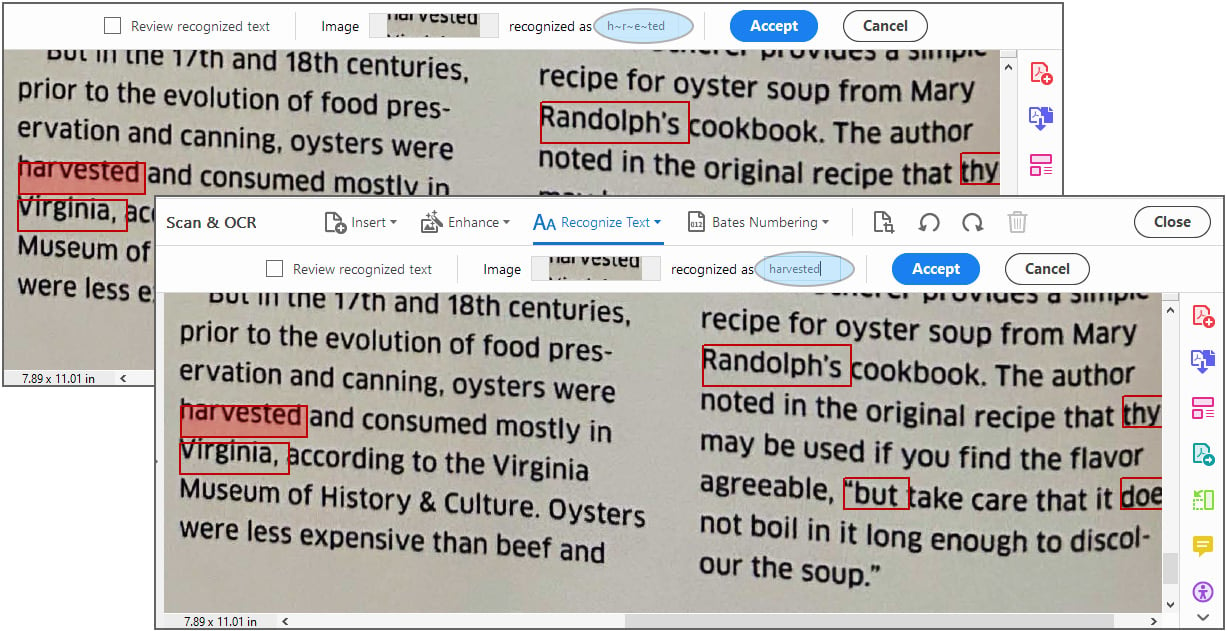
Figure 2.11 – Correcting recognized text
- Use Correct Recognized Text from the Recognize Text toolbar option to correct the suspects in this invisible layer. Using the toolbar field and highlighted areas of the page, you can type the correct text. If there are no suspects, you will see an alert saying Acrobat didn’t find any text needing correction.
Important note
The OCR accuracy level will vary depending on the document type, scan quality, and enhancements applied. Additionally, the Language setting may affect the reliability of the OCR results, with English being rather stable, but other languages may need more attention. To ensure acceptable quality of text recognition output, it should always be checked for suspects.
We can now test the usefulness of using OCR and other enhancements. Do you recall the file test at the start of our discussion? Now that we have applied enhancements, we will repeat testing the document with the same two methods mentioned earlier – Method #1 and Method #2. Note the differences in results:
- Method #1: Use a selection tool and move the cursor over the page. If it is not an image-only file anymore, your cursor will have the shape of a crosshair only on the margin and photo areas if there are any. Over the text area, the cursor changes to an I-beam, and when you click on the text, the insertion point signals that you can work with the text. It can be searched, selected, copied, and so on.
- Method #2: Test searching the text from the Edit | Find menu or use the Ctrl + F keyboard shortcut (or Command + F for macOS). Type a word of text that you see on the page in the Find field. Acrobat finds all phrases on the page and in parentheses tells you how many it has found. Click the Next or Previous button to find all instances.
So, now your document has been enhanced. Improved contrast and straightened edges make it much easier to read, and OCR made it searchable for text. The next section will show you how to take advantage of those newly added features.
Searching and using content in the enhanced PDF
Now that the document contains live text, you can find any phrase by selecting the Find | Replace with options and then entering the text in the field. If needed, you can also replace those phrases with different text, or you can change their formatting. Here are the steps:
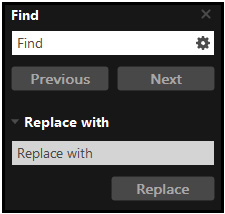
Figure 2.12 – Find/Replace with dialog box (Ctrl + F or Command + F)
- Type text in the Find field. The Options button will open a menu so that you can refine the search to whole words only, case sensitive, and include bookmarks text, or use the Open Full Acrobat Search… option. If no refinements are needed, click the Next or Previous button.
- Open the Replace with field by clicking the small pointing triangle on the left.
- Type the replacement text.
You can see that the Edit PDF tool with all formatting options opens in the Tools column. We will discuss in detail all the edits that can be done using this tool in Chapter 4, Modifying and Editing PDF Files.
- Replace the selected text by clicking Replace.
Great job! Taking some time to apply enhancements really paid off. The file is much more functional now and you learned how to take advantage of the enhancements. It does take quite a bit of effort to produce high-quality scanned pages. But it is worth it. In Chapter 5, Remediation for Accessibility in PDF Publications, we will add even more features to the scanned document and learn how to make it compliant with accessibility standards.
There is one more thing that needs to be discussed. No one wants to have beautiful pages posted online that readers can’t access because the file size is too large. In the next section, we will explain what optimizing is and why it is important in scanned PDFs.


