Hands-on exercise
To support your learning with practical skills, let’s learn how to create some of the services we looked at in this chapter. You will learn how to install AD DS on Windows Server.
Getting started
To start this hands-on exercise, you will need access to a physical or virtual machine running Windows Server 2012 Standard/Datacenter or later.
For this exercise, we could use a nested virtualization environment in Azure, meaning no on-premises hardware is required. However, to help you with your learning and demo purposes, we will complete this exercise using IaaS VMs in an Azure environment where we have the correct level of access to create the required resources.
You can create a free Azure account at https://azure.microsoft.com/free. This free Azure account provides the following:
- 12 months of free services
- $200 credit to explore Azure for 30 days
- 25+ services that are always free
If you will be using Azure IaaS VMs for DCs, then recommended practice is that each VM should have a data disk attached to store the AD DS database, log files, and SYSVOL. Alternatively, you could install them on the default paths provided for learning purposes. However, this should not be done in a production scenario.
Let’s move on to the exercise.
Exercise – installing AD DS on Windows Server
This section will teach you how to install AD DS on Windows Server.
The following steps must be carried out on the local OS of a machine you have admin access to. We will install the AD DS role directly on the server we wish to be our first DC in our new domain, in a new forest; we will not use remoting.
The Server Manager Add Roles wizard and the AD DS Configuration wizard are used to install and configure AD DS.
Follow these steps:
Note
The dcpromo.exe AD DS Installation Wizard has been deprecated as a deployment method starting with Windows Server 2012.
- Log in to your server. Then, from Manage in Server Manager, click Add Roles and Features:

Figure 1.15 – Server Manager
- On the Before you begin page, click Next.
- On the Select installation type page, leave Role-based or feature-based installation set and click Next.
- On the Select a destination server page, leave Select a server from the server pool set and ensure the server where you want to install AD DS is selected. Then, click Next.
- From the list of available roles on the Select server roles page, select the box for the Active Directory Domain Services role:
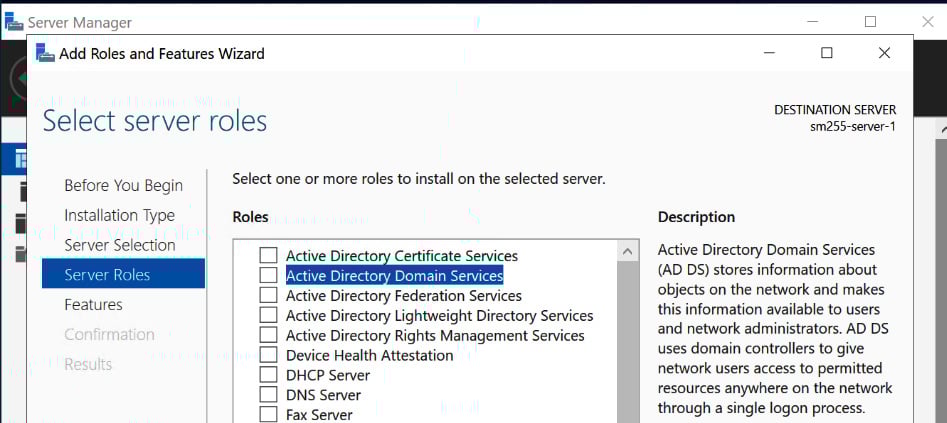
Figure 1.16 – The Select server roles screen
- From the Add Roles and Features Wizard pop-up screen, click Add Features:
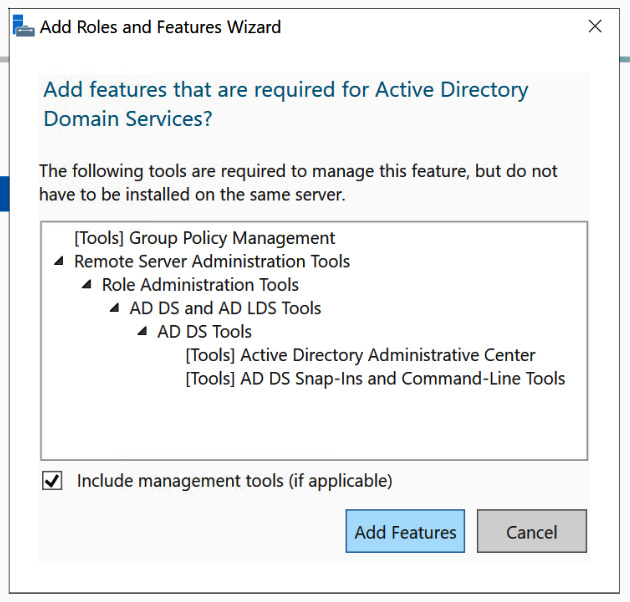
Figure 1.17 – The Add Roles and Feature Wizard pop-up screen
- Back on the Select server roles page, click Next.
- On the Features page, leave all the defaults as-is, review the features selected as a reference, and click Next.
- On the AD DS page, review the information and click Next.
- If required, select Restart the destination server automatically on the Confirmation page. Then, review the selections installed as a reference and click Install.
- On the Results page, observe and monitor the installation progress; click Close when you see a message stating the Installation succeeded on [YourServerName]:
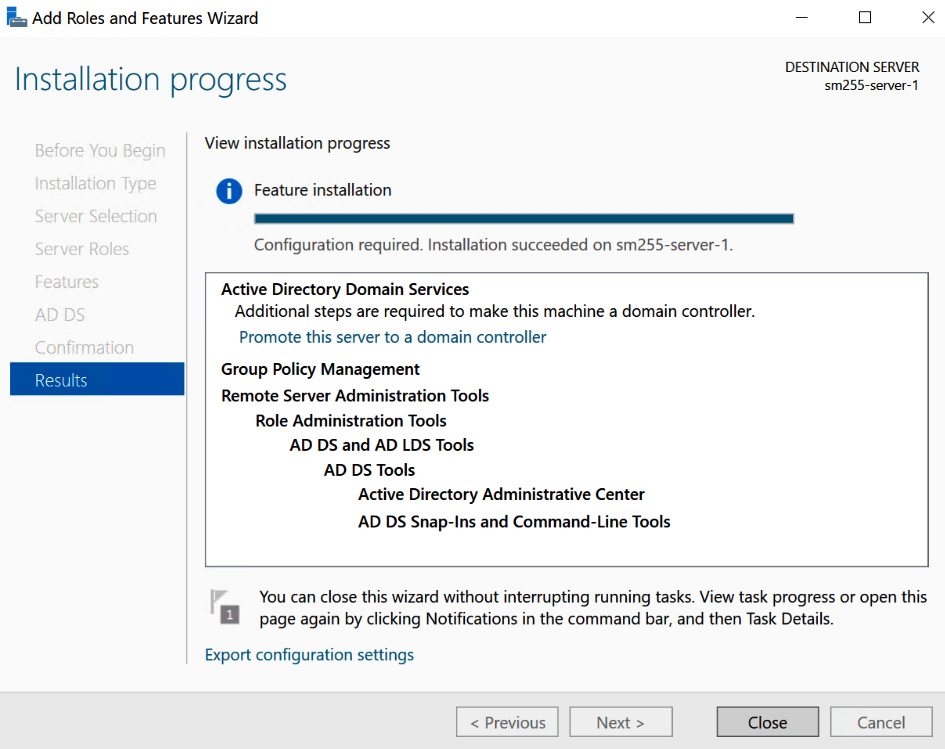
Figure 1.18 – The Installation progress screen
- From Server Manager, click on Notifications, then Promote this server to a domain controller:
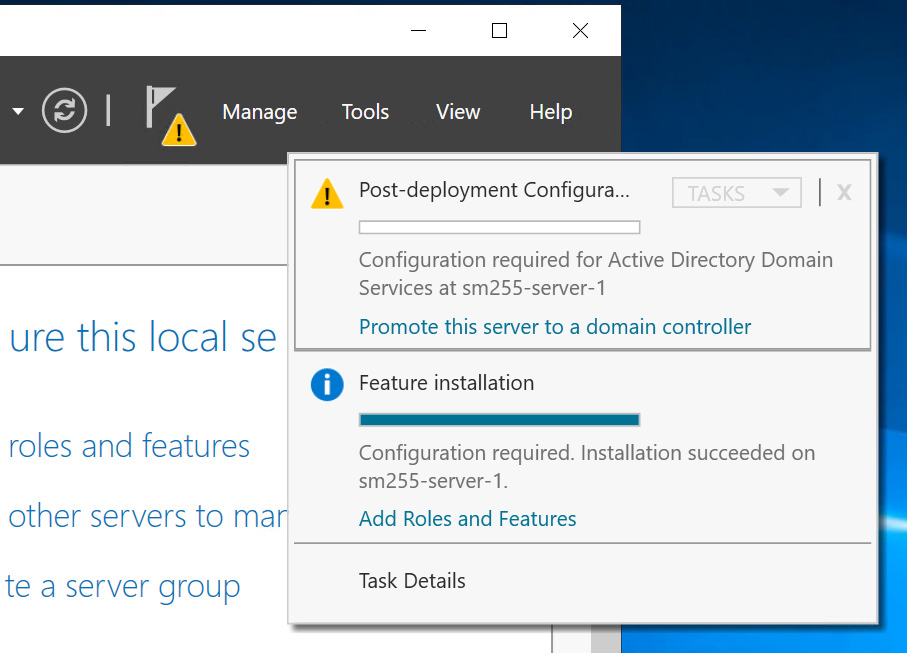
Figure 1.19 – The Promote this server to a domain controller notification screen
- On the AD DS Configuration Wizard pop-up screen, note the deployment operation options on the Deployment Configuration screen. Select Add a new forest for this exercise:
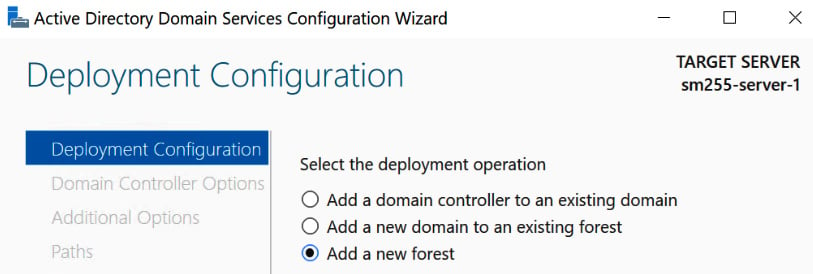
Figure 1.20 – The Deployment Configuration screen
- Enter a domain name under the Root domain name and click Next:
For further reference, click the More about deployment configurations hyperlink at the bottom of the page:
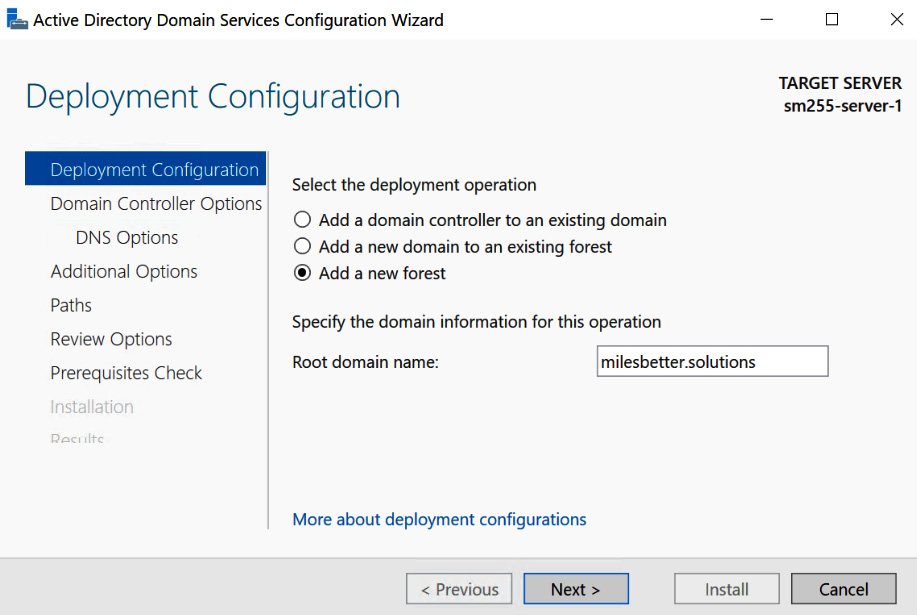
Figure 1.21 – The Deployment Configuration screen
- On the Domain Controller Options page, note that the Domain Name System (DNS) server and Global Catalog (GC) options are selected by default but that the Read only domain controller (RODC) option is not available; leave all the defaults as-is and enter the DSRM password and confirm. Then, click Install.
For further reference, click the More about domain controller options hyperlink at the bottom of the page:
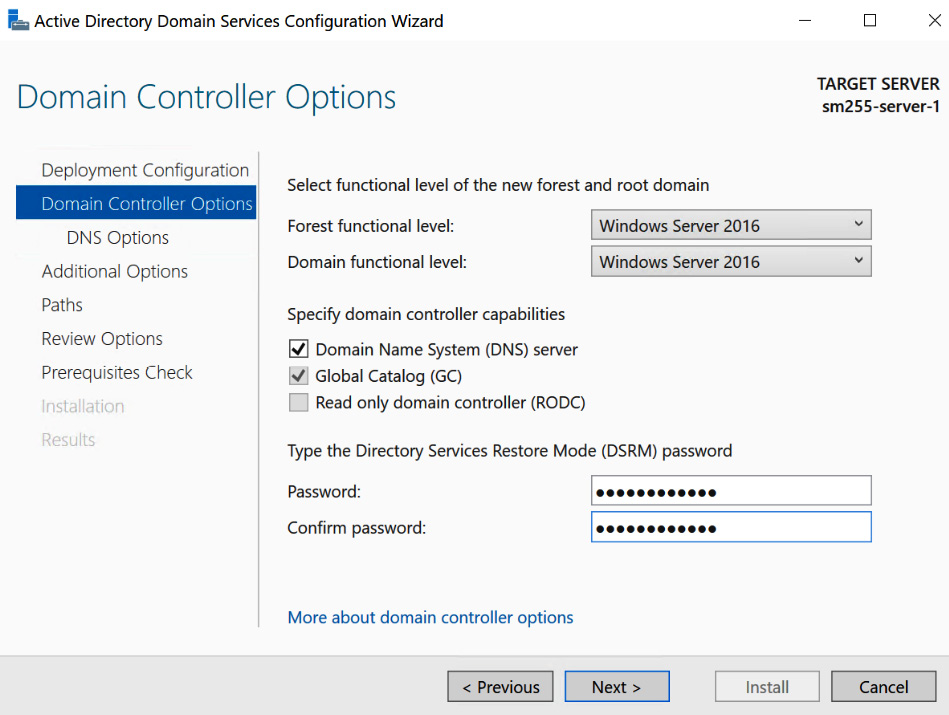
Figure 1.22 – The Domain Controller Options screen
- On the DNS Options page, ignore the message that states that delegation for this DNS server cannot be created and click Next.
- Wait while the NETBIOS domain name is auto-populated on the Additional Options page. Then, click Next:

Figure 1.23 – The Additional Options screen
- From the Paths page, specify the location for the AD DS database, log files, and SYSVOL. For this exercise, leave the defaults as-is. Then, click Next.
For further reference, click the More about Active Directory paths hyperlink at the bottom of the page:
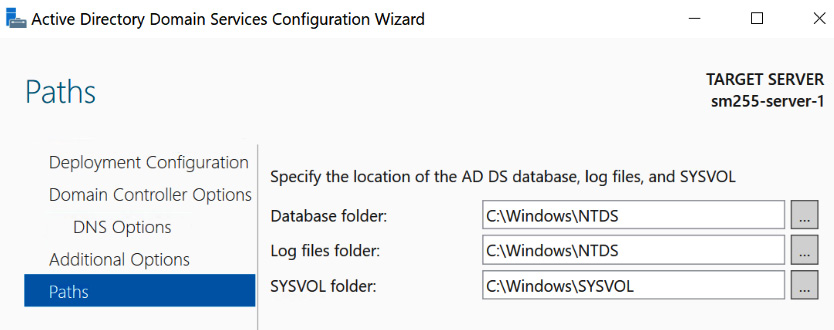
Figure 1.24 – The Paths screen
- From the Review Options page, review the selections and click Next.
- The Prerequisites Check page confirms the status of all prerequisite checks. A green tick should appear with a message stating All prerequisite checks passed successfully. Click ‘Install’ to begin the installation. Then, click Install:
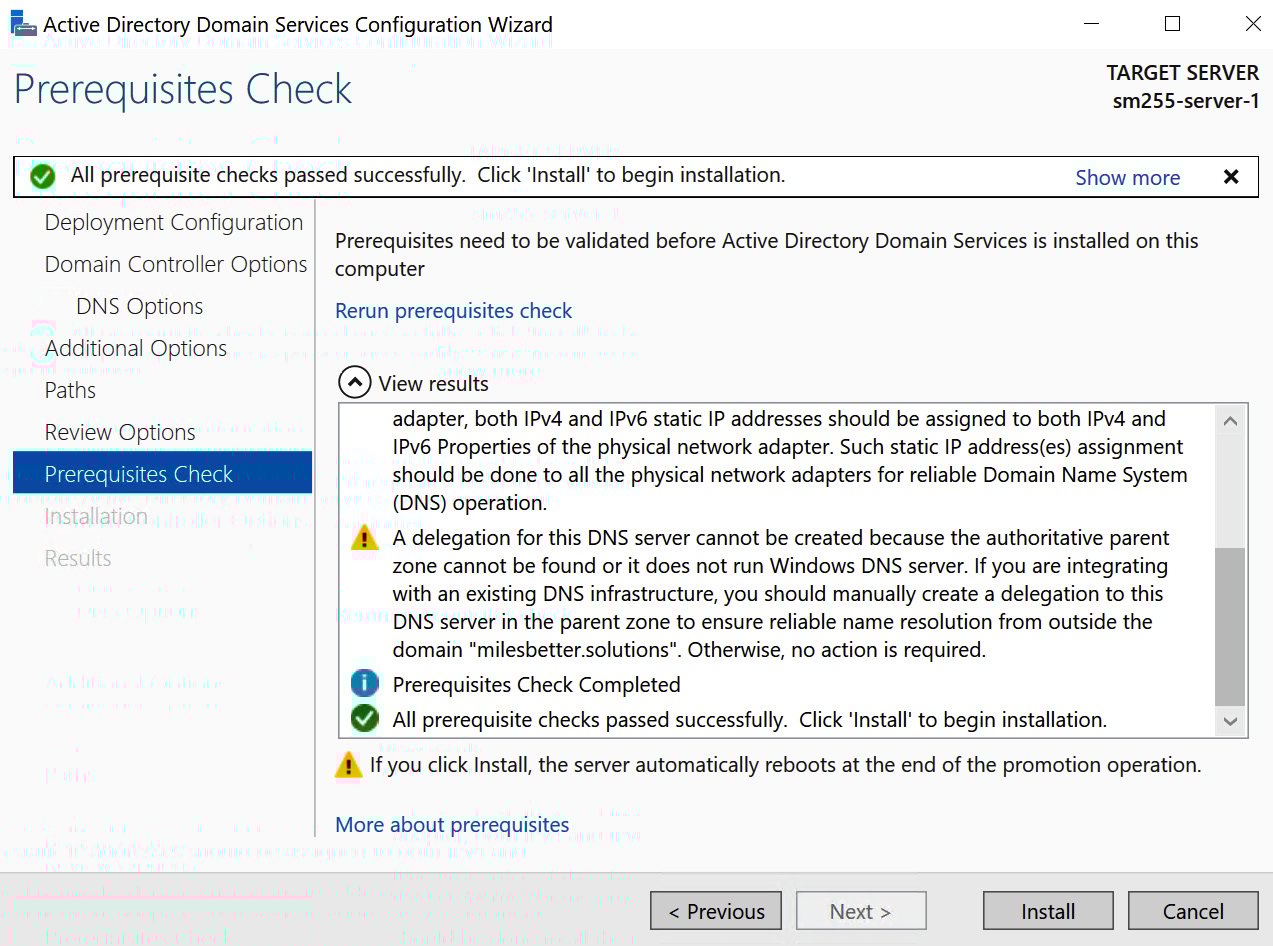
Figure 1.25 – The Prerequisites Check screen
- From the Installation page, observe and monitor the installation progress; your server will automatically restart:
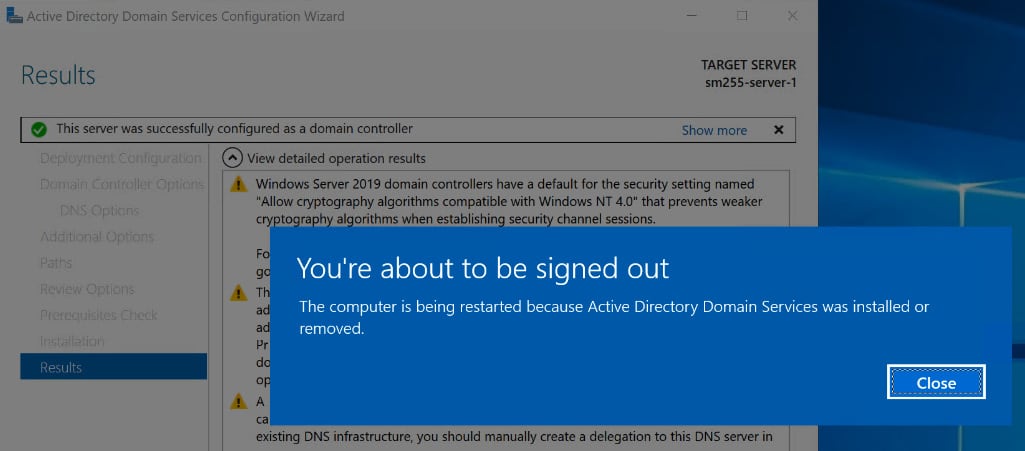
Figure 1.26 – Installation progress screen
- From the login screen of the server, you will need to use the domain account for your user, not the local account; this will be in UPN format – that is,
UserName@domain.name:
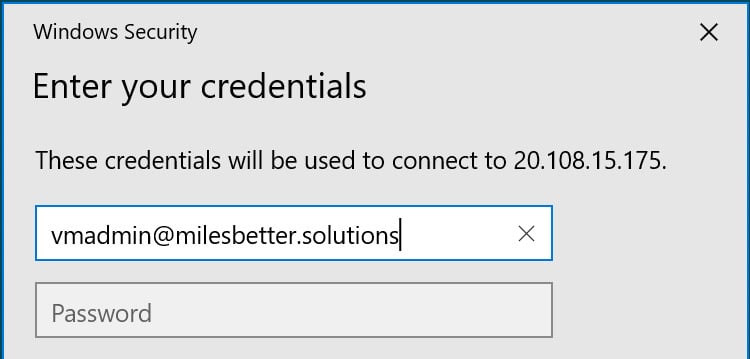
Figure 1.27 – Server login screen
- From Server Manager, you will see that the AD DS role has been installed, as well as the DNS:
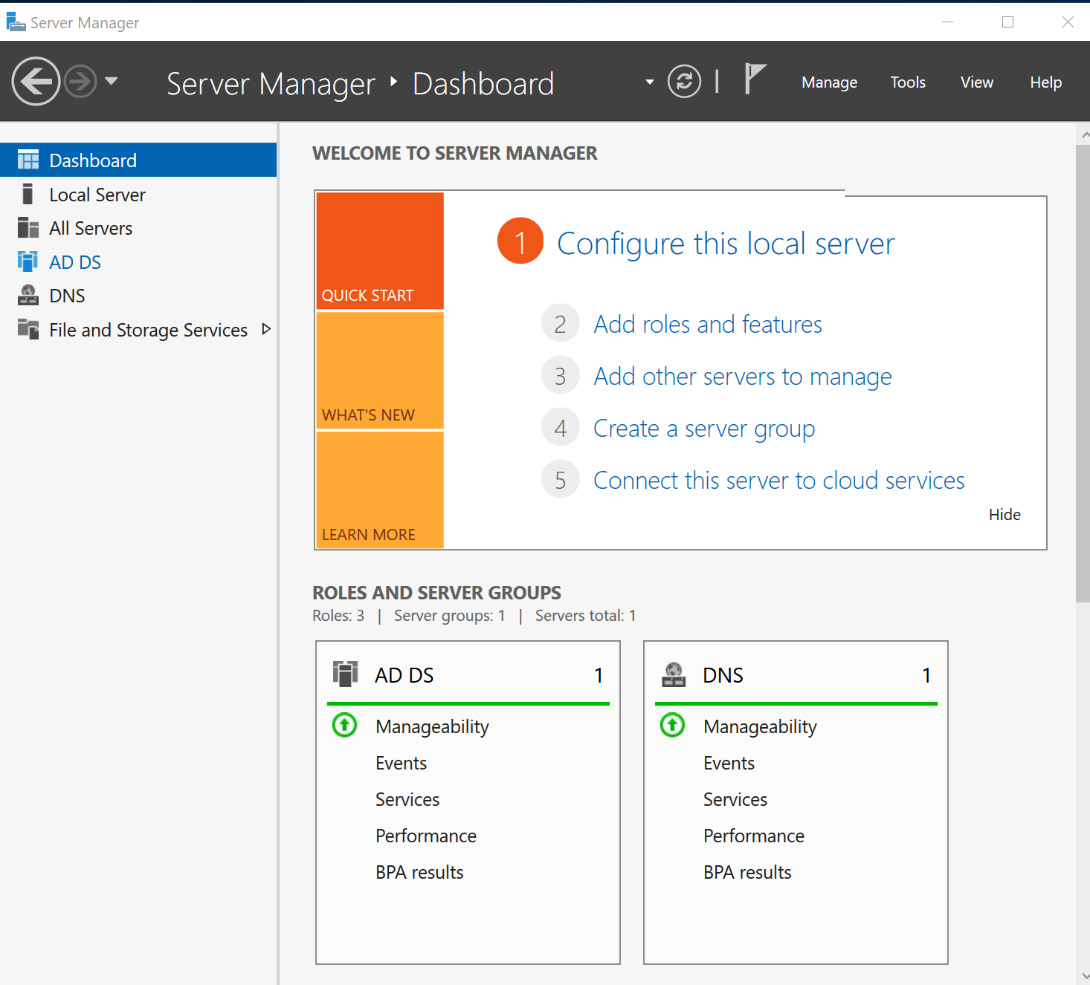
Figure 1.28 – Server Manager
- From Server Manager, click Tools, then Active Directory Administrative Center:

Figure 1.29 – AD Administrative Center
Congratulations! You have completed this exercise and installed AD DS on Windows Server.
In this exercise, you installed AD DS on Windows Server and accessed it via the ADAC. This helped you reinforce this chapter’s theory, along with some practical skills.
Now, let’s summarize this chapter.


