


Rigging the feet
You should already know the process for painting weights, but here it is again:
- As we did in the previous section, select the correct bones and mesh in weight paint mode.
- Set the weight and strength of the default brush you have to a desired amount (
1.0will do for now). - Hold and left-click over the mesh to begin painting weights onto it.
By following these steps, you should have something that looks like this:

Figure 5.3 – Initial toe weights
With your current brush, Draw, you will see that you paint hard lines; there’s a Blur brush we can use to give softer edges once we have laid down our weights. The Blur tool is great for making soft transitions between two bones; here is how to find it:
- Head to the left-hand side of Blender to find a small gray pull tab.
- Click this tab to reveal brushes you can use in Weight Paint Mode:
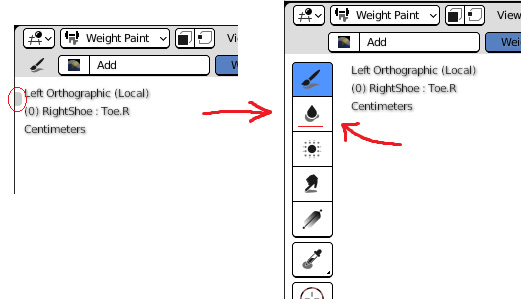
Figure 5.4 – Finding...


