Search icon CANCEL
Subscription
0
Cart icon
Your Cart (0 item)
Close icon
You have no products in your basket yet
Arrow left icon
Explore Products
Best Sellers
New Releases
Books
Videos
Audiobooks
Learning Hub
Free Learning
Arrow right icon
Arrow up icon
GO TO TOP
Squeaky Clean Topology in Blender

You're reading from   Squeaky Clean Topology in Blender Create accurate deformations and optimized geometry for characters and hard surface models

Arrow left icon
Product type Paperback
Published in Dec 2022
Publisher Packt
ISBN-13 9781803244082
Length 248 pages
Edition 1st Edition
Tools
Concepts
Arrow right icon
Author (1):
Arrow left icon
Michael Steppig Michael Steppig
Author Profile Icon Michael Steppig
Michael Steppig
Arrow right icon
View More author details
Toc

Table of Contents (13) Chapters Close

Preface 1. Part 1 – Getting Started with Modeling and Topology
2. Chapter 1: Navigating and Modeling in Blender FREE CHAPTER 3. Chapter 2: The Fundamentals of Topology 4. Chapter 3: Deforming Topology 5. Chapter 4: Improving Topology Using UV Maps 6. Part 2 – Using Topology to Create Appropriate Models
7. Chapter 5: Topology on a Humanoid Head 8. Chapter 6: Topology on a Humanoid Body 9. Chapter 7: Topology on a Hard Surface 10. Chapter 8: Optimizing Geometry for a Reduced Triangle Count 11. Index 12. Other Books You May Enjoy

Applying the bending and stretching deformation rule

In Figure 3.1, you can see an elbow joint. This is one of the most common joints modeled on a mesh being deformed by an armature. Deformation refers to the bending or stretching of a mesh and is used to describe any shifting of the mesh after the mesh is finished.
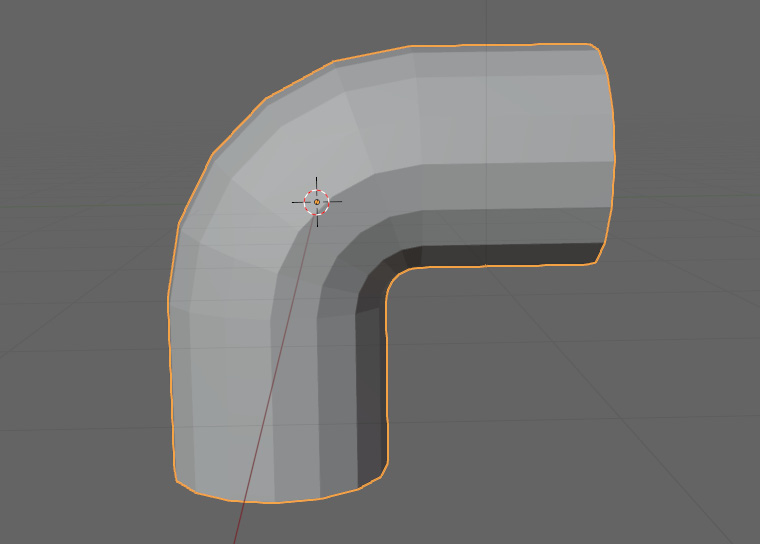
Figure 3.1 – An elbow joint

Figure 3.1 – An elbow joint

Our first deformation rule is that the edges of our grid need to be parallel to the axis of deformation. That is a bit of a mouthful, so we are going to break it down with a few examples. In Figure 3.2, we have a plane that has been bent around the y-axis.
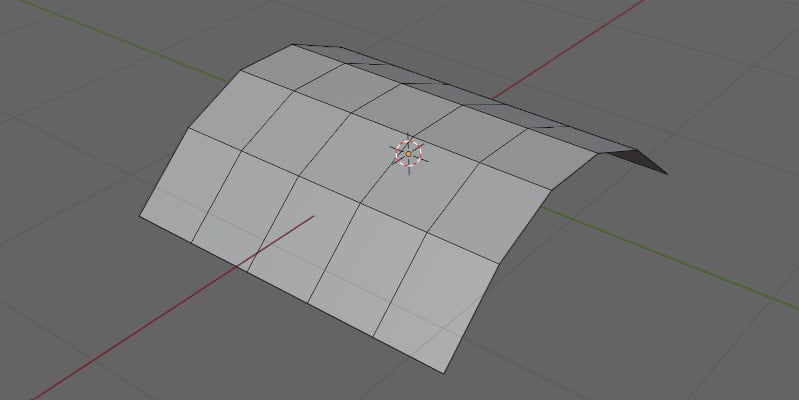
Figure 3.2 – A plane bent around the y-axis

Figure 3.2 – A plane bent around the y-axis

Go through the following steps to make this shape:

  1. First, start by pressing Shift + A.
  2. Add a plane from the mesh dropdown.
  3. Then, go into Edit Mode.
  4. Click on RMB, and select Subdivide.
  5. In the bottom left of the Viewport, the Subdivide tab will appear ...
lock icon The rest of the chapter is locked
Register for a free Packt account to unlock a world of extra content!
A free Packt account unlocks extra newsletters, articles, discounted offers, and much more. Start advancing your knowledge today.
Unlock this book and the full library FREE for 7 days
Get unlimited access to 7000+ expert-authored eBooks and videos courses covering every tech area you can think of
Renews at $19.99/month. Cancel anytime
Banner background image