Search icon CANCEL
Subscription
0
Cart icon
Your Cart (0 item)
Close icon
You have no products in your basket yet
Arrow left icon
Explore Products
Best Sellers
New Releases
Books
Events
Videos
Audiobooks
Packt Hub
Free Learning
Arrow right icon
timer SALE ENDS IN
0 Days
:
00 Hours
:
00 Minutes
:
00 Seconds
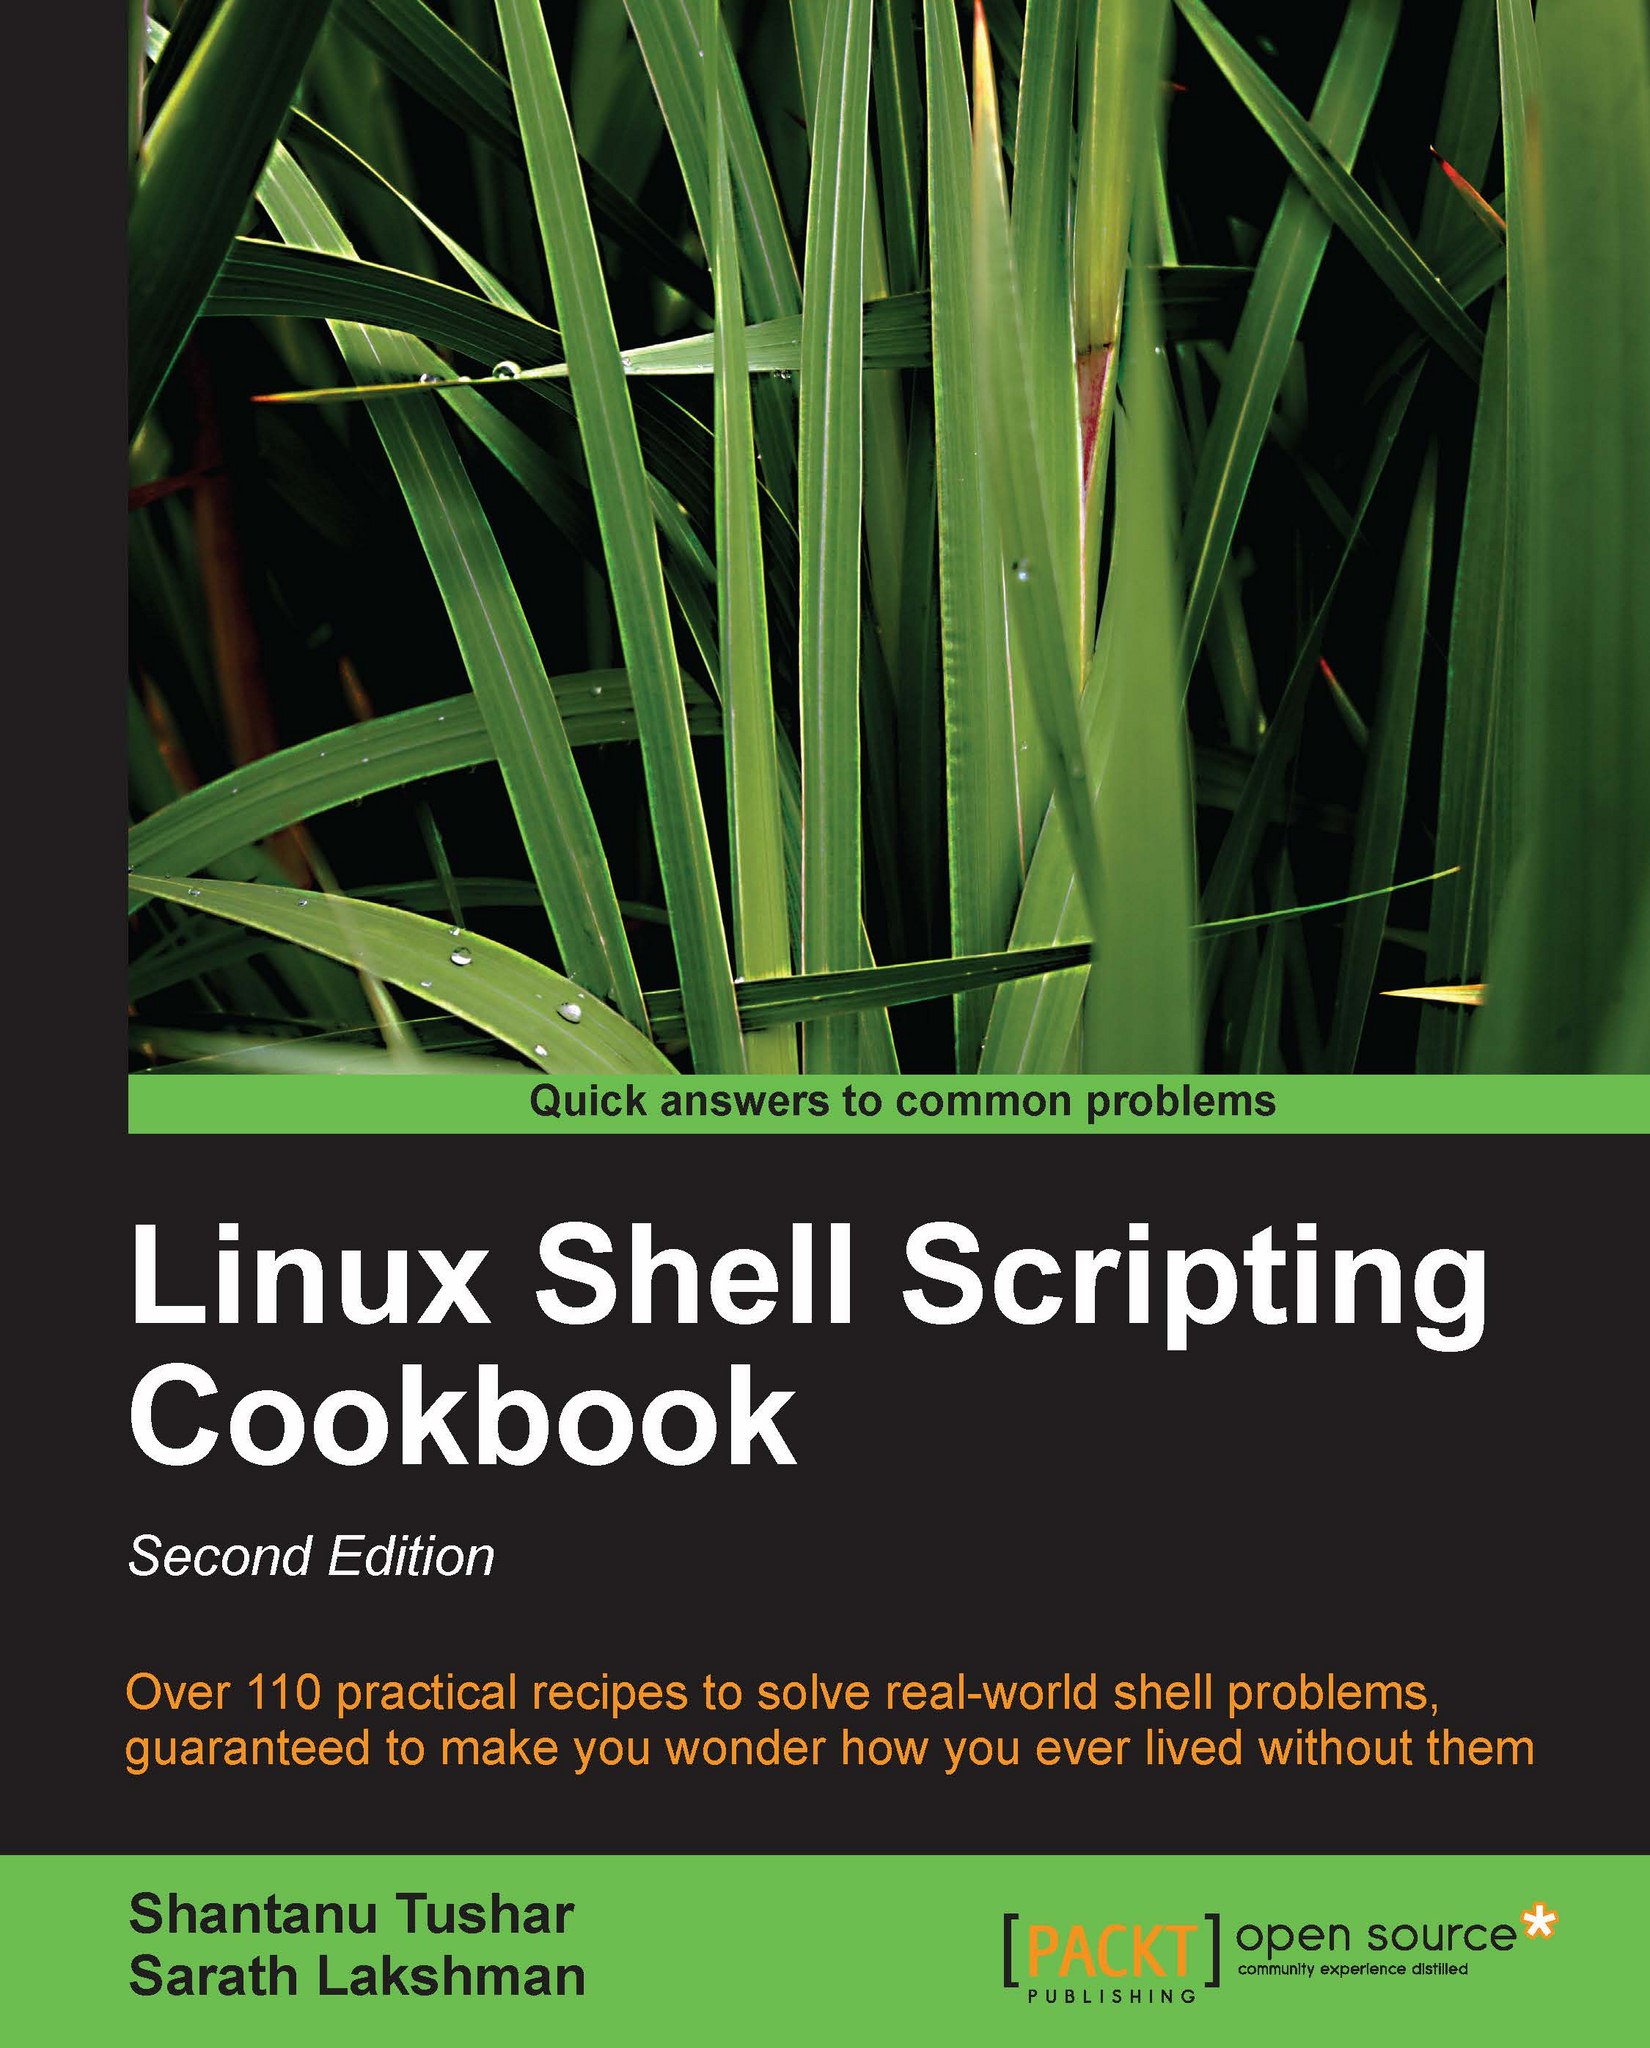
Linux Shell Scripting Cookbook, Second Edition

Linux Shell Scripting Cookbook, Second Edition: Don't neglect the shell – this book will empower you to use simple commands to perform complex tasks. Whether you're a casual or advanced Linux user, the cookbook approach makes it all so brilliantly accessible and, above all, useful. , Second Edition

Arrow left icon
Profile Icon Shantanu Tushar Profile Icon Sarath Lakshman
Arrow right icon
£38.99
Full star icon Full star icon Full star icon Full star icon Half star icon 4.3 (9 Ratings)
Paperback May 2013 384 pages 2nd Edition
eBook
£27.89 £30.99
Paperback
£38.99
Arrow left icon
Profile Icon Shantanu Tushar Profile Icon Sarath Lakshman
Arrow right icon
£38.99
Full star icon Full star icon Full star icon Full star icon Half star icon 4.3 (9 Ratings)
Paperback May 2013 384 pages 2nd Edition
eBook
£27.89 £30.99
Paperback
£38.99
eBook
£27.89 £30.99
Paperback
£38.99

What do you get with Print?

Product feature icon Instant access to your digital copy whilst your Print order is Shipped
Product feature icon Paperback book shipped to your preferred address
Product feature icon Redeem a companion digital copy on all Print orders
Product feature icon Access this title in our online reader with advanced features
Product feature icon DRM FREE - Read whenever, wherever and however you want
Modal Close icon
Payment Processing...
tick Completed

Shipping Address

Billing Address

Shipping Methods
Table of content icon View table of contents Preview book icon Preview Book

Linux Shell Scripting Cookbook, Second Edition

Chapter 1. Shell Something Out

In this chapter, we will cover:

  • Printing in the terminal

  • Playing with variables and environment variables

  • Function to prepend to environment variables

  • Math with the shell

  • Playing with file descriptors and redirection

  • Arrays and associative array

  • Visiting aliases

  • Grabbing information about the terminal

  • Getting and setting dates and delays

  • Debugging the script

  • Functions and arguments

  • Reading output of a sequence of commands in a variable

  • Reading n characters without pressing the return key

  • Running a command until it succeeds

  • Field separators and iterators

  • Comparisons and tests

Arrays and associative arrays

Arrays are a very important component for storing a collection of data as separate entities using indexes. Regular arrays can use only integers as their array index. On the other hand, Bash also supports associative arrays that can take a string as their array index. Associative arrays are very useful in many types of manipulations where having a string index makes more sense. In this recipe, we will see how to use both of these.

Getting ready

To use associate arrays, you must have Bash Version 4 or higher.

How to do it...

  1. An array can be defined in many ways. Define an array using a list of values in a line as follows:
    array_var=(1 2 3 4 5 6)
    #Values will be stored in consecutive locations starting from index 0.
    

    Alternately, define an array as a set of index-value pairs as follows:

    array_var[0]="test1"
    array_var[1]="test2"
    array_var[2]="test3"
    array_var[3]="test4"
    array_var[4]="test5"
    array_var[5]="test6"
    
  2. Print the contents of an array at a given index using the following commands:
    echo ${array_var[0]}
    test1
    index=5
    echo ${array_var[$index]}
    test6
    
  3. Print all of the values in an array as a list using the following commands:
    $ echo ${array_var[*]}
    test1 test2 test3 test4 test5 test6
    

    Alternately, you could use:

    $ echo ${array_var[@]}
    test1 test2 test3 test4 test5 test6
    
  4. Print the length of an array (the number of elements in an array) as follows:
    $ echo ${#array_var[*]}
    6
    

There's more...

Associative arrays have been introduced to Bash from Version 4.0 and they are useful entities to solve many problems using the hashing technique. Let us go into more detail.

Defining associative arrays

In an associative array, we can use any text data as an array index. Initially, a declaration statement is required to declare a variable name as an associative array. This can be done as follows:

$ declare -A ass_array

After the declaration, elements can be added to the associative array using two methods as follows:

  • By using inline index-value list method, we can provide a list of index-value pairs:
    $ ass_array=([index1]=val1 [index2]=val2)
    
  • Alternately, you could use separate index-value assignments:
    $ ass_array[index1]=val1
    $ ass_array'index2]=val2
    

For example, consider the assignment of price for fruits using an associative array:

$ declare -A fruits_value
$ fruits_value=([apple]='100dollars' [orange]='150 dollars')

Display the content of an array as follows:

$ echo "Apple costs ${fruits_value[apple]}"
Apple costs 100 dollars

Listing of array indexes

Arrays have indexes for indexing each of the elements. Ordinary and associative arrays differ in terms of index type. We can obtain the list of indexes in an array as follows:

$ echo ${!array_var[*]}

Or, we can also use:

$ echo ${!array_var[@]

In the previous fruits_value array example, consider the following command:

$ echo ${!fruits_value[*]}
orange apple

This will work for ordinary arrays too.

Visiting aliases

An alias is basically a shortcut that takes the place of typing a long-command sequence. In this recipe, we will see how to create aliases using the alias command.

How to do it...

There are various operations you can perform on aliases, these are as follows:

  1. An alias can be created as follows:
    $ alias new_command='command sequence'
    

    Giving a shortcut to the install command, apt-get install, can be done as follows:

    $ alias install='sudo apt-get install'
    

    Therefore, we can use install pidgin instead of sudo apt-get install pidgin.

  2. The alias command is temporary; aliasing exists until we close the current terminal only. To keep these shortcuts permanent, add this statement to the ~/.bashrc file. Commands in ~/.bashrc are always executed when a new shell process is spawned:
    $ echo 'alias cmd="command seq"' >> ~/.bashrc
    
  3. To remove an alias, remove its entry from ~/.bashrc (if any) or use the unalias command. Alternatively, alias example= should unset the alias named example.
  4. As an example, we can create an alias for rm so that it will delete the original and keep a copy in a backup directory:
    alias rm='cp $@ ~/backup && rm $@'
    

Note

When you create an alias, if the item being aliased already exists, it will be replaced by this newly aliased command for that user.

There's more...

There are situations when aliasing can also be a security breach. See how to identify them.

Escaping aliases

The alias command can be used to alias any important command, and you may not always want to run the command using the alias. We can ignore any aliases currently defined by escaping the command we want to run. For example:

$ \command

The \ character escapes the command, running it without any aliased changes. While running privileged commands on an untrusted environment, it is always good security practice to ignore aliases by prefixing the command with \. The attacker might have aliased the privileged command with his/her own custom command to steal the critical information that is provided by the user to the command.

Grabbing information about the terminal

While writing command-line shell scripts, we will often need to heavily manipulate information about the current terminal, such as the number of columns, rows, cursor positions, masked password fields, and so on. This recipe helps in collecting and manipulating terminal settings.

Getting ready

tput and stty are utilities that can be used for terminal manipulations. Let us see how to use them to perform different tasks.

How to do it...

There are specific information you can gather about the terminal as shown in the following list:

  • Get the number of columns and rows in a terminal by using the following commands:
    tput cols
    tput lines
    
  • To print the current terminal name, use the following command:
    tput longname
    
  • To move the cursor to a 100,100 position, you can enter:
    tput cup 100 100
    
  • Set the background color for the terminal using the following command:
    tputsetb n
    

    n can be a value in the range of 0 to 7.

  • Set the foreground color for text by using the following command:
    tputsetf n
    

    n can be a value in the range of 0 to 7.

  • To make text bold use this:
    tput bold
    
  • To start and end underlining use this:
    tput smul
    tput rmul
    
  • To delete from the cursor to the end of the line use the following command:
    tputed
    
  • While typing a password, we should not display the characters typed. In the following example, we will see how to do it using stty:
    #!/bin/sh
    #Filename: password.sh
    echo -e "Enter password: "
    stty -echo
    read password
    stty echo
    echo
    echo Password read.
    

    Note

    The -echo option in the preceding command disables the output to the terminal, whereas echo enables output.

Getting and setting dates and delays

Many applications require printing dates in different formats, setting date and time, and performing manipulations based on date and time. Delays are commonly used to provide a wait time (such as 1 second) during the program execution. Scripting contexts, such as monitoring a task every 5 seconds, demands the understanding of writing delays in a program. This recipe will show you how to work with dates and time delays.

Getting ready

Dates can be printed in variety of formats. We can also set dates from the command line. In Unix-like systems, dates are stored as an integer, which denotes the number of seconds since 1970-01-01 00:00:00 UTC. This is called epoch or Unix time . Let us see how to read dates and set them.

How to do it...

It is possible to read the dates in different formats and also to set the date. This can be accomplished with these steps:

  1. You can read the date as follows:
    $ date
    Thu May 20 23:09:04 IST 2010
    
  2. The epoch time can be printed as follows:
    $ date +%s
    1290047248
    

    We can find out epoch from a given formatted date string. You can use dates in multiple date formats as input. Usually, you don't need to bother about the date string format that you use if you are collecting the date from a system log or any standard application generated output. Convert the date string into epoch as follows:

    $ date --date "Thu Nov 18 08:07:21 IST 2010" +%s
    1290047841
    

    The --date option is used to provide a date string as input. However, we can use any date formatting options to print the output. Feeding the input date from a string can be used to find out the weekday, given the date.

    For example:

    $ date --date "Jan 20 2001" +%A
    Saturday
    

    The date format strings are listed in the table mentioned in the How it works… section:

  3. Use a combination of format strings prefixed with + as an argument for the date command to print the date in the format of your choice. For example:
    $ date "+%d %B %Y"
    20 May 2010
    
  4. We can set the date and time as follows:
    # date -s "Formatted date string"
    

    For example:

    # date -s "21 June 2009 11:01:22"
    
  5. Sometimes we need to check the time taken by a set of commands. We can display it using the following code:
    #!/bin/bash
    #Filename: time_take.sh
    start=$(date +%s)
    commands;
    statements;
    
    end=$(date +%s)
    difference=$(( end - start))
    echo Time taken to execute commands is $difference seconds.

Note

An alternate method would be to use time <scriptpath> to get the time that it took to execute the script.

How it works...

While considering dates and time, epoch is defined as the number of seconds that have elapsed since midnight proleptic Coordinated Universal Time (UTC) of January 1, 1970, not counting leap seconds. Epoch time is very useful when you need to calculate the difference between two dates or time. You may find out the epoch times for two given timestamps and take the difference between the epoch values. Therefore, you can find out the total number of seconds between two dates.

To write a date format to get the output as required, use the following table:

Date component

Format

Weekday

%a (for example, Sat)

%A (for example, Saturday)

Month

%b (for example, Nov)

%B (for example, November)

Day

%d (for example, 31)

Date in format (mm/dd/yy)

%D (for example, 10/18/10)

Year

%y (for example, 10)

%Y (for example, 2010)

Hour

%I or %H (For example, 08)

Minute

%M (for example, 33)

Second

%S (for example, 10)

Nano second

%N (for example, 695208515)

Epoch Unix time in seconds

%s (for example, 1290049486)

There's more...

Producing time intervals is very essential when writing monitoring scripts that execute in a loop. Let us see how to generate time delays.

Producing delays in a script

To delay execution in a script for a particular period of time, use sleep:$ sleepno_of_seconds. For example, the following script counts from 0 to 40 by using tput and sleep:

#!/bin/bash
#Filename: sleep.sh
echo -n Count:
tput sc

count=0;
while true;
do
    if [ $count -lt 40 ];
    then
        let count++;
        sleep 1;
        tput rc
        tput ed
        echo -n $count;
    else exit 0;
    fi
done

In the preceding example, a variable count is initialized to 0 and is incremented on every loop execution. The echo statement prints the text. We use tput sc to store the cursor position. On every loop execution we write the new count in the terminal by restoring the cursor position for the number. The cursor position is restored using tput rc. This clears text from the current cursor position to the end of the line, so that the older number can be cleared and the count can be written. A delay of 1 second is provided in the loop by using the sleep command.

Debugging the script

Debugging is one of the critical features that every programming language should implement to produce race-back information when something unexpected happens. Debugging information can be used to read and understand what caused the program to crash or to act in an unexpected fashion. Bash provides certain debugging options that every sysadmin should know. This recipe shows how to use these.

How to do it...

We can either use Bash's inbuilt debugging tools or write our scripts in such a manner that they become easy to debug, here's how:

  1. Add the -x option to enable debug tracing of a shell script as follows:
    $ bash -x script.sh
    

    Running the script with the -x flag will print each source line with the current status. Note that you can also use sh -x script.

  2. Debug only portions of the script using set -x and set +x. For example:
    #!/bin/bash
    #Filename: debug.sh
    for i in {1..6};
    do
        set -x
        echo $i
        set +x
    done
    echo "Script executed"

    In the preceding script, the debug information for echo $i will only be printed, as debugging is restricted to that section using -x and +x.

  3. The aforementioned debugging methods are provided by Bash built-ins. But they always produce debugging information in a fixed format. In many cases, we need debugging information in our own format. We can set up such a debugging style by passing the _DEBUG environment variable.

    Look at the following example code:

    #!/bin/bash
    function DEBUG()
    {
        [ "$_DEBUG" == "on" ] && $@ || :
    }
    for i in {1..10}
    do
        DEBUG echo $i
    done

    We can run the above script with debugging set to "on" as follows:

    $ _DEBUG=on ./script.sh
    

    We prefix DEBUG before every statement where debug information is to be printed. If _DEBUG=on is not passed to the script, debug information will not be printed. In Bash, the command : tells the shell to do nothing.

How it works...

The -x flag outputs every line of script as it is executed to stdout. However, we may require only some portions of the source lines to be observed such that commands and arguments are to be printed at certain portions. In such conditions we can use set builtin to enable and disable debug printing within the script.

  • set -x: This displays arguments and commands upon their execution
  • set +x: This disables debugging
  • set -v: This displays input when they are read
  • set +v: This disables printing input

There's more...

We can also use other convenient ways to debug scripts. We can make use of shebang in a trickier way to debug scripts.

Shebang hack

The shebang can be changed from #!/bin/bash to #!/bin/bash -xv to enable debugging without any additional flags (-xv flags themselves).

Functions and arguments

Like any other scripting languages, Bash also supports functions. Let us see how to define and use functions.

How to do it...

We can create functions to perform tasks and we can also create functions that take parameters (also called arguments) as you can see in the following steps:

  1. A function can be defined as follows:
    function fname()
    {
        statements;
    }
    Or alternately,
    fname()
    {
        statements;
    }
  2. A function can be invoked just by using its name:
    $ fname ; # executes function
    
  3. Arguments can be passed to functions and can be accessed by our script:
    fname arg1 arg2 ; # passing args
    

    Following is the definition of the function fname. In the fname function, we have included various ways of accessing the function arguments.

    fname()
    {
      echo $1, $2; #Accessing arg1 and arg2
      echo "$@"; # Printing all arguments as list at once
      echo "$*"; # Similar to $@, but arguments taken as single entity
      return 0; # Return value
    }

    Similarly, arguments can be passed to scripts and can be accessed by script:$0 (the name of the script):

    • $1 is the first argument
    • $2 is the second argument
    • $n is the nth argument
    • "$@"expands as "$1" "$2" "$3" and so on
    • "$*" expands as "$1c$2c$3", where c is the first character of IFS
    • "$@" is used more often than "$*"since the former provides all arguments as a single string

There's more...

Let us explore through more tips on Bash functions.

The recursive function

Functions in Bash also support recursion (the function that can call itself). For example, F() { echo $1; F hello; sleep 1; }.

Tip

Fork bomb

We can write a recursive function, which is basically a function that calls itself:

:(){ :|:& };:

It infinitely spawns processes and ends up in a denial-of-service attack. & is postfixed with the function call to bring the subprocess into the background. This is a dangerous code as it forks processes and, therefore, it is called a fork bomb.

You may find it difficult to interpret the preceding code. See the Wikipedia page http://en.wikipedia.org/wiki/Fork_bomb for more details and interpretation of the fork bomb.

It can be prevented by restricting the maximum number of processes that can be spawned from the config file at /etc/security/limits.conf.

Exporting functions

A function can be exported—like environment variables—using export, such that the scope of the function can be extended to subprocesses, as follows:

export -f fname

Reading the return value (status) of a command

We can get the return value of a command or function in the following way:

cmd; 
echo $?;

$? will give the return value of the command cmd.

The return value is called exit status . It can be used to analyze whether a command completed its execution successfully or unsuccessfully. If the command exits successfully, the exit status will be zero, otherwise it will be a nonzero value.

We can check whether a command terminated successfully or not by using the following script:

#!/bin/bash
#Filename: success_test.sh
CMD="command" #Substitute with command for which you need to test the exit status
$CMD
if [ $? -eq 0 ];
then
    echo "$CMD executed successfully"
else
    echo "$CMD terminated unsuccessfully"
fi

Passing arguments to commands

Arguments to commands can be passed in different formats. Suppose -p and-v are the options available and -k N is another option that takes a number. Also, the command takes a filename as argument. It can be executed in multiple ways as shown:

  • $ command -p -v -k 1 file
  • $ command -pv -k 1 file
  • $ command -vpk 1 file
  • $ command file -pvk 1

Reading the output of a sequence of commands in a variable

One of the best-designed features of shell scripting is the ease of combining many commands or utilities to produce output. The output of one command can appear as the input of another, which passes its output to another command, and so on. The output of this combination can be read in a variable. This recipe illustrates how to combine multiple commands and how its output can be read.

Getting ready

Input is usually fed into a command through stdin or arguments. Output appears as stderr or stdout. While we combine multiple commands, we usually use stdin to give input and stdout to provide an output.

In this context, the commands are called filters . We connect each filter using pipes, the piping operator being |. An example is as follows:

$ cmd1 | cmd2 | cmd3 

Here we combine three commands. The output of cmd1 goes to cmd2 and output of cmd2 goes to cmd3 and the final output (which comes out of cmd3) will be printed, or it can be directed to a file.

How to do it...

We typically use pipes and use them with the subshell method for combining outputs of multiple files. Here's how:

  1. Let us start with combining two commands:
    $ ls | cat -n > out.txt
    

    Here the output of ls (the listing of the current directory) is passed to cat –n, which in turn puts line numbers to the input received through stdin. Therefore, its output is redirected to the out.txt file.

  2. We can read the output of a sequence of commands combined by pipes as follows:
    cmd_output=$(COMMANDS)

    This is called subshell method . For example:

    cmd_output=$(ls | cat -n)
    echo $cmd_output
    

    Another method, called back quotes (some people also refer to it as back tick ) can also be used to store the command output as follows:

    cmd_output=`COMMANDS`
    

    For example:

    cmd_output=`ls | cat -n`
    echo $cmd_output
    

    Back quote is different from the single-quote character. It is the character on the ~ button in the keyboard.

There's more...

There are multiple ways of grouping commands. Let us go through a few of them.

Spawning a separate process with subshell

Subshells are separate processes. A subshell can be defined using the ( )operators as follows:

pwd;
(cd /bin; ls);
pwd;

When some commands are executed in a subshell, none of the changes occur in the current shell; changes are restricted to the subshell. For example, when the current directory in a subshell is changed using the cd command, the directory change is not reflected in the main shell environment.

The pwd command prints the path of the working directory.

The cd command changes the current directory to the given directory path.

Subshell quoting to preserve spacing and the newline character

Suppose we are reading the output of a command to a variable using a subshell or the back quotes method. We always quote them in double quotes to preserve the spacing and newline character (\n). For example:

$ cat text.txt
1
2
3

$ out=$(cat text.txt)
$ echo $out
1 2 3 # Lost \n spacing in 1,2,3 

$ out="$(cat tex.txt)"
$ echo$out
1
2
3

Reading n characters without pressing the return key

read is an important Bash command to read text from the keyboard or standard input. We can use read to interactively read an input from the user, but read is capable of much more. Most of the input libraries in any programming language read the input from the keyboard; but string input termination is done when return is pressed. There are certain critical situations when return cannot be pressed, but the termination is done based on a number of characters or a single character. For example, in a game, a ball is moved upward when + is pressed. Pressing + and then pressing return every time to acknowledge the + press is not efficient. In this recipe we will use the read command that provides a way to accomplish this task without having to press return.

How to do it...

You can use various options of the read command to obtain different results as shown in the following steps:

  1. The following statement will read n characters from input into the variable_name variable:
    read -n number_of_chars variable_name
    

    For example:

    $ read -n 2 var
    $ echo $var
    
  2. Read a password in the nonechoed mode as follows:
    read -s var
    
  3. Display a message with read using:
    read -p "Enter input:"  var
    
  4. Read the input after a timeout as follows:
    read -t timeout var
    

    For example:

    $ read -t 2 var
    #Read the string that is typed within 2 seconds into variable var.
    
  5. Use a delimiter character to end the input line as follows:
    read -d delim_char var
    

    For example:

    $ read -d ":" var
    hello:#var is set to hello
    

Running a command until it succeeds

When using your shell for everyday tasks, there will be cases where a command might succeed only after some conditions are met, or the operation depends on an external event (such as a file being available to download). In such cases, one might want to run a command repeatedly until it succeeds.

How to do it...

Define a function in the following way:

repeat()
{
  while true
  do
    $@ && return
  done
}

Or, add this to your shell's rc file for ease of use:

repeat() { while true; do $@ && return; done }

How it works...

We create a function called repeat that has an infinite while loop, which attempts to run the command passed as a parameter (accessed by $@) to the function. It then returns if the command was successful, thereby exiting the loop.

There's more...

We saw a basic way to run commands until they succeed. Let us see what we can do to make things more efficient.

A faster approach

On most modern systems, true is implemented as a binary in /bin. This means that each time the aforementioned while loop runs, the shell has to spawn a process. To avoid this, we can use the : shell built-in, which always returns an exit code 0:

repeat() { while :; do $@ && return; done }

Though not as readable, this is certainly faster than the first approach.

Adding a delay

Let's say you are using repeat() to download a file from the Internet which is not available right now, but will be after some time. An example would be:

repeat wget -c http://www.example.com/software-0.1.tar.gz

In the current form, we will be sending too much traffic to the web server at www.example.com, which causes problems to the server (and maybe even to you, if say the server blacklists your IP for spam). To solve this, we can modify the function and add a small delay as follows:

repeat() { while :; do $@ && return; sleep 30; done }

This will cause the command to run every 30 seconds.

Field separators and iterators

The internal field separator (IFS) is an important concept in shell scripting. It is very useful while manipulating text data. We will now discuss delimiters that separate different data elements from single data stream. An internal field separator is a delimiter for a special purpose. An internal field separator is an environment variable that stores delimiting characters. It is the default delimiter string used by a running shell environment.

Consider the case where we need to iterate through words in a string or comma separated values (CSV). In the first case we will use IFS=" " and in the second, IFS=",". Let us see how to do it.

Getting ready

Consider the case of CSV data:

data="name,sex,rollno,location"
To read each of the item in a variable, we can use IFS.
oldIFS=$IFS
IFS=, now,
for item in $data;
do
    echo Item: $item
done

IFS=$oldIFS

The output is as follows:

Item: name
Item: sex
Item: rollno
Item: location

The default value of IFS is a space component (newline, tab, or a space character).

When IFS is set as , the shell interprets the comma as a delimiter character, therefore, the $item variable takes substrings separated by a comma as its value during the iteration.

If IFS is not set as , then it would print the entire data as a single string.

How to do it...

Let us go through another example usage of IFS by taking the /etc/passwd file into consideration. In the /etc/passwd file, every line contains items delimited by ":". Each line in the file corresponds to an attribute related to a user.

Consider the input: root:x:0:0:root:/root:/bin/bash. The last entry on each line specifies the default shell for the user. To print users and their default shells, we can use the IFS hack as follows:

#!/bin/bash
#Desc: Illustration of IFS
line="root:x:0:0:root:/root:/bin/bash" 
oldIFS=$IFS;
IFS=":"
count=0
for item in $line;
do

     [ $count -eq 0 ]  && user=$item;
     [ $count -eq 6 ]  && shell=$item;
    let count++
done;
IFS=$oldIFS
echo $user\'s shell is $shell;

The output will be:

root's shell is /bin/bash

Loops are very useful in iterating through a sequence of values. Bash provides many types of loops. Let us see how to use them:

  • Using a for loop:
    for var in list;
    do
        commands; # use $var
    done
    list can be a string, or a sequence.

    We can generate different sequences easily.

    echo {1..50}can generate a list of numbers from 1 to 50. echo {a..z}or{A..Z} or {a..h} can generate lists of alphabets. Also, by combining these we can concatenate data.

    In the following code, in each iteration, the variable i will hold a character in the range a to z:

    for i in {a..z}; do actions; done;

    The for loop can also take the format of the for loop in C. For example:

    for((i=0;i<10;i++))
    {
        commands; # Use $i
    }
  • Using a while loop:
    while condition
    do
        commands;
    done

    For an infinite loop, use true as the condition.

  • Using a until loop:

    A special loop called until is available with Bash. This executes the loop until the given condition becomes true. For example:

    x=0;
    until [ $x -eq 9 ]; # [ $x -eq 9 ] is the condition
    do
        let x++; echo $x;
    done

Comparisons and tests

Flow control in a program is handled by comparison and test statements. Bash also comes with several options to perform tests that are compatible with the Unix system-level features. We can use if, if else, and logical operators to perform tests and certain comparison operators to compare data items. There is also a command called test available to perform tests. Let us see how to use these.

How to do it...

We will have a look at all the different methods used for comparisons and performing tests:

  • Using an if condition:
    if condition;
    then
        commands;
    fi
  • Using else if and else:
    if condition; 
    then
        commands;
    else if condition; then
        commands;
    else
        commands;
    fi

    Note

    Nesting is also possible with if and else. The if conditions can be lengthy, to make them shorter we can use logical operators as follows:

    • [ condition ] && action; # action executes if the condition is true
    • [ condition ] || action; # action executes if the condition is false

    && is the logical AND operation and || is the logical OR operation. This is a very helpful trick while writing Bash scripts.

  • Performing mathematical comparisons: Usually conditions are enclosed in square brackets []. Note that there is a space between [ or ] and operands. It will show an error if no space is provided. An example is as follows:
    [$var -eq 0 ] or [ $var -eq 0]

    Performing mathematical conditions over variables or values can be done as follows:

    [ $var -eq 0 ]  # It returns true when $var equal to 0.
    [ $var -ne 0 ] # It returns true when $var is not equal to 0

    Other important operators are as follows:

    • -gt: Greater than
    • -lt: Less than
    • -ge: Greater than or equal to
    • -le: Less than or equal to

    Multiple test conditions can be combined as follows:

    [ $var1 -ne 0 -a $var2 -gt 2 ]  # using and -a
    [ $var1 -ne 0 -o var2 -gt 2 ] # OR -o
  • Filesystem related tests: We can test different filesystem-related attributes using different condition flags as follows:
    • [ -f $file_var ]: This returns true if the given variable holds a regular file path or filename
    • [ -x $var ]: This returns true if the given variable holds a file path or filename that is executable
    • [ -d $var ]: This returns true if the given variable holds a directory path or directory name
    • [ -e $var ]: This returns true if the given variable holds an existing file
    • [ -c $var ]: This returns true if the given variable holds the path of a character device file
    • [ -b $var ]: This returns true if the given variable holds the path of a block device file
    • [ -w $var ]: This returns true if the given variable holds the path of a file that is writable
    • [ -r $var ]: This returns true if the given variable holds the path of a file that is readable
    • [ -L $var ]: This returns true if the given variable holds the path of a symlink

    An example of the usage is as follows:

    fpath="/etc/passwd"
    if [ -e $fpath ]; then
        echo File exists; 
    else
        echo Does not exist; 
    fi
  • String comparisons: While using string comparison, it is best to use double square brackets, since the use of single brackets can sometimes lead to errors.

    Two strings can be compared to check whether they are the same in the following manner:

    • [[ $str1 = $str2 ]]: This returns true when str1 equals str2, that is, the text contents of str1 and str2 are the same
    • [[ $str1 == $str2 ]]: It is an alternative method for string equality check

    We can check whether two strings are not the same as follows:

    • [[ $str1 != $str2 ]]: This returns true when str1 and str2 mismatch

    We can find out the alphabetically smaller or larger string as follows:

    • [[ $str1 > $str2 ]]: This returns true when str1 is alphabetically greater than str2
    • [[ $str1 < $str2 ]]: This returns true when str1 is alphabetically lesser than str2

      Note

      Note that a space is provided after and before =, if it is not provided, it is not a comparison, but it becomes an assignment statement.

    • [[ -z $str1 ]]: This returns true if str1 holds an empty string
    • [[ -n $str1 ]]: This returns true if str1 holds a nonempty string

    It is easier to combine multiple conditions using logical operators such as && and || in the following code:

    if [[ -n $str1 ]] && [[ -z $str2 ]] ;
    then
        commands;
    fi

    For example:

    str1="Not empty "
    str2=""
    if [[ -n $str1 ]] && [[ -z $str2 ]];
    then
        echo str1 is nonempty and str2 is empty string.
    fi

    Output:

    str1 is nonempty and str2 is empty string.

The test command can be used for performing condition checks. It helps to avoid usage of many braces. The same set of test conditions enclosed within [] can be used for the test command.

For example:

if  [ $var -eq 0 ]; then echo "True"; fi
can be written as
if  test $var -eq 0 ; then echo "True"; fi

Functions and arguments


Like any other scripting languages, Bash also supports functions. Let us see how to define and use functions.

How to do it...

We can create functions to perform tasks and we can also create functions that take parameters (also called arguments) as you can see in the following steps:

  1. A function can be defined as follows:

    function fname()
    {
        statements;
    }
    Or alternately,
    fname()
    {
        statements;
    }
  2. A function can be invoked just by using its name:

    $ fname ; # executes function
    
  3. Arguments can be passed to functions and can be accessed by our script:

    fname arg1 arg2 ; # passing args
    

    Following is the definition of the function fname. In the fname function, we have included various ways of accessing the function arguments.

    fname()
    {
      echo $1, $2; #Accessing arg1 and arg2
      echo "$@"; # Printing all arguments as list at once
      echo "$*"; # Similar to $@, but arguments taken as single entity
      return 0; # Return value
    }

    Similarly, arguments can be passed to scripts and can be accessed by script:$0 (the name of the script):

    • $1 is the first argument

    • $2 is the second argument

    • $n is the nth argument

    • "$@"expands as "$1" "$2" "$3" and so on

    • "$*" expands as "$1c$2c$3", where c is the first character of IFS

    • "$@" is used more often than "$*"since the former provides all arguments as a single string

There's more...

Let us explore through more tips on Bash functions.

The recursive function

Functions in Bash also support recursion (the function that can call itself). For example, F() { echo $1; F hello; sleep 1; }.

Tip

Fork bomb

We can write a recursive function, which is basically a function that calls itself:

:(){ :|:& };:

It infinitely spawns processes and ends up in a denial-of-service attack. & is postfixed with the function call to bring the subprocess into the background. This is a dangerous code as it forks processes and, therefore, it is called a fork bomb.

You may find it difficult to interpret the preceding code. See the Wikipedia page http://en.wikipedia.org/wiki/Fork_bomb for more details and interpretation of the fork bomb.

It can be prevented by restricting the maximum number of processes that can be spawned from the config file at /etc/security/limits.conf.

Exporting functions

A function can be exported—like environment variables—using export, such that the scope of the function can be extended to subprocesses, as follows:

export -f fname

Reading the return value (status) of a command

We can get the return value of a command or function in the following way:

cmd; 
echo $?;

$? will give the return value of the command cmd.

The return value is called exit status . It can be used to analyze whether a command completed its execution successfully or unsuccessfully. If the command exits successfully, the exit status will be zero, otherwise it will be a nonzero value.

We can check whether a command terminated successfully or not by using the following script:

#!/bin/bash
#Filename: success_test.sh
CMD="command" #Substitute with command for which you need to test the exit status
$CMD
if [ $? -eq 0 ];
then
    echo "$CMD executed successfully"
else
    echo "$CMD terminated unsuccessfully"
fi

Passing arguments to commands

Arguments to commands can be passed in different formats. Suppose -p and-v are the options available and -k N is another option that takes a number. Also, the command takes a filename as argument. It can be executed in multiple ways as shown:

  • $ command -p -v -k 1 file

  • $ command -pv -k 1 file

  • $ command -vpk 1 file

  • $ command file -pvk 1

Reading the output of a sequence of commands in a variable


One of the best-designed features of shell scripting is the ease of combining many commands or utilities to produce output. The output of one command can appear as the input of another, which passes its output to another command, and so on. The output of this combination can be read in a variable. This recipe illustrates how to combine multiple commands and how its output can be read.

Getting ready

Input is usually fed into a command through stdin or arguments. Output appears as stderr or stdout. While we combine multiple commands, we usually use stdin to give input and stdout to provide an output.

In this context, the commands are called filters . We connect each filter using pipes, the piping operator being |. An example is as follows:

$ cmd1 | cmd2 | cmd3 

Here we combine three commands. The output of cmd1 goes to cmd2 and output of cmd2 goes to cmd3 and the final output (which comes out of cmd3) will be printed, or it can be directed to a file.

How to do it...

We typically use pipes and use them with the subshell method for combining outputs of multiple files. Here's how:

  1. Let us start with combining two commands:

    $ ls | cat -n > out.txt
    

    Here the output of ls (the listing of the current directory) is passed to cat –n, which in turn puts line numbers to the input received through stdin. Therefore, its output is redirected to the out.txt file.

  2. We can read the output of a sequence of commands combined by pipes as follows:

    cmd_output=$(COMMANDS)

    This is called subshell method . For example:

    cmd_output=$(ls | cat -n)
    echo $cmd_output
    

    Another method, called back quotes (some people also refer to it as back tick ) can also be used to store the command output as follows:

    cmd_output=`COMMANDS`
    

    For example:

    cmd_output=`ls | cat -n`
    echo $cmd_output
    

    Back quote is different from the single-quote character. It is the character on the ~ button in the keyboard.

There's more...

There are multiple ways of grouping commands. Let us go through a few of them.

Spawning a separate process with subshell

Subshells are separate processes. A subshell can be defined using the ( )operators as follows:

pwd;
(cd /bin; ls);
pwd;

When some commands are executed in a subshell, none of the changes occur in the current shell; changes are restricted to the subshell. For example, when the current directory in a subshell is changed using the cd command, the directory change is not reflected in the main shell environment.

The pwd command prints the path of the working directory.

The cd command changes the current directory to the given directory path.

Subshell quoting to preserve spacing and the newline character

Suppose we are reading the output of a command to a variable using a subshell or the back quotes method. We always quote them in double quotes to preserve the spacing and newline character (\n). For example:

$ cat text.txt
1
2
3

$ out=$(cat text.txt)
$ echo $out
1 2 3 # Lost \n spacing in 1,2,3 

$ out="$(cat tex.txt)"
$ echo$out
1
2
3

Reading n characters without pressing the return key


read is an important Bash command to read text from the keyboard or standard input. We can use read to interactively read an input from the user, but read is capable of much more. Most of the input libraries in any programming language read the input from the keyboard; but string input termination is done when return is pressed. There are certain critical situations when return cannot be pressed, but the termination is done based on a number of characters or a single character. For example, in a game, a ball is moved upward when + is pressed. Pressing + and then pressing return every time to acknowledge the + press is not efficient. In this recipe we will use the read command that provides a way to accomplish this task without having to press return.

How to do it...

You can use various options of the read command to obtain different results as shown in the following steps:

  1. The following statement will read n characters from input into the variable_name variable:

    read -n number_of_chars variable_name
    

    For example:

    $ read -n 2 var
    $ echo $var
    
  2. Read a password in the nonechoed mode as follows:

    read -s var
    
  3. Display a message with read using:

    read -p "Enter input:"  var
    
  4. Read the input after a timeout as follows:

    read -t timeout var
    

    For example:

    $ read -t 2 var
    #Read the string that is typed within 2 seconds into variable var.
    
  5. Use a delimiter character to end the input line as follows:

    read -d delim_char var
    

    For example:

    $ read -d ":" var
    hello:#var is set to hello
    

Running a command until it succeeds


When using your shell for everyday tasks, there will be cases where a command might succeed only after some conditions are met, or the operation depends on an external event (such as a file being available to download). In such cases, one might want to run a command repeatedly until it succeeds.

How to do it...

Define a function in the following way:

repeat()
{
  while true
  do
    $@ && return
  done
}

Or, add this to your shell's rc file for ease of use:

repeat() { while true; do $@ && return; done }

How it works...

We create a function called repeat that has an infinite while loop, which attempts to run the command passed as a parameter (accessed by $@) to the function. It then returns if the command was successful, thereby exiting the loop.

There's more...

We saw a basic way to run commands until they succeed. Let us see what we can do to make things more efficient.

A faster approach

On most modern systems, true is implemented as a binary in /bin. This means that each time the aforementioned while loop runs, the shell has to spawn a process. To avoid this, we can use the : shell built-in, which always returns an exit code 0:

repeat() { while :; do $@ && return; done }

Though not as readable, this is certainly faster than the first approach.

Adding a delay

Let's say you are using repeat() to download a file from the Internet which is not available right now, but will be after some time. An example would be:

repeat wget -c http://www.example.com/software-0.1.tar.gz

In the current form, we will be sending too much traffic to the web server at www.example.com, which causes problems to the server (and maybe even to you, if say the server blacklists your IP for spam). To solve this, we can modify the function and add a small delay as follows:

repeat() { while :; do $@ && return; sleep 30; done }

This will cause the command to run every 30 seconds.

Field separators and iterators


The internal field separator (IFS) is an important concept in shell scripting. It is very useful while manipulating text data. We will now discuss delimiters that separate different data elements from single data stream. An internal field separator is a delimiter for a special purpose. An internal field separator is an environment variable that stores delimiting characters. It is the default delimiter string used by a running shell environment.

Consider the case where we need to iterate through words in a string or comma separated values (CSV). In the first case we will use IFS=" " and in the second, IFS=",". Let us see how to do it.

Getting ready

Consider the case of CSV data:

data="name,sex,rollno,location"
To read each of the item in a variable, we can use IFS.
oldIFS=$IFS
IFS=, now,
for item in $data;
do
    echo Item: $item
done

IFS=$oldIFS

The output is as follows:

Item: name
Item: sex
Item: rollno
Item: location

The default value of IFS is a space component (newline, tab, or a space character).

When IFS is set as , the shell interprets the comma as a delimiter character, therefore, the $item variable takes substrings separated by a comma as its value during the iteration.

If IFS is not set as , then it would print the entire data as a single string.

How to do it...

Let us go through another example usage of IFS by taking the /etc/passwd file into consideration. In the /etc/passwd file, every line contains items delimited by ":". Each line in the file corresponds to an attribute related to a user.

Consider the input: root:x:0:0:root:/root:/bin/bash. The last entry on each line specifies the default shell for the user. To print users and their default shells, we can use the IFS hack as follows:

#!/bin/bash
#Desc: Illustration of IFS
line="root:x:0:0:root:/root:/bin/bash" 
oldIFS=$IFS;
IFS=":"
count=0
for item in $line;
do

     [ $count -eq 0 ]  && user=$item;
     [ $count -eq 6 ]  && shell=$item;
    let count++
done;
IFS=$oldIFS
echo $user\'s shell is $shell;

The output will be:

root's shell is /bin/bash

Loops are very useful in iterating through a sequence of values. Bash provides many types of loops. Let us see how to use them:

  • Using a for loop:

    for var in list;
    do
        commands; # use $var
    done
    list can be a string, or a sequence.

    We can generate different sequences easily.

    echo {1..50}can generate a list of numbers from 1 to 50. echo {a..z}or{A..Z} or {a..h} can generate lists of alphabets. Also, by combining these we can concatenate data.

    In the following code, in each iteration, the variable i will hold a character in the range a to z:

    for i in {a..z}; do actions; done;

    The for loop can also take the format of the for loop in C. For example:

    for((i=0;i<10;i++))
    {
        commands; # Use $i
    }
  • Using a while loop:

    while condition
    do
        commands;
    done

    For an infinite loop, use true as the condition.

  • Using a until loop:

    A special loop called until is available with Bash. This executes the loop until the given condition becomes true. For example:

    x=0;
    until [ $x -eq 9 ]; # [ $x -eq 9 ] is the condition
    do
        let x++; echo $x;
    done

Comparisons and tests


Flow control in a program is handled by comparison and test statements. Bash also comes with several options to perform tests that are compatible with the Unix system-level features. We can use if, if else, and logical operators to perform tests and certain comparison operators to compare data items. There is also a command called test available to perform tests. Let us see how to use these.

How to do it...

We will have a look at all the different methods used for comparisons and performing tests:

  • Using an if condition:

    if condition;
    then
        commands;
    fi
  • Using else if and else:

    if condition; 
    then
        commands;
    else if condition; then
        commands;
    else
        commands;
    fi

    Note

    Nesting is also possible with if and else. The if conditions can be lengthy, to make them shorter we can use logical operators as follows:

    • [ condition ] && action; # action executes if the condition is true

    • [ condition ] || action; # action executes if the condition is false

    && is the logical AND operation and || is the logical OR operation. This is a very helpful trick while writing Bash scripts.

  • Performing mathematical comparisons: Usually conditions are enclosed in square brackets []. Note that there is a space between [ or ] and operands. It will show an error if no space is provided. An example is as follows:

    [$var -eq 0 ] or [ $var -eq 0]

    Performing mathematical conditions over variables or values can be done as follows:

    [ $var -eq 0 ]  # It returns true when $var equal to 0.
    [ $var -ne 0 ] # It returns true when $var is not equal to 0

    Other important operators are as follows:

    • -gt: Greater than

    • -lt: Less than

    • -ge: Greater than or equal to

    • -le: Less than or equal to

    Multiple test conditions can be combined as follows:

    [ $var1 -ne 0 -a $var2 -gt 2 ]  # using and -a
    [ $var1 -ne 0 -o var2 -gt 2 ] # OR -o
  • Filesystem related tests: We can test different filesystem-related attributes using different condition flags as follows:

    • [ -f $file_var ]: This returns true if the given variable holds a regular file path or filename

    • [ -x $var ]: This returns true if the given variable holds a file path or filename that is executable

    • [ -d $var ]: This returns true if the given variable holds a directory path or directory name

    • [ -e $var ]: This returns true if the given variable holds an existing file

    • [ -c $var ]: This returns true if the given variable holds the path of a character device file

    • [ -b $var ]: This returns true if the given variable holds the path of a block device file

    • [ -w $var ]: This returns true if the given variable holds the path of a file that is writable

    • [ -r $var ]: This returns true if the given variable holds the path of a file that is readable

    • [ -L $var ]: This returns true if the given variable holds the path of a symlink

    An example of the usage is as follows:

    fpath="/etc/passwd"
    if [ -e $fpath ]; then
        echo File exists; 
    else
        echo Does not exist; 
    fi
  • String comparisons: While using string comparison, it is best to use double square brackets, since the use of single brackets can sometimes lead to errors.

    Two strings can be compared to check whether they are the same in the following manner:

    • [[ $str1 = $str2 ]]: This returns true when str1 equals str2, that is, the text contents of str1 and str2 are the same

    • [[ $str1 == $str2 ]]: It is an alternative method for string equality check

    We can check whether two strings are not the same as follows:

    • [[ $str1 != $str2 ]]: This returns true when str1 and str2 mismatch

    We can find out the alphabetically smaller or larger string as follows:

    • [[ $str1 > $str2 ]]: This returns true when str1 is alphabetically greater than str2

    • [[ $str1 < $str2 ]]: This returns true when str1 is alphabetically lesser than str2

      Note

      Note that a space is provided after and before =, if it is not provided, it is not a comparison, but it becomes an assignment statement.

    • [[ -z $str1 ]]: This returns true if str1 holds an empty string

    • [[ -n $str1 ]]: This returns true if str1 holds a nonempty string

    It is easier to combine multiple conditions using logical operators such as && and || in the following code:

    if [[ -n $str1 ]] && [[ -z $str2 ]] ;
    then
        commands;
    fi

    For example:

    str1="Not empty "
    str2=""
    if [[ -n $str1 ]] && [[ -z $str2 ]];
    then
        echo str1 is nonempty and str2 is empty string.
    fi

    Output:

    str1 is nonempty and str2 is empty string.

The test command can be used for performing condition checks. It helps to avoid usage of many braces. The same set of test conditions enclosed within [] can be used for the test command.

For example:

if  [ $var -eq 0 ]; then echo "True"; fi
can be written as
if  test $var -eq 0 ; then echo "True"; fi
Left arrow icon Right arrow icon

Key benefits

  • Master the art of crafting one-liner command sequence to perform text processing, digging data from files, backups to sysadmin tools, and a lot more
  • And if powerful text processing isn't enough, see how to make your scripts interact with the web-services like Twitter, Gmail
  • Explores the possibilities with the shell in a simple and elegant way - you will see how to effectively solve problems in your day to day life

Description

The shell remains one of the most powerful tools on a computer system — yet a large number of users are unaware of how much one can accomplish with it. Using a combination of simple commands, we will see how to solve complex problems in day to day computer usage.Linux Shell Scripting Cookbook, Second Edition will take you through useful real-world recipes designed to make your daily life easy when working with the shell. The book shows the reader how to effectively use the shell to accomplish complex tasks with ease.The book discusses basics of using the shell, general commands and proceeds to show the reader how to use them to perform complex tasks with ease.Starting with the basics of the shell, we will learn simple commands with their usages allowing us to perform operations on files of different kind. The book then proceeds to explain text processing, web interaction and concludes with backups, monitoring and other sysadmin tasks.Linux Shell Scripting Cookbook, Second Edition serves as an excellent guide to solving day to day problems using the shell and few powerful commands together to create solutions.

Who is this book for?

This book is both for the casual GNU/Linux users who want to do amazing things with the shell, and for advanced users looking for ways to make their lives with the shell more productive.You can start writing scripts and one-liners by simply looking at the similar recipe and its descriptions without any working knowledge of shell scripting or Linux. Intermediate/advanced users as well as system administrators/ developers and programmers can use this book as a reference when they face problems while coding.

What you will learn

  • Explore a variety of regular usage tasks and how it can be made faster using shell command
  • Write shell scripts that can dig data from web and process it with few lines of code
  • Use different kinds of tools together to create solutions
  • Interact with simple web API from scripts
  • Perform and automate tasks such as automating backups and restore with archiving tools
  • Create and maintain file/folder archives, compression formats and encrypting techniques with shell
  • Set up Ethernet and Wireless LAN with the shell script
  • Monitor different activities on the network using logging techniques
Estimated delivery fee Deliver to Great Britain

Standard delivery 1 - 4 business days

£4.95

Premium delivery 1 - 4 business days

£7.95
(Includes tracking information)

Product Details

Country selected
Publication date, Length, Edition, Language, ISBN-13
Publication date : May 21, 2013
Length: 384 pages
Edition : 2nd
Language : English
ISBN-13 : 9781782162742
Tools :

What do you get with Print?

Product feature icon Instant access to your digital copy whilst your Print order is Shipped
Product feature icon Paperback book shipped to your preferred address
Product feature icon Redeem a companion digital copy on all Print orders
Product feature icon Access this title in our online reader with advanced features
Product feature icon DRM FREE - Read whenever, wherever and however you want
Modal Close icon
Payment Processing...
tick Completed

Shipping Address

Billing Address

Shipping Methods
Estimated delivery fee Deliver to Great Britain

Standard delivery 1 - 4 business days

£4.95

Premium delivery 1 - 4 business days

£7.95
(Includes tracking information)

Product Details

Publication date : May 21, 2013
Length: 384 pages
Edition : 2nd
Language : English
ISBN-13 : 9781782162742
Tools :

Packt Subscriptions

See our plans and pricing
Modal Close icon
£16.99 billed monthly
Feature tick icon Unlimited access to Packt's library of 7,000+ practical books and videos
Feature tick icon Constantly refreshed with 50+ new titles a month
Feature tick icon Exclusive Early access to books as they're written
Feature tick icon Solve problems while you work with advanced search and reference features
Feature tick icon Offline reading on the mobile app
Feature tick icon Simple pricing, no contract
£169.99 billed annually
Feature tick icon Unlimited access to Packt's library of 7,000+ practical books and videos
Feature tick icon Constantly refreshed with 50+ new titles a month
Feature tick icon Exclusive Early access to books as they're written
Feature tick icon Solve problems while you work with advanced search and reference features
Feature tick icon Offline reading on the mobile app
Feature tick icon Choose a DRM-free eBook or Video every month to keep
Feature tick icon PLUS own as many other DRM-free eBooks or Videos as you like for just £5 each
Feature tick icon Exclusive print discounts
£234.99 billed in 18 months
Feature tick icon Unlimited access to Packt's library of 7,000+ practical books and videos
Feature tick icon Constantly refreshed with 50+ new titles a month
Feature tick icon Exclusive Early access to books as they're written
Feature tick icon Solve problems while you work with advanced search and reference features
Feature tick icon Offline reading on the mobile app
Feature tick icon Choose a DRM-free eBook or Video every month to keep
Feature tick icon PLUS own as many other DRM-free eBooks or Videos as you like for just £5 each
Feature tick icon Exclusive print discounts

Frequently bought together


Stars icon
Total £ 126.97
Web Penetration Testing with Kali Linux
£43.99
Linux Shell Scripting Cookbook, Second Edition
£38.99
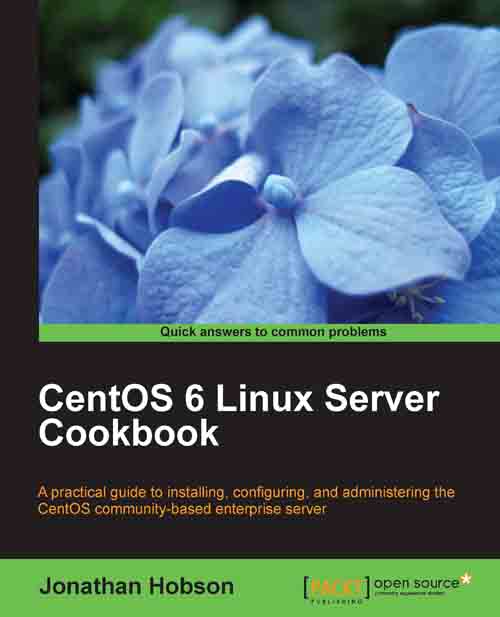
CentOS 6 Linux Server Cookbook
£43.99
Total £ 126.97 Stars icon

Table of Contents

9 Chapters
Shell Something Out Chevron down icon Chevron up icon
Have a Good Command Chevron down icon Chevron up icon
File In, File Out Chevron down icon Chevron up icon
Texting and Driving Chevron down icon Chevron up icon
Tangled Web? Not At All! Chevron down icon Chevron up icon
The Backup Plan Chevron down icon Chevron up icon
The Old-boy Network Chevron down icon Chevron up icon
Put on the Monitor's Cap Chevron down icon Chevron up icon
Administration Calls Chevron down icon Chevron up icon

Customer reviews

Top Reviews
Rating distribution
Full star icon Full star icon Full star icon Full star icon Half star icon 4.3
(9 Ratings)
5 star 77.8%
4 star 0%
3 star 0%
2 star 22.2%
1 star 0%
Filter icon Filter
Top Reviews

Filter reviews by


Pierre Jun 23, 2013
Full star icon Full star icon Full star icon Full star icon Full star icon 5
I have started using Linux in 2000 with Suse Linux. Coming from Windows Linux right away took my interest especially the tremendous freedom it gives you and the ability to operate the system instead of being operated by the system. But if you want to get into the depth of Linux and being an expert the learning curve especially when starting is quite steep and the huge amount of possibilities is hard to tackle. But if you go over this hurdle than you get rewarded with the knowledge of how to rule your computer. You can do it the hard way as I did when starting with Linux by asking Google for each and every question coming up. But if you want to accelerate to get into understanding and using Linux not only on the surface than this book is for you.The book is precisely focused on shell scripting and is therefore always right to the point. So you won't find information on how to install Linux but as this is one of the easier parts you can find a lot of good information on the internet and nowadays setting up a Linux machine is quite easy.If you have Linux installed this book helps you to jump right into the topic. In the introduction of chapter 1 you get the basics about the shell environment you need just enough to start scripting. For example it is explained what does the prompt look like, the structure of a shell script and how to start it. And some handy information to avoid unnecessary typing using the history.After the introduction of each chapter the book starts with recipes. Each recipe is introduced with a short objective of a recipe and then it has more or less always the same structure. Getting ready gives a brief overview of the commands and syntax used in the following sections. How to do it shows how the commands are used that support the objective. The explanation is done on practical and real life examples that can be used in your day to day work. In some recipes you get also deeper information in the But there is more section that can be skipped at a first read and referenced later when topic comes up in combination with other recipes.As this book's title denotes the content is presented as a cookbook. In a cookbook you can assume to jump into a specific topic and than just program along. But I would recommend before starting to read the first chapter as it explains all basic elements of a shell script like variable assignment, arrays, functions and other programming structures as well as debugging tools and strategies. After chapter 1 you have enough information to tackle the recipes in following chapters.Chapter 2 and chapter 3 provide a comprehensive set of recipes on file manipulation. Chapter 2 is more focused on recipes you will need in your day to day work, like finding, copying and moving files. Chapter 3 has more sophisticated recipes like file comparison to find out the differences between two files.Chapter 4 is about the content of files, that is finding and manipulating the content of a file. The chapter starts with an introduction into regular expressions and some often used patterns like e-mail address validation are provided.Especially interesting to me was chapter 5 which goes beyond the Linux operating system but shows how to use shell scripting for accessing the web. I liked the recipe about cURL, a very sophisticated and comprehensive tool for accessing the web through a lot of different web protocols. This recipe gives you a kick start into cURL with the commands you will use 80% of your time when down or uploading files from or to the web or another file system.The book does not only cover topics you would need as a regular Linux user but also provides recipes for administration tasks. And from my experience the book covers the main commands that you would need to administer your private Linux home network to keep it up and running. The chapters 6, 8 and 9 cover backup tools, tools for monitoring you system and manipulating or running automatically scheduled processes with cron jobs.And finally chapter 7 has a lot to say about setting up a network. The topics cover file transfer between computers or logging in to remote computers using ssh.If you are a programmer of a programming language that uses a lot the Linux shell like Python, Ruby or Ruby on Rails than I also can recommend this book. It covers the topics you will need when mainly working with the console and not using an IDE. Especially useful I consider in this regard the topics how to find files, how to compare files, how to find a specific content of a file that you need to refactor. SSH without login is also very useful when working with Ruby on Rails and administrating an application server like passenger. Also the brief introduction into Git serves as a good start into managing and archiving your source files like the scripts you generate based on the knowledge gained from the book. The section finding broken links on a web site is very helpful when working as a web developer.So all in all this book is a very helpful companion whether you are using Linux as a regular user or as an administrator. And if you are a developer you find a lot of valuable commands and recipes that make your programming life easier. It is a book you should have handy when you are one of the above mentioned users to make your life easier with Linux.
Amazon Verified review Amazon
T. Williams Mar 19, 2014
Full star icon Full star icon Full star icon Full star icon Full star icon 5
This is one of the best books I have read on Linux scripting. Shantanu, has a straight to the point no fluff writing style. It was straight forward and I was able to read this book in two days because of it. It felt good not having to waste my time with page "filler's" as I have done with most technical books. I commend Shantanu on his efforts and I hope that other ( IT) technical writers take note.
Amazon Verified review Amazon
Doug Duncan Oct 10, 2013
Full star icon Full star icon Full star icon Full star icon Full star icon 5
Linux Shell Scripting Cookbook by Shantanu Tushar and Sarath Lakshman is a book that will get beginners of the Linux shell up to speed quickly. Being a cookbook style book a user can bounce around pretty much at will to get their task completed without relying on having read previous recipes.The reader will find basic admin type one-liners, in addition to some interesting recipes such as how to access your gmail account and sending tweets from the command line.Overall this is a well written book and something every beginning Linux admin (or power user) will want to have in their collection.
Amazon Verified review Amazon
Gregory T. Laden Oct 07, 2013
Full star icon Full star icon Full star icon Full star icon Full star icon 5
I just finished "Linux Shell Scripting Cookbook" (Second Edition) by Shantanu Tushar and Sarath Lakshman. This is a beginner's guide to using shell scripting (bash) on linux.Usually, a "cookbook" is set up more like a series of projects organized around a set of themes, and is usually less introductory than this book. "Linux Shell Scripting Cookbook" might be better titled "Introduction to Linux Shell Scripting" because it is more like a tutorial and a how too book than like a cookbook. Nonetheless, it is an excellent tutorial that includes over 100 "recipes" that address a diversity of applications. It's just that they are organized more like a tutorial. What this means is that a beginner can use only the resources in this book and get results. The various recipes are organized in an order that brings the reader through basics (like how to use the terminal, how to mess with environment variables, etc.) then on to more complex topics such as regular expressions, manipulating text, accessing web pages, and archiving. One very nice set of scripts that is not often found in intro books addresses networking. The book also covers MySQL database use.All of the scripts are available from the publisher in a well organized zip archive.I read the e-version of the book, in iBooks, but the PDF version is very nice as well. I don't know how this would translate as at Kindle book. But, importantly (and this may be more common now than not) the ebook uses all text, unlike some earlier versions of ebooks that used photographs of key text snippets as graphics which essentially renders them useless. Of course, copy and paste from a ebook is difficult, and that is where the zip file of scrips comes in. You can open the PDF file, get the zip archive, and as you read through examples simply open up (or copy and paste) the scripts from the zip archive and modify or run them. Also, the ebook is cheaper than a paper edition and clearly takes up way less space!If I was going to recommend a starting out guide to shell scripting this is the book I'd recommend right now. It is well organized and well executed.
Amazon Verified review Amazon
Amazon Customer Apr 27, 2015
Full star icon Full star icon Full star icon Full star icon Full star icon 5
This is one of the best Linux books I've studied in the last year - and i've studied several. This book will give you the hacker buzz. If you have had at least some exposure to Linux, and want a better understanding of the command line and shell scripting in particular, then get this book!I had my doubts, but the first two chapters are pure gold. And there's one teasure after another throughout the whole book. Absolutely insightful...and it makes a perfect reference for looking up various commands and getting the essential information on how to use them quickly, showing things by example. Commands like "xargs" have never been presented in a meaningful way to me before; the authors do this for all the essential commands.And along the way, shell scripting will just sneaks in there. Before you know it, you're jamming! Fantastic treatment on a variety of topics that anyone with a computer background will recognize and can leverage or exploit...potentially, of course. The more background you have with Linux, the more you'll love this book.
Amazon Verified review Amazon
Get free access to Packt library with over 7500+ books and video courses for 7 days!
Start Free Trial

FAQs

What is the digital copy I get with my Print order? Chevron down icon Chevron up icon

When you buy any Print edition of our Books, you can redeem (for free) the eBook edition of the Print Book you’ve purchased. This gives you instant access to your book when you make an order via PDF, EPUB or our online Reader experience.

What is the delivery time and cost of print book? Chevron down icon Chevron up icon

Shipping Details

USA:

'

Economy: Delivery to most addresses in the US within 10-15 business days

Premium: Trackable Delivery to most addresses in the US within 3-8 business days

UK:

Economy: Delivery to most addresses in the U.K. within 7-9 business days.
Shipments are not trackable

Premium: Trackable delivery to most addresses in the U.K. within 3-4 business days!
Add one extra business day for deliveries to Northern Ireland and Scottish Highlands and islands

EU:

Premium: Trackable delivery to most EU destinations within 4-9 business days.

Australia:

Economy: Can deliver to P. O. Boxes and private residences.
Trackable service with delivery to addresses in Australia only.
Delivery time ranges from 7-9 business days for VIC and 8-10 business days for Interstate metro
Delivery time is up to 15 business days for remote areas of WA, NT & QLD.

Premium: Delivery to addresses in Australia only
Trackable delivery to most P. O. Boxes and private residences in Australia within 4-5 days based on the distance to a destination following dispatch.

India:

Premium: Delivery to most Indian addresses within 5-6 business days

Rest of the World:

Premium: Countries in the American continent: Trackable delivery to most countries within 4-7 business days

Asia:

Premium: Delivery to most Asian addresses within 5-9 business days

Disclaimer:
All orders received before 5 PM U.K time would start printing from the next business day. So the estimated delivery times start from the next day as well. Orders received after 5 PM U.K time (in our internal systems) on a business day or anytime on the weekend will begin printing the second to next business day. For example, an order placed at 11 AM today will begin printing tomorrow, whereas an order placed at 9 PM tonight will begin printing the day after tomorrow.


Unfortunately, due to several restrictions, we are unable to ship to the following countries:

  1. Afghanistan
  2. American Samoa
  3. Belarus
  4. Brunei Darussalam
  5. Central African Republic
  6. The Democratic Republic of Congo
  7. Eritrea
  8. Guinea-bissau
  9. Iran
  10. Lebanon
  11. Libiya Arab Jamahriya
  12. Somalia
  13. Sudan
  14. Russian Federation
  15. Syrian Arab Republic
  16. Ukraine
  17. Venezuela
What is custom duty/charge? Chevron down icon Chevron up icon

Customs duty are charges levied on goods when they cross international borders. It is a tax that is imposed on imported goods. These duties are charged by special authorities and bodies created by local governments and are meant to protect local industries, economies, and businesses.

Do I have to pay customs charges for the print book order? Chevron down icon Chevron up icon

The orders shipped to the countries that are listed under EU27 will not bear custom charges. They are paid by Packt as part of the order.

List of EU27 countries: www.gov.uk/eu-eea:

A custom duty or localized taxes may be applicable on the shipment and would be charged by the recipient country outside of the EU27 which should be paid by the customer and these duties are not included in the shipping charges been charged on the order.

How do I know my custom duty charges? Chevron down icon Chevron up icon

The amount of duty payable varies greatly depending on the imported goods, the country of origin and several other factors like the total invoice amount or dimensions like weight, and other such criteria applicable in your country.

For example:

  • If you live in Mexico, and the declared value of your ordered items is over $ 50, for you to receive a package, you will have to pay additional import tax of 19% which will be $ 9.50 to the courier service.
  • Whereas if you live in Turkey, and the declared value of your ordered items is over € 22, for you to receive a package, you will have to pay additional import tax of 18% which will be € 3.96 to the courier service.
How can I cancel my order? Chevron down icon Chevron up icon

Cancellation Policy for Published Printed Books:

You can cancel any order within 1 hour of placing the order. Simply contact customercare@packt.com with your order details or payment transaction id. If your order has already started the shipment process, we will do our best to stop it. However, if it is already on the way to you then when you receive it, you can contact us at customercare@packt.com using the returns and refund process.

Please understand that Packt Publishing cannot provide refunds or cancel any order except for the cases described in our Return Policy (i.e. Packt Publishing agrees to replace your printed book because it arrives damaged or material defect in book), Packt Publishing will not accept returns.

What is your returns and refunds policy? Chevron down icon Chevron up icon

Return Policy:

We want you to be happy with your purchase from Packtpub.com. We will not hassle you with returning print books to us. If the print book you receive from us is incorrect, damaged, doesn't work or is unacceptably late, please contact Customer Relations Team on customercare@packt.com with the order number and issue details as explained below:

  1. If you ordered (eBook, Video or Print Book) incorrectly or accidentally, please contact Customer Relations Team on customercare@packt.com within one hour of placing the order and we will replace/refund you the item cost.
  2. Sadly, if your eBook or Video file is faulty or a fault occurs during the eBook or Video being made available to you, i.e. during download then you should contact Customer Relations Team within 14 days of purchase on customercare@packt.com who will be able to resolve this issue for you.
  3. You will have a choice of replacement or refund of the problem items.(damaged, defective or incorrect)
  4. Once Customer Care Team confirms that you will be refunded, you should receive the refund within 10 to 12 working days.
  5. If you are only requesting a refund of one book from a multiple order, then we will refund you the appropriate single item.
  6. Where the items were shipped under a free shipping offer, there will be no shipping costs to refund.

On the off chance your printed book arrives damaged, with book material defect, contact our Customer Relation Team on customercare@packt.com within 14 days of receipt of the book with appropriate evidence of damage and we will work with you to secure a replacement copy, if necessary. Please note that each printed book you order from us is individually made by Packt's professional book-printing partner which is on a print-on-demand basis.

What tax is charged? Chevron down icon Chevron up icon

Currently, no tax is charged on the purchase of any print book (subject to change based on the laws and regulations). A localized VAT fee is charged only to our European and UK customers on eBooks, Video and subscriptions that they buy. GST is charged to Indian customers for eBooks and video purchases.

What payment methods can I use? Chevron down icon Chevron up icon

You can pay with the following card types:

  1. Visa Debit
  2. Visa Credit
  3. MasterCard
  4. PayPal
What is the delivery time and cost of print books? Chevron down icon Chevron up icon

Shipping Details

USA:

'

Economy: Delivery to most addresses in the US within 10-15 business days

Premium: Trackable Delivery to most addresses in the US within 3-8 business days

UK:

Economy: Delivery to most addresses in the U.K. within 7-9 business days.
Shipments are not trackable

Premium: Trackable delivery to most addresses in the U.K. within 3-4 business days!
Add one extra business day for deliveries to Northern Ireland and Scottish Highlands and islands

EU:

Premium: Trackable delivery to most EU destinations within 4-9 business days.

Australia:

Economy: Can deliver to P. O. Boxes and private residences.
Trackable service with delivery to addresses in Australia only.
Delivery time ranges from 7-9 business days for VIC and 8-10 business days for Interstate metro
Delivery time is up to 15 business days for remote areas of WA, NT & QLD.

Premium: Delivery to addresses in Australia only
Trackable delivery to most P. O. Boxes and private residences in Australia within 4-5 days based on the distance to a destination following dispatch.

India:

Premium: Delivery to most Indian addresses within 5-6 business days

Rest of the World:

Premium: Countries in the American continent: Trackable delivery to most countries within 4-7 business days

Asia:

Premium: Delivery to most Asian addresses within 5-9 business days

Disclaimer:
All orders received before 5 PM U.K time would start printing from the next business day. So the estimated delivery times start from the next day as well. Orders received after 5 PM U.K time (in our internal systems) on a business day or anytime on the weekend will begin printing the second to next business day. For example, an order placed at 11 AM today will begin printing tomorrow, whereas an order placed at 9 PM tonight will begin printing the day after tomorrow.


Unfortunately, due to several restrictions, we are unable to ship to the following countries:

  1. Afghanistan
  2. American Samoa
  3. Belarus
  4. Brunei Darussalam
  5. Central African Republic
  6. The Democratic Republic of Congo
  7. Eritrea
  8. Guinea-bissau
  9. Iran
  10. Lebanon
  11. Libiya Arab Jamahriya
  12. Somalia
  13. Sudan
  14. Russian Federation
  15. Syrian Arab Republic
  16. Ukraine
  17. Venezuela
Modal Close icon
Modal Close icon