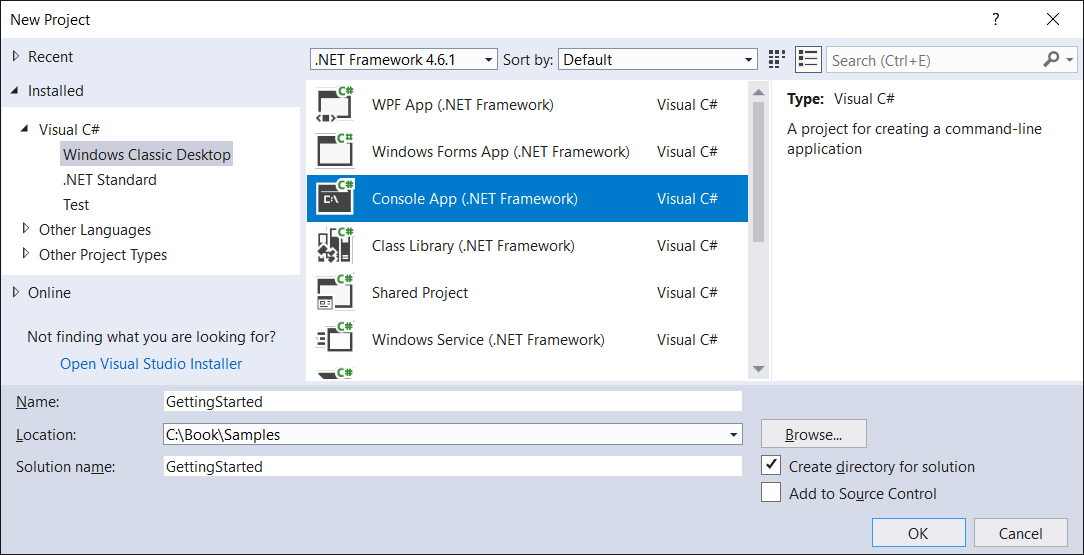
Just after launching the IDE, let's proceed by creating a new project. Such a process will be performed many times while reading the book to create the example applications according to information provided in particular chapters.
To create a new project:
- Click on File | New | Project in the main menu.
- Choose Installed | Visual C# | Windows Classic Desktop on the left in the New Project window, as shown in the following screenshot. Then, click on Console App (.NET Framework) in the middle. You should also type a name of the project (Name) and a name of the solution (Solution name), as well as select location for the files (Location) by pressing the Browse button. At the end, click on OK to automatically create the project and generate the necessary files:

Congratulations, you have just created the first project! But what is inside?
Let's take a look at the Solution Explorer window, which presents the structure of the project. It is worth mentioning that the project is included in the solution with the same name. Of course, a solution could contain more than one project, which is a common scenario while developing more complex applications.
The automatically generated project (named GettingStarted) has the following structure:
- The Properties node with one file (AssemblyInfo.cs) that contains general information about the assembly with the application, such as about its title, copyright, and version. The configuration is performed using attributes, for example, AssemblyTitleAttribute and AssemblyVersionAttribute.
- The References element presents additional assemblies or projects that are used by the project. It is worth noting that you could easily add references by choosing the Add Reference option from the context menu of the References element. Moreover, you could install additional packages using the NuGet Package Manager, which could be launched by choosing Manage NuGet Packages from the References context menu.
- The App.config file contains the Extensible Markup Language (XML)-based configuration of the application, including the number of the minimum supported version of the .NET Framework platform.
- The Program.cs file contains the code of the main class in the C# language. You could adjust the behavior of the application by changing the following default implementation:
using System;
using System.Collections.Generic;
using System.Linq;
using System.Text;
using System.Threading.Tasks;

namespace GettingStarted
{
    class Program
    {
        static void Main(string[] args)
        {
        }
    }
}
The initial content of the Program.cs file contains the definition of the Program class within the GettingStarted namespace. The class contains the Main static method, which is called automatically when the application is launched. The five using statements are included as well, namely System, System.Collections.Generic, System.Linq, System.Text, and System.Threading.Tasks.
Before proceeding, let's take a look at the structure of the project in the file explorer, not in the Solution Explorer window. Are such structures exactly the same?
First of all, you can see the bin and obj directories, which are generated automatically. Both contain Debug and Release directories, whose names are related to the configuration set in the IDE. After building the project, a subdirectory of the bin directory (that is, Debug or Release) contains .exe, .exe.config, and .pdb files, while the subdirectory in the obj directory—for example—contains .cache and some temporary .cs files. What's more, there is no References directory, but there are .csproj and .csproj.user files with XML-based configurations of the project. Similarly, the solution-based .sln configuration file is located in the solution's directory.
If you want to learn how to write some example code, as well as launch and debug the program, let's proceed to the next section.


