


Creating your first project under PlatformIO
After setting up the development environment, let’s walk through the process of creating your first project in PlatformIO:
- Click the PlatformIO icon in the left-hand bar.
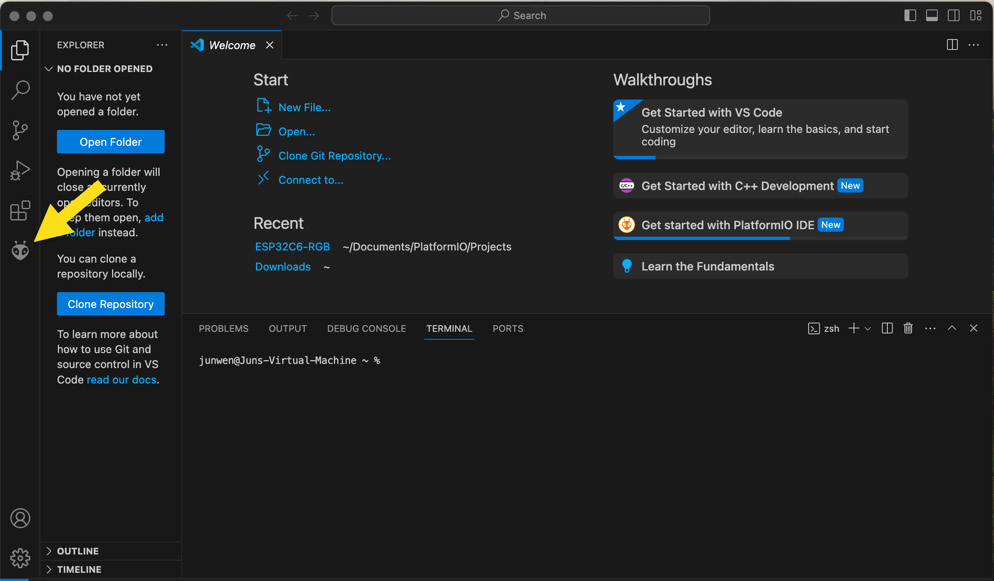
Figure 10.26 – Launch PlatformIO IDE in VS Code
- Click Open under PIO Home.
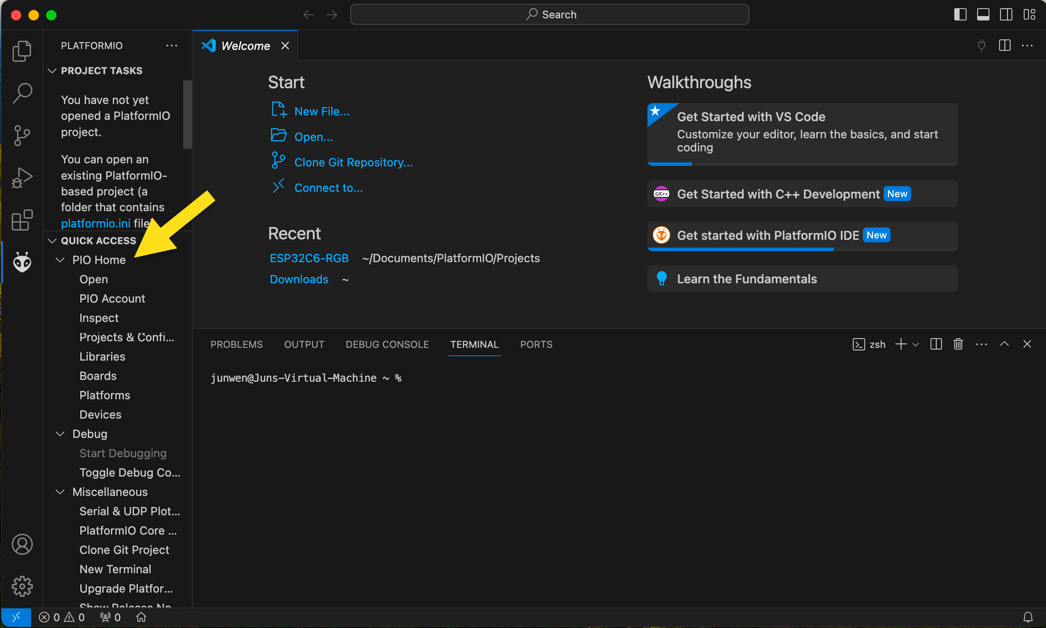
Figure 10.27 – PlatformIO welcome page
- Click New Project under Quick Access.
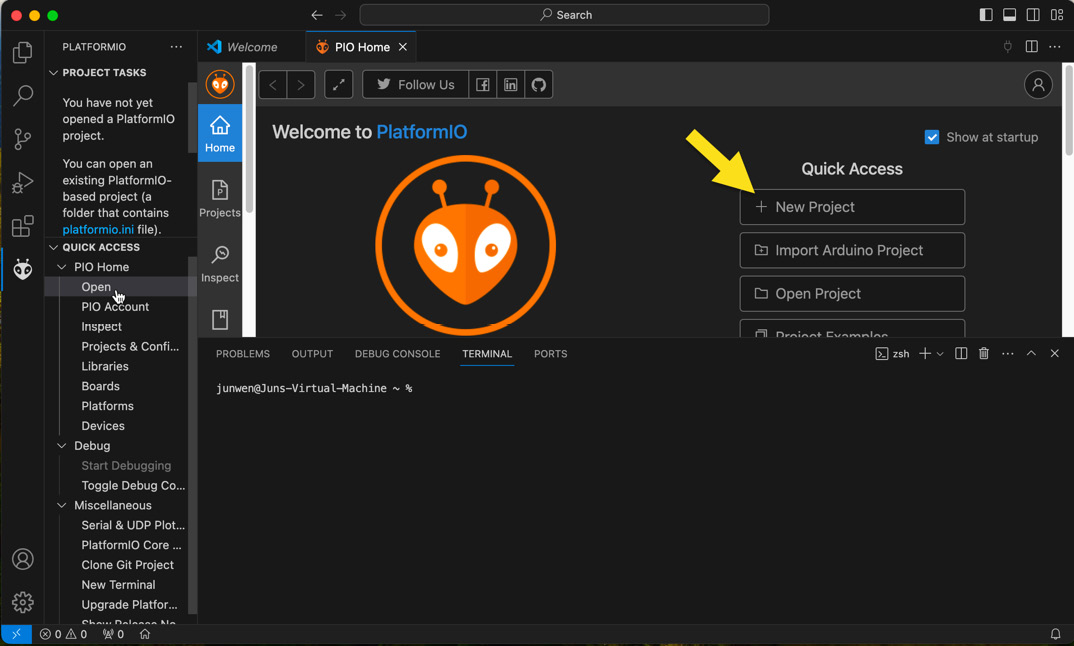
Figure 10.28 – Create a new project
- You will see Project Wizard as shown in the following figure. Give the project a name in the Name field.
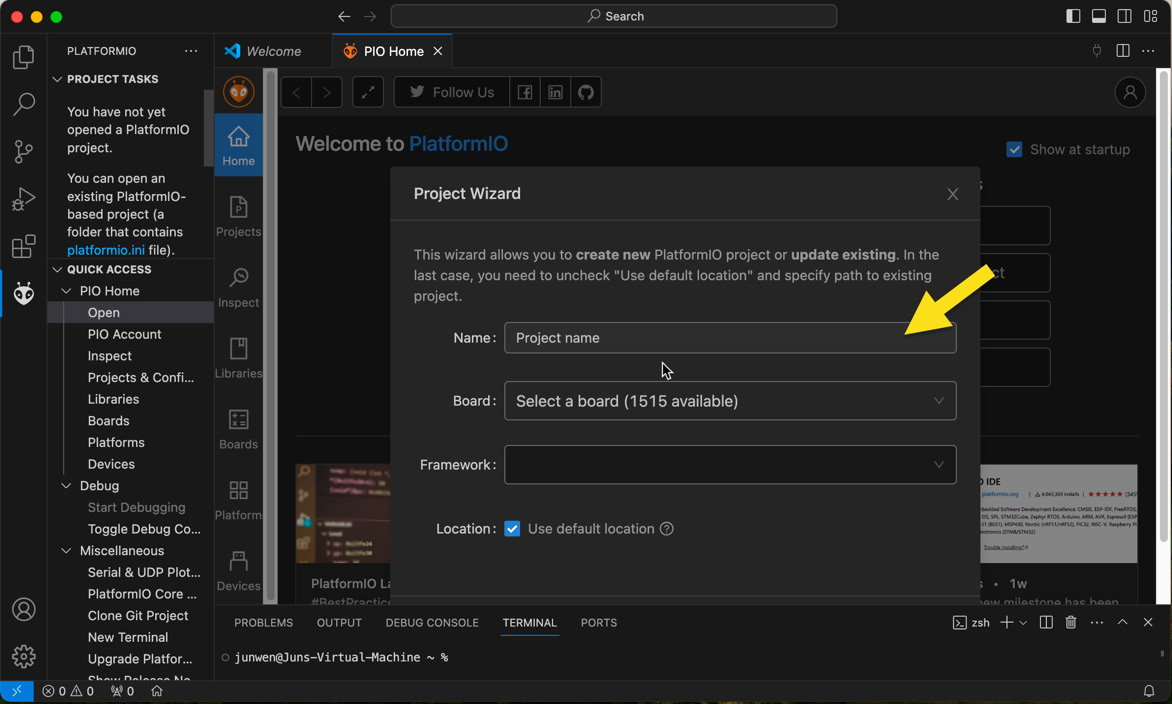
Figure 10.29 – Give the project a name
- Click the Board dropdown to find your ESP32 board model.
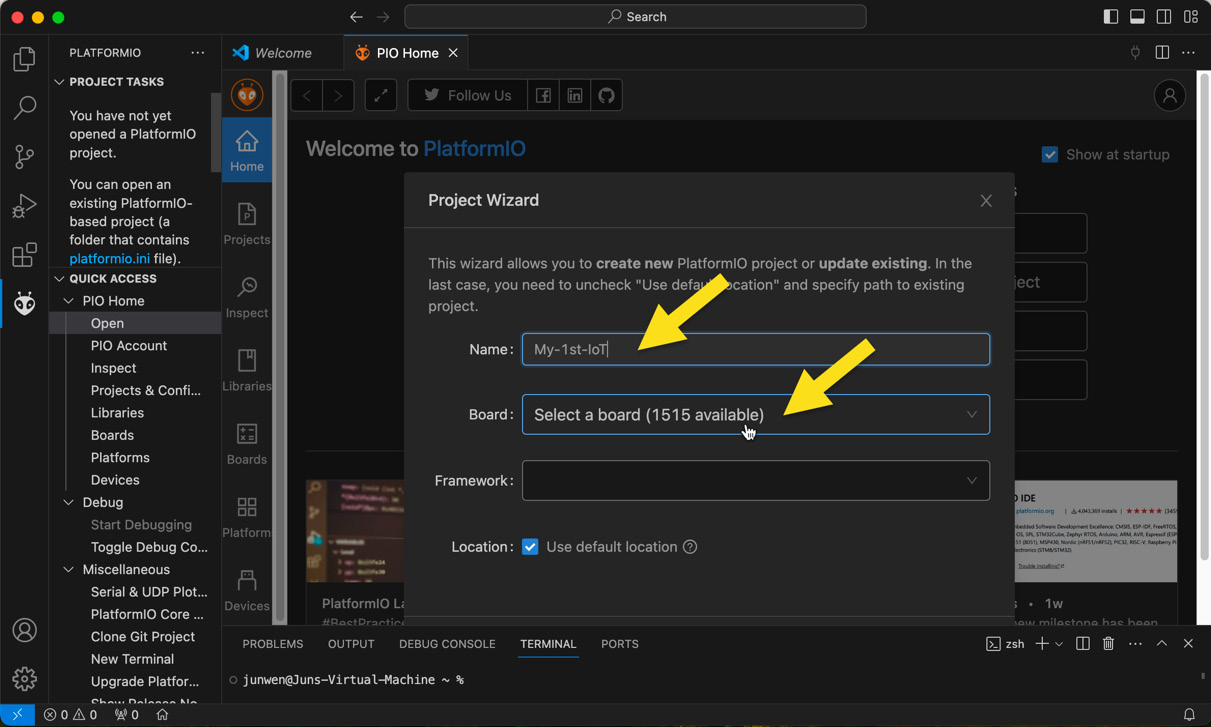
Figure 10.30 – Find the hardware type
For example, if you want to use ESP32-C3, you can type in esp32-c3, and you will find your expected board model....


