(For more resources on Game Development, see here.)
Before we start
As there is a large amount of ground to cover in this chapter, we'll be moving quickly through steps similar to those we've done before. If it's been a while since you've used Construct, then you may find it useful to read through a chapter or two again before continuing, because certain steps assume that you are able to complete acO ons we have performed in the past.
Multiplayer: getting your friends involved
We're ready to start our next game, a multiplayer side-scrolling shooter, but before we add any shooO ng, we'll need to have the multiplayer side-scroller part finished first. So let's get to it!
Time for action – creating the game assets and title screen
The first thing we will need to do is to create our game content and create the first layout of the game, the title screen.
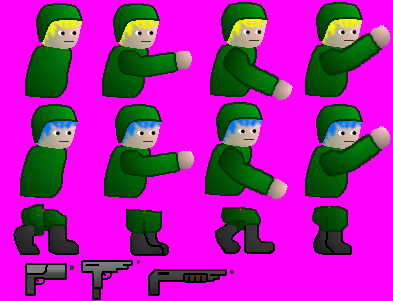
- First, draw up our player graphics and guns. We'll want the torso to be a separate object from the legs for easier animation. Use red dots where the legs will be attached to as markers for image point placement later on. Also include drawings for three weapons: a pistol, an uzi, and a shotgun:

- Next, we can draw up our enemies for the game. In this case, we'll use an enemy robot with a turret arm that shoots balls of plasma:

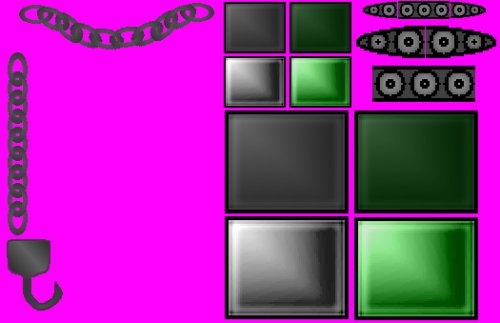
- We'll also need some scenery and ground objects for the levels:

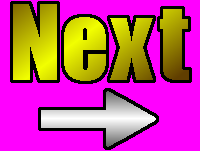
- Finally, we'll need a graphic to tell the player to go onto the next screen when no enemies are present:

- Now we can move on to starting our game. Create a new project and set its Name to SideShooter, and enter your Creator name. Then set the window size to 800 by 600.
- Create the global variables CanGoNext, CurrentScreen, NumPlayers, P1Lives, P2Lives, GameWonLost, and RespawnY with values 0, 0, 1, 3, 3, 0, and 100 respectively.
- Following that, rename the first layout to Title and its event sheet to Title events .
- On this layout, create the layers Text, Buttons, and Background in top-to-bottom order.
- Selecting the Background layer, create a Panel object and name it Background before setting its top corner filters to Green and bottom corner filters to DarkGreen. Stretch this object to cover the whole of the layout and lock the layer.
- Now, on the Buttons layer, create a sprite and draw a box with the word Play in it.
- PosiO on this object in the center of the layout. This will be the start button for our game and should have the name btnPlay.
- Next, add the Mouse & Keyboard and XAudio2 objects into the layout and give them the global property.
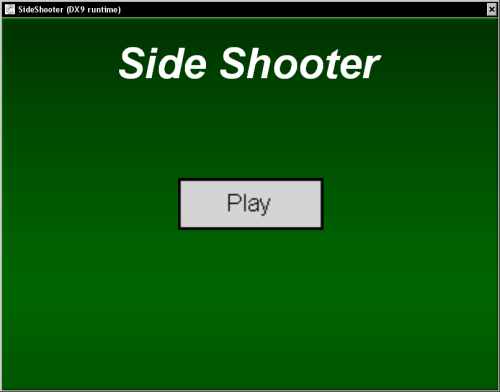
- In order to finish the layout design, create a Text object on the Text layer and set its name to Title and its text to SideShooter, and position it above the btnPlay object:

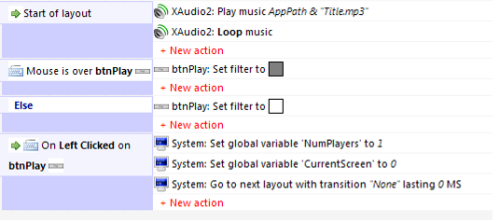
- Switch over to the event sheet editor to add in a Start of layout event and use it to play a music file, Title.mp3, and loop it. This can be any title music you'd like, and it will also be played at the game's end screen.
- Next, create an event for the MouseKeyboard object with the condition Mouse is over object to check if the mouse overlaps btnPlay.
- Give this event the action Set colour filter for the btnPlay object to set the filter to Grey – 40.
- Now create an Else event to set the filter color back to White.
- In order to finish the event sheet, create an event with the condition On object clicked and select the object btnPlay.
- Add actions to this event to set the value of NumPlayers to 1 and the value of CurrentScreen to 0 before adding the final System action Next Layout:

Time for action – designing the level
Now that we have our graphics created, we can put them into our second layout and make the first playable level.
- Now we're ready to create a level layout. Create a layout and name it Level1 and its event sheet Level1 events . Then create our main game event sheet Game.
- For the layout, set its width to a multiple of the screen width (800), and check the box for Unbounded scrolling. In the event sheet of this layout, include our main event sheet Game.
- Next, give this layout the layers HUD, Foreground, FrontScenery, Objects, LevelLights, ShadowCasters, BackScenery, and Walls in top-to-bottom order. After that, set the ScrollX and ScrollY rates of the HUD and Walls layers to 0%
- On the objects layer, create a Tiled Background object named Ground and give it the smaller light gray tile image. Ensure it has the Solid attribute and stretch and place some of them to form a level design.
- Now create a Sprite object with the light green tile image and name it CrateBox . Give it the Solid attribute as well and place some around the level too. Have its collisions mode set to Bounding box.
- Next, create a Sprite named ExitLevel and fill it with a solid color. Give it a width of 32 and stretch it so that it's taller than the display height (600). Then finish the object by checking the box for Invisible on start and placing it at the end of the level:

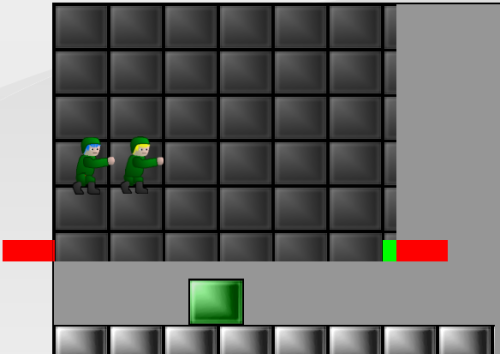
- With the base layout complete, we can now add in three more invisible objects to handle scrolling. These are going to be Box objects with the names BackStopper, FrontStopper, and GoNextScreen.
- Have the BackStopper and FrontStopper objects colored red and marked Solid with a width of 120.
- Set the Hotspot property of the BackStopper object to Bottom-right, and the FrontStopper to Bottom-Left, before positioning them at 0,600 and 800,600 respectively.
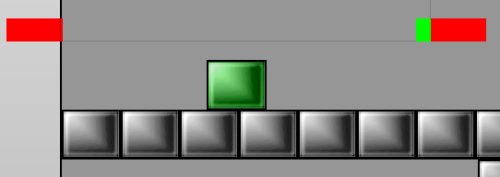
- Next, have the GoNextScreen box colored green and a width of 32 as well as a Hotspot of Bottom-right. Position this object at 800,600:

Time for action – creating player characters and conveyor belt objects
Now we can create our player character objects and also add moving and staO c conveyor belts into our level.
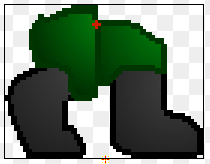
- We are now ready to create our player objects. Start by inserting a Sprite and paste the standing image of the player character legs into it. Have an image point named 1 at the red spot that we drew earlier, and then place the hotspot at the bottom-middle point of the image ( num-pad 2) as shown in the following image:

- Name this sprite P1Legs, and for its Default animation, set the animation Tag to Stopped before checking the Auto Mirror checkbox in the main Appearance settings of the object.
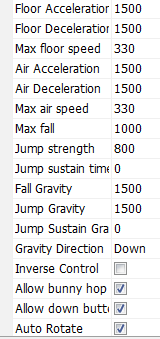
- Next, give it the platform behavior with the settings shown as follows:

- Next, scroll down to the Angle properties box and check the Auto mirror checkbox.
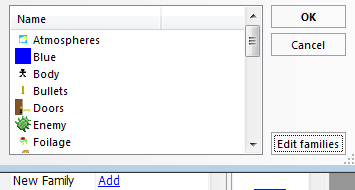
- Now we are ready to add the object to a family. Scroll up to the Groups sub-group Families and click on Add to bring up the Construct: New Family screen. Note that Construct Classic comes with some default families, but will also display any family that have been used previously:

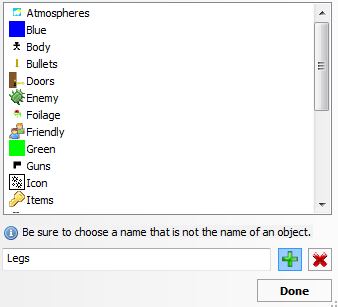
- Click on Edit Families to bring up the Construct: Families editor screen. On this screen, enter the name Legs and click on the + button:

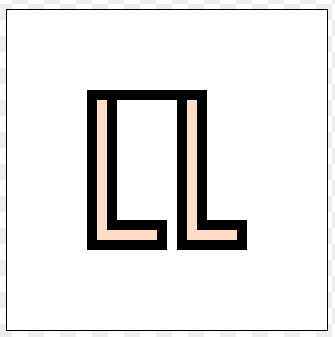
- We can now draw the family image using the image editor that appears, shown as follows:

- After finishing the image, save it by exiting out of the image editor and check that the family is now in the list. Once finished, click on Done to return to the family selection page.
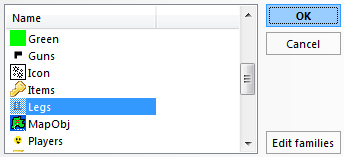
- Now select the Legs family and click on Ok:

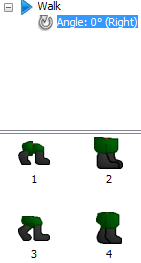
- Now we can add the animation Walk in for our object. In this animation, set the Tag to Walking, and add the other leg sprites so they match the following image:

- Now change the settings of the animation to have an Animation speed of 5 and check the Loop checkbox.
- Next, copy the object and right-click on the layout to use the Paste Clone option, and name this clone as P2Legs. In the Platform behavior for this object, change the Control setting to Player 2 .
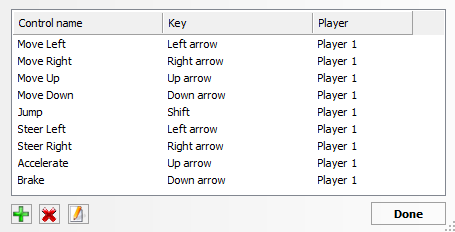
- Now go into the project properties and scroll to the bottom section, Controls. Click on the Add / Edit option for the Manage Controls setting at the bottom to bring up the controls box:

Unlock access to the largest independent learning library in Tech for FREE!
Get unlimited access to 7500+ expert-authored eBooks and video courses covering every tech area you can think of.
Renews at £16.99/month. Cancel anytime
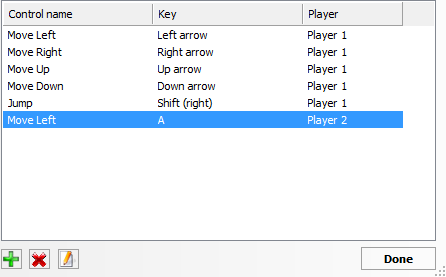
- Use the red X button to remove all of the controls below Jump. Then click on the Green plus button to add a new control. Select this control and click on the Pencil and paper button to change its name to Move Left.
- Click on the Key name for this control to bring up a drop-down box and set it to A.
- Now, in the Player drop-down box, select Player 2 for this control. It should match the following screenshot:

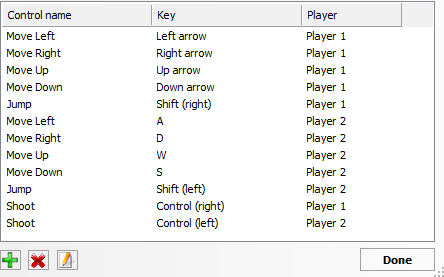
- Now continue to add controls until it matches the settings in the following screenshot before clicking on Done:

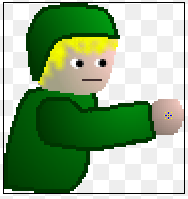
- Next, we'll create the bodies of our player objects. Create a Sprite called P1Torso and paste the normal body image of our character into it. Then position the Hotspot in the bottom-middle of the body. Give this sprite an image point 1 in the centre of its hand:

- Rename the Default animation to Normal and set its speed to 0, and check the Auto Mirror checkbox for this object as well.
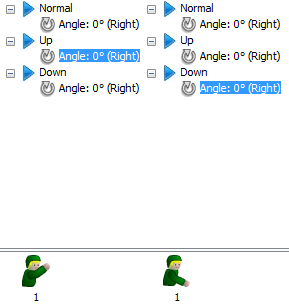
- Create two more animations, Up and Down respectively. Set their frames to match the following screenshot:

- Now give the object a new family and name it Body. Then create Private Variables of names Weapon, Ammo, and GunAngle . Set the starting values to 0, 99, and 0 respectively.
- Clone this object as well to create P2Torso, and replace the sprites with the second player graphics.
- Now select P1Legs and scroll down to the Groups | Container properties to click on Add object and select P1Torso. The properties box and sprites should match the following screenshot:

- Next, put the P2Torso object into the container P2Legs using the same method.
- Now, on the Walls layer, create a Tiled Background object named FactoryWall and paste the dark wall graphic into it. Then resize it to 800 in Width by 600 in Height and set its position to 0,0 . The layout should look similar to the following screenshot:

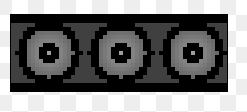
- Switch to the FrontScenery layer and create a Tiled Background object called ConveyorMiddle, and give it the center piece of the conveyor belt images:

- Give this object the Private Variables of Direction and Speed with starting values of 0.
- Place these around the map to act as scenery, as well as using them as an object to move players with at certain points. Set the Direction variable to 1 to have the conveyor belt move right, and 2 to move left. Speed is the attribute used to determine how fast a player character is moved by the conveyor belt; a speed of 25 works well in this instance. The following screenshot shows a moving conveyor belt in the layout:

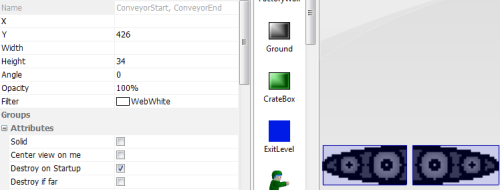
- On the same layer, create a Sprite with the name ConveyorStart and Collisions set to None. Use the starting conveyor belt image for this object and set the Hotspot to the middle-right (num-pad 6). Give this sprite the Attribute of Destroy on Startup.
- Create a second Sprite with the same setttigs called ConveyorEnd and a Hotspot in the middle-left (num-pad 4). Both sprites are shown in the following screenshot:

Time for action – creating the HUD objects
Now, we will move on to creating the Heads Up Display (HUD) objects for our game.
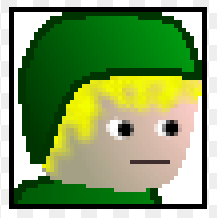
- We are now ready to create the HUD objects for our game. Switch to the HUD layer and create a Sprite called P1Face, and give it an image of the P1Torso head and set its Collisions mode to Bounding Box:

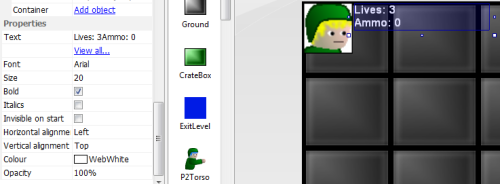
- Next, create a Text object called P1Info and set it up to match the following screenshot:

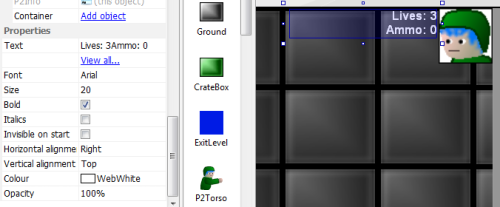
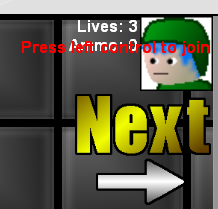
- Create similar objects replacing P1 with P2 for the second player. In this case, have the objects match the following layout screenshot:

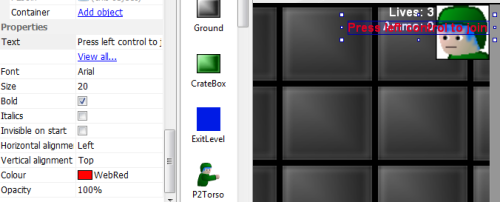
- Now create a Text object for when the second player is not playing, and call it P2Join. Set its text to Press left control to join and have it matched to the following screenshot:

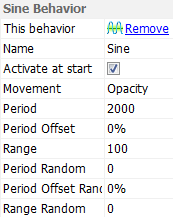
- Give it a Sine behavior to make it fade in and out by matching its settings to those in the following screenshot:

- Now create the final HUD item, a Sprite called NextSign, and place the next arrow image into it. Set the Collisions of this object to None:

 United States
 Great Britain
 India
India
 Germany
 France
 Canada
 Russia
 Spain
Spain
 Brazil
 Australia
 Singapore
 Hungary
 Ukraine
 Luxembourg
 Estonia
 Lithuania
 South Korea
 Turkey
 Switzerland
 Colombia
 Taiwan
 Chile
Chile
 Norway
 Ecuador
 Indonesia
 New Zealand
 Cyprus
 Denmark
 Finland
 Poland
 Malta
Malta
 Czechia
 Austria
 Sweden
 Italy
Italy
 Egypt
Egypt
 Belgium
 Portugal
 Slovenia
 Ireland
 Romania
 Greece
 Argentina
 Netherlands
 Bulgaria
 Latvia
 South Africa
 Malaysia
 Japan
Japan
 Slovakia
 Philippines
 Mexico
 Thailand

