


Adding content to a database
Now that you have configured a server, a database, and a table with columns, you get to see all the pieces working together. In this section, you’ll create a flow, execute it, and then verify that it wrote the data successfully.
First, let’s create a flow so that we can add content.
Creating the flow
To verify that you’ve configured database connectivity, we’ll walk through creating a sample button or instant flow so that we can post data to the database. Follow these steps to create the flow:
- From the Power Automate web portal (https://flow.microsoft.com), select Create.
- In the Start from blank section, select Instant cloud flow.
- Enter a name for the flow, and then select Manually trigger a flow as the trigger type.
- Click Create.
- Click New step.
- In the search box, enter
SQL insertand then select the Insert row (V2) action:
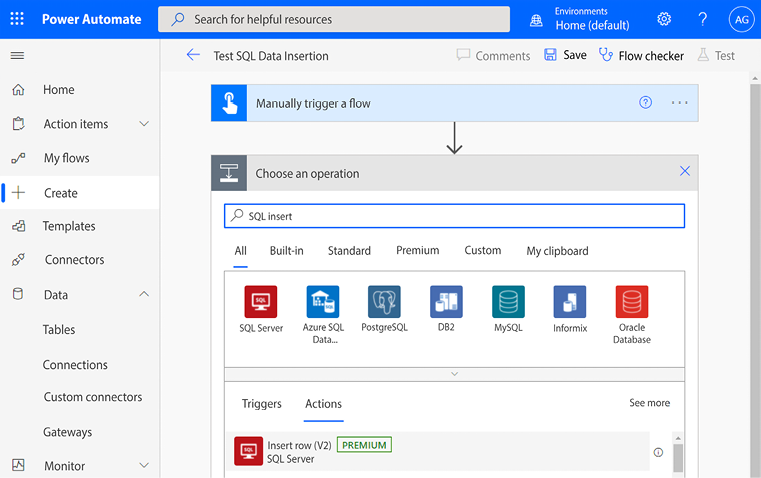
Figure 12.13: Selecting the Insert...


