Every server that you build will need a hostname, and most likely will need to be joined to your domain. We are all familiar with doing these things with the mouse using system properties, but have you ever thought of using a command interface to do these tasks quickly? Let's work together to discover how PowerShell can once again help make these necessary tasks more efficient.
Renaming and domain joining via PowerShell
Getting ready
We have just finished turning on a new Windows Server 2016 machine. Immediately following the mini-setup wizard in order to get logged into Windows, let's now use PowerShell to set our hostname and join the system to our domain.
How to do it...
Follow these steps to rename and domain join this new server with PowerShell:
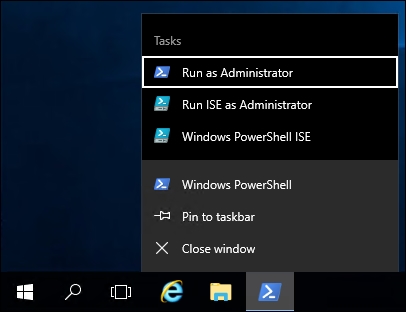
- Right-click on your PowerShell icon on the Taskbar and choose Run as Administrator:

- In order to rename our new server WEB2, input the following command. Using the -Restart flag will ensure that our server reboots following the name change:
Rename-Computer -NewName WEB2 -Restart

- That's it for renaming! Now that our WEB2 server has rebooted, open PowerShell again and use the Add-Computer command in order to join it to our domain:
       Add-Computer -DomainName MYDOMAIN.LOCAL -Credential
           MYDOMAIN.LOCAL\Administrator -Restart

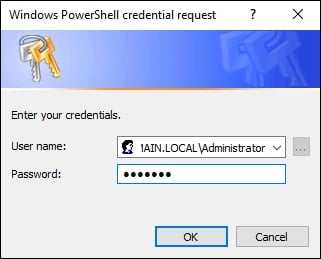
- Since we specified an account to use as credentials when joining the domain, we are prompted to supply the password. As soon as you enter the password, the server will be joined to the domain and will immediately restart to complete the process:

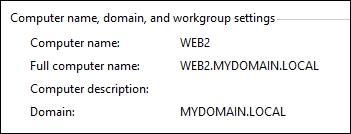
- Following the reboot, you can see in system properties that our server is now appropriately named and domain joined:

How it works...
Through a couple of quick PowerShell cmdlets, we can rename computers and join them to our domain. In fact, these functions are even possible without ever logging into the console of the server. There are parameters that can be added to these cmdlets that allow you to run them remotely. For example, you could run the PowerShell commands from a local desktop computer, specifying that you want to run them against the remote server's IP address or name. By performing the functions this way, you never even have to log into the server itself in order to name and join it. See the links in the following section for additional information on these parameters.
See also
Take a look at the following links for even more detailed information about the Rename-Computer and Add-Computer cmdlets that we used in this recipe:


