Boards
The first principal component of Trello is the digital whiteboard – that is, “the board.” You can have several boards in Trello (up to 10 per workspace in the free plan and unlimited boards in paid plans).
A board is a collection of cards, but we’ll get to those later. Think of a board as a topic or a goal. It could be a specific project you’re working on, or it could be a team.
Don’t worry too much about what your board should be, as it will likely change over time, and you’ll find yourself operating on multiple boards. It’s easy to adjust as you go.
Are you ready to put your fingers on the keyboard? It’s time to start digging in.
Creating a board
To help you explore boards, we will create one so that you have a visual as I explain what’s going on inside the board.
From the top toolbar in Trello, click the Create button and choose the first option that appears – that is, Create board:
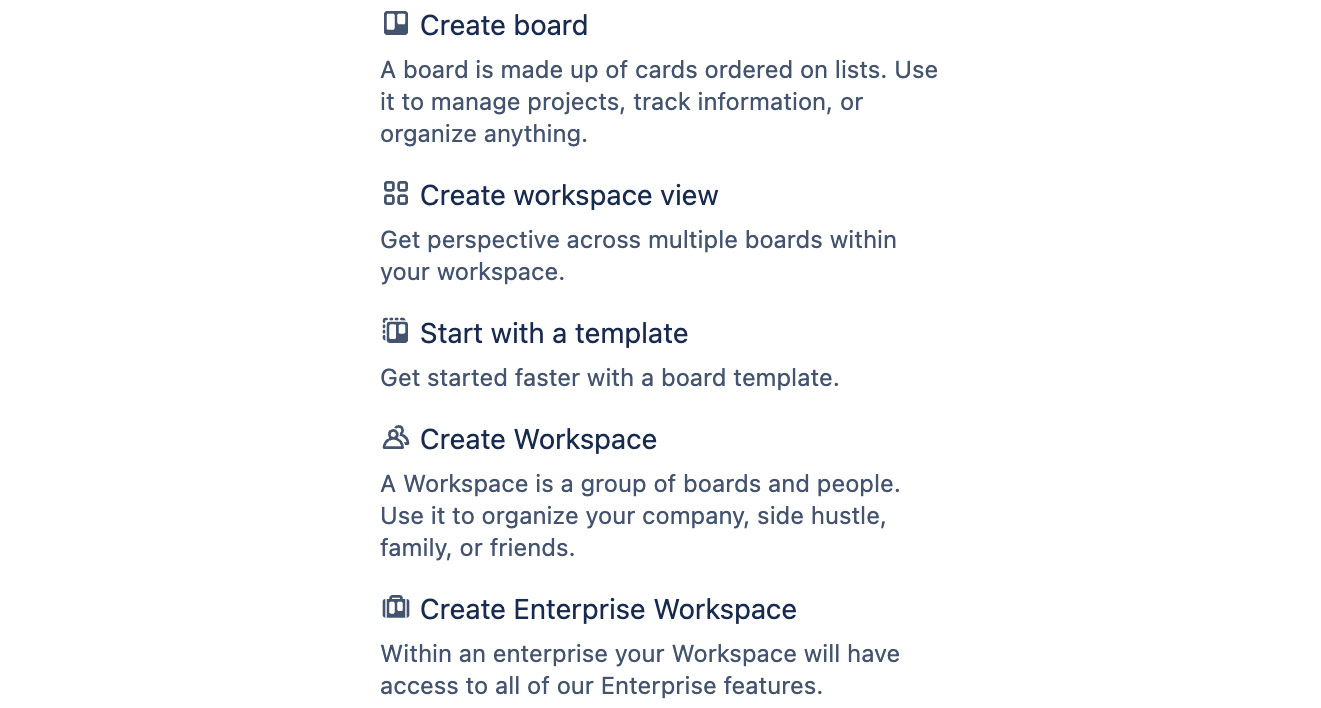
Figure 1.3 – Create options in Trello
Name your board. You can call it To Do or Team Tasks.
Next, confirm the workspace you want the board to be in. You can leave the default option or click the name of the board to select another available workspace.
Lastly, you’ll choose a level of visibility – that is, who has access to view your board. For now, stick with the default option, which is Workspace visible. If no one else is part of your workspace, this is effectively the same as private visibility. If you aren’t sure and would prefer to hide this board, you can set the visibility to Private.
Once you click Create, you’ll go straight to your new board.
Finding your boards
Go to trello.com to see the boards you have joined or created:
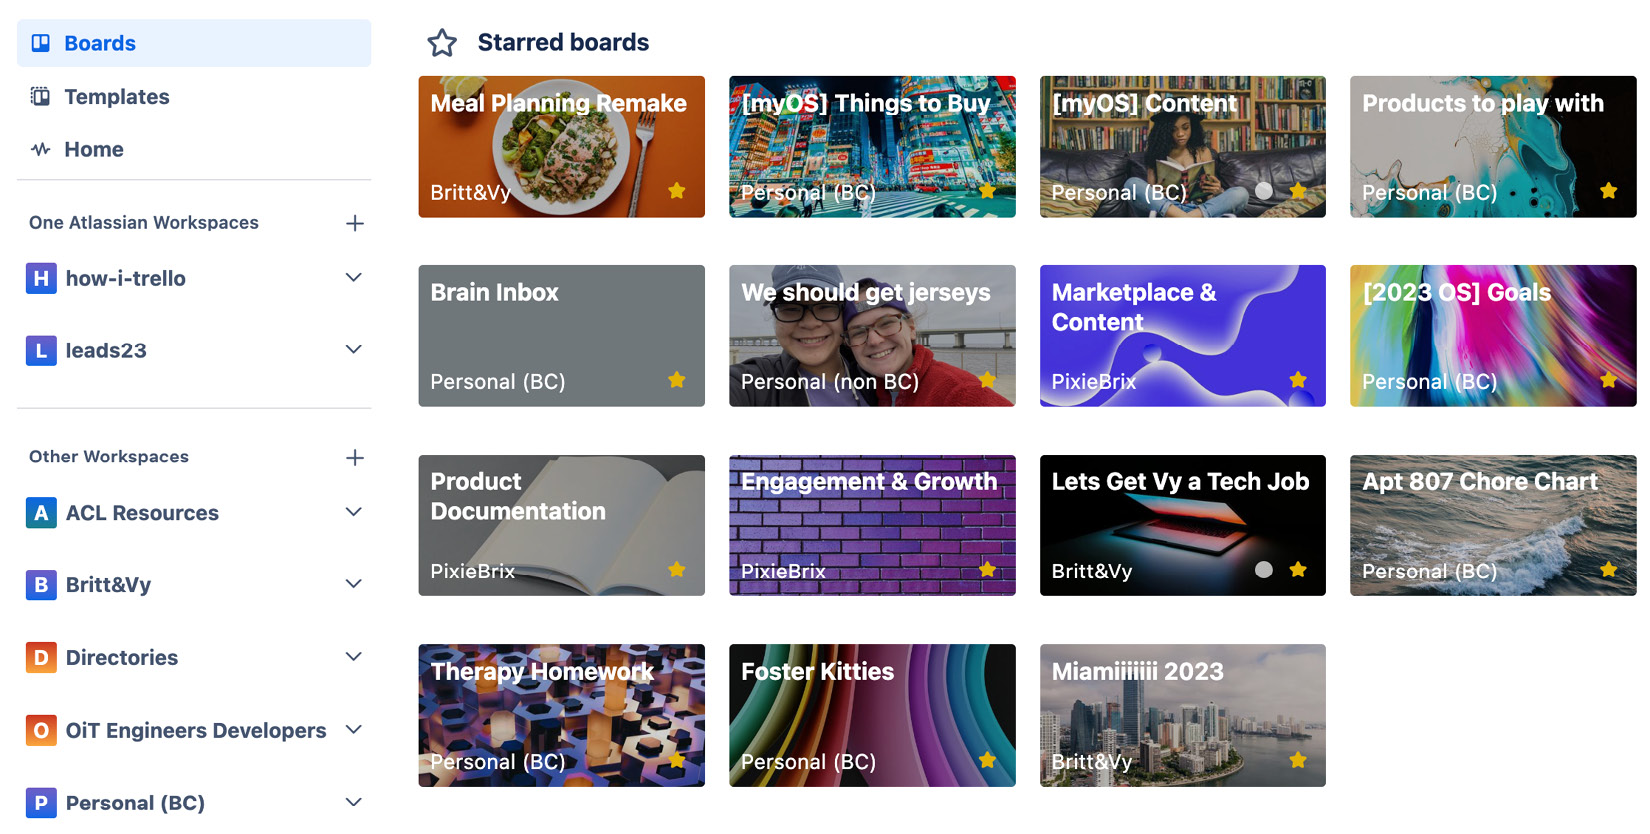
Figure 1.4 – Trello board home page
View all boards, starting with starred ones, then your recently viewed ones, and finally the remaining boards. You can view only boards from a specific workspace by selecting a workspace name on the left-hand side.
To go to a board, click on its tile.
Top toolbar options for a board
Though boards can look very different, navigating them is the same. They all have a top toolbar with items for personalizing your board.
Although other tools have the “board” concept, did you know Trello was the first to promote this type of organization? Trello also offers the best customization and set of features at a board level that I’ve seen across all other similar tools.
Starring a board
The first item you will see is the board’s name; immediately next to it will be a star. If it’s filled yellow, this means that the board is “starred” and will show up at the top of your Trello Boards page.
You can also access these boards from the Starred menu in the very top toolbar in Trello.
By default, the starred field will be unselected. Click it to star it, and click again to un-star it:

Figure 1.5 – Board title with star icon for favoriting
Setting board visibility
The next option you’ll see is your board’s visibility. When creating a board, by default, it will be set to Workspace visible. This means that anyone who is part of your workspace can view the board and join it.
To change this, select the current visibility option – a menu will appear with options to change it:
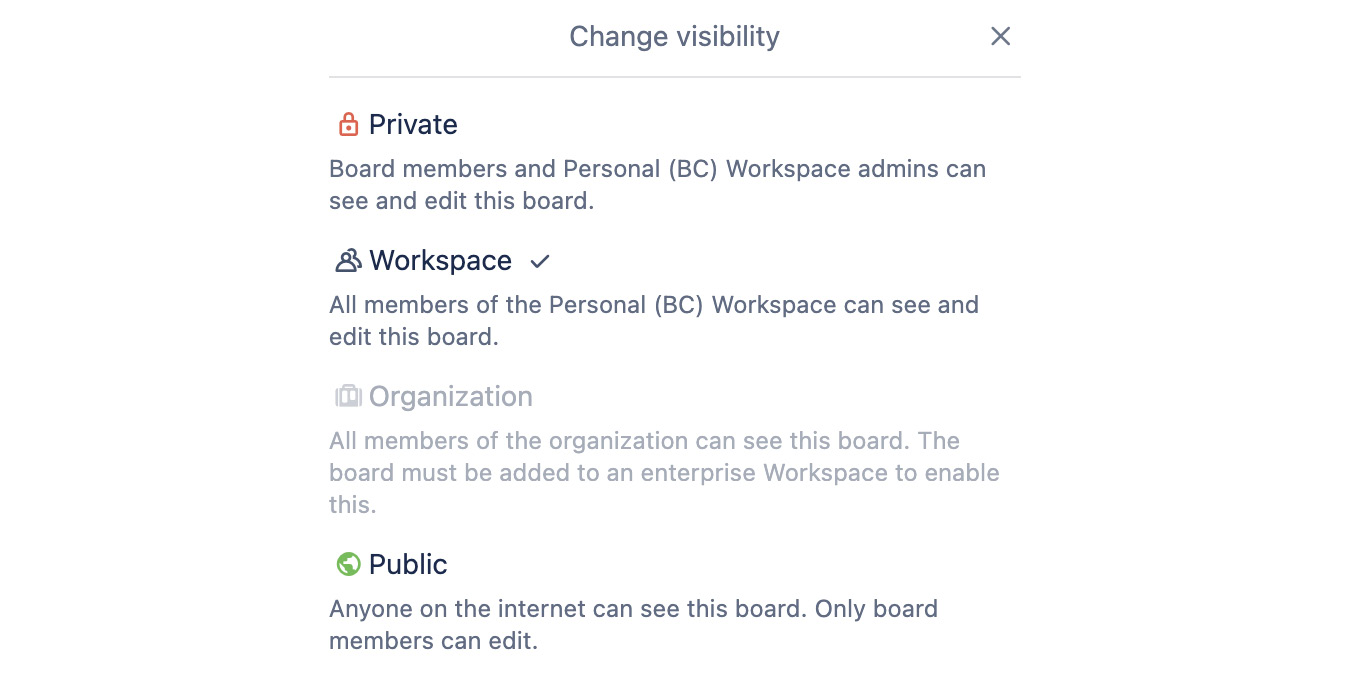
Figure 1.6 – Board visibility options
You have at least three visibility options, and a fourth one if you are on an Enterprise version of Trello.
Private means that only you and the people who you invite can see the board and its contents, with one exception – workspace admins are also able to see the contents of any board (so make sure not to say anything about your boss in your boards 😅).
You can find your workspace admins by opening the panel on the left-hand side of the board and selecting Members:
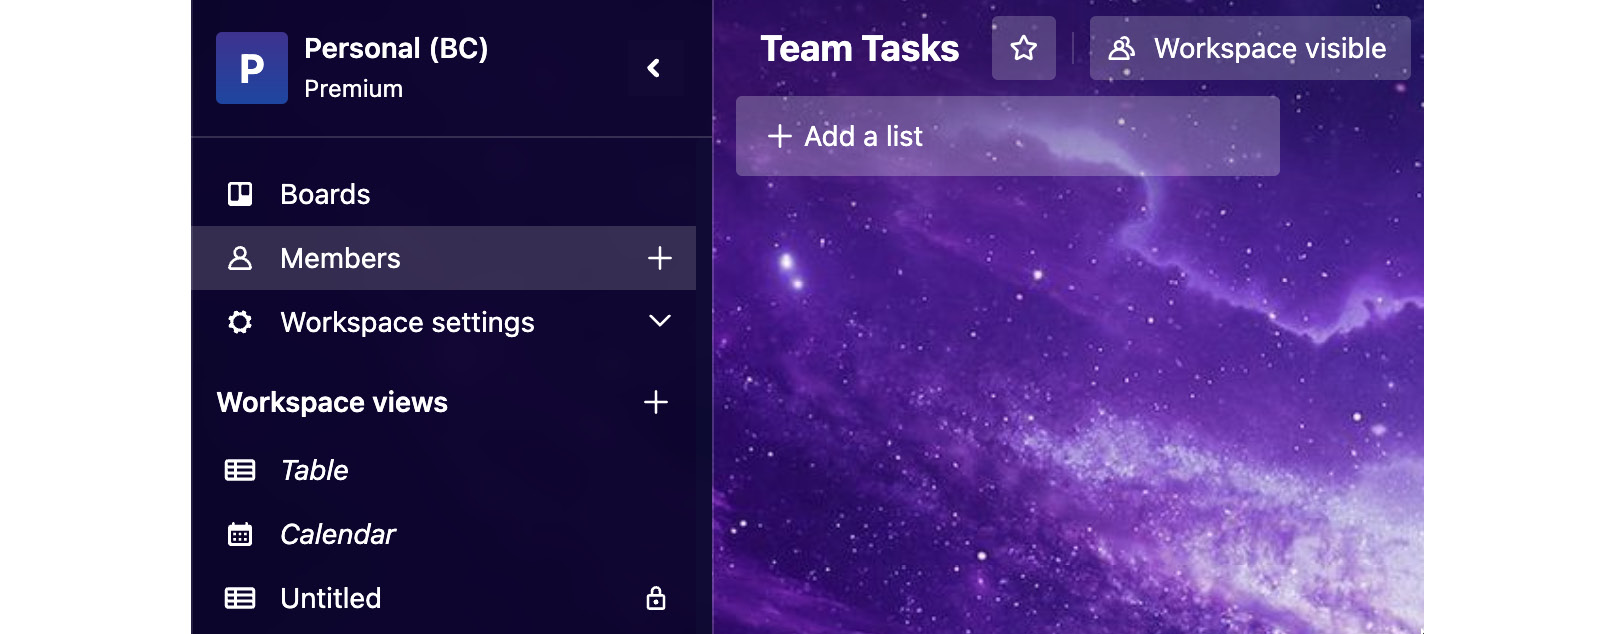
Figure 1.7 – Board member settings
If you want others to view your content and engage in a board, you can invite them to the board, even if its visibility is Private. Click the Share button in the top-right toolbar of your board to see a modal appear:

Figure 1.8 – Board sharing and invite options
Here, you can type a member’s name or email address. If they’re not on Trello, you can send an invite to their email address.
You can also click the Create link button below the text field to create a link that you can send to someone to join the board. This link is not public, but anyone you send it to will be able to join the board. You can revoke this link any time after you create it.
Workspace visible means that anyone who is part of your workspace can see the contents of your board. They’ll also be able to join it and edit. This is great for any information that is relevant to your wider group of colleagues and doesn’t contain sensitive information.
Public visibility means that anyone can see this board, even if they don’t have a Trello account. Sometimes, this is actually kind of useful! For instance, perhaps you want to distribute information, such as a roadmap or resources. Although anyone can see this board, they can’t edit it.
It’s also important to note that as of 2022, Google does not index Trello boards, so they will not appear in Google search results. Bummer for folks who had Trello boards with links that were getting tons of traffic!
Organization visibility is only available to Trello Enterprise accounts. It means anyone using Trello with the same company email domain (for example, mary@coolcompany.com and john@coolcompany.com) can view this board.
Next to the visibility settings, you’ll see options for board views. If you want to learn about them now, skip to Chapter 4.
There’s another button called Power-Ups, but once again, we won't cover these until a later chapter because we’ve got a lot of ground to cover there. These add-ons super-charge your Trello board to do even more powerful things. It’s best to start with Trello’s native features before diving into the extras. We will discuss those in Chapters 11, 12, 13, and 14.
You’ll also see a button for Automation, which allows you to customize rules for managing items in Trello. You will learn more about this in Chapter 6.
Filtering a board
One more button you’ll see in your top bar is the Filter button. If you don’t have any cards on your board, it won’t be very useful, but once you add cards, you can select which cards you want to see:
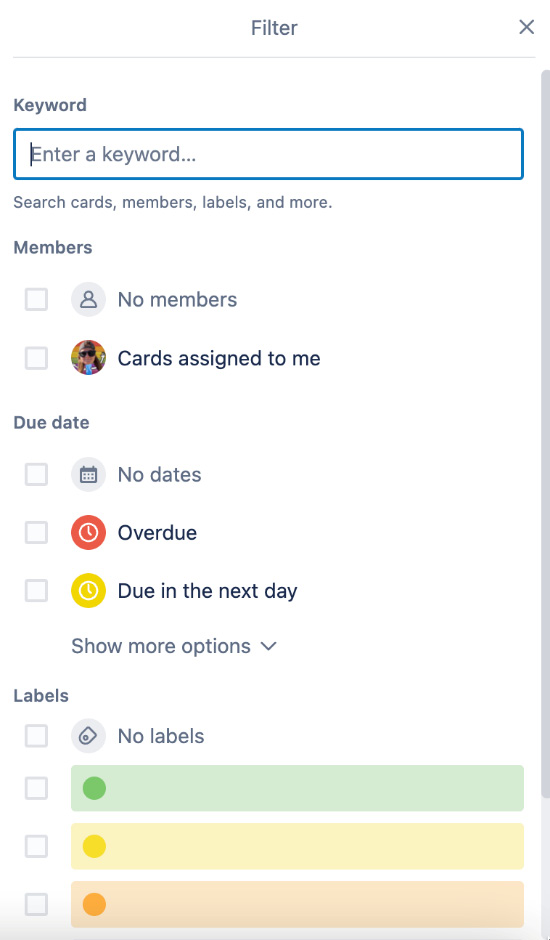
Figure 1.9 – Board filtering options
Here, you can filter to only show your cards (or another member’s) or filter by due dates. You can even filter by keywords, labels, or recency of activity. It’s a great tool for drilling down to exactly what matters, and helpful when you have a busy board.
Adding members and setting roles
You’ll also notice avatars on the top right-hand side of your board, which indicate who has joined the board. Click on an avatar to view that member’s information. If you need to change their role, click the Share button. You can also see a list of all the members and their roles here.
By default, everyone is a member, which means they can edit the content on a board, such as creating cards, lists, and more.
Admins have superpowers and can rename a board and close a board.
If you’re on a Trello Premium or higher plan, you’ll have access to another role type: Observer. These users can view content and comment on a card, but they aren’t able to edit anything on the board. This is helpful if you don't want to make a board public, but need your team to see the content without having the power to break anything.
Accessing the board menu
The last stop on the board menu is an ellipsis on the right-hand side of the top toolbar. Click it to reveal extra settings for configuring your board:

Figure 1.10 – Menu navigation on Trello boards
Description
A board description is a place where you can summarize the board. It’s helpful for others to understand the context of the board and also a great place to save related links. Let’s go ahead and set this:
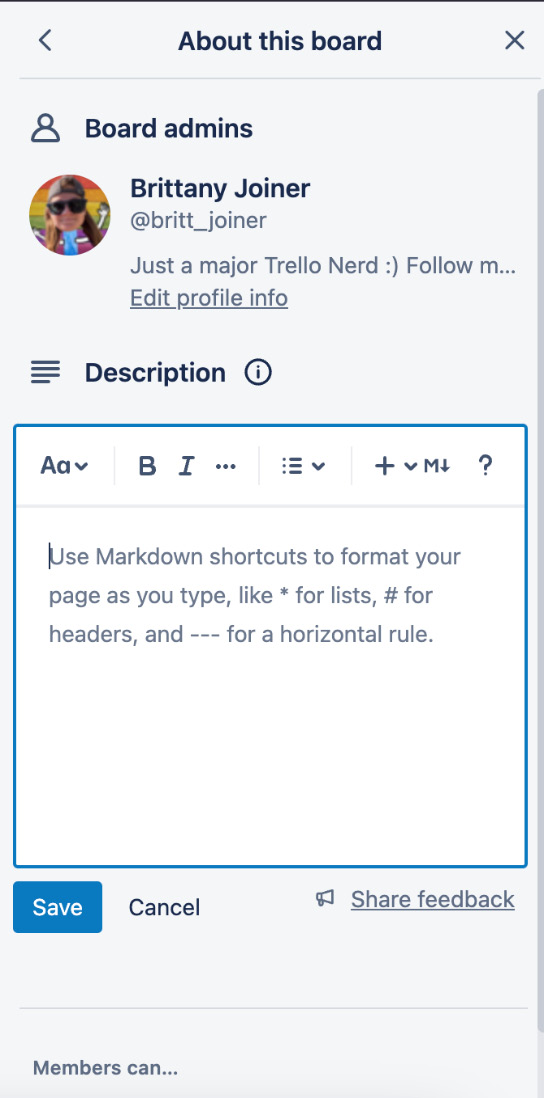
Figure 1.11 – Board description section
Use the rich text editor to style your text with headers, bullet points, and anything else you want. When you’re done, click Save.
Background
The next setting allows you to change the background to another color, a stock photo, or a custom image.
Click Custom to upload a file, or search for keywords to find photos from Unsplash:
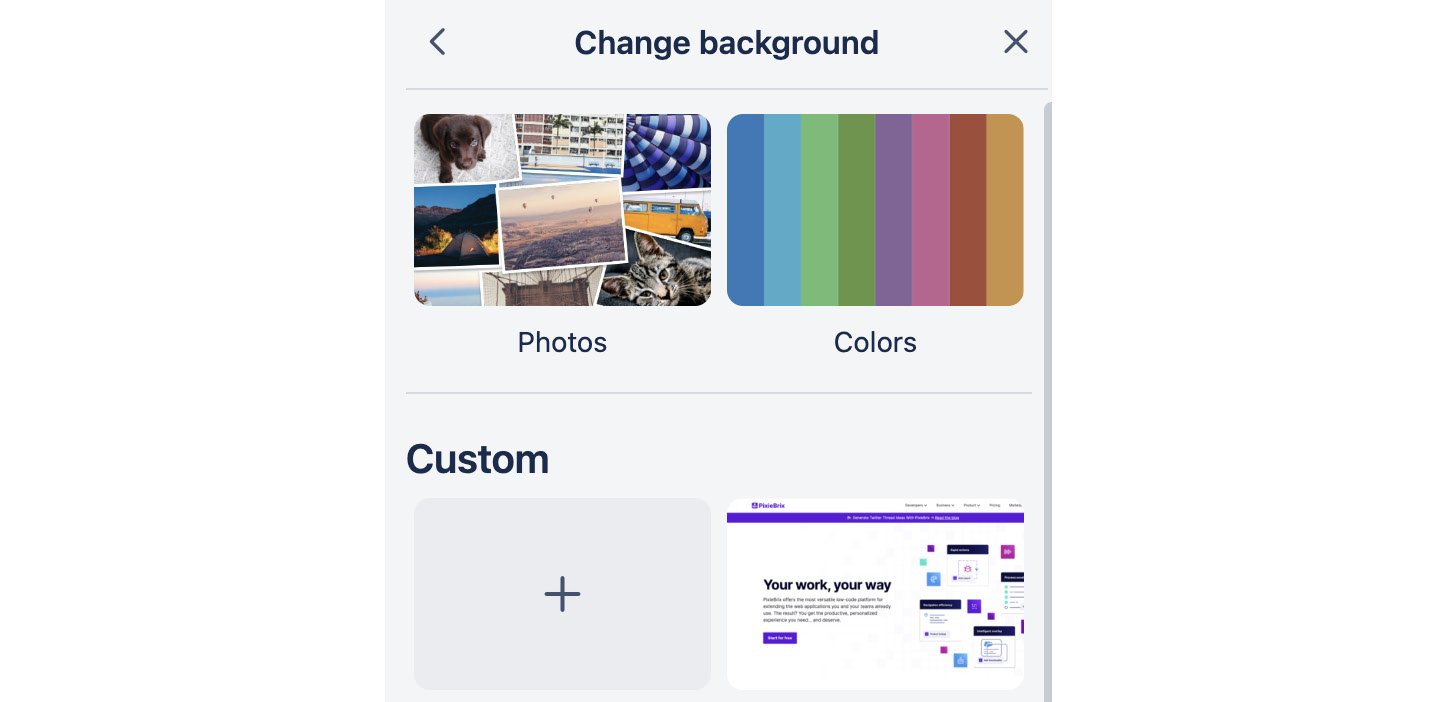
Figure 1.12 – Board background customization options
Not every tool lets you customize and style your workspace. Trello lets you make the board your own rather than being limited to using the default light or dark mode background.
Stickers
If you want to add flair to your board, you can add stickers to style cards. Open the stickers menu, search for a keyword, select the sticker, and then drag it over to a card. You can remove a sticker by hovering over it and clicking the x button:
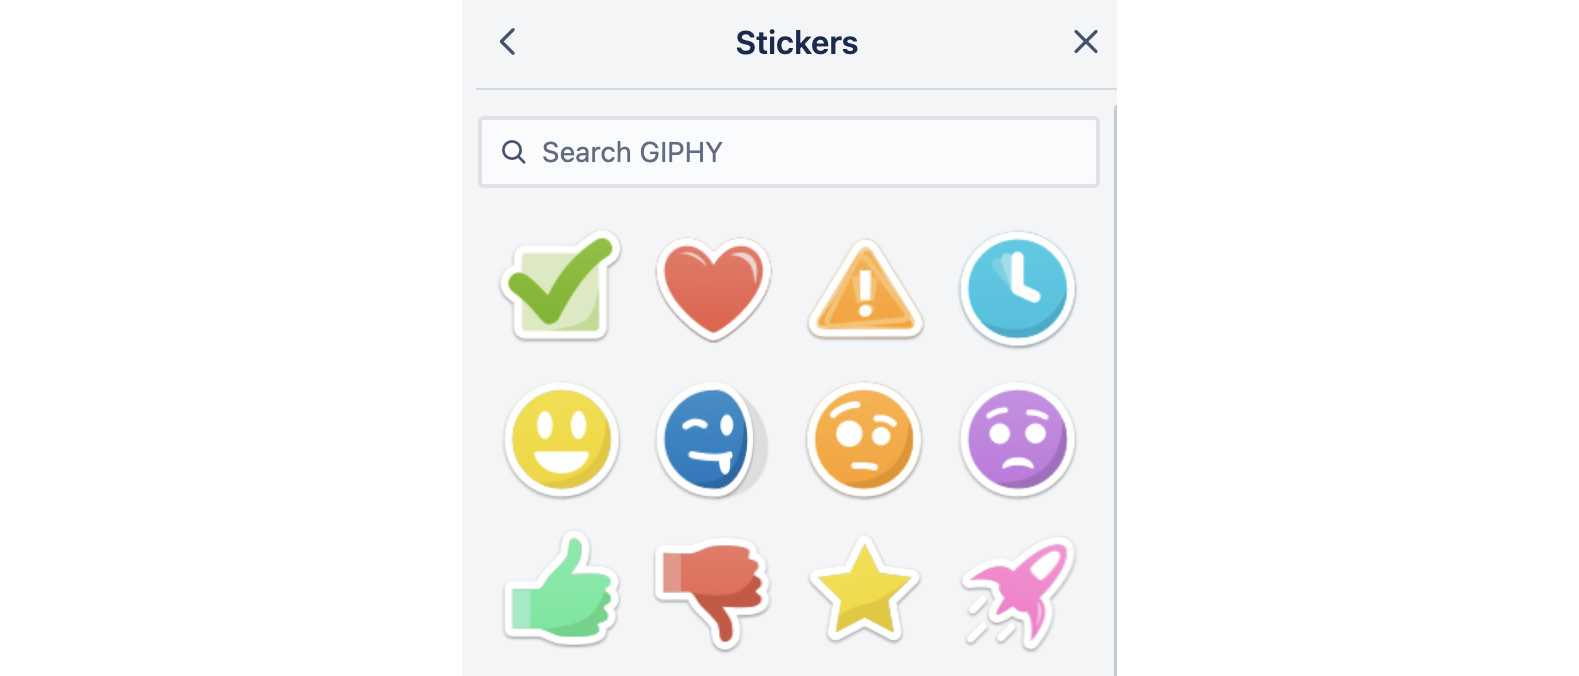
Figure 1.13 – Trello board stickers
Additional settings
Click More to view another hidden layer of settings. If you choose the first option, called Settings, you’ll see options to change the board’s workspace.
You can also enable or disable card covers (images that prepend to the top of a card).
Lastly, you can change the permissions of who is allowed to perform various actions on a board, such as commenting on cards or adding people.
You can even edit the ability for workspace members to join the board without an invite:
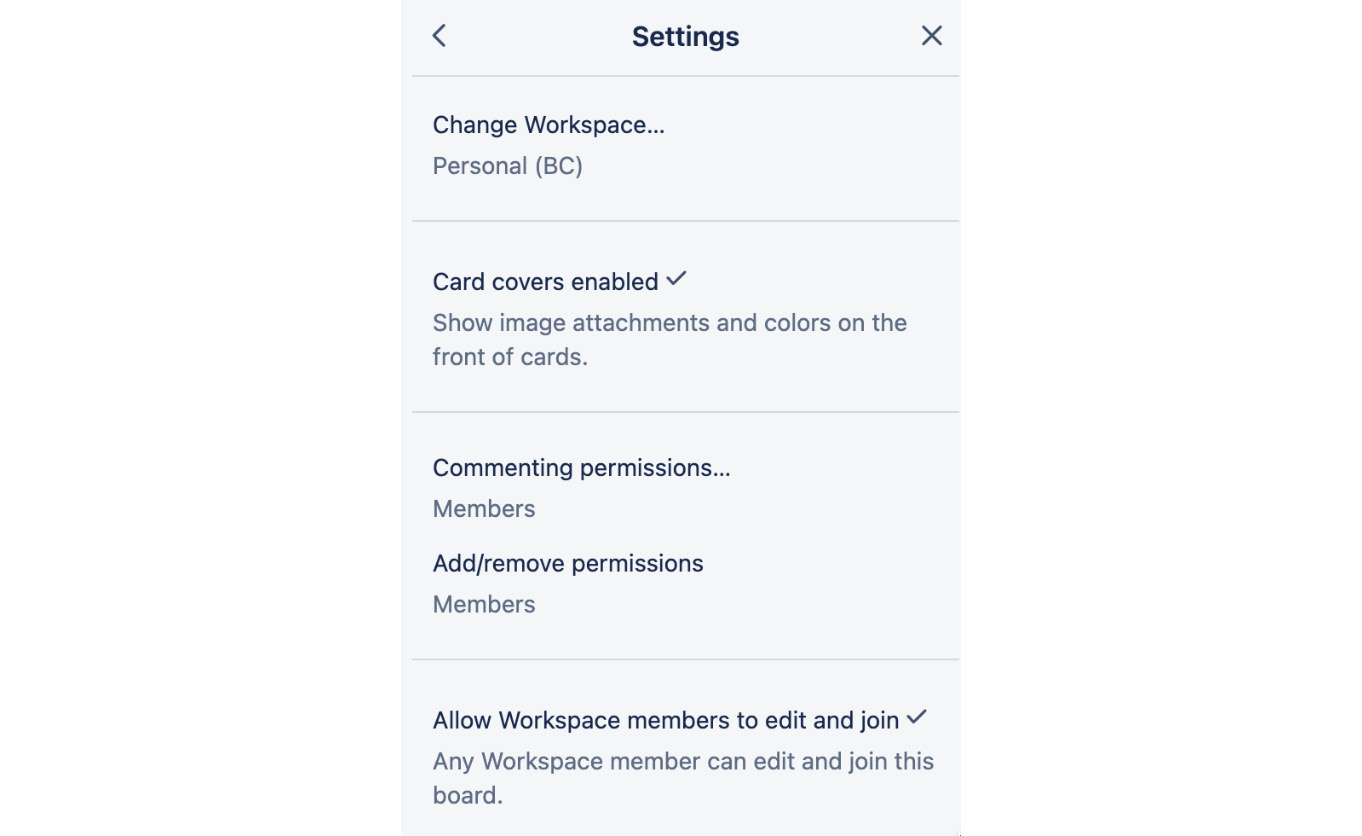
Figure 1.14 – Board advanced settings options
Collections
Collections are kind of like folders for your Trello boards. If you’d like to organize multiple boards together, you can add them to a collection. This feature is only available for Premium and higher plans.
Archived items
Trello makes it very hard to accidentally delete something. If you seem to be missing something, there’s a good chance it was just archived! You can find your archived items here. Click this option to see anything archived in this board, sorted by card or list:
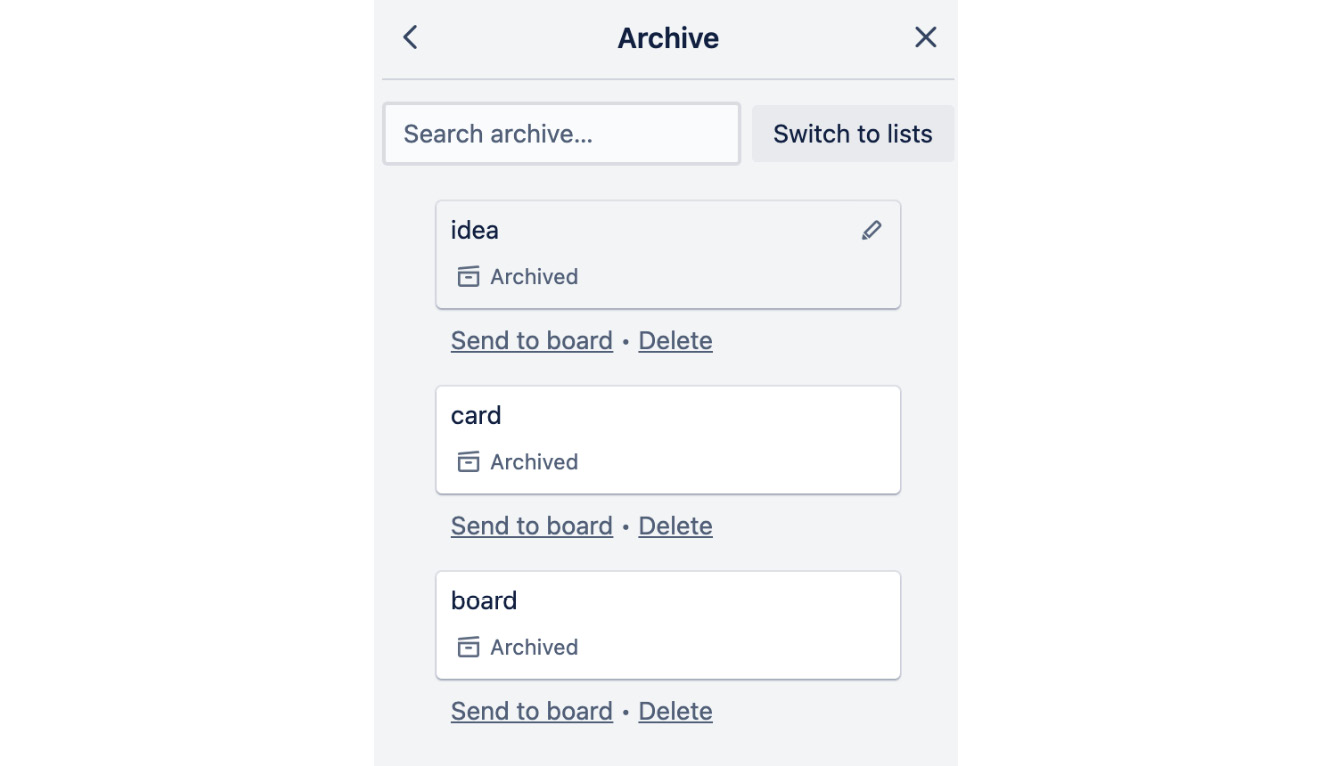
Figure 1.15 – Archived items in Trello
To bring something back, click the Send to board button.
This is one of the reasons I prefer to use Trello – because it’s hard to lose something. In other tools, you might delete something as the default action. This makes it difficult to restore if it was an accident. But when using Trello, if you find that something's missing, it’s easy to recover it.
Email address
Did you know that you can email something to a Trello board? Every board has a unique email address. You can use the Email-to-board settings area to view the board’s address, generate a new one, and configure which list to add new items to:
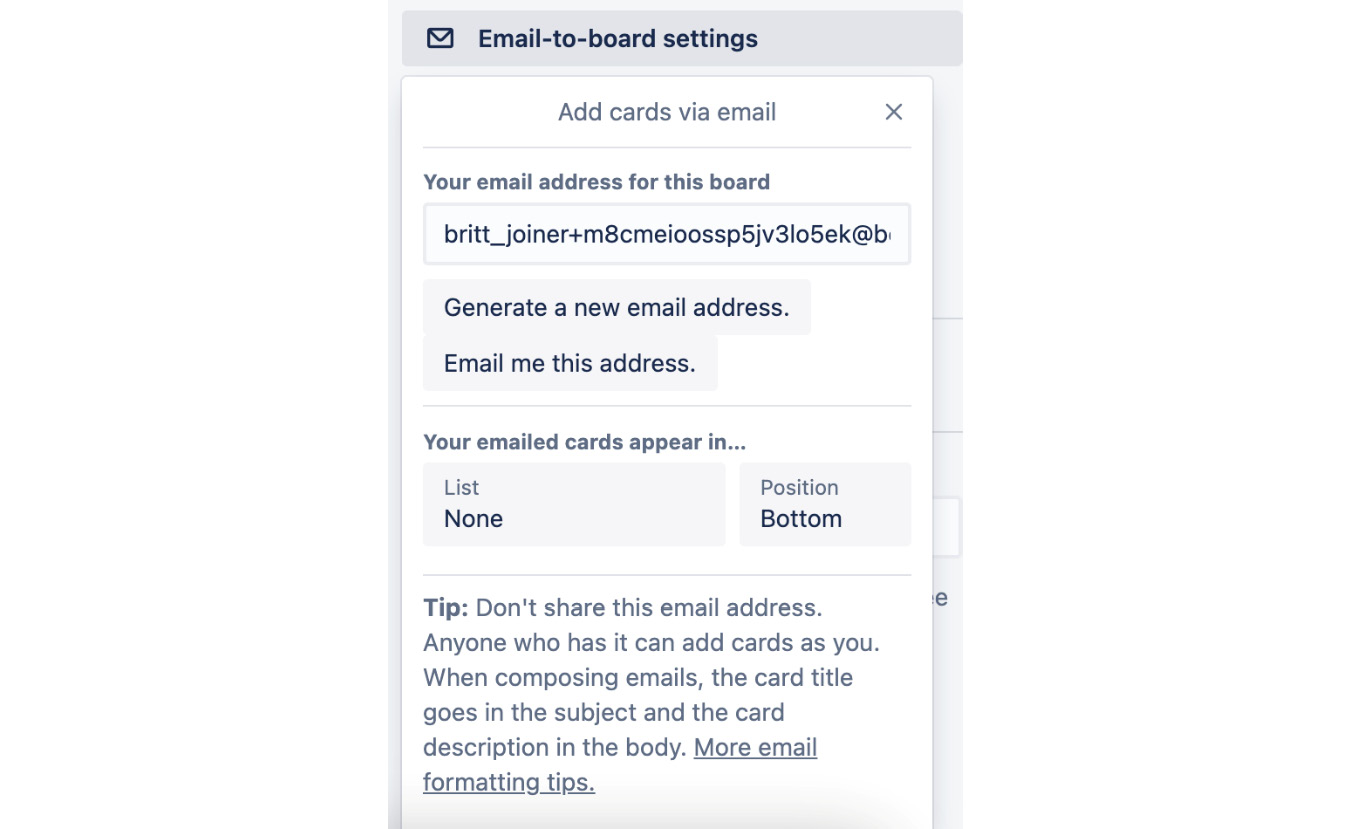
Figure 1.16 – Board email options
Go ahead and try it! Copy the email address and head to your email. Send an email with the subject Hi and something in the body. Then, head back to Trello and watch it appear on your board within seconds!
Watching
If you want notifications about everything that happens to anything on this Trello board, click the Watch button. But fair warning – that’s a lot of notifications! You’ll get a notification whenever something happens to any card on this board:

Figure 1.17 – The board’s Watch button checked
You can confirm whether you’re watching a board or not in this section, as it will show a checkmark if you are. Or, in the toolbar, you’ll see a watch button. You can toggle it off if you’re getting too many notifications.
Template
Once you have your board set up the way you like, you might want to share it as a template that you or others can use in the future. This is a great way to customize and reuse boards so that you don’t have to set them up from scratch each time:
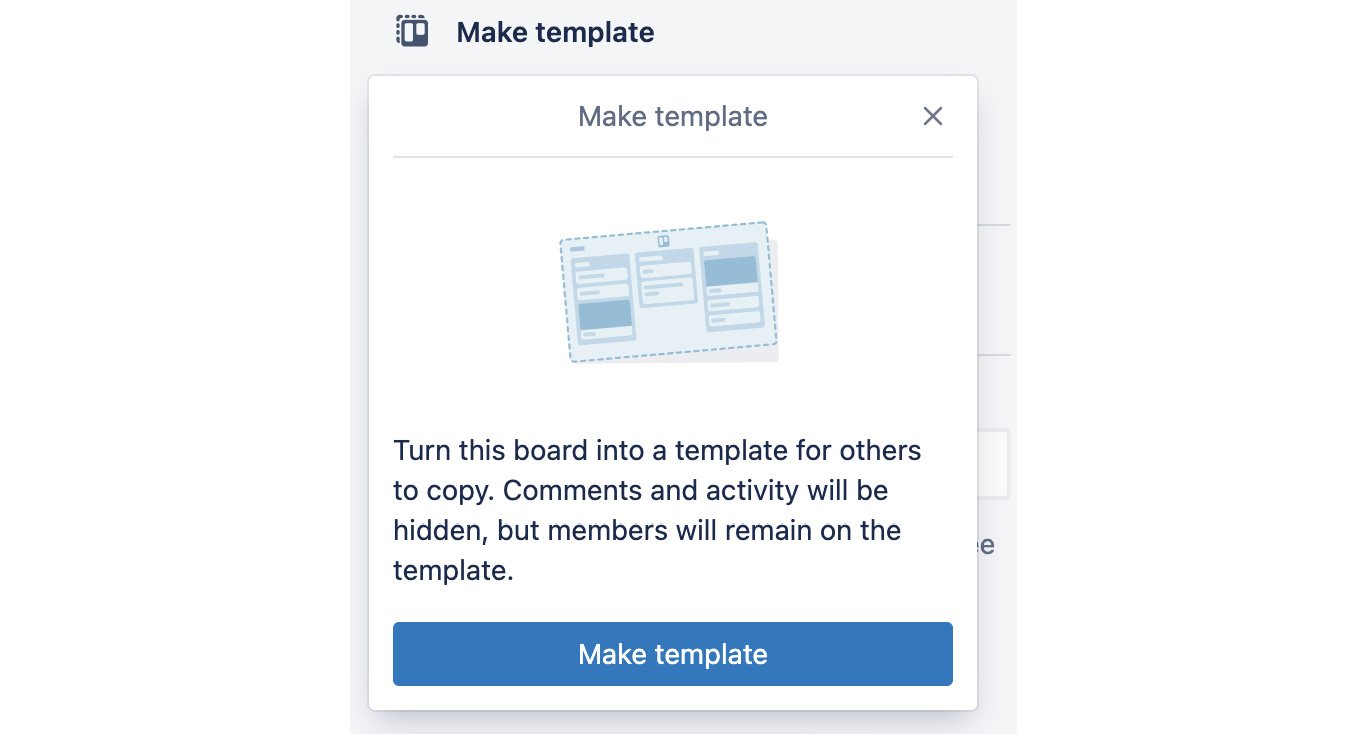
Figure 1.18 – The Make template button
You can even publicize a template to help more people discover more uses for Trello! To view templates others have contributed to, head to trello.com/templates.
Copy
You don’t have to make a board a template to be able to copy it. Click the Copy button to duplicate the board and choose which parts you want to copy over, such as members and cards:
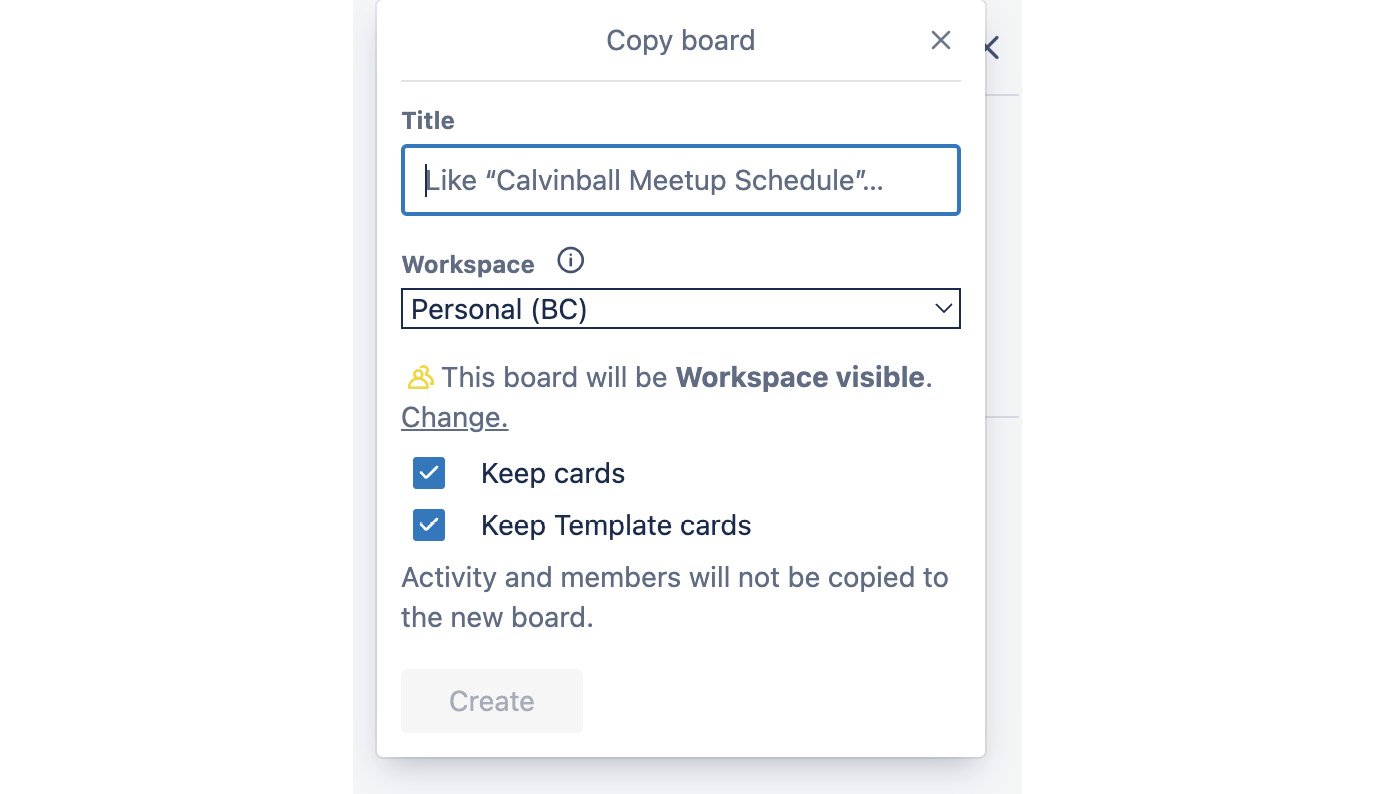
Figure 1.19 – Settings to copy a board
Try it out and make a copy of your current board. Make a duplicate board named House Projects.
Exporting
As much as you’ll enjoy working in Trello, you might find that you need to get your information out of Trello. There are multiple ways to do that – you can print your boards, export them as a CSV, or export them as a JSON object (pro tip – you can also view your board as a JSON object in your browser by appending .json to the URL):

Figure 1.20 – Board export options
At the moment, our board is pretty empty, but if you want to test it out, add a few cards and try it out!
Close board
If you ever want to delete a board, you can close it. Even after you close it, you can undo it if you change your mind! Simply click Reopen board. You can also find your closed boards from your Boards page (to get there, click the Trello logo in the top-left corner from anywhere in Trello). From there, scroll to the bottom of the page, then click the View all closed boards button.

Figure 1.21 – Reopening a closed board
Go ahead and try it out! Close your board, and then bring it back.


