The Windows environment suffers from a drawback: none of the standard Linux tools are available out of the box. This is a problem as Jupyter and many other programs were developed on a version of Unix and expect many developer tools normally used in Unix to be available.
Installing Jupyter on Windows
Getting ready
Luckily, there is a company that has seen this problem and addressed it—Anaconda. Anaconda describes itself as a Python Data Science Platform, but its platform allows for a variety of solutions in data science that are not based on Python.
How to do it...
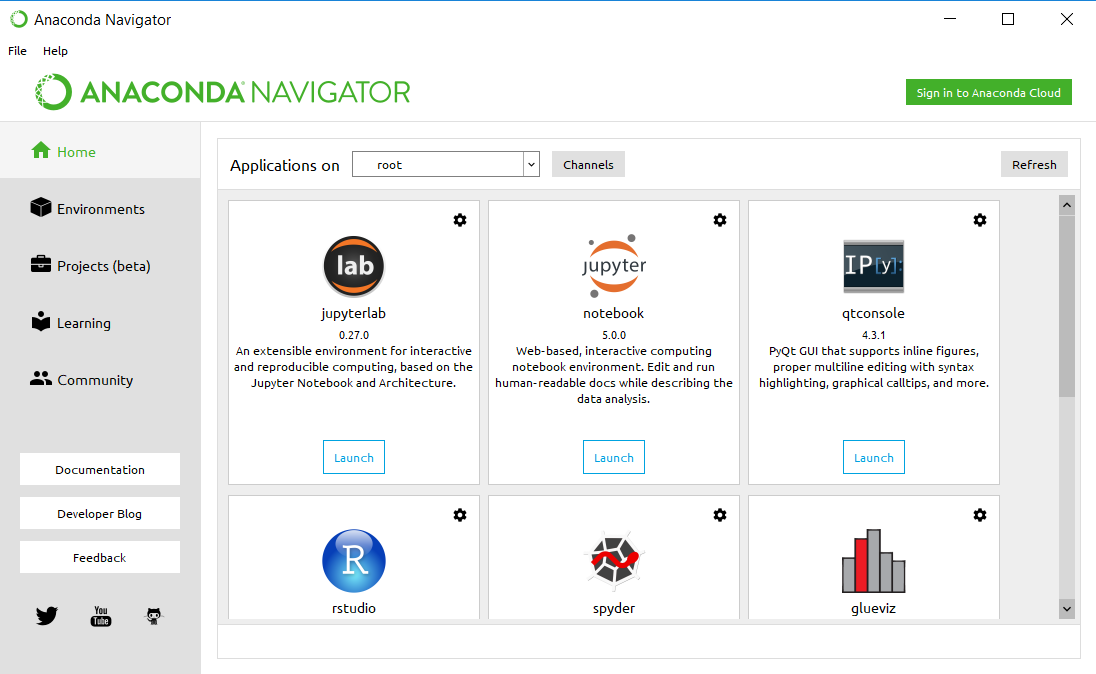
After installing Anaconda and starting Navigator, you get to a dashboard that presents the programs available, such as:

The Anaconda Navigator provides access to each of the programs you have installed (using Anaconda). Each of the programs can be started from Navigator (by clicking on the associated Launch button) and you can also start them individually (as they are standalone applications). As you install programs with Anaconda, additional menu items become available under the Anaconda menu tree for each of the applications to run directly. The menu item has coding to start the individual applications as needed.
As you can see in the preceding screen, the Home display shows the applications available. There are additional menu choices for:
- Environments: This menu displays all the Python packages that have been installed. I don't think R packages are displayed, nor are other tools or packages included in this display.
- Projects (beta): This menu is usually empty. I have been using/upgrading Anaconda for a while and have not seen anything displayed here.
- Learning: This is a very useful feature, where a number of tutorials, videos, and write-ups have been included for the different applications that you (may) have installed.
- Community: This lists some community groups for the different products you have installed.
The preceding screen shows Jupyter as an installed program. The standard install of Anaconda does include Jupyter. If you choose not to use Anaconda, you can install Jupyter directly.
Installing Jupyter directly
Jupyter, as a project, grew out of Python, so it is somewhat dependent on which version of Python you have installed. For Python 2 installations, the command line steps to install Jupyter are:
python -m pip install --upgrade pip
python -m pip install jupyter
This assumes you have pip installed. The pip system is a package management system written in Python. To install pip on your Windows machine, execute the following line:
python get-pip.py
As you can see, this is all Python (this code calls Python to execute a standard Python script).
Installing Jupyter through Anaconda
Anaconda provides the tools to install a number of programs, including Jupyter. Once you have installed Anaconda, Jupyter will be available to you already.
The only issue I found was that the engine installed was Python 2 instead of Python 3. There is a process that Anaconda uses to decide which version of Python to run on your machine. In my case, I started out with Python 2. To upgrade to Python 3, I used these commands:
conda create -n py3k python=3
anaconda source activate py3k
ipython kernelspec install-self
After this, when you start Jupyter, you will have the Python 3 engine choice.
You may prefer to have the Python 2 engine also available. This might be if you want to use scripts that were written using Python 2. The commands to add Python 2 back in as an engine choice are:
python2 -m pip install ipykernel
python2 -m ipykernel install --user
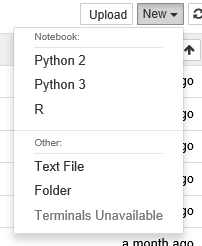
You should now see Python 2 and Python 3 as engine choices when you start Jupyter:


