Installing a plugin
Installing ImageJ plugins just requires you to download the plugin file (or files) and copy it into the plugins/ directory that can be found inside the ImageJ's installation directory. After copying the file and restarting ImageJ, the plugin can be run from the corresponding Plugins menu option. The specific menu option depends on the plugin you have installed and sometimes on the path into which the file or files are being copied.
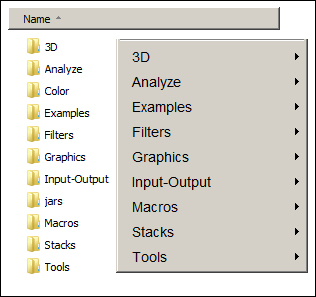
First of all, let's take a look at the Plugins menu structure. At the top of it, you will see some commands that you should already be familiar with (the ones related to macro development). Then there is a horizontal separation bar and several submenus (3D, Analyze, and so on). Now go to your ImageJ's installation directory and check the contents of the plugins/ subdirectory. There is an almost perfect match between the directory listing of that folder and the options from the Plugins menu below the divider line:

The contents of the plugins/...


