Setting up an Azure AD tenant
In this section, we are going to set up a new Azure AD tenant inside an Azure subscription.
Important Note
If you are new to Azure and don't have a subscription already, you can sign up for a free account here: https://azure.microsoft.com/en-us/free/.
Microsoft also offers the Microsoft 365 Developer Program. Here you can sign up for an E5 licensed tenant with no need to sign up for a subscription, no credit card needed, and you get access to sample data packs. The tenant is live by default for 90 days and it will automatically renew if it is actively used. If you want to use an environment that includes a fully functional E5 license including all the features and sample data, this is the way to go. You can sign up for this program here: https://developer.microsoft.com/en-us/microsoft-365/dev-program.
To create a new Azure AD tenant, you have to take the following steps:
- Open a web browser and navigate to https://portal.azure.com.
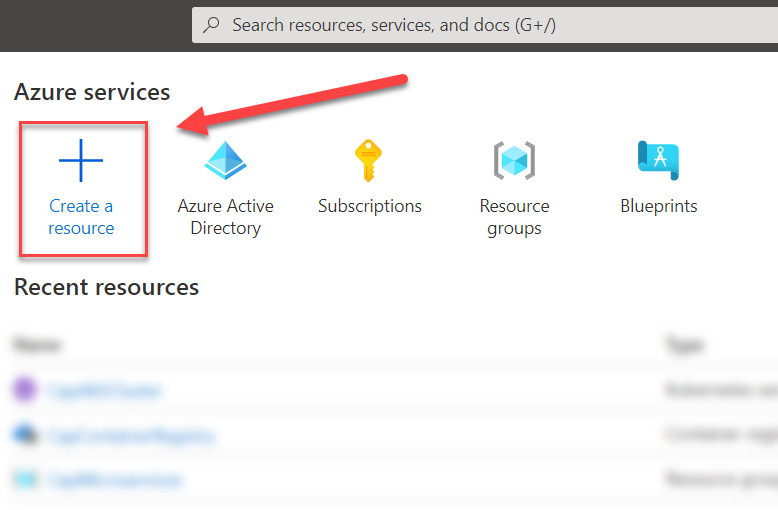
- In the overview page of Azure AD, in the top menu, select + Create a resource:

Figure 1.3 – Azure portal overview
- Search for
Azure Active Directoryin the search box and select it. - Click the Create button to start creating a new Azure AD tenant.
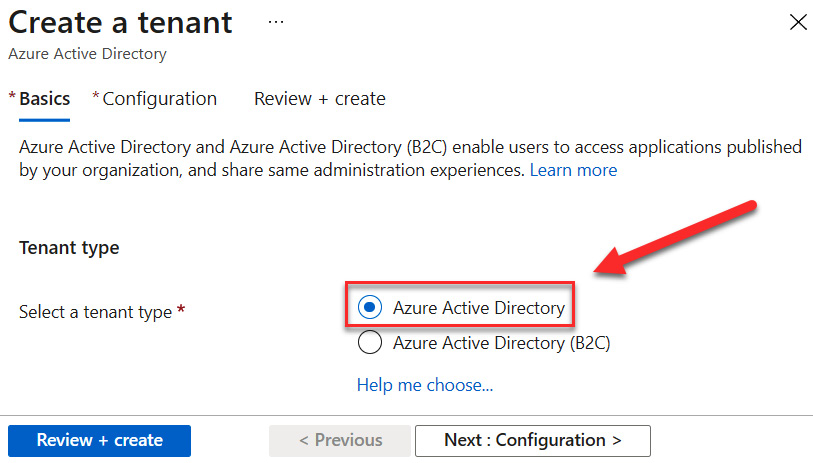
- Next, in the Basic tab, you need to select the type of tenant that you want to create, an Azure Active Directory or Azure Active Directory (B2C) tenant. Azure Active Directory will be selected by default. Make sure that it is selected and click Next: Configuration:

Figure 1.4 – Selecting the type of tenant to create
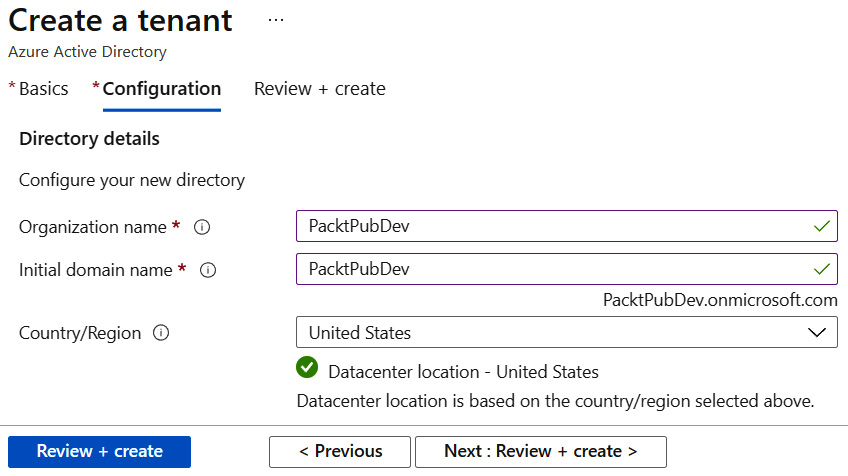
- In the next screen, you need to specify the values for the Azure AD tenant. I've used the following values, but you have to fill in a unique name here:
- Organization name:
PacktPubDev. - Initial domain name:
PacktPubDev. This will result in the following domain name:PacktPubDev.onmicrosoft.com. - Country/Region: Here, select your current country or region.
- Organization name:
Your settings will look like the following screenshot:

Figure 1.5 – Specifying Azure AD tenant details
- Click Review + create and Create. If needed, prove that you are not a robot and then click Submit to create the Azure AD tenant.
It will take a couple of minutes before the Azure AD tenant is created. After it is created, we can start adding our first user to it. Let's cover this in the next section.


