Installing ROS kinetic on Ubuntu 16.04 LTS
As we have discussed, there are a variety of ROS distributions available to download and install, so choosing the exact distribution for our needs may be confusing. Following are answers to some of the frequently asked questions while choosing a distribution:
- Which distribution should I choose to get maximum support?
- Answer: If you are interested in getting maximum support, choose an LTS release. It will be good if you choose the second most recent LTS distribution.
- I need the latest features of ROS; which should I choose?
- Answer: Go for the latest version then; you may not get the latest complete packages immediately after the release. You may have to wait for a few months after the release. This is because of the migration period from one distribution to other.
In this book, we are dealing with two LTS distributions: ROS Indigo, which is a stable release, and ROS Kinetic, the latest one.
Getting started with the installation
Go to the ROS website (http://www.ros.org/), and navigate to Getting Started | Install.
You will get a screen listing the latest ROS distributions:

Figure 14: Latest ROS distributions on the website
You can get the complete installation instructions for each distribution if you click on the Install button.
We'll now step through the instructions to install the latest ROS distribution.
Configuring Ubuntu repositories
We are going to install ROS on Ubuntu from the ROS package repository. The repository will have prebuilt binaries of ROS in .deb format. To be able to use packages from the ROS repository, we have to configure the repository options of Ubuntu first.
Note
Here are the details of the different kinds of Ubuntu repositories: (https://help.ubuntu.com/community/Repositories/Ubuntu)
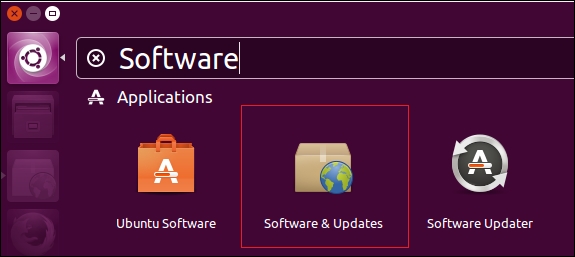
To configure the repository, first search for Software & Updates in the Ubuntu search bar.

Figure 15: Ubuntu Software & Updates
Click on Software and & Updates and enable all the Ubuntu repositories, as shown in the following screenshot:

Figure 16: The Ubuntu Software & Updates centre
Setting up source.list
The next step is to allow ROS packages from the ROS repository server, called packages.ros.org. The ROS repository server details have to be fed into source.list, which is in the /etc/apt/.
The following command will do this job for ROS Kinetic, Jade, and Indigo:
sudo sh -c 'echo "deb http://packages.ros.org/ros/ubuntu $(lsb_release -sc) main" > /etc/apt/sources.list.d/ros-latest.list'
Setting up keys
When a new repository is added to Ubuntu, we should add the keys to make it trusted and to be able to validate the origin of the packages. The following key should be added to Ubuntu before starting installation:
sudo apt-key adv --keyserver hkp://ha.pool.sks-keyservers.net:80 --recv-key 0xB01FA116
Now we are sure that we are downloading from an authorized server.
Installing ROS
Now, we are ready to install ROS packages on Ubuntu. The first step is to update the list of packages on Ubuntu. You can use the following command to update the list:
$ sudo apt-get update
This will fetch all packages from the servers that are in source.list.
After getting the package list, we have to install the entire ROS package suite using the following command:
- ROS Kinect:
$ sudo apt-get install ros-kinetic-desktop-full
- ROS Jade:
$ sudo apt-get install ros-jade-desktop-full
- ROS Indigo:
$ sudo apt-get install ros-indigo-desktop-full
This will install most of the important packages in ROS. You will need at least 15 GB of space in your root Ubuntu partition to install and work with ROS.
Initializing rosdep
The rosdep tool in ROS helps us easily install dependencies of packages that we are going to compile. This tool is also necessary for some core components of ROS.
This command launches rosdep:
$ sudo rosdep init
$ rosdep update
Setting the ROS environment
Congratulations! We are done with the ROS installation, but what next?
The ROS installation mainly consists of scripts and executables, which are mostly installed to /opt/ros/<ros_version>.
To get access to these commands and scripts, we should add ROS environment variables to the Ubuntu Terminal. It's easy to do this. To access ROS commands from inside the Terminal, we have to source the following bash file:
/opt/ros/<ros_version>/setup.bash
Here's the command to do so:
$ source /opt/ros/kinetic/setup.bash
But in order to get the ROS environment in multiple Terminals, we should add the command to the .bashrc script, which is in the home folder. The .bashrc script will be sourced whenever a new Terminal opens.
$ echo "source /opt/ros/kinetic/setup.bash" >> ~/.bashrc
$ source ~/.bashrc
We can install multiple ROS distributions on Ubuntu. If there are multiple distributions, we can switch to each ROS distribution by changing the distribution name in the preceding command.
Getting rosinstall
Last but not least, there is the ROS command-line tool, called rosinstall, for installing source trees for particular ROS packages. The tool is based on Python, and you can install it using the following command:
$ sudo apt-get install python-rosinstall
We are done with the ROS installation. Just check whether the installation is proper, by running the following commands.
Open a Terminal window and run the roscore command:
$ roscore
Run a turtlesim node in another Terminal:
$ rosrun turtlesim turtlesim_node
If everything is proper, you will get this:

Figure 17: The turtlesim node


