Chapter 1. Cartoonifier and Skin Changer for Android
This chapter will show you how to write some image-processing filters for Android smartphones and tablets, written first for desktop (in C/C++) and then ported to Android (with the same C/C++ code but with a Java GUI), since this is the recommended scenario when developing for mobile devices. This chapter will cover:
How to convert a real-life image to a sketch drawing
How to convert to a painting and overlay the sketch to produce a cartoon
A scary "evil" mode to create bad characters instead of good characters
A basic skin detector and skin color changer, to give someone green "alien" skin
How to convert the project from a desktop app to a mobile app
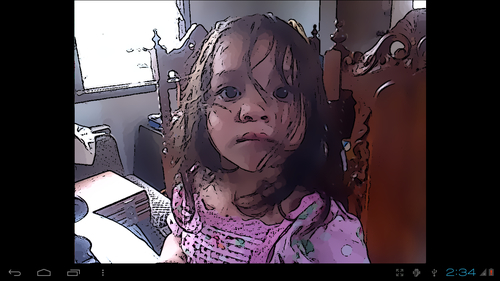
The following screenshot shows the final Cartoonifier app running on an Android tablet:

We want to make the real-world camera frames look like they are genuinely from a cartoon. The basic idea is to fill the flat parts with some color and then draw thick lines on the strong edges. In other words, the flat areas should become much more flat and the edges should become much more distinct. We will detect edges and smooth the flat areas, then draw enhanced edges back on top to produce a cartoon or comic book effect.
When developing mobile computer vision apps, it is a good idea to build a fully working desktop version first before porting it to mobile, since it is much easier to develop and debug a desktop program than a mobile app! This chapter will therefore begin with a complete Cartoonifier desktop program that you can create using your favorite IDE (for example, Visual Studio, XCode, Eclipse, QtCreator, and so on). After it is working properly on the desktop, the last section shows how to port it to Android (or potentially iOS) with Eclipse. Since we will create two different projects that mostly share the same source code with different graphical user interfaces, you could create a library that is linked by both projects, but for simplicity we will put the desktop and Android projects next to each other, and set up the Android project to access some files (cartoon.cpp and cartoon.h
, containing all the image processing code) from the Desktop folder. For example:
C:\Cartoonifier_Desktop\cartoon.cppC:\Cartoonifier_Desktop\cartoon.hC:\Cartoonifier_Desktop\main_desktop.cppC:\Cartoonifier_Android\...
The desktop app uses an OpenCV GUI window, initializes the camera, and with each camera frame calls the cartoonifyImage() function containing most of the code in this chapter. It then displays the processed image on the GUI window. Similarly, the Android app uses an Android GUI window, initializes the camera using Java, and with each camera frame calls the exact same C++ cartoonifyImage() function as previously mentioned, but with Android menus and finger-touch input. This chapter will
explain how to create the desktop app from scratch, and the Android app from one of the OpenCV Android sample projects. So first you should create a desktop program in your favorite IDE, with a main_desktop.cpp file to hold the GUI code given in the following sections, such as the main loop, webcam functionality, and keyboard input, and you should create a cartoon.cpp file that will be shared between projects. You should put most of the code of this chapter into cartoon.cpp as a function called cartoonifyImage().


