What is step one when we get underway with a project? We visit Stack Overflow and look for an example project to help us build our project!
Seriously, the amount of time spent adapting another project's build file, picking dependencies, and filling in other details adds up to a lot of wasted time.
No more.
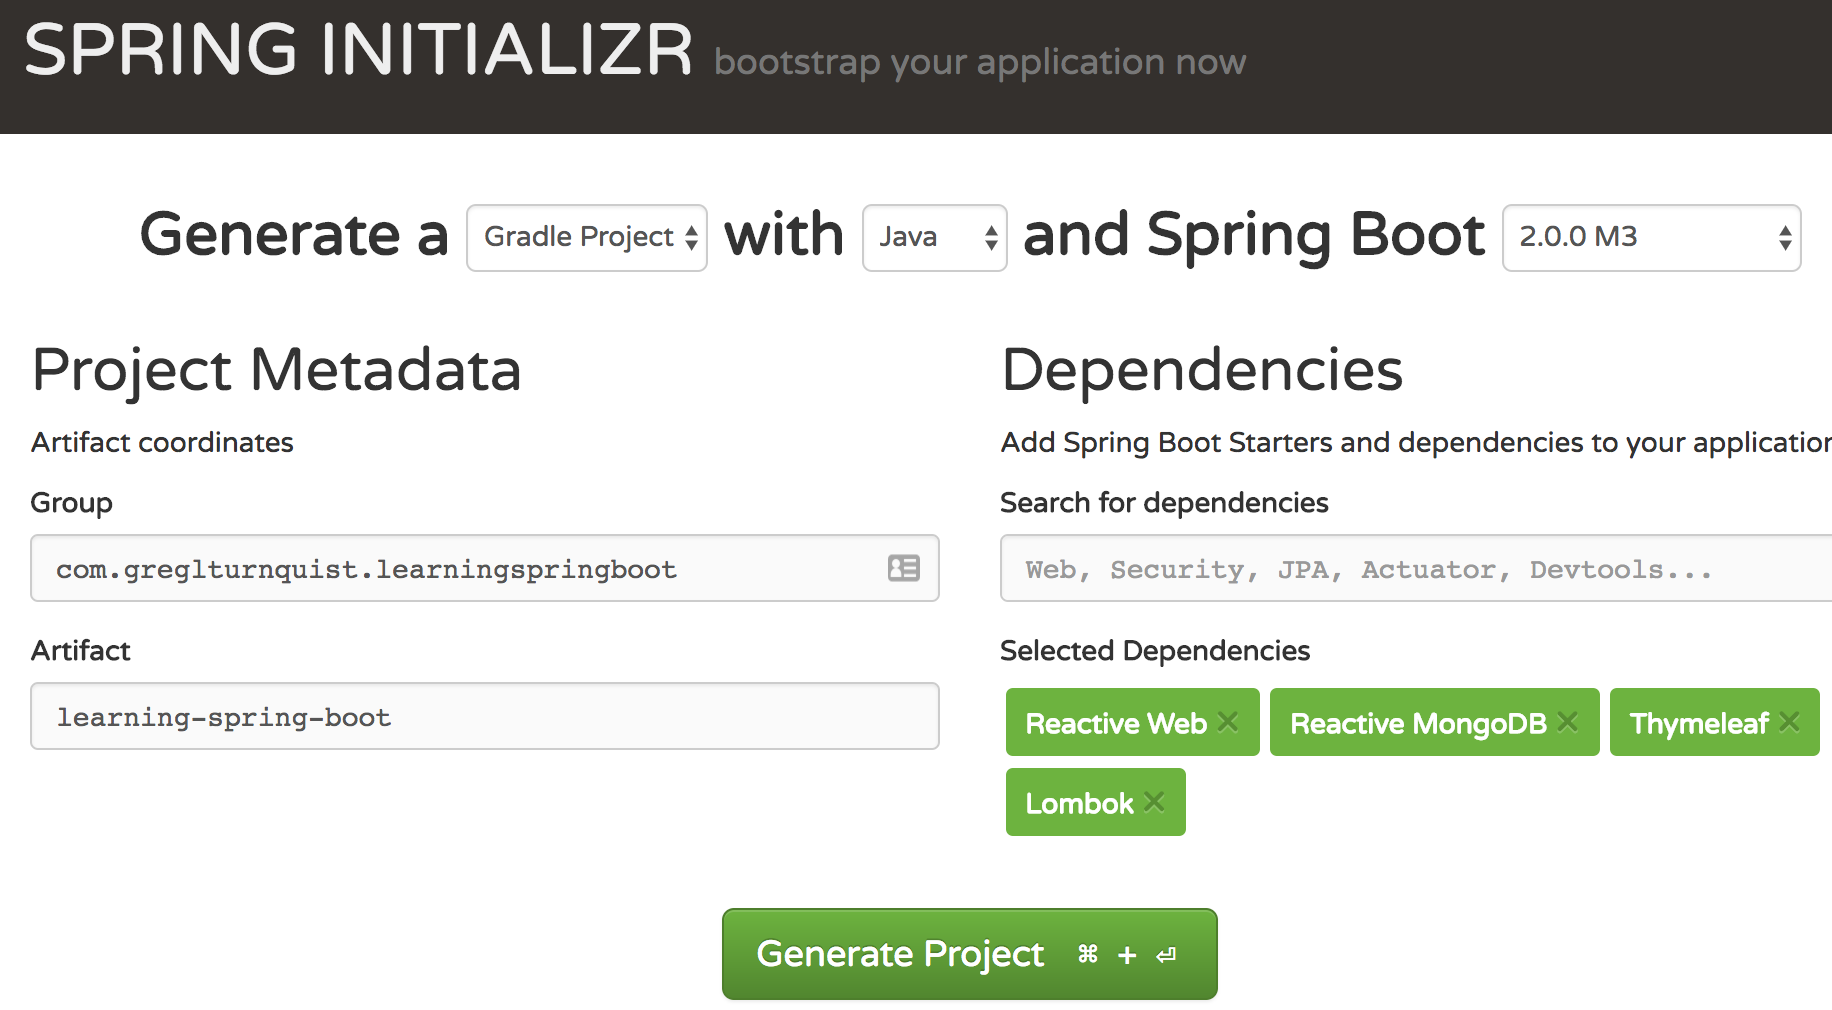
At the Spring Initializr (https://start.spring.io), we can enter minimal details about our app, pick our favorite build system and the version of Spring Boot we wish to use, and then choose our dependencies off a menu. Click the Generate Project button, and we have a free-standing, ready-to-run application.
In this chapter, we'll take a quick test drive, and build a small web app. We can start by picking Gradle from the drop-down menu. Then select 2.0.0.M5 as the version of Spring Boot we wish to use.
Next, we need to pick our application's coordinates, as follows:
- Group - com.greglturnquist.learningspringboot
- Artifact - learning-spring-boot
Now comes the fun part. We pick the ingredients for our application, like picking off a delicious menu. If we start typing, say, Web, into the Dependencies box, we'll see several options appear. To see all the available options, click on the Switch to the full version link toward the bottom.
To build our social media platform, we need these few ingredients:
- Reactive Web (embedded Netty + Spring WebFlux)
- Reactive MongoDB (Spring Data MongoDB)
- Thymeleaf template engine
- Lombok (to simplify writing POJOs)
The following screenshot shows us picking these options:

With these items selected, click on Generate Project.
Now, let's unpack that ZIP file, and see what we've got. You will find the following:
- A build.gradle build file
- A Gradle wrapper, so there's no need to install Gradle
- A LearningSpringBootApplication.java application class
- An application.properties file
- A LearningSpringBootApplicationTests.java test class
We built an empty Spring Boot project. Now what? Before we sink our teeth into writing code, let's take a peek at the build file. It's quite terse, but carries some key bits.
Let's take a look, starting from the top:
    buildscript {
      ext {
        springBootVersion = '2.0.0.M5'
      }
      repositories {
        mavenCentral()
        maven { url "https://repo.spring.io/snapshot" }
        maven { url "https://repo.spring.io/milestone" }
      }
      dependencies {
        classpath(
            "org.springframework.boot:spring-boot-gradle-
             plugin:${springBootVersion}")
      }
    }
This preceding build file contains the basis for our project:
- springBootVersion shows us we are using Spring Boot 2.0.0.M5
- The Maven repositories it will pull from are listed next (Maven central plus Spring's snapshot and milestone repositories)
- Finally, we see the spring-boot-gradle-plugin, a critical tool for any Spring Boot project
The first piece, the version of Spring Boot, is important. That's because Spring Boot comes with a curated list of 140 third-party library versions, extending well beyond the Spring portfolio and into some of the most commonly used libraries in the Java ecosystem. By simply changing the version of Spring Boot, we can upgrade all these libraries to newer versions known to work together. (See https://github.com/spring-projects/spring-boot/blob/master/spring-boot-project/spring-boot-dependencies/pom.xml for a complete list.)
The repositories aren't as critical, but it's important to add milestones and snapshots if fetching a library that hasn't been released to Maven central, or is hosted on some vendor's local repository. Thankfully, Spring Initializr does this for us based on the version of Spring Boot selected on the site.
Finally, we have spring-boot-gradle-plugin (and there is a corresponding spring-boot-maven-plugin for Maven users). This plugin is responsible for linking Spring Boot's curated list of versions with the libraries we select in the build file. That way, we don't have to specify the version number.
Additionally, this plugin hooks into the build phase and bundles our application into a runnable über JAR, also known as a shaded or fat JAR.
With an über JAR in hand, we only need put it on a thumb drive. We can carry it to another machine, to a hundred virtual machines in the cloud, our data center, or anywhere else. It runs anywhere we can find a JVM.
Peeking a little further down in build.gradle, we can see the plugins that are enabled by default:
    apply plugin: 'java'
    apply plugin: 'eclipse'
    apply plugin: 'org.springframework.boot'
    apply plugin: 'io.spring.dependency-management'
- The java plugin indicates the various tasks expected for a Java project
- The eclipse plugin helps generate project metadata for Eclipse users
- The org.springframework.boot plugin is where the actual spring-boot-gradle-plugin is activated
- The io.spring.dependency-management plugin supports Maven Bill of Materials (BOM) manifests, allowing usage of libraries that manage the sets of library versions in our Gradle build. (Because Maven supports this natively, there is no Maven equivalent plugin.)
This brings us to the final ingredient used to build our application--Dependencies.


