Data and file server migration (Must know)
File server or data migration can be achieved by migrating the data from the existing server using tools such as Microsoft Robocopy and Microsoft File Server Migration Tool (FSMT), or directly presenting the storage Logical Unit Number (LUNs) onto a new server. In this scenario, I will be explaining the data migration procedure using Windows Server Migration Tools. Send-SmigServerData and Receive-SmigServerData are the two PowerShell cmdlets that we will use for this migration.
The Send-SmigServerData cmdlet, as it sounds, is responsible for sending (migrating) data from the source server. This tool can migrate folders, files, permission, share, and so on. However, it doesn′t support migrating any Encrypted File Systems (EFS). Unlike other cmdlets in the Windows Server Migration Tools, the Send-SmigServerData cmdlet does not store the data in a staging area or an export file. It will directly copy over to the target server. So the required ports (7000, 7001, and 7002) must be open between the source and target servers. The Receive-SmigServerData cmdlet has to be running on the target server to be able to receive the migrated data. The Send-SmigServerData and Receive-SmigServerData cmdlets have to be running on the source and target servers at the same time. The default time out value is five minutes, but this value can be changed by modifying the registry.
For this migration, we need to run the Send-SmigServerData cmdlet on the source server and Receive-SmigServerData cmdlet on the target server. The following diagram graphically represents the high-level tasks:

The following recipe explains the data migration procedure.
How to do it...
- Log on to the source file server and copy the previously created Windows Server Migration Tools package from the
\\HOU-MGR-01\MigToolsfolder toC:\MigToolsfolder on the local server. - Open Command Prompt with elevated privilege and navigate to
C:\MigTools. - From the
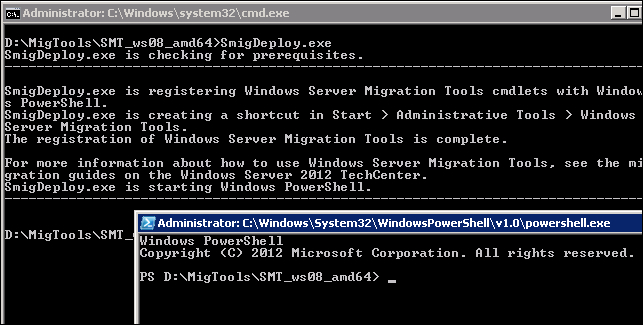
C:\MigToolsfolder, give theSmigDeploy.execommand. This will register the Windows Server Migration Tools on the server and open a PowerShell window as shown in the following screenshot:
- If you close the PowerShell window by mistake, you can re-open it from the Windows Server Migration Tools menu in Administrative Tools.
- At this time you need to make sure that the users are not connected to the file server or are not accessing the data from this server. If you have any backup or any other software running on this server, make sure to disable them during the migration process.
- Run the following cmdlet from the PowerShell window to initiate the migration process:
Send-SmigServerData -ComputerName server12-demo1 -SourcePath ″D:\Hou-Fil-Data-01″ -DestinationPath ″C:\Data\″ -Recurse -Include All –Force
In the preceding command,
–ComputerNameis the target file server,-SourcePathis the location of the source data, and you also need to specify the destination location on the target server by using the–DestinationPathparameter. You have the following three options that can be used with the–Includeparameter:All: This migrates data and shareData: This copies only the files and folders and their associated permissionShare: This copies only the share properties and permission
The
–Forceparameter overwrites the existing files on the target server if the source files are current.It will prompt you for a password. Once it accepts the password you will have five minutes to run the
Receive-SmigServerDatacmdlet on the target server. As you can see in the following screenshot, the source server is waiting for the destination server request to transfer the data.
- Log on to the target Windows Server 2012 file server. Copy the Windows Server Migration Tools package from
\\HOU-MGR-01\Migtoolsto theC:\MigToolsfolder. - Open Command Prompt with elevated privilege and navigate to
C:\MigTools. - From the
C:\MigToolsfolder, type theSmigDeploy.execommand. This will register the Windows Server Migration Tools on the source server and open a PowerShell window. - From the PowerShell command window, type the
Receive-SmigServerDatacmdlet. It will prompt you for the same password which you used on the source server.
- Once the password is validated, it will copy the data from the source server.

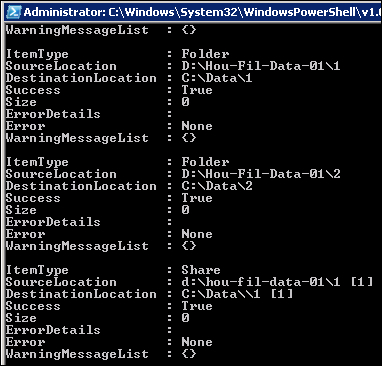
- A migration summary report will be generated as shown in the following screenshot:

How it works...
Once you have validated the data between the source and target servers you can decommission the old file server. If drive mapping or shares are enabled through Group Policy Object or Group Policy Preference, the policies will have to be updated with the new server name.


