Creating a baseline using the WAF Cost Optimization assessment
The scope of the WAF Cost Optimization assessment is per application or workload. First, you must identify the large workload. This assessment is a collaborative effort between FinOps, cloud governance, engineering, DevOps, architecture, and product teams. Ideally, this assessment is completed in a single two-hour meeting. The FinOps lead facilitates the meeting, provides clarification of the questions, and records the final answers. As you go through the questions, you will realize how much knowledge flows through. This is a fantastic opportunity for you to get a good insight into the thinking and decision-making patterns of engineering and DevOps teams. Follow these steps to run through the assessment:
- Open the Microsoft Edge browser.
- Navigate to https://docs.microsoft.com/en-us/assessments.
- Select Azure Well-Architected Review from the Available assessments list:
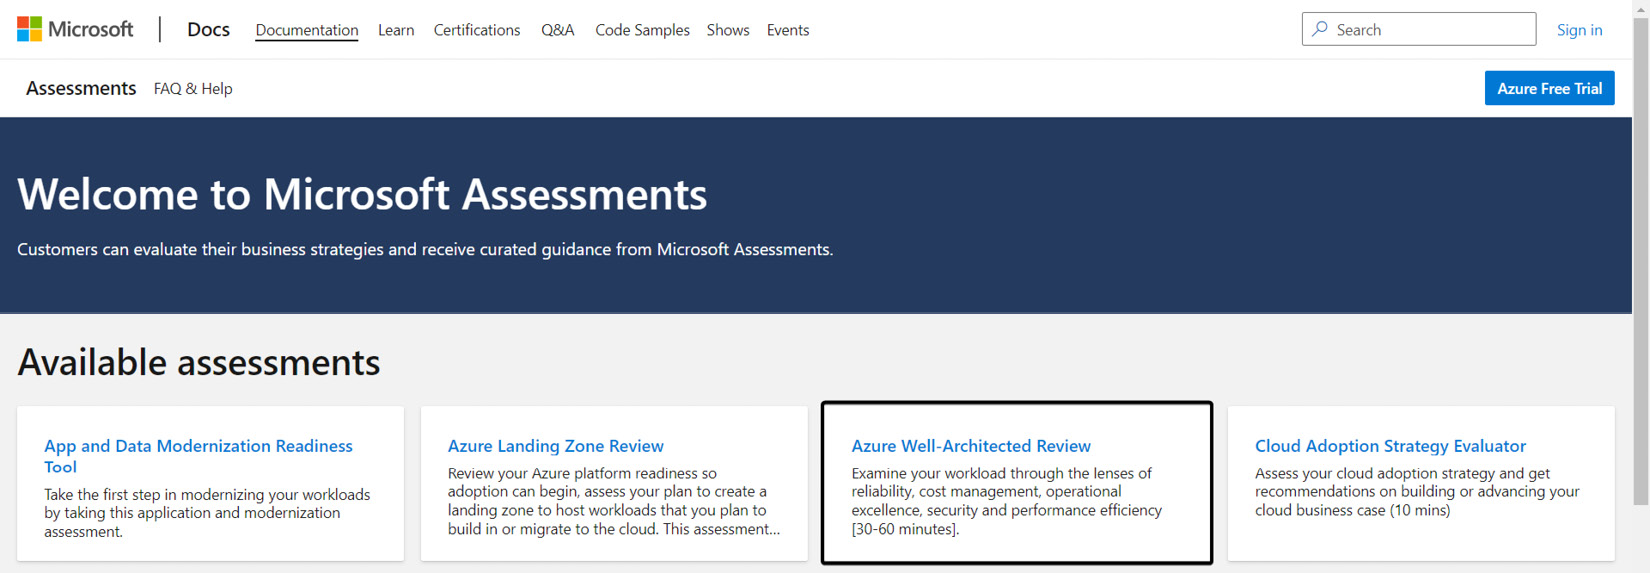
Figure 1.1 – Microsoft Assessments
- To save your progress, you will need to sign in with your organization ID. After that, give your assessment a name and click Import to include Azure Advisor recommendations. When you click Import, the pop-up window will list all your Azure accounts. Select the account that belongs to the workload and then click Continue. On the next screen, select the workload subscription and click Import.
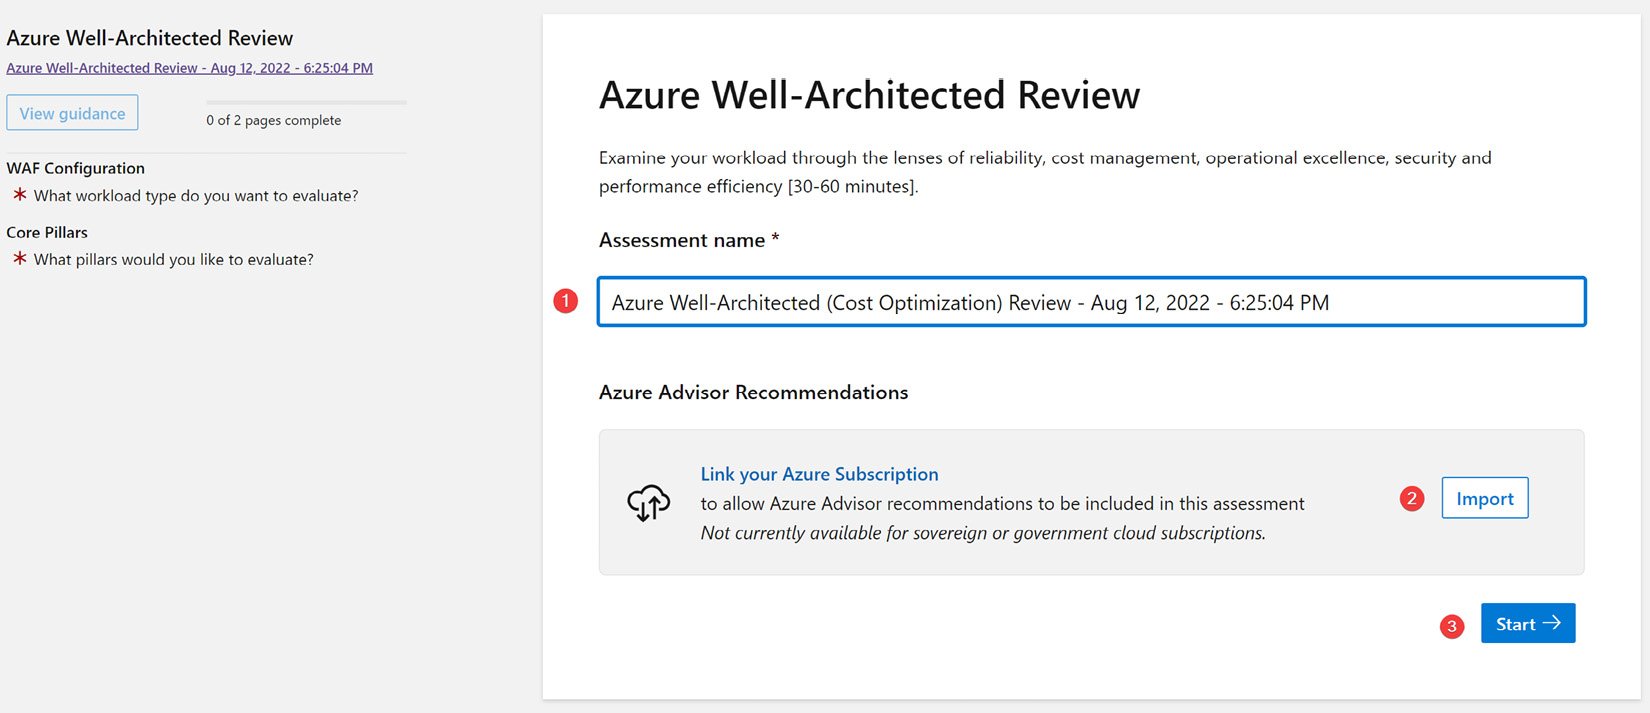
Figure 1.2 – Azure Well-Architected Review
- Once your subscription has been linked, you will see a screen similar to the following. At this point, click Start.
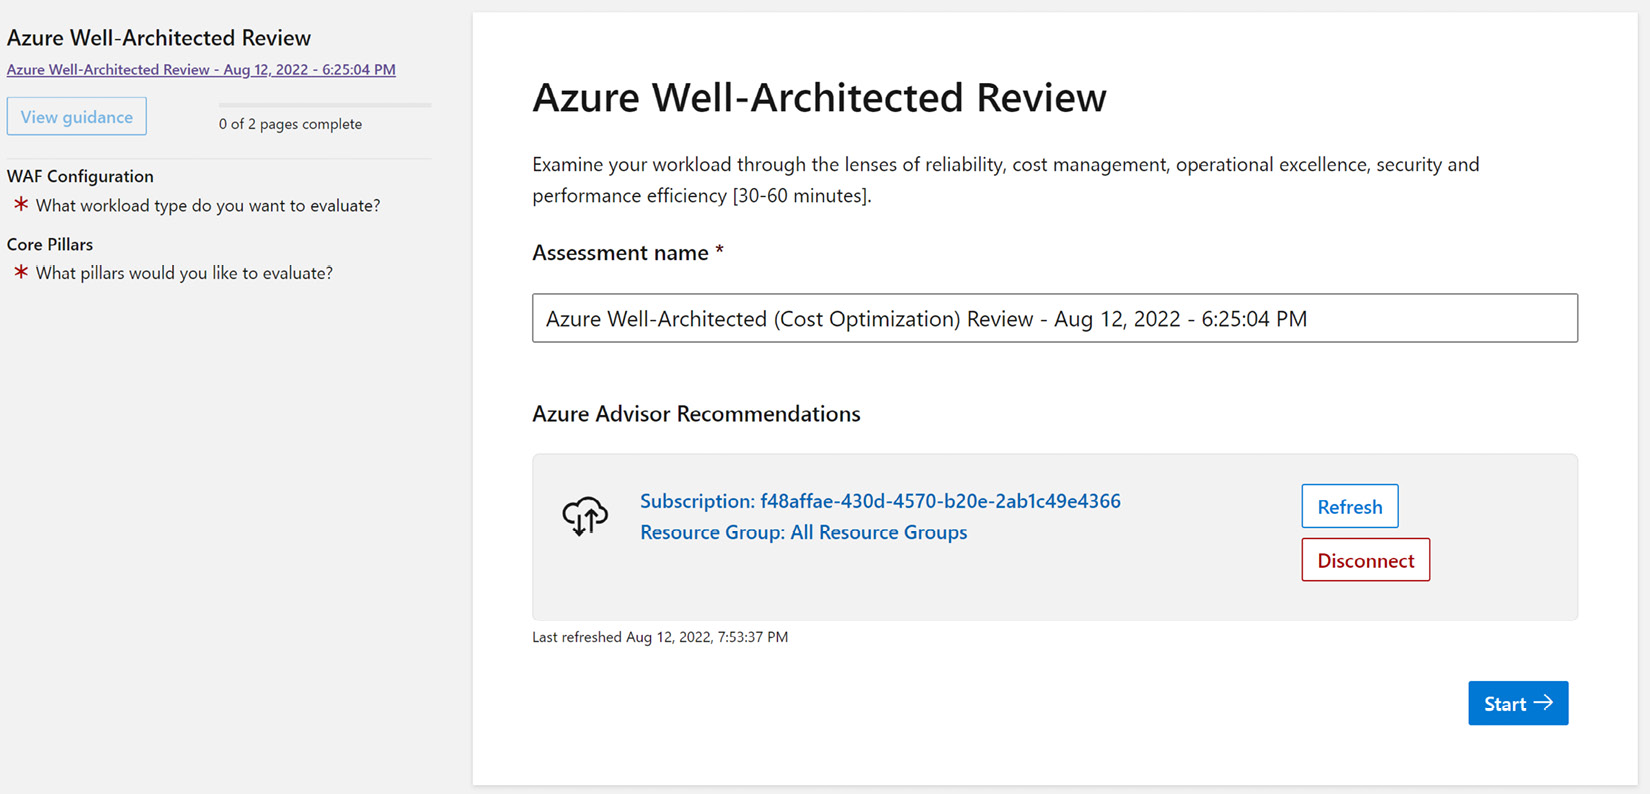
Figure 1.3 – Import Azure Advisor recommendations
- The Cost Optimization pillar falls under Core Well-Architected Review. So, check that option and then click Next.
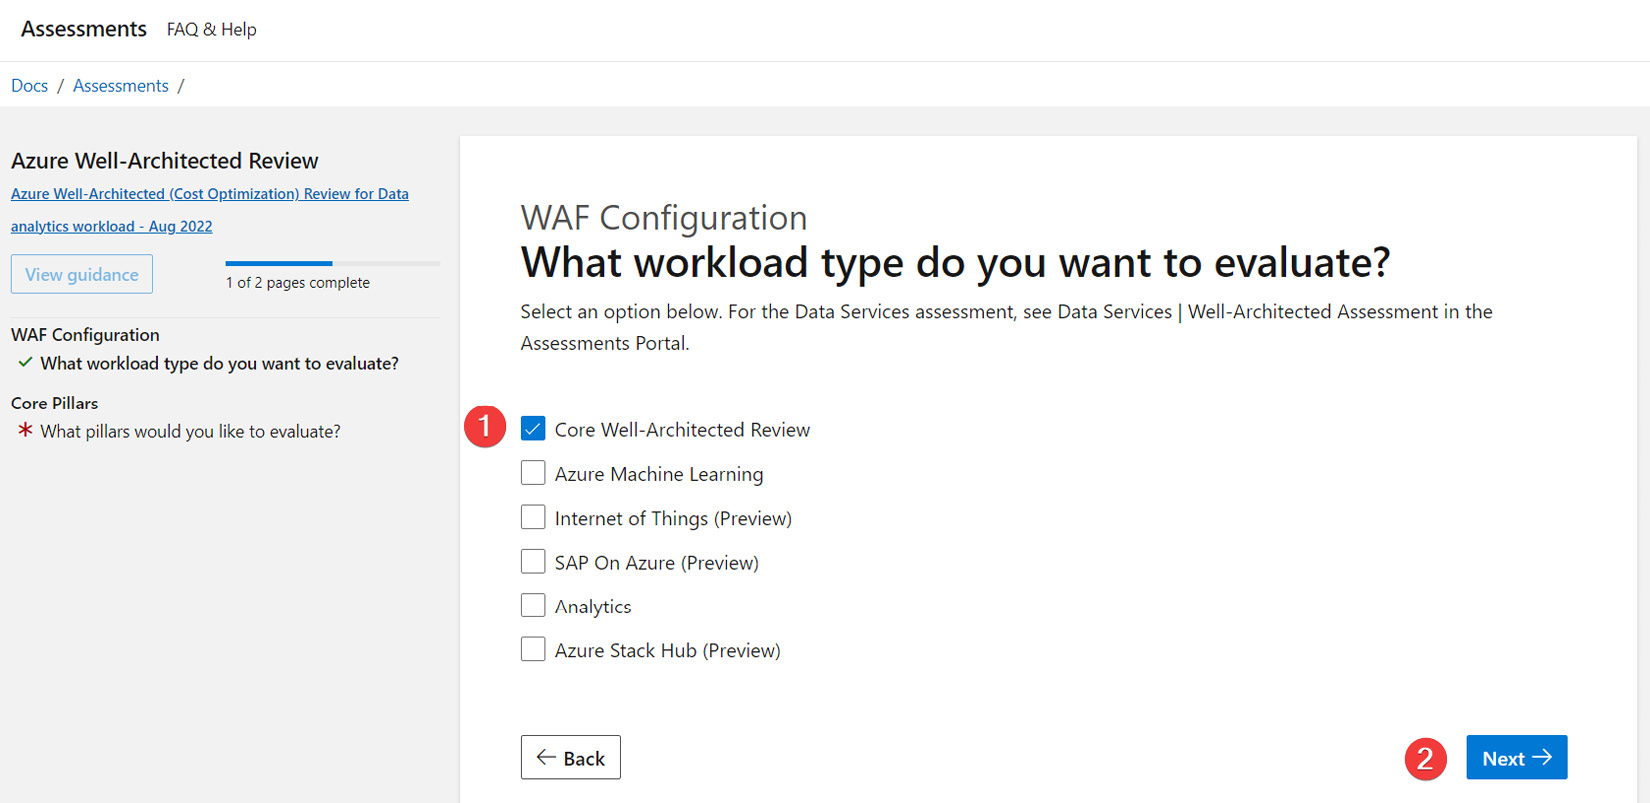
Figure 1.4 – WAF Configuration
- On the next screen, select Cost and then click Next.
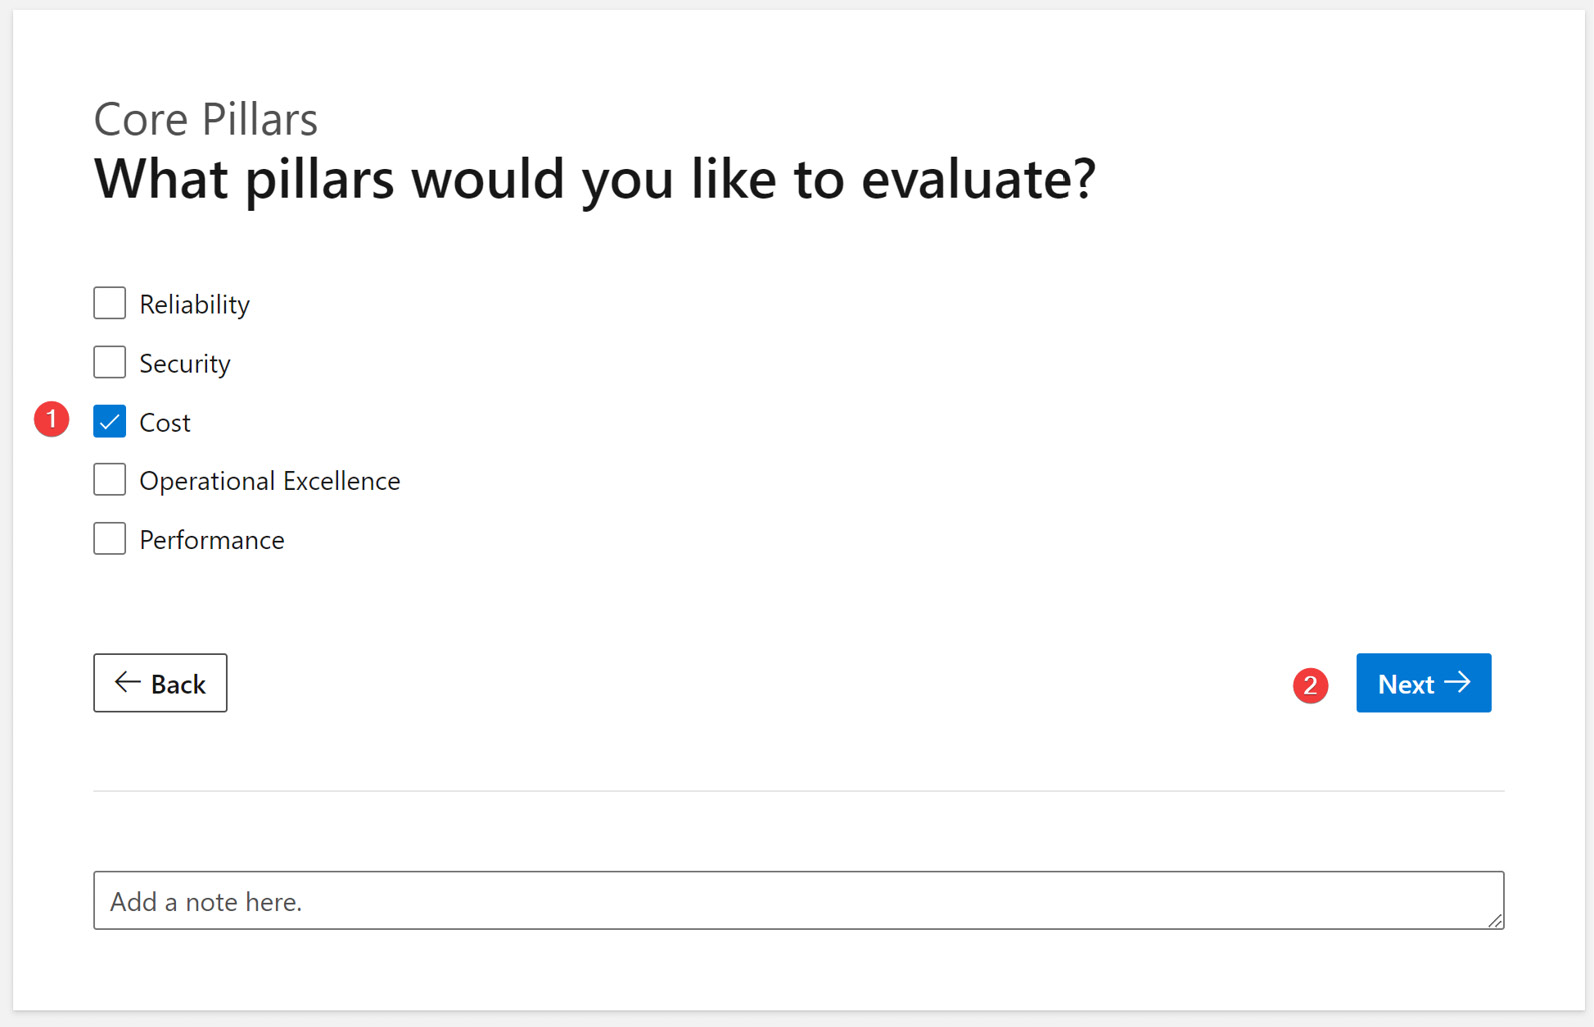
Figure 1.5 – Core pillars of WAF
At this point, the WAF cost assessment questions start. Let’s understand the key parts of the assessment screen. There are nine sections, and each section has a different number of questions that the team will collaboratively answer.
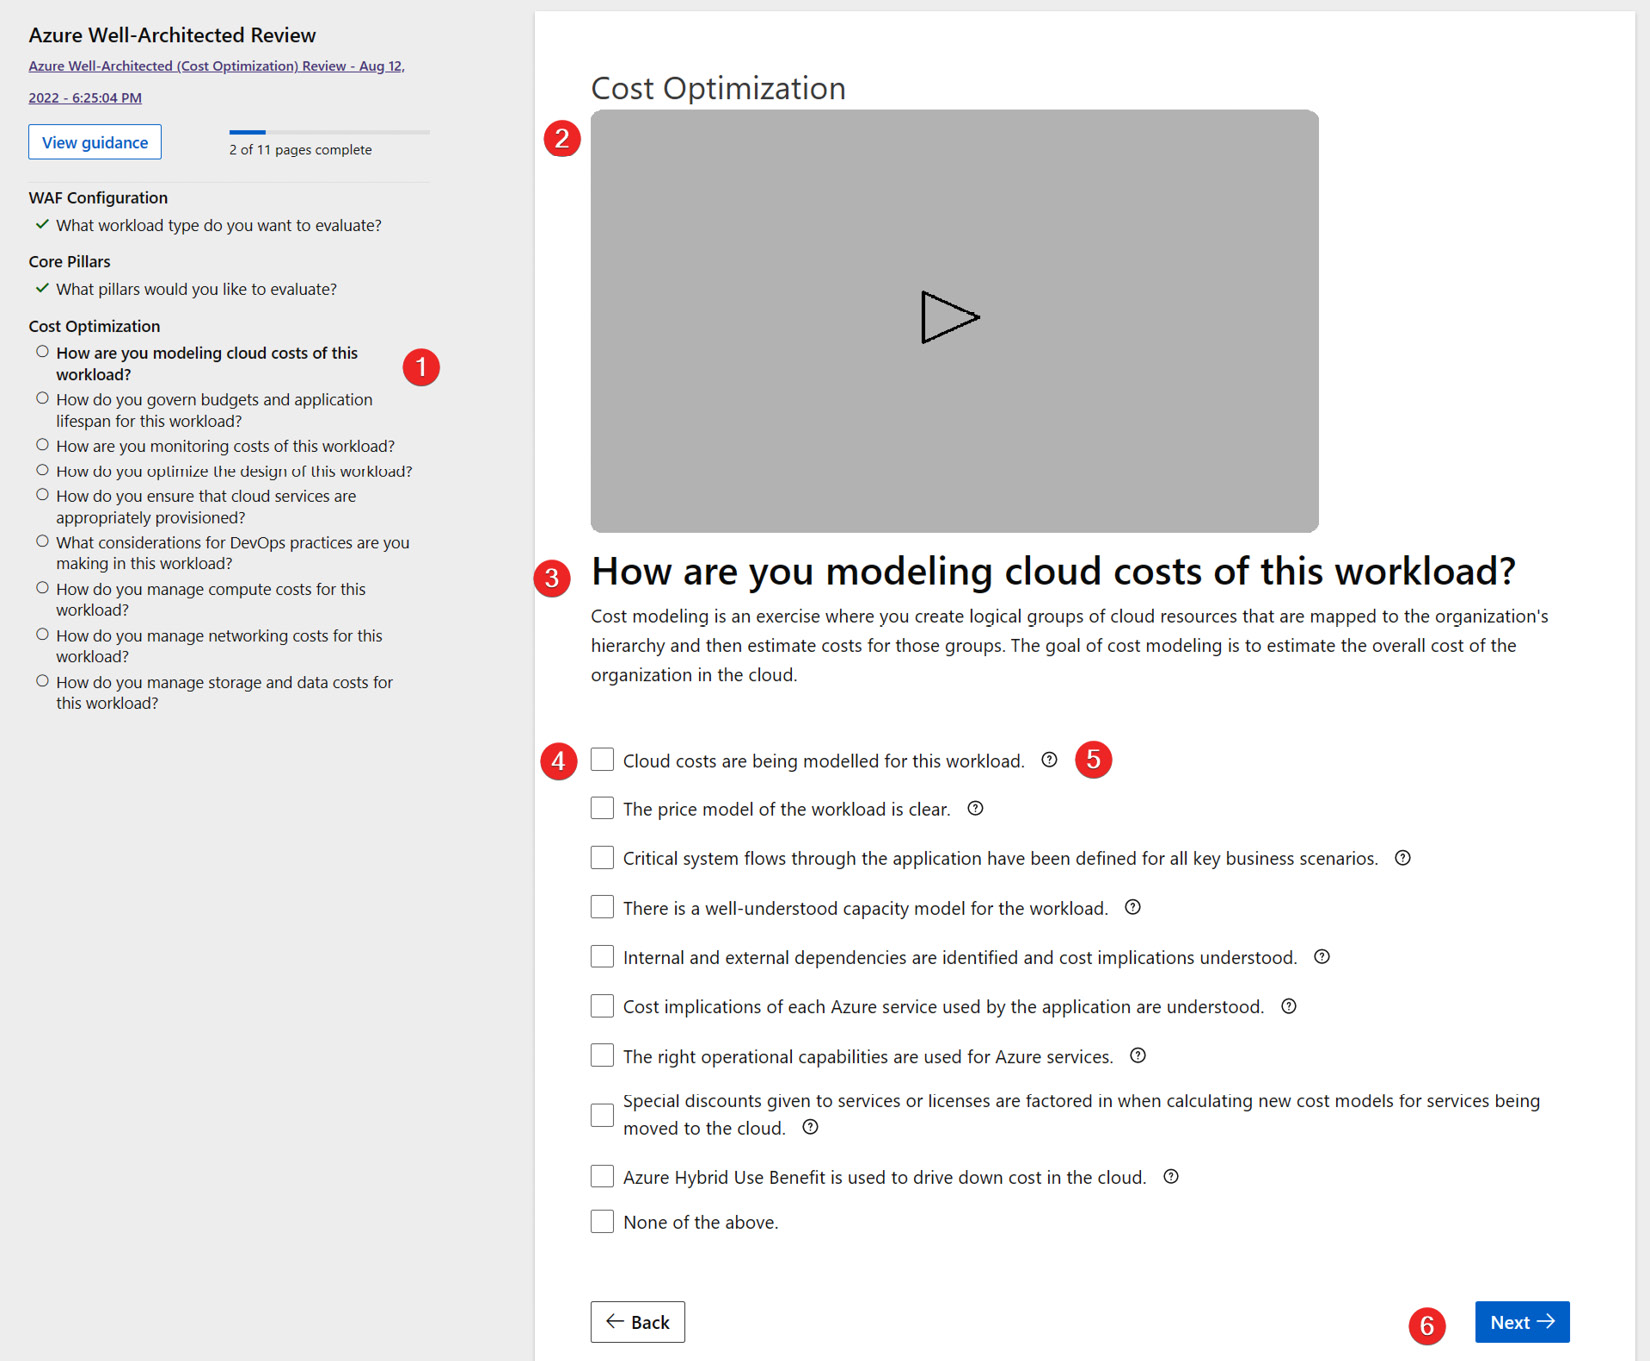
Figure 1.6 – Azure Well-Architected Review
The main parts of the assessment screen are as follows:
- On the left-hand side is the list of Cost Optimization sections.
- At the top of the screen is a short video explaining what each section means.
- Under the video is the title of the current section – for example, How are you modeling cloud costs of this workload?.
- Below is the list of questions, each with a checkbox. You discuss these questions with the team and check the box if applicable. If they are unsure, leave the box unchecked.
- The question marks to the right of each item provide more context to help you understand the option.
- Once you have completed all the questions, click Next to move to the next section.
Once you have completed all the sections, the Your results screen will appear. Let’s understand the results screen. The top part of the screen displays your overall score. As shown in the following screenshot, I received a score of MODERATE, which means a score between 33 and 76. So, my workload is following some cost optimization best practices, but there is lots of room for improvement. You can export the result to a CSV file and use that later to either create your own dashboard to keep track of the progress on each item or import it into Azure DevOps for tracking purposes.
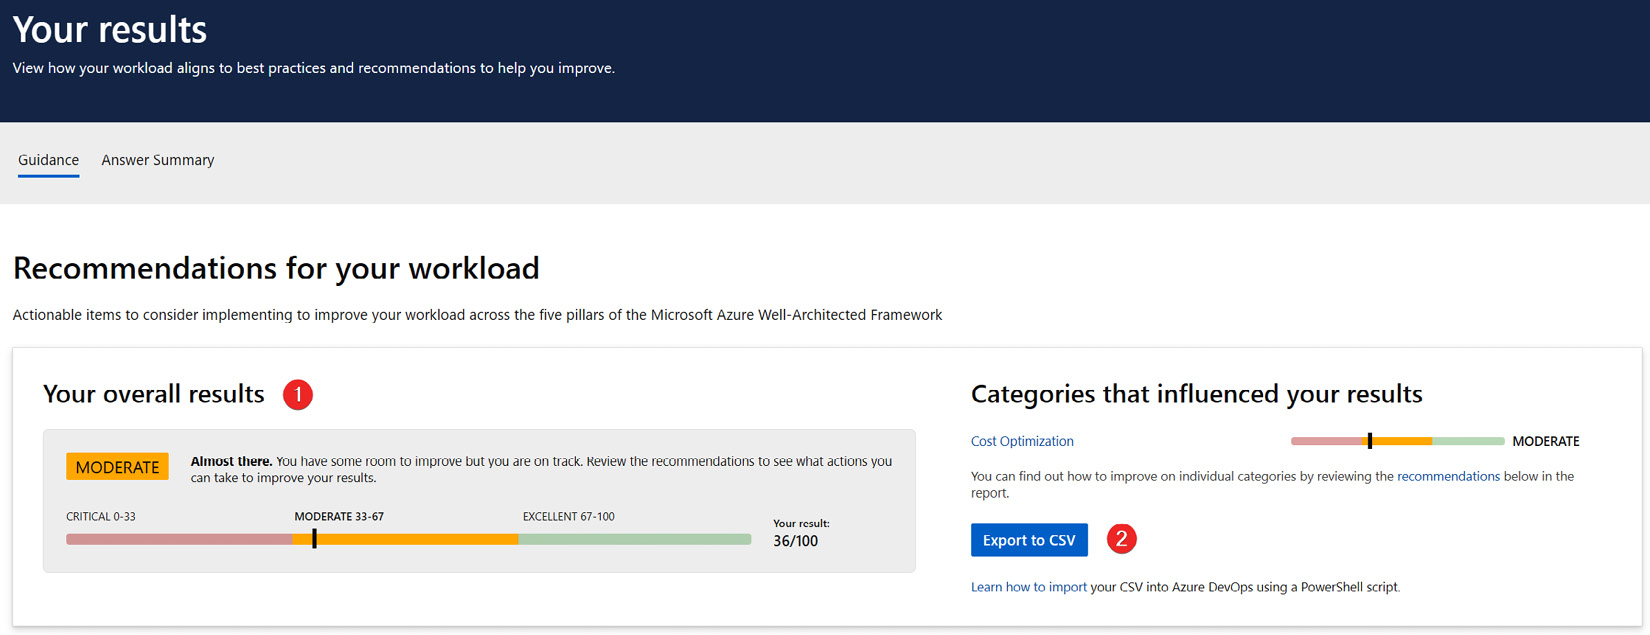
Figure 1.7 – Overall results of the Well-Architected Review assessment
Below the results section, the screen shows a list of all recommendations with a link to the Microsoft documentation, which helps you practice that specific cost optimization area.
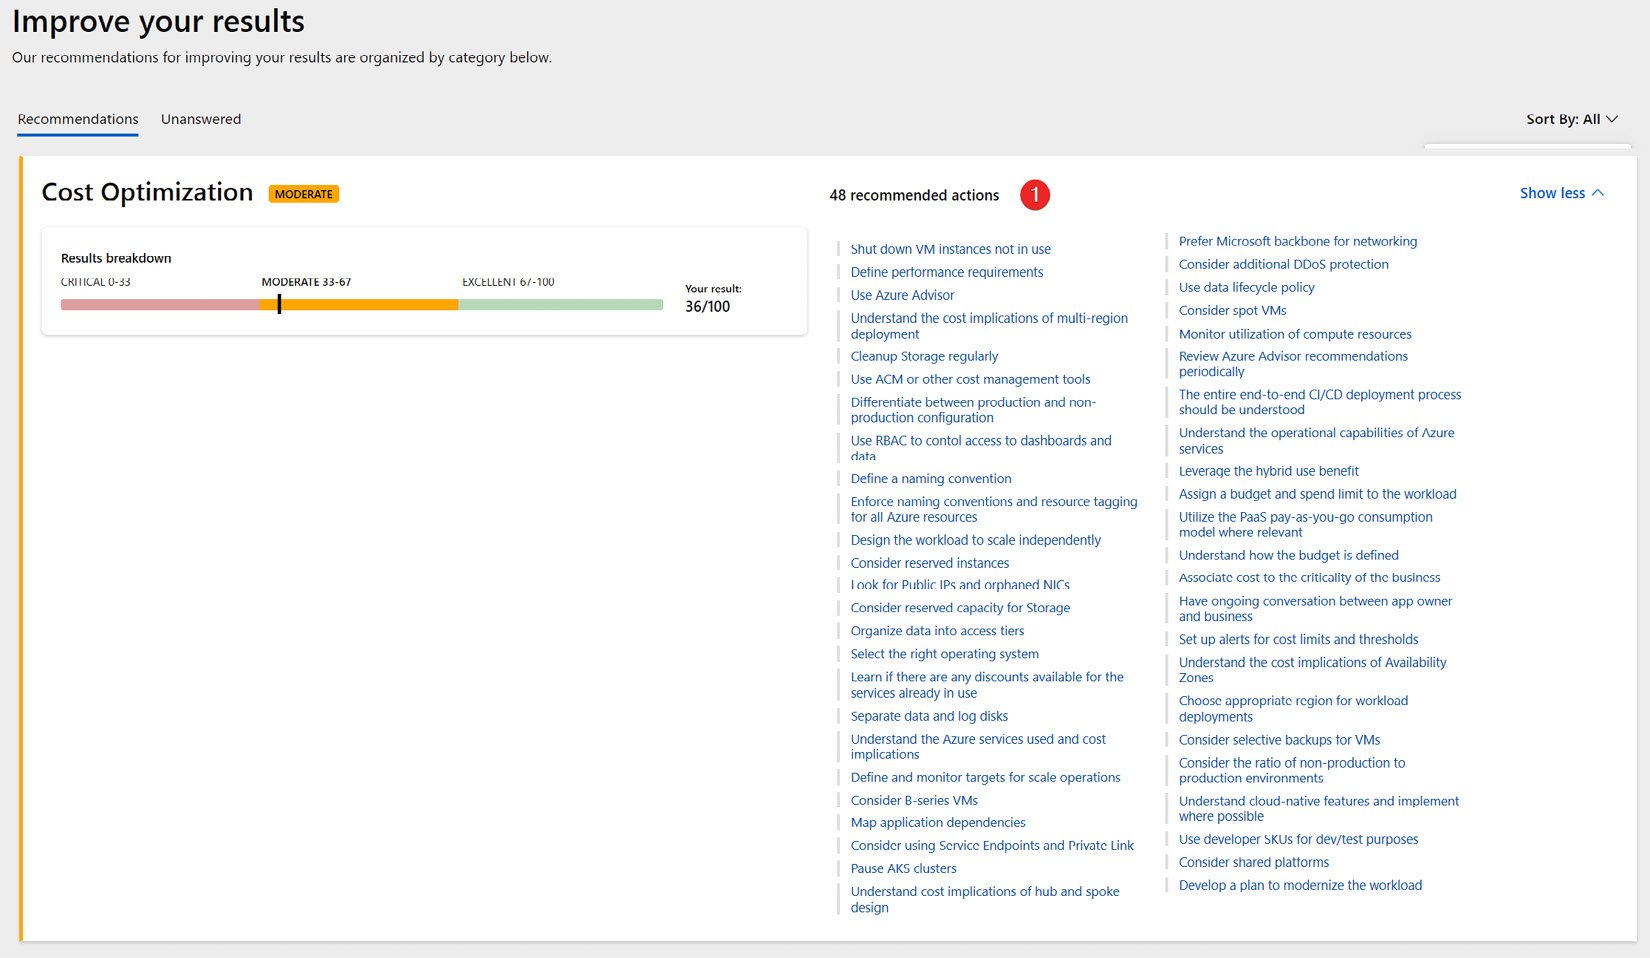
Figure 1.8 – Detailed results of the Well-Architected Review assessment
With that, we have looked at how to create a WAF baseline score. Now that you have the baseline score for your selected workload, let’s understand what cost allocation is and how you can practice it in Azure.


