Search icon CANCEL
Subscription
0
Cart icon
Your Cart (0 item)
Close icon
You have no products in your basket yet
Save more on your purchases! discount-offer-chevron-icon
Savings automatically calculated. No voucher code required.
Arrow left icon
Explore Products
Best Sellers
New Releases
Books
Videos
Audiobooks
Learning Hub
Newsletter Hub
Free Learning
Arrow right icon
timer SALE ENDS IN
0 Days
:
00 Hours
:
00 Minutes
:
00 Seconds
Arrow up icon
GO TO TOP
Extending Unity with Editor Scripting

You're reading from   Extending Unity with Editor Scripting Put Unity to use for your video games by creating your own custom tools with editor scripting

Arrow left icon
Product type Paperback
Published in Sep 2015
Publisher
ISBN-13 9781785281853
Length 268 pages
Edition 1st Edition
Languages
Tools
Arrow right icon
Author (1):
Arrow left icon
Angelo R Tadres Bustamante Angelo R Tadres Bustamante
Author Profile Icon Angelo R Tadres Bustamante
Angelo R Tadres Bustamante
Arrow right icon
View More author details
Toc

Table of Contents (12) Chapters Close

Preface 1. Getting Started with Editor Scripting FREE CHAPTER 2. Using Gizmos in the Scene View 3. Creating Custom Inspectors 4. Creating Editor Windows 5. Customizing the Scene View 6. Changing the Look and Feel of the Editor with GUI Styles and GUI Skins 7. Saving Data in a Persistent Way with Scriptable Objects 8. Controlling the Import Pipeline Using AssetPostprocessor Scripts 9. Improving the Build Pipeline 10. Distributing Your Tools Index

Using the Handles class


In this section, we are going to extend the capabilities to the Edit mode, allowing the user to also reallocate the position of the pieces in the grid. To achieve this, we will use the class Handles.

In Unity, a handle is a 3D control you use to manipulate items in the Scene View. The Handles class allows you to use several built-in handle GUIs, such as the tools to position, scale, and rotate an object via the Transform component. Let's take a look at the following screenshot:
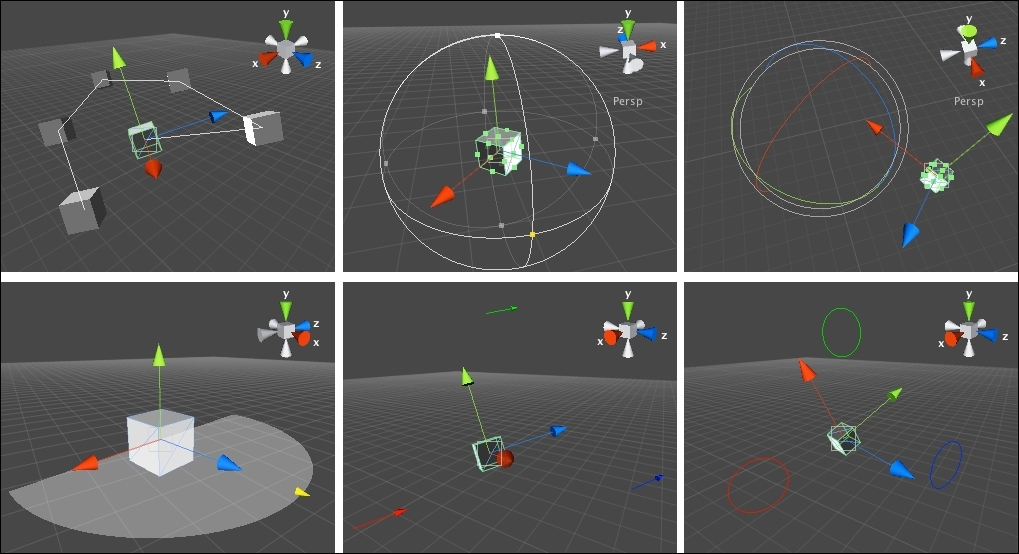
The Handles class is also used to add the GUI to the Scene View. We did that at the beginning of the chapter using the methods BeginGUI and EndGUI.

Let's make the necessary changes to make this work. Let's add this code snippet defining two variables to the LevelInspector class to save the original position of the piece:

private int _originalPosX;
private int _originalPosY;

Then we will create a new method called Move:

private void Move() {
  Vector3 gridPoint = _myTarget.WorldToGridCoordinates(_itemInspected...
lock icon The rest of the chapter is locked
Register for a free Packt account to unlock a world of extra content!
A free Packt account unlocks extra newsletters, articles, discounted offers, and much more. Start advancing your knowledge today.
Unlock this book and the full library FREE for 7 days
Get unlimited access to 7000+ expert-authored eBooks and videos courses covering every tech area you can think of
Renews at $19.99/month. Cancel anytime
Banner background image