Configuring SSPR
By enabling a self-service password for your users, they are able to change their passwords automatically, without calling the help desk. This will significantly eliminate the management overhead.
Note
The Azure AD free-tier license only supports cloud users for SSPR, and only password change is supported, not password reset.
SSPR can be easily enabled from the Azure portal. To do this, perform the following steps:
- Navigate to the Azure portal by opening
https://portal.azure.com. - In the left-hand menu, select Azure Active Directory.
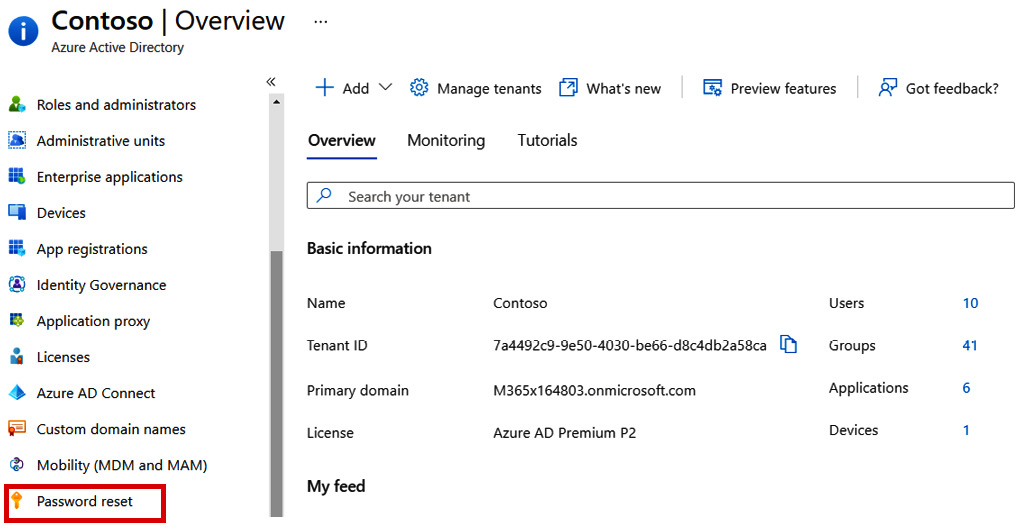
- In the Azure AD Overview blade, in the left-hand menu, under Manage, select Password reset, as follows:

Figure 1.31 – The Azure AD Password reset blade
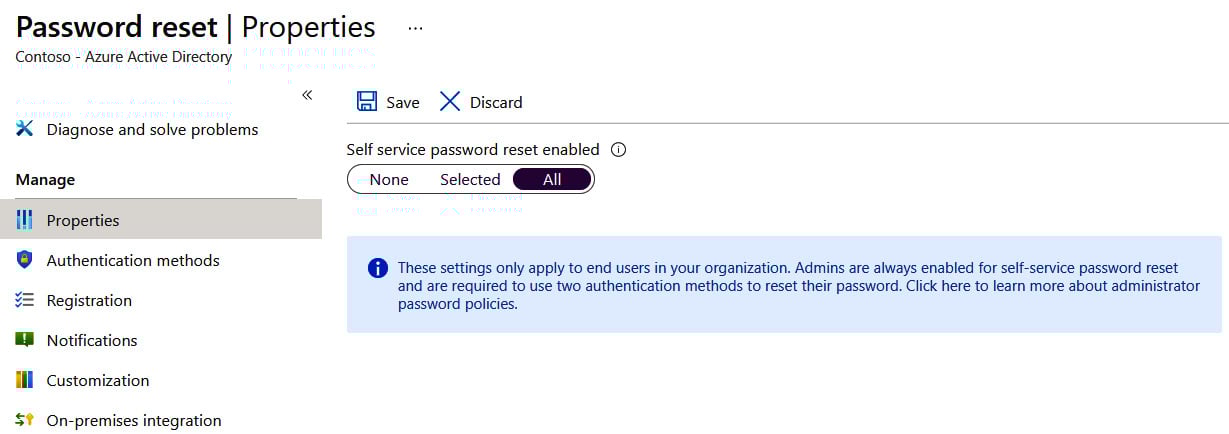
- In the Password reset overview blade, you can enable SSPR for all your users, by selecting All, or for selected users and groups, by selecting Selected. For this demonstration, enable it for all users and click on Save in the top-level menu, as follows:

Figure 1.32 – The Azure AD Password reset properties
- Next, we need to set the different required authentication methods for your users. To do this, under Manage, select Authentication methods.
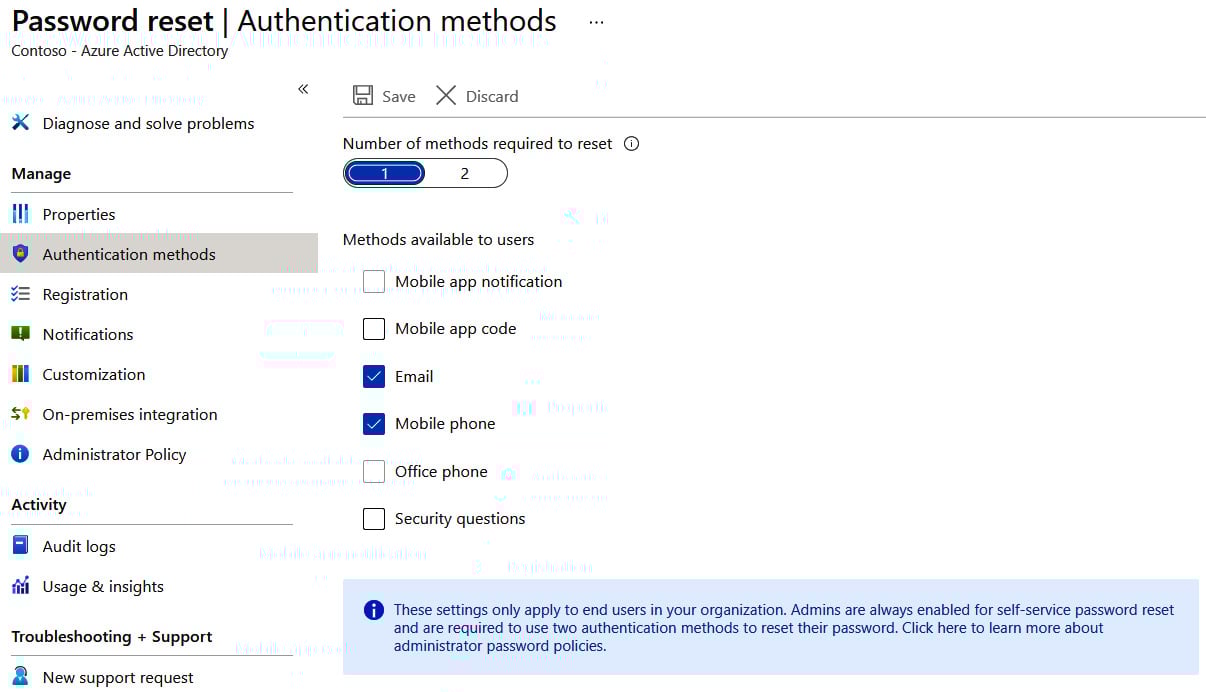
- In the next blade, we can set the number of authentication methods that are required to reset a password and explore what methods are available for your users, as follows:

Figure 1.33 – The Azure AD Password reset blade displaying the available authentication methods for users
- Make a selection and click on Save.
Important Note
If you want to test SSPR after configuration, make sure that you use a user account without administrator privileges.
We encourage students to read up further by using the following links:


