Creating our first flow
Now that we have installed PAD successfully, it’s time to create our first simple flow:
- At this point, the program has started and provides us with a welcome screen. Please note the different tabs, which allow you to switch to your flows or even look at the sample programs from Microsoft, which are worth a look. Starting on the flow container screen, choose + New flow either from the top-left menu bar or in the middle of the screen:
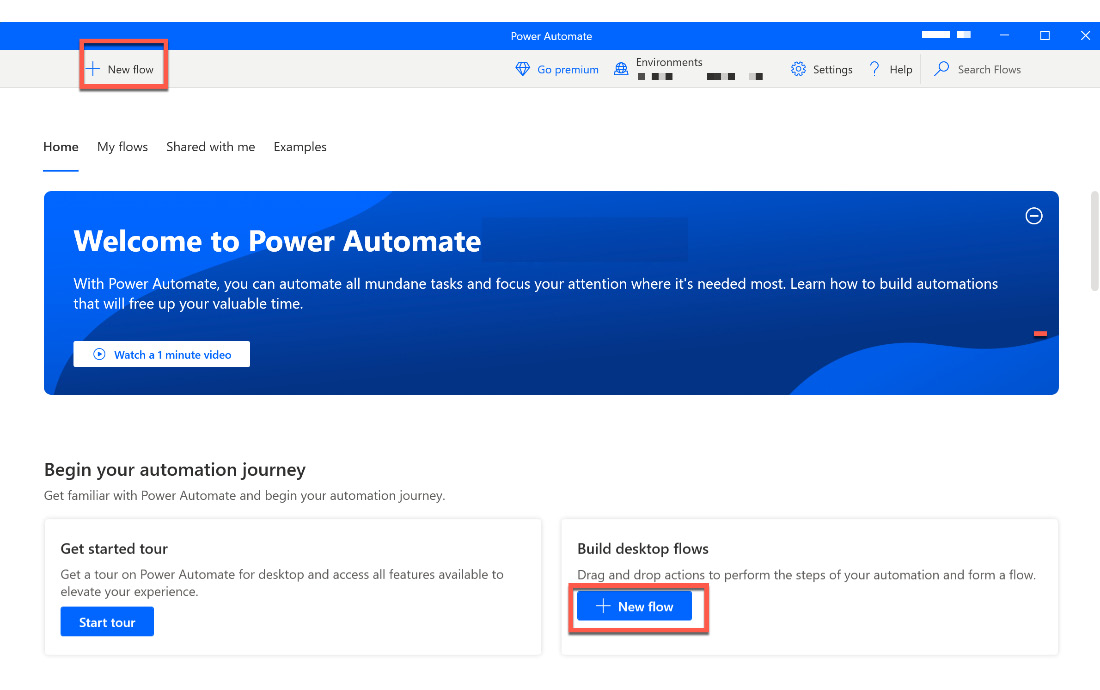
Figure 2.6 – Creating our first flow
- In the next dialog, you will be asked to name the flow. Although this is optional, it is good practice to name your flow accordingly. Let’s choose Welcome Flow this time. You can go ahead and click the Create button to start the designer:
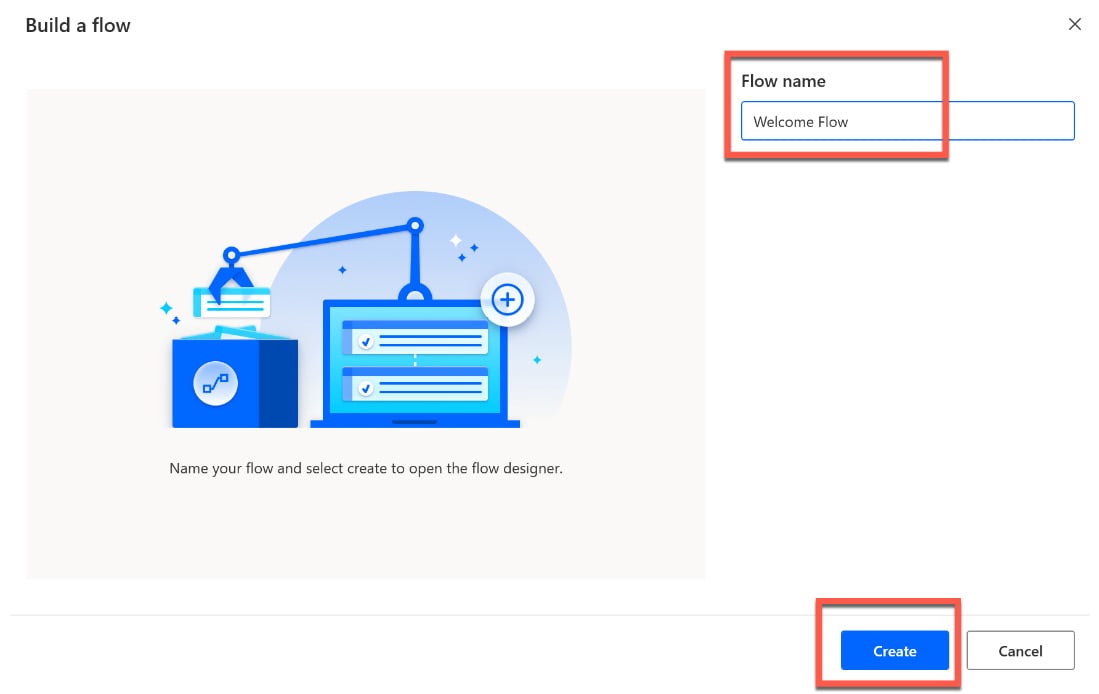
Figure 2.7 – Flow container screen with the + New flow option
- This launches the design interface for PAD flows, and this will probably be the place where we will spend most of our time in this book. In the next section, we will learn what all the individual areas mean and what functions they have. But for now, let’s create our first flow.
In our first flow, the idea here is that we want the flow to ask us for our name and then take this to display a nice welcome message. To achieve this, we are going to make use of the Message boxes actions. Take a look at the list of entries on the left-hand side and hover over the entry called Message boxes; you should see the following:
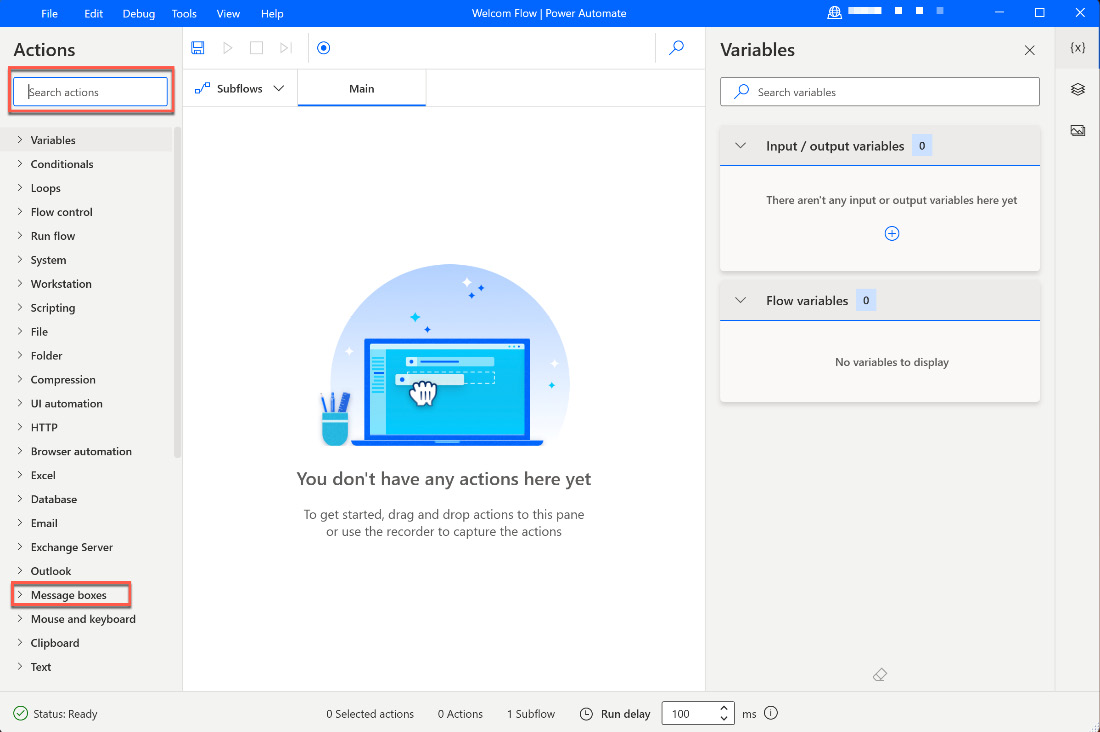
Figure 2.8 – Exploring the Actions pane
- Once you get more familiar with the different actions, you can also use the Search bar on the top left-hand side to reveal a specific set of actions. Try and click in the search box and enter
displayas some text. The left list of actions adapts as per the results of the search term:
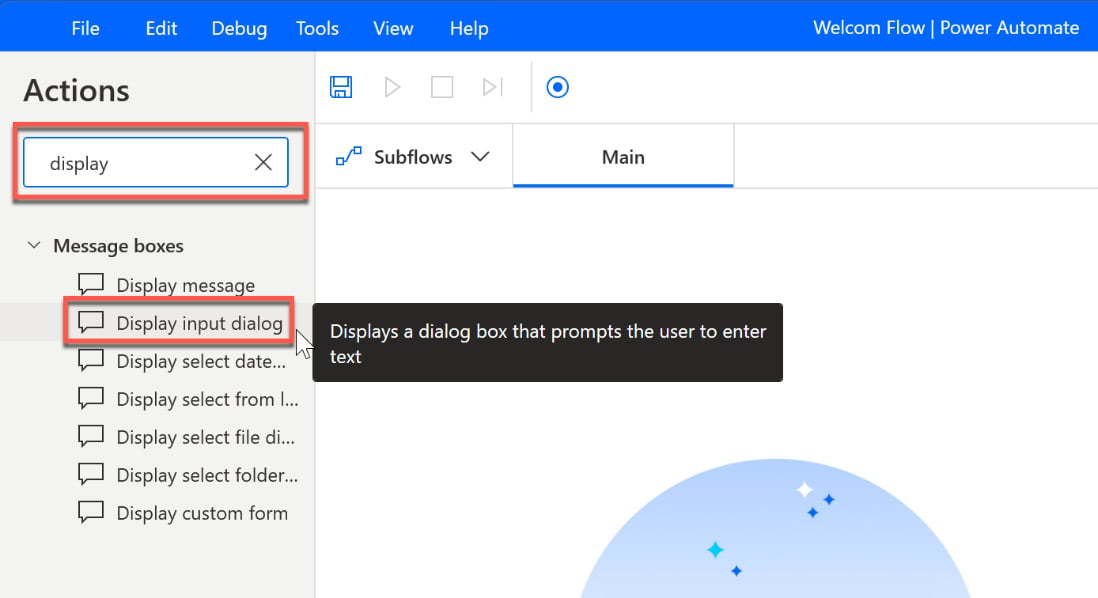
Figure 2.9 – Using the search bar
We are now interested in the Display input dialog action, which is the second entry in the list. Remember, you can also use the full list of actions on the left-hand side and expand the Message boxes action group:
- To place the action onto the design canvas, just click and hold the Display input dialog entry and drag and drop it into the middle of the window, right under the Main tab:
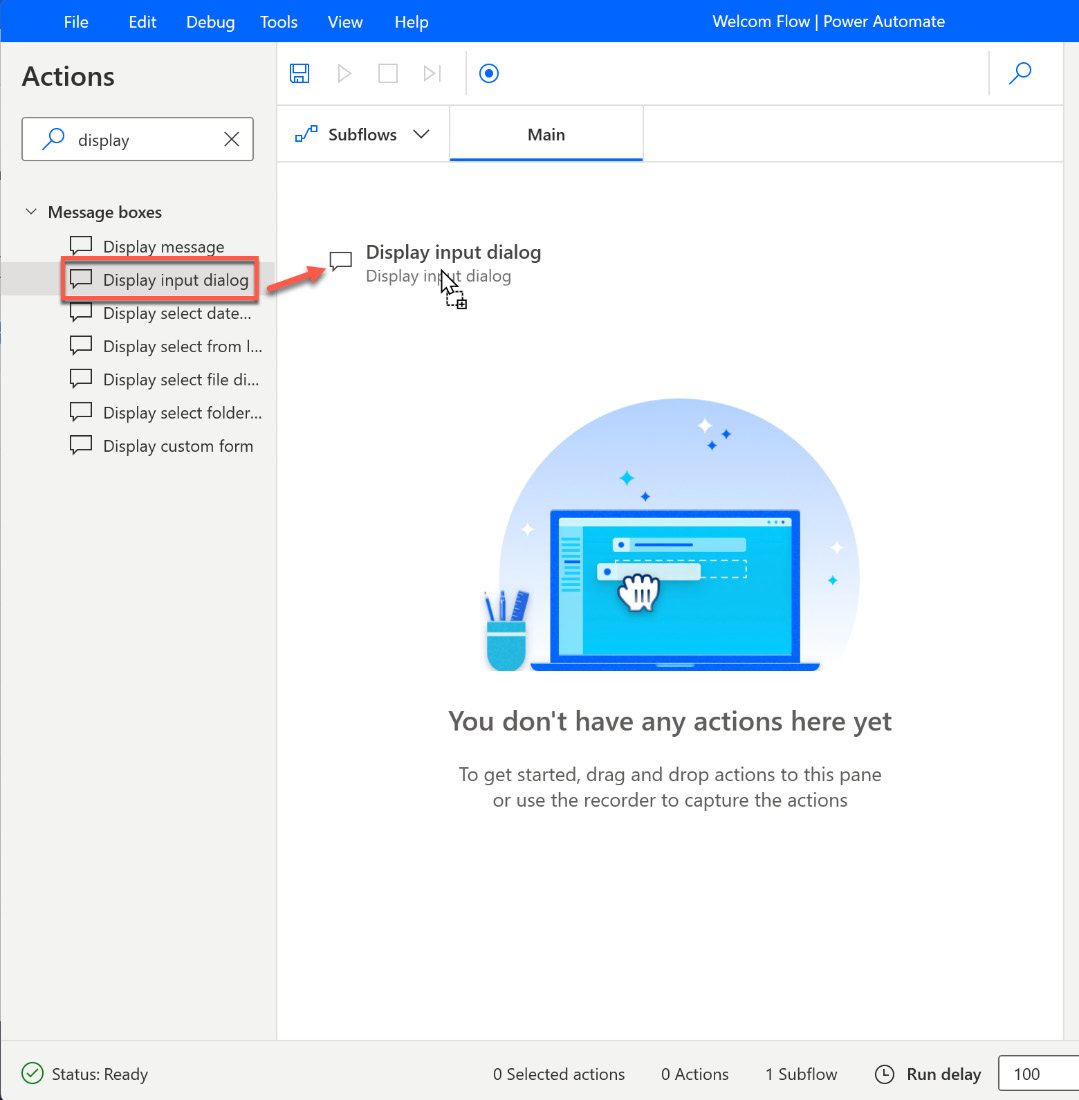
Figure 2.10 – Dragging an action onto the canvas
- Immediately after you release the mouse button, a dialog will appear. Here, we need to enter the required data:
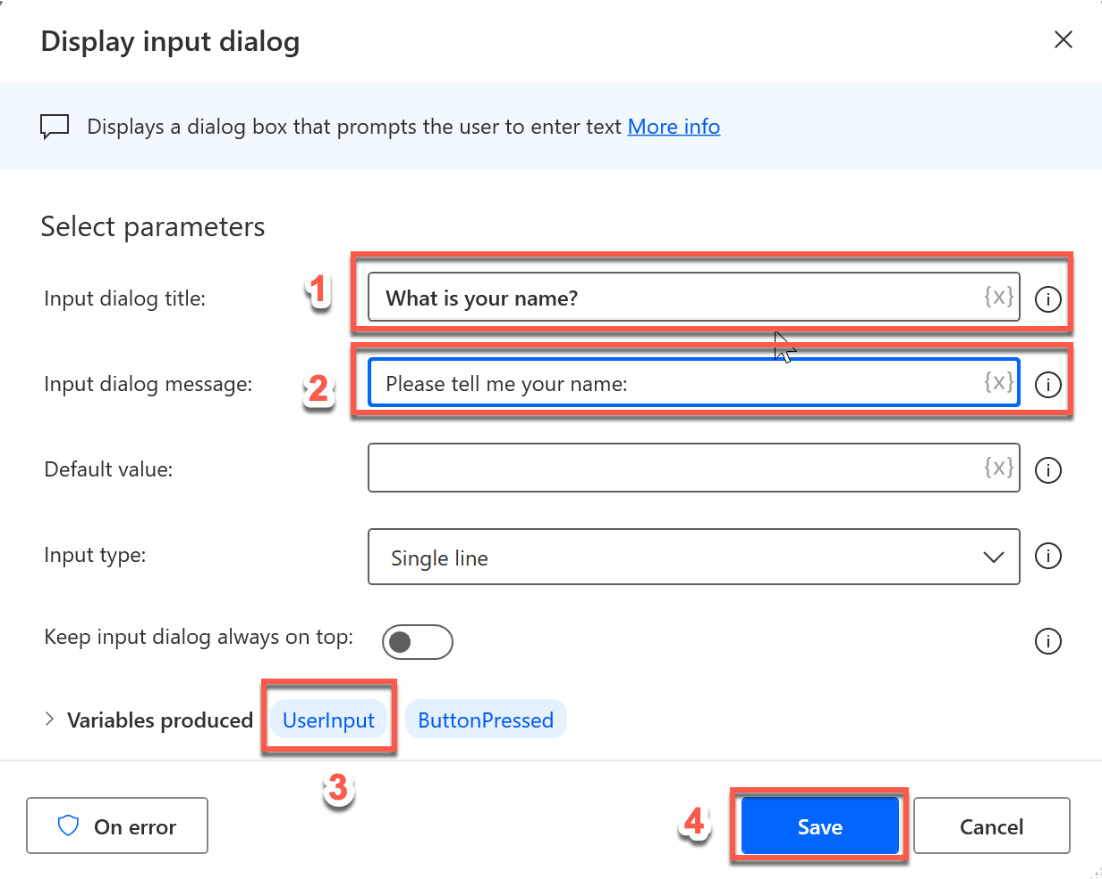
Figure 2.11 – The Display input dialog parameters
We need to provide the following information in this dialog:
- Enter a name for the title of the input dialog. This title appears in the header of the message box.
- Enter a message for the dialog. In this case, we want to know the name of the person.
- You don’t need to enter anything here. However, the value of the name that is entered by the user must be stored somewhere so that it can be displayed later. This action produces a variable as internal memory for where the input of the user is stored.
- Click on the Save button to save and close this dialog.
- The design canvas should now contain the first action and look like this:
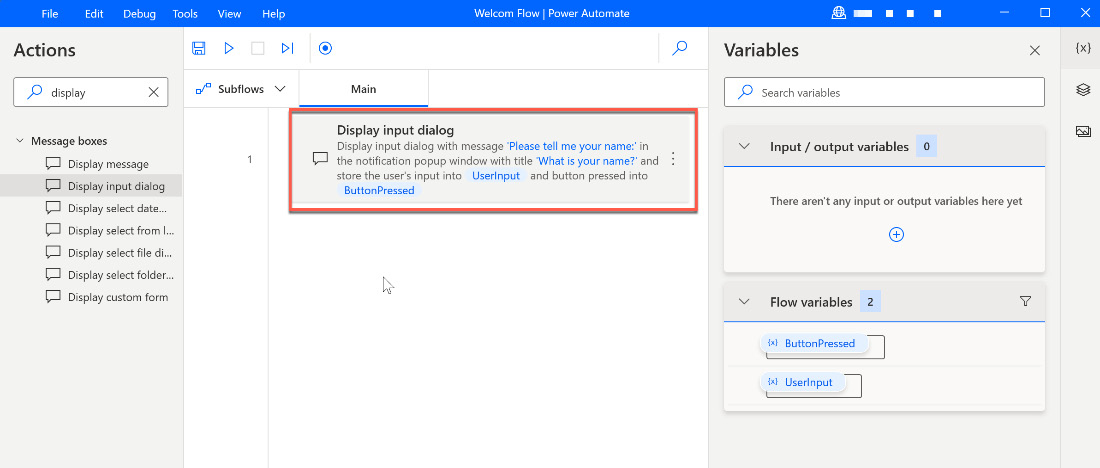
Figure 2.12 – The first action in the canvas
Now that we have a way to query the name, we want to display that name to the user again. For this, we are going to use the Display message action. Click and drag this action and place it under the existing action:
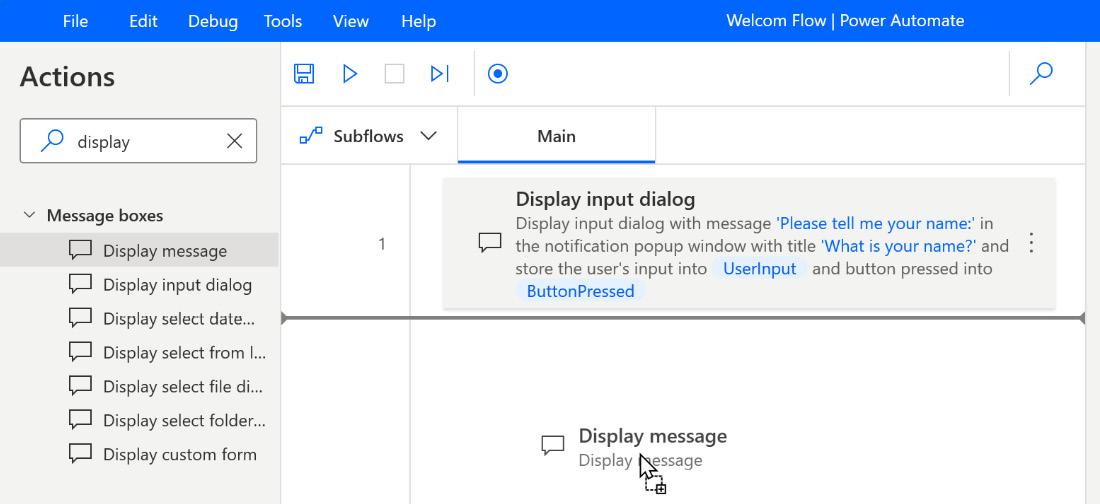
Figure 2.13 – Dragging the Display message action onto the canvas
It’s important to note that there is a line indicating where the action will be placed. Later, when we have larger flows with more actions, this will allow us to place an action in the middle of a flow and modify the sequence very easily. Like in our first action, immediately after releasing the mouse, a dialog will appear where we can specify the parameters of this action:
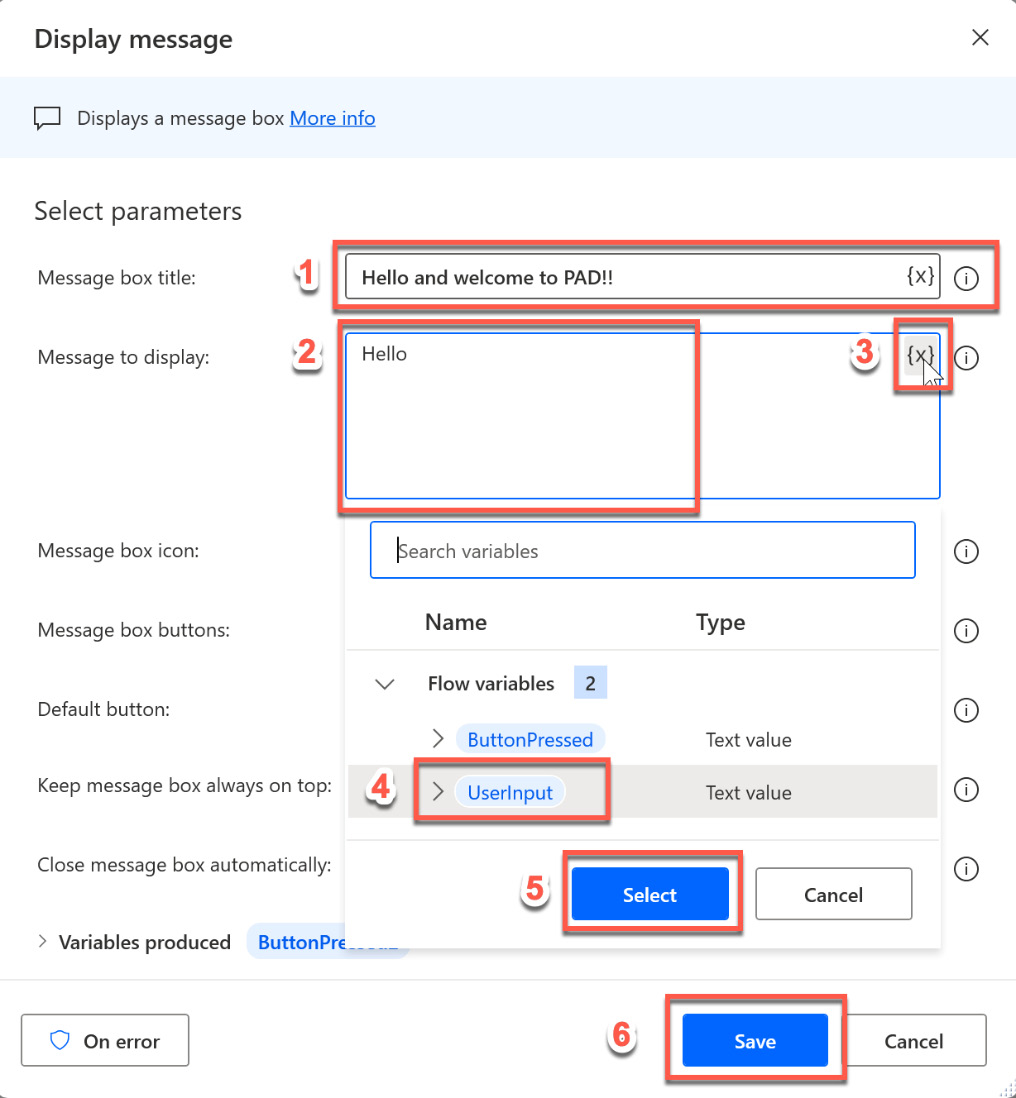
Figure 2.14 – Parameters for the Display message action
Again, we need to enter some information here:
- This will be the text a user will see in the title of the message box.
- The message text we want to display.
- To the right of the text field for the message box, there is a little X symbol in brackets. This is a button that can be used to insert dynamic content from variables in the flow. In the previous action, we stored the name of the user in a variable called UserInput. When clicking on the X button, another dialog will appear at the top that shows us the variables that are available in this flow. Here, we can select UserInput and click the Select button. The variable will be inserted into the text box for the message. It should look like this now:
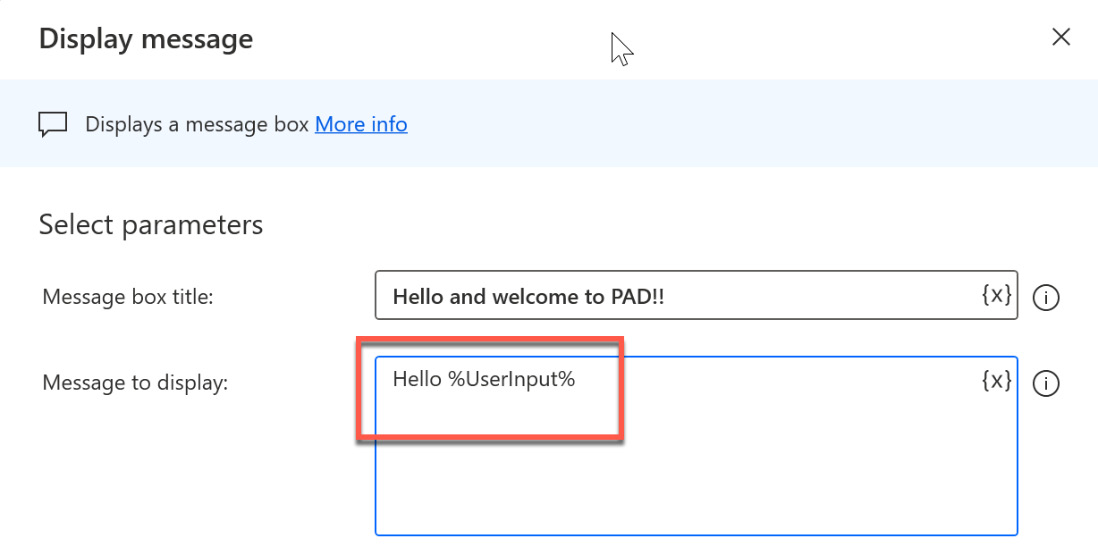
Figure 2.15 – Using a variable in the message
- Click the Save button to save and close the dialog.
- Our first UI flow now looks like this:
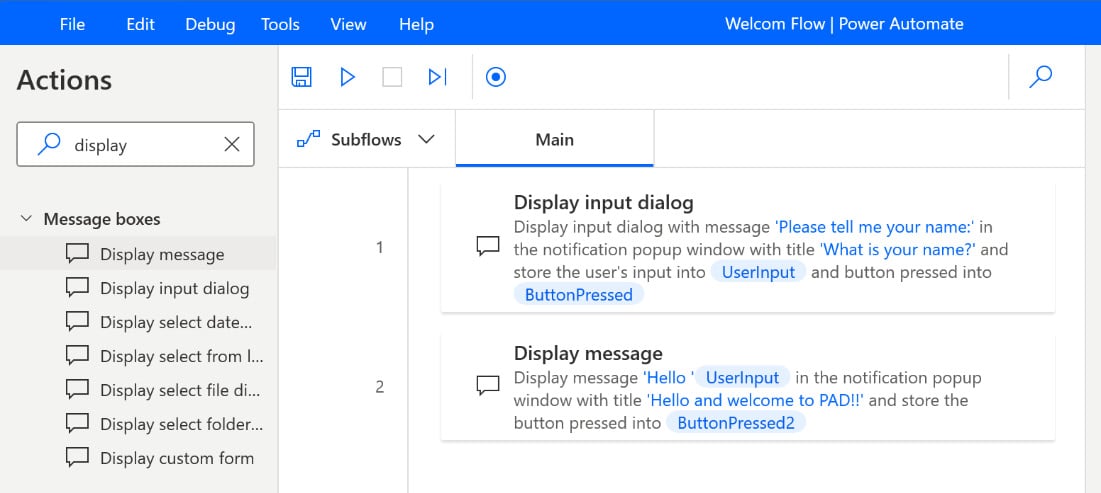
Figure 2.16 – Our first flow completed
- To test this flow, we need to run it. This can be done by pressing the Play button at the top of the action canvas or by going to the Debug menu and selecting Start. The shortcut for running a flow is F5.
As expected, an input dialog appears, asking us for our name, which we can now enter into the text box:
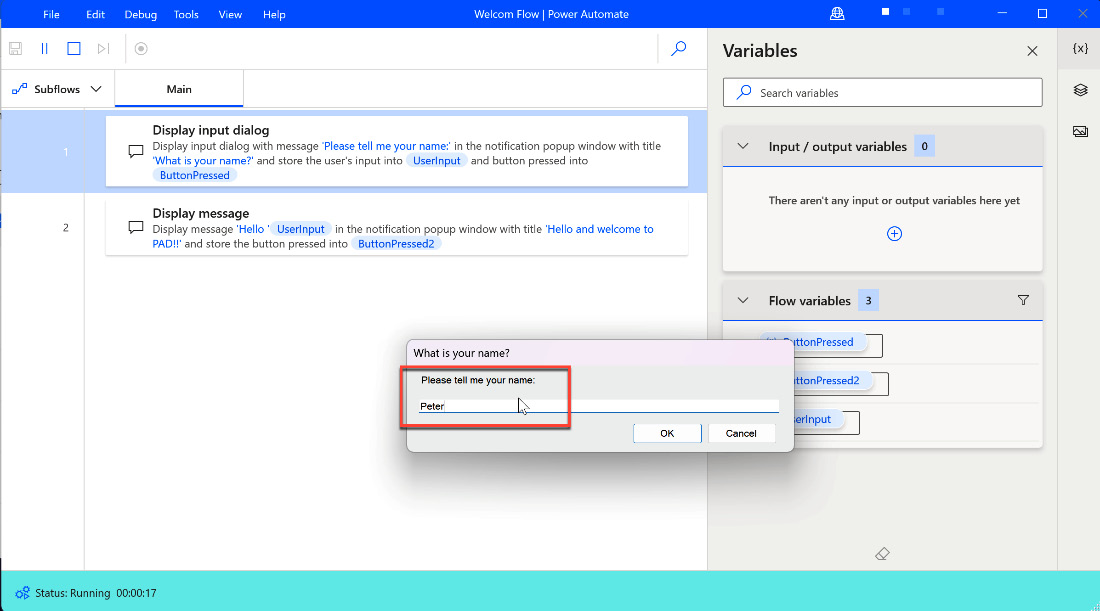
Figure 2.17 – Running our first flow – part 1
Also, notice that in the background, the UI of the program has changed a little bit. The entry with the blue background indicates the current step of the flow. Enter a name and click the OK button. The flow will continue with the next step and display a message box with the name you have entered:
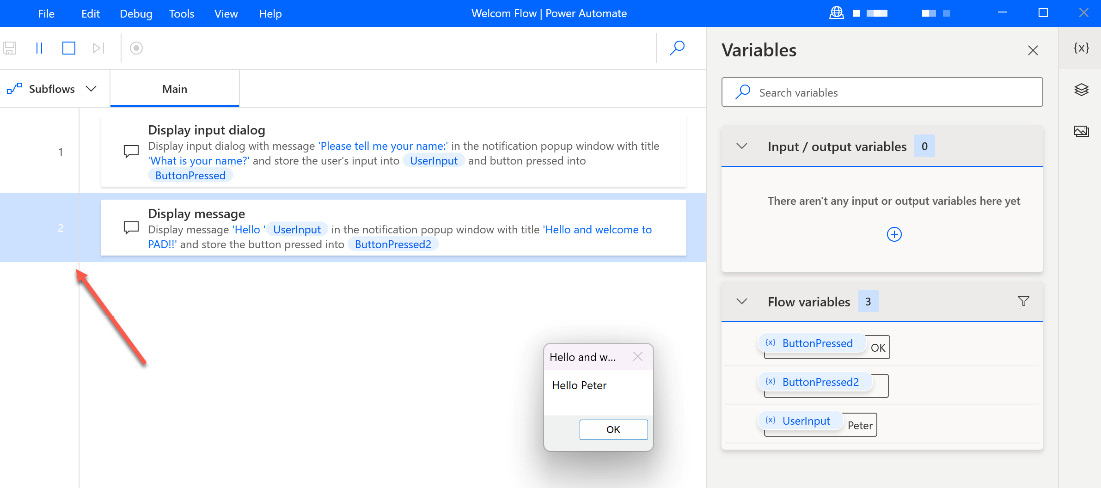
Figure 2.18 – Running our first flow – part 2
Again, the blue background in the application indicates the current step. Click OK to close the message box and end the flow. Congratulations – you’ve created and executed your first UI flow!


