Accessing your notebooks from different devices
One of the best things about OneNote is the fact that you can access it from any device you own. All it takes is for you to log in to the appropriate Microsoft account on that device and then start opening notebooks.
In this section, we will discover which other devices we can have our OneNote notebooks on. We will also learn how to set up OneNote on these other devices so that we can view and access our notebook(s).
Opening OneNote from a different device/computer
Let's say you use OneNote on your desktop computer at work; you may also want to access this same notebook on your laptop, your phone, your iPad, or another computer (that doesn't belong to you). Let's look at all these options now.
Accessing your notebook from a different Windows device
If you are using OneNote for Windows 10 at work, then to access OneNote for Windows 10 on a different computer, it's easier if that computer has Windows 10 as well. However, if you don't have Windows 10 on that other computer, don't worry. You can still access that notebook using either OneNote for the web or the OneNote app.
To open an existing notebook on another computer, you need to take the following steps:
- Go to the Windows Start menu and open OneNote. If you do not see OneNote immediately, go down the Menu list, where it should be listed alphabetically. If you do not have OneNote for Windows 10 on your computer for some reason, go to the Microsoft Store and download this program. If your computer does not have Windows 10, you will have to download OneNote (for Office 365 or Office 2019).
- Once you open OneNote, you will see your Microsoft account email if you are using other Microsoft 365 applications or Windows 10. If the account is not correct for some reason, then go to the Windows Settings menu and choose Accounts to include the correct information. Then, proceed as follows:
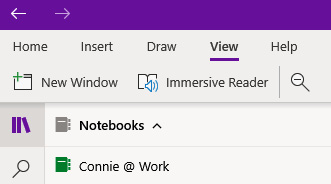
- Inside the OneNote application, you will need to open up the notebooks that you want to work on. Under the Notebooks column on the left, choose More Notebooks (at the bottom). If there is no separate column for notebooks showing, you'll notice an icon of a stack of books on the left-hand side, as shown in the following screenshot. This will show or hide your notebooks area. Press on the books icon to show your notebooks and press again to hide them:

Figure 1.5 – OneNote screen with notebook show/hide icon
- Provided the Notebooks area is visible, you can choose to open pre-existing notebooks with More Notebooks (at the bottom of the page), or you can add a new notebook by choosing Add Notebook at the bottom of the notebooks area.
Now, let's look at how to access OneNote from your Mac computer.
Accessing OneNote from a Mac computer
Accessing OneNote from your Mac computer follows most of the same steps as outlined in the previous section for Windows computers. The notebooks area looks and works the same as shown in Figure 1.5.
The difference is that there is no More Notebooks option; you can simply choose Add Notebook to add in another notebook that you created on another device.
Another option on the Mac is that you can use the File menu at the top of your screen and from this menu, you will see the Open Notebook option.
Now, let's look at how to access OneNote from your smartphone.
Accessing OneNote from your smartphone
You will need to download OneNote onto your smartphone and then open or create a notebook, as follows:
- Search for
Microsoft OneNoteon the App Store of your iPhone, or the Play Store of your Android phone. Download the app. - Go through all the prompts to get the app started, as follows:
- Press the Get started button.
- Choose OK for the privacy options.
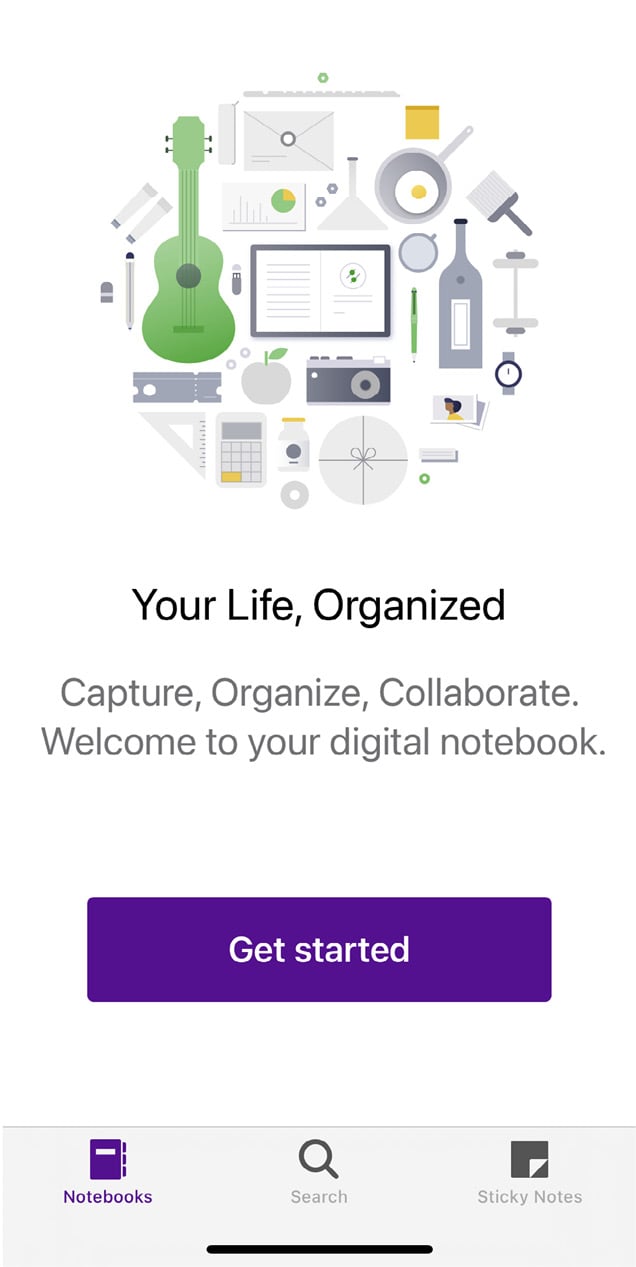
- Choose Get started to start your first notebook, as illustrated in the following screenshot:

Figure 1.6 – OneNote download prompt when installing on iPhone
- To start your first notebook, you must sign in to a Microsoft account, as follows:
- At the top-left corner of the App screen, press the circular icon. The Android app opens directly to a Sign in screen titled Welcome to OneNote. You will then find a Sign in field and button at the bottom of the page.
- Choose Sign in.
- Type in your Microsoft sign-in email and password or create a new one.
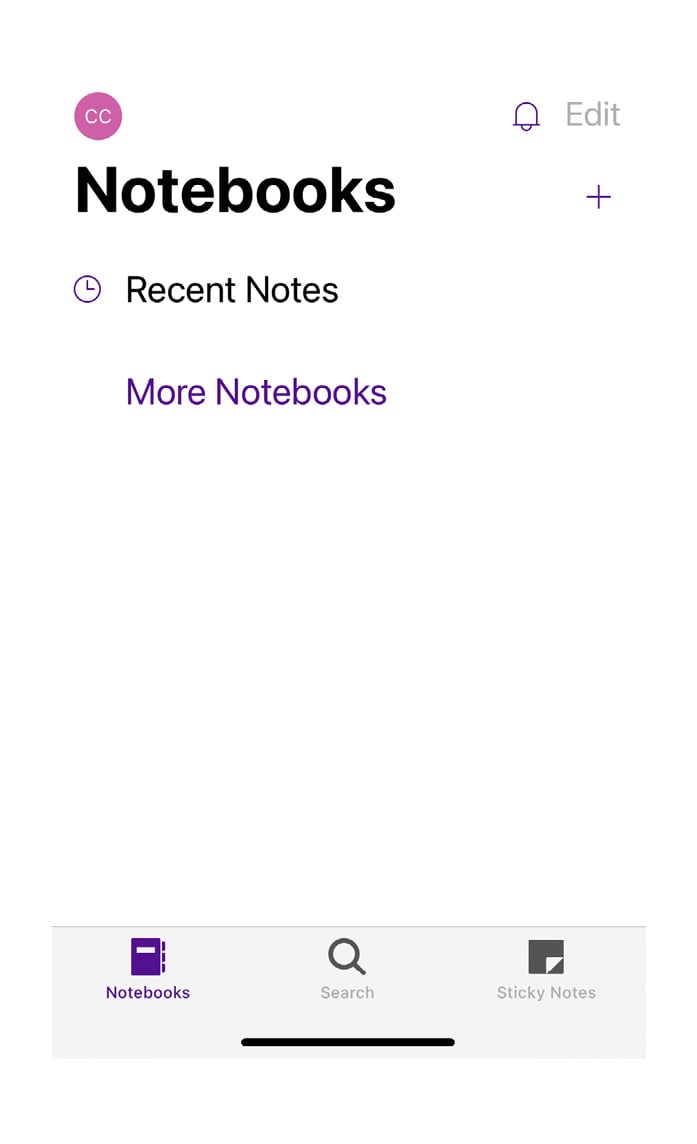
- Once signed in, you can create a new notebook using the plus sign (+) at the top right of the screen, or you can open existing notebooks by selecting More Notebooks, as illustrated in the following screenshot:

Figure 1.7 – OneNote initial notebooks screen
The instructions for downloading OneNote onto your iPad are almost the same, but there is one little difference that happens when opening up your notebooks. Let's look at that next.
Accessing OneNote from an iPad or a Galaxy tablet
You will need to download OneNote onto your iPad following the same instructions as detailed for a smartphone.
When it comes to opening up notebooks on your iPad, choose More Notebooks at the bottom of the first leftmost column. Select a notebook from the list that you wish to have open on your iPad.
On a Galaxy tablet, the More Notebooks option is shown closer to the top of the first leftmost column in OneNote.
In addition to using OneNote as an application on our computers, phones, or tablets, we can access OneNote via the OneNote web application. Let's look at how to do that next.


