Once you have vCenter Server upgraded to version 6.5, the next step is to upgrade the ESXi hosts. The upgrade procedure will depend on the current deployment architecture. For instance, if all your ESXi hosts were deployed using the VMware Auto Deploy server, then you'll have to update the image profile sourcing the streamed image using a new offline bundle. As Auto Deploy is covered in Chapter 5, Using vSphere Auto Deploy, in this chapter, we will cover the upgrade of the ESXi host using the installation media. VMware ESXi can also be upgraded by running the ESXi installer on each of the servers or use vSphere Update Manager to perform the same activity. You will learn about patching/upgrading ESXi hosts using VUM in Chapter 14, Upgrading and Patching using vSphere Update Manager.
Upgrading ESXi Hypervisor
Getting ready
Before you begin any upgrade, it is very important to plan for it. So what would you need to do to perform an upgrade of ESXi? You would, of course, need the ISO image downloaded from VMware's website, but you would also need a method to present the ISO to the physical machine so that it can boot from it. Most of the modern server equipment's have a methodology to avoid the need to burn ISO to a physical DVD medium and then insert it into the DVD drive of the physical machine. If you are an administrator, you might already be aware of terms such as ILO (HP), DRAC (Dell), and KVM Manager (Cisco). These are web-based tools that will connect to an RAC on the server and enable remote access to the server's console via the Web. Enough said on what is available out there; let's make a list of what you need to begin the upgrade:
- The ESXi 6.5 Hypervisor ISO image can be downloaded from VMware's downloads page https://my.vmware.com/web/vmware/downloads
- Access to the remote console of the server on which the upgrade will be performed
How to do it...
The following procedure will walk you through the steps involved in upgrading ESXi 5.5/6.0 to ESXi 6.5 using the ESXi installer:
- Boot the host with the ESXi 6.5 installer ISO mapped to it.
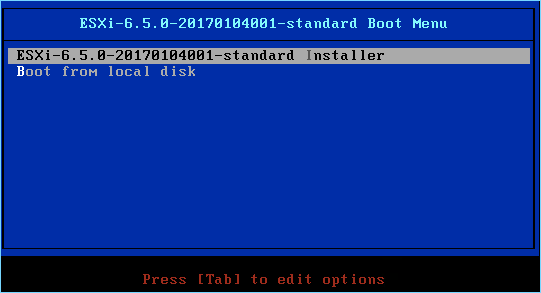
- Choose ESXi 6.5 standard installer from the boot menu and press Enter:

- Once the installer is fully loaded into the memory, you will be prompted with a Welcome to the VMware ESXi 6.5.0 Installation screen. Now press Enter to continue.
- To accept the EULA and continue, press the function key F11.
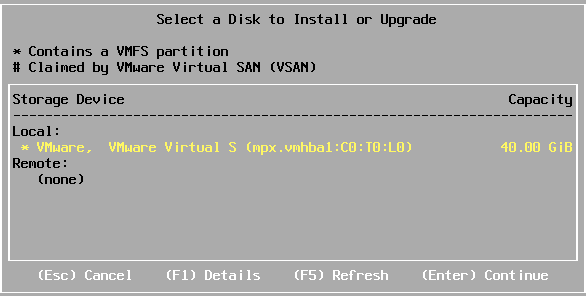
- Select the storage device that has the previous installation of ESXi and press F1 to view the disk details:

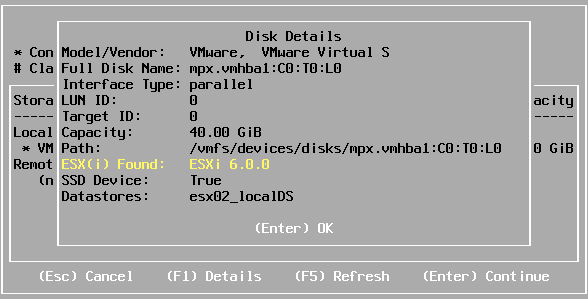
- On pressing F1, it will show you the Disk Details. In this case, it has detected an ESXi 6.0 installation. Press Enter to go back to the Select a Disk to Install or Upgrade screen:

- At the Select a Disk to Install or Upgrade window, press Enter to continue.
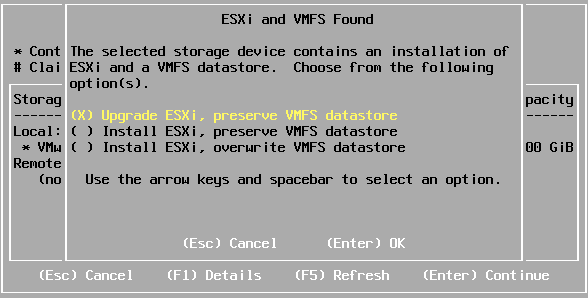
- On the ESXi and VMFS Found window, select the option Upgrade ESXi, preserve VMFS datastore and press Enter to continue:

- On the Confirm Upgrade window, select the Upgrade option by pressing the F11 key:

- If the upgrade completes successfully, you will be presented with an Upgrade Complete success window. Now press Enter to reboot the ESXi host.
- After a reboot, you should be able to see the ESXi 6.5 DCUI welcome screen.
You should now be able to connect to this vCenter using the embedded host client as well. If the host was managed by a vCenter, then the inventory should now show this ESXi host connected.
There is more...
Once you have vCenter and Update Manager upgraded and configured for use, the ESXi host upgrades can be performed using VUM in a much more effective manner. You will be able to run the upgrades simultaneously on more than one ESXi host using VUM remediation. You will learn more about this in Chapter 14, Upgrading and Patching using vSphere Update Manager.


