
DHCP server – more than just IPs
The DHCP server will be running a standard DHCP server that is available with Oracle Linux 8. Installation of DHCP is straightforward.
Getting ready
To set up a DHCP server, you will need an Oracle Linux 8 VM running on the same subnet that VMs that will be installed are using.
How to do it…
Install the DHCP server with the dnf install -y dhcp-sever command. The following screenshot shows the full process:
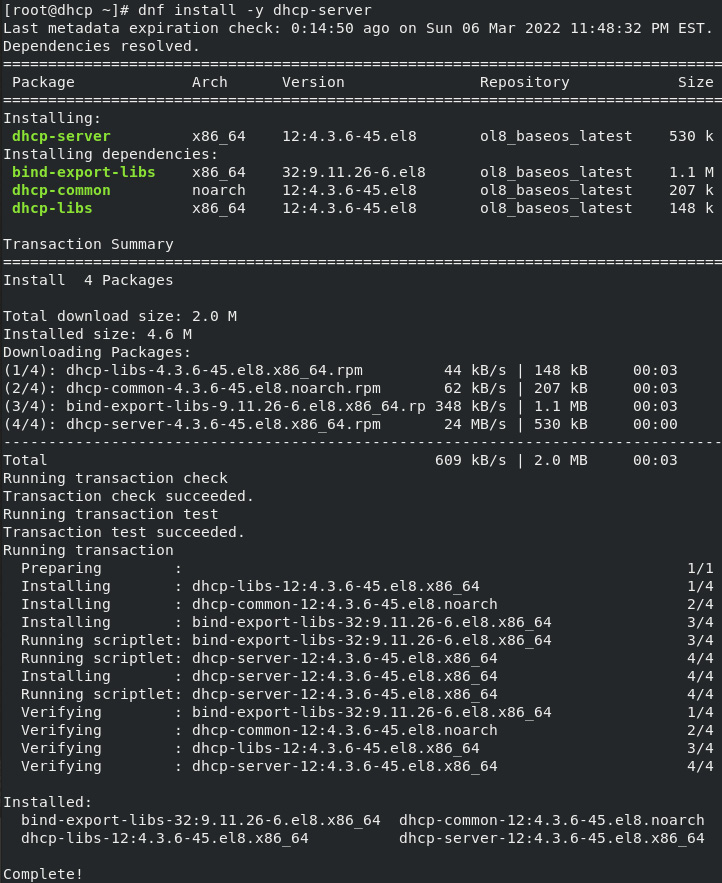
Figure 2.3 – DHCP server installation
Once installed, enable DHCP traffic through the firewall (as seen in the following screenshot) with the firewall-cmd --add-service=dhcp --permanent and firewall-cmd --reload commands:

Figure 2.4 – DHCP firewall commands
The DHCP server has a sample DHCP config file installed in /usr/share/doc/dhcp-server. This has sample config files for both IPv4 in /usr/share/doc/dhcp-server/dhcpd.conf.example and IPv6 in /usr/share/doc/dhcp-server/dhcpd6.conf.example. For this DHCP server, we will use IPv4 and copy the sample config file to /etc/dhcp/dhcpd.conf. There is an existing config file, but by default, it is mostly empty with no configuration and can be replaced as in the following screenshot:

Figure 2.5 – Copy dhcp.conf
Next, the config file will need to be updated, changing the IP address range, as well as adding an NTP server to the configuration with the option of option ntp-servers 192.168.200.1, which sets the NTP server to 192.168.200.1. While configuring a NTP server is optional, it is highly recommended. Additionally, when the PXE server is not the DHCP server, you will need to add the next server parameter to the subnet. This will point DHCP clients to the TFTP boot from the PXE server.
Note
If you are using an existing DHCP server, make sure you add the next-server parameter to point to the PXE server that has the TFTP server.
Since the TFTP server is running on the PXE server, the DHCP server will need the next server option to be set to the IP address of the PXE server. A complete sample config file is shown here:
# dhcpd.conf
#
# These options are common to all networks
option domain-name "lab.m57.local";
option domain-name-servers 192.168.56.10;
default-lease-time 600;
max-lease-time 7200;
# If the DHCP server is the main server for the network, this should be set authoritative;
# This sets where logs are sent. By default they are sent to syslog. You can reconfigure sysylog to send to a different location as needed.
log-facility local7;
subnet 192.168.56.0 netmask 255.255.255.0 {
  range dynamic-bootp 192.168.56.100 192.168.56.150 ;
  option broadcast-address  192.168.56.255;
  option routers 192.168.56.1;
  option domain-name-servers 192.168.56.10 ;
  option domain-name "lab.m57.local";
  option ntp-servers 192.168.200.1;
   next-server pxe.lab.m57.local;
}
# Hosts which require special configuration options can be listed here, with the host details. This could be used to hard-code an IP address to a host, or define host-specific parameters like a non-0standard vmunix filename or a fixed IP address.
host fixedhost {
  hardware ethernet 0:0:aa:bb:cc:dd;
  filename "vmunix.fixedhost";
  server-name "fixedhost.m57.local;
}
# When using a fixed IP address, it is more common to assign the host an IP address outside of the DHCP managed IP address range. set.
host fantasia {
  hardware ethernet 08:01:02:03:04:05;
  fixed-address fixedhost2.m57.local;
}
Next, we need to test the DHCP server. To do this, install the nmap program with dnf install -y nmap.
Nmap is a powerful utility and can be used for many things. It is most well known as a port scanning tool, letting the user scan networks looking for servers that respond to a ping with nmap -sP 192.168.200.1/28, as seen in the following screenshot:
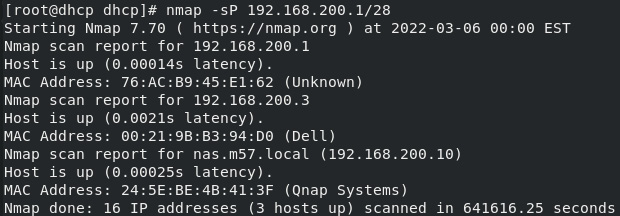
Figure 2.6 – Nmap ping scan
It can also be used to identify the OS and open ports of a specific server, with nmap 192.168.200.34 -O:
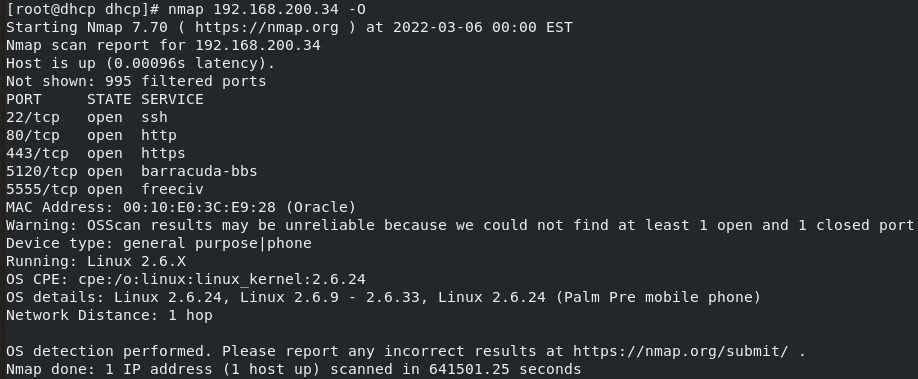
Figure 2.7 – Nmap ID server
While Nmap is a powerful tool for scanning networks, it can also be used for many additional tasks, including checking that a DHCP server is replying correctly. This is done with the broadcast-dhcp-discover script and is used via the nmnap ––script option. Additionally, if your system has multiple interfaces, you can specify the network interface used by the scan with the -e option. In this environment, the DHCP server is verified with the nmap --script broadcast-dhcp-discover -e enp0s8 command:
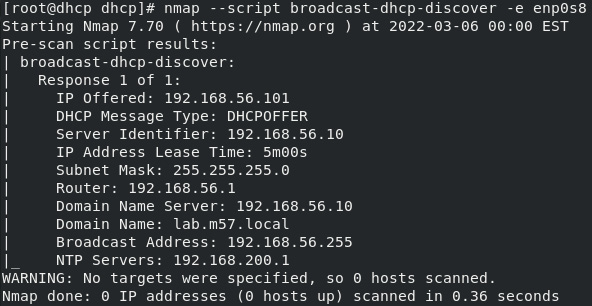
Figure 2.8 – Nmap DHCP discovery
We now know how the DHCP server works, so next is the Apache HTTPD server.