Back in the day – a manual installation
Automated installations are great, but for some admins, the complexity of configuring and maintaining the infrastructure to support an automated installation is more effort than doing a manual installation. This recipe will go over how the manual installation works.
Getting ready
To do this, you will need a system to install from. In the example, Oracle VM VirtualBox will be used, but it could just as easily be on a bare-metal server or a different hypervisor. You will also need installation media. Normally, an ISO works fine, but you can also use a boot ISO and an HTTP server, an FTP server, or even a network file share.
How to do it…
Regardless of whether you boot from an ISO, a USB stick, or even a kickstart file with a graphical installation option set, the process is the same!
If you are booting from a boot-only image, you will need to enable the network and then point to an installation source. This is shown in the next few steps. If you are installing from an ISO or USB, skip to the How it works… section:
- When booting from a boot image, you will need to select Install Oracle Linux X to start the process. When possible, use the latest version of Oracle Linux. When doing an installation you will get the first screen where you can test the boot image or continue:
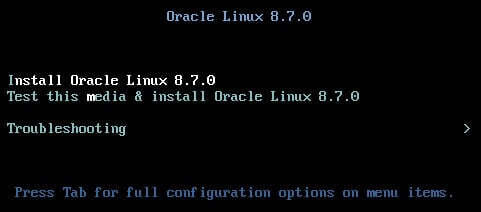
Figure 2.15 – Linux installer boot
- Next, pick your language:
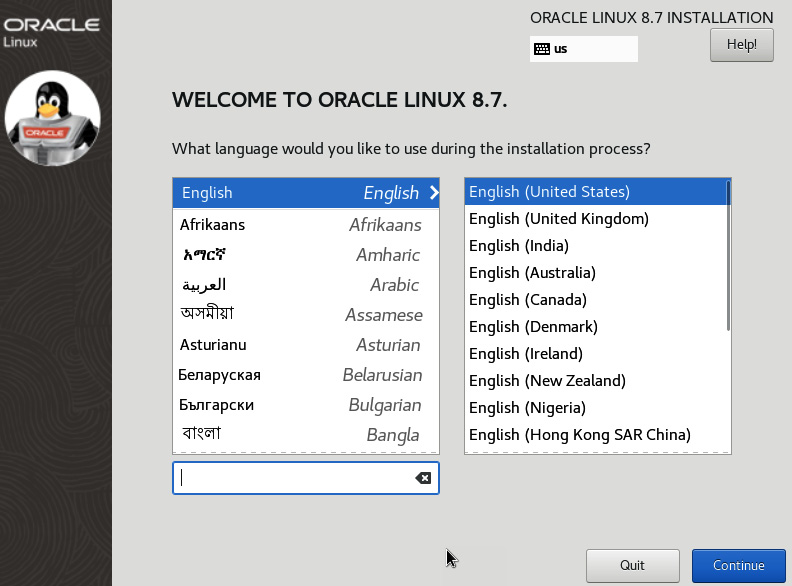
Figure 2.16 – Install language
- Click on Continue once you have picked your language. Next, you should see the INSTALLATION SUMMARY section:
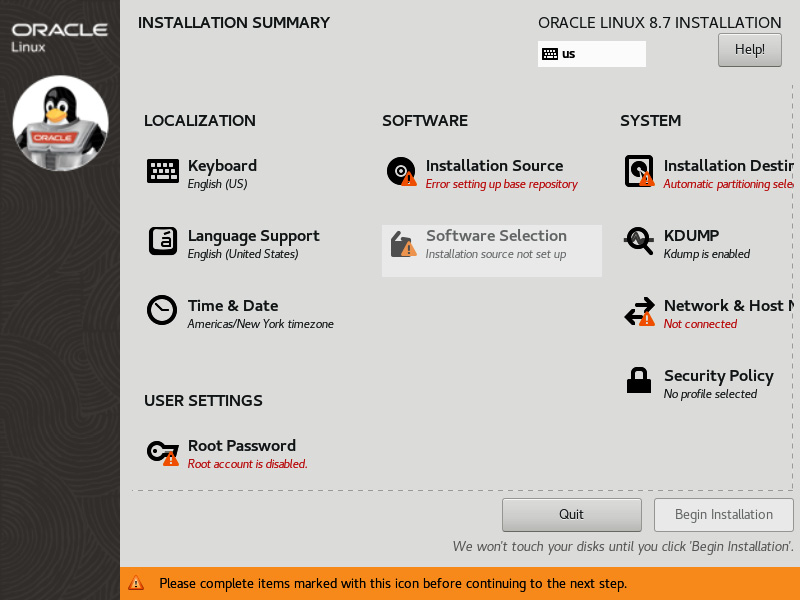
Figure 2.17 – Installation Summary
For now, we need to do two tasks:
- Enable the network
- Set Installation Source to Oracle’s yum repo
To enable the network, click on the Network & Host Name option.
- Here, you will need to switch Ethernet on, and also update the hostname with the name of the server. The network will automatically use DHCP to configure the boot image. You can optionally manually configure the IP stack by clicking the Configure option.
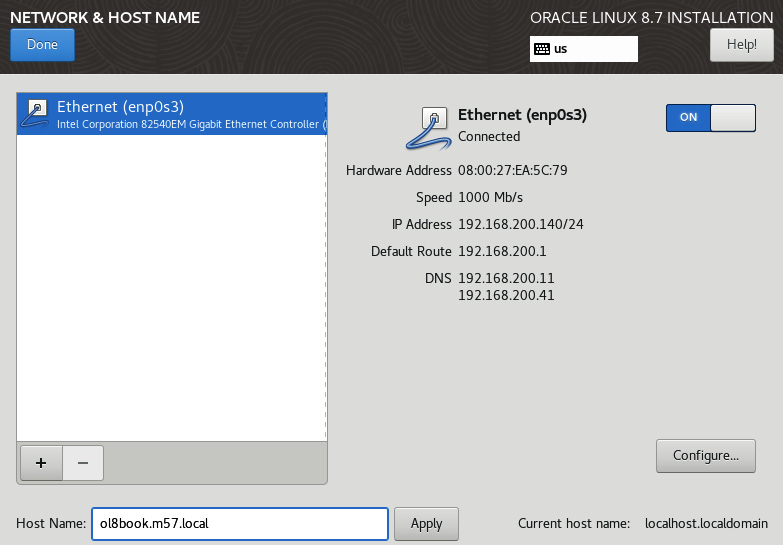
Figure 2.18 – Network & Host Name
- Next, click Apply and then Done. This will take you back to the INSTALLATION SUMMARY page. From there, we will need to select Installation Source to set where we will get the install files.
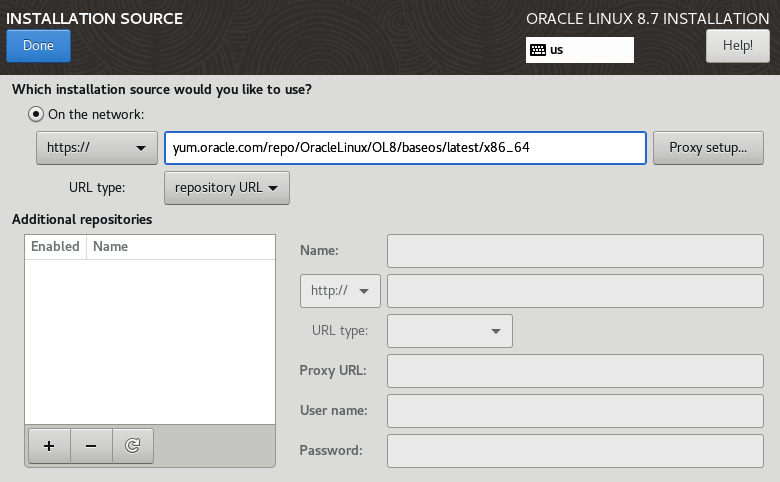
Figure 2.19 – Installation Source
In this example, we are using the Oracle Public YUM server as the installation source. You can optionally add additional repositories if needed, as well as set any proxy settings if required. You can also set an FTP:// patch for an NFS server path. Once you have a path, select Done.
- This will take you back to the INSTALLATION SUMMARY page. Wait a few minutes for the repo index to load. Once it loads, you should see the Installation Source option, as well as the option for Software Selection.
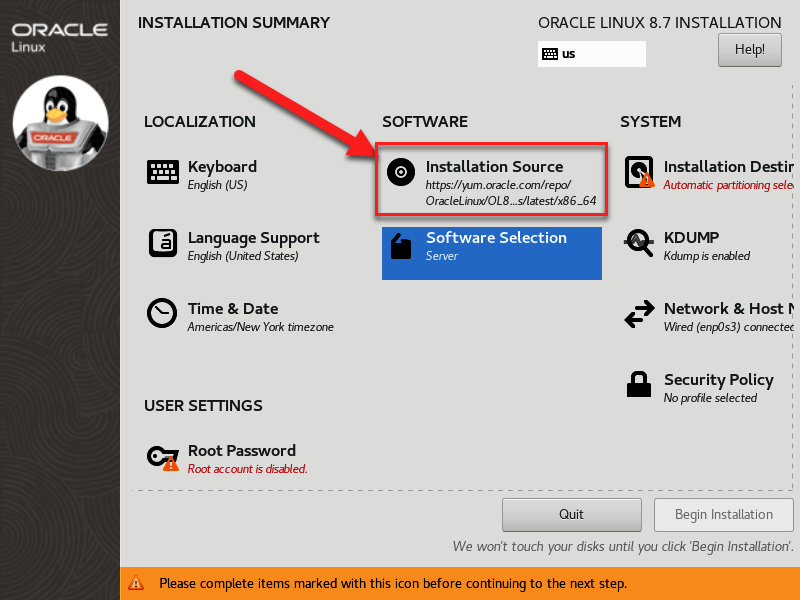
Figure 2.20 – Selecting Installation Source
Manually network booting is otherwise the same as an ISO or USB boot.
How it works…
A manual boot process is fairly simple to do. Once booted, on the INSTALLATION SUMMARY screen, you have many options:
- LOCALIZATION: This is where you can set settings for country-specific options language, keyboard type, time, and more:
- Keyboard: This allows you to set what keyboard is used. You can use non-US keyboards.
- Language Support: This sets the language used.
- Time and Date: This sets the system time, as well as the Network Time Protocol (NTP) servers to be used to automatically synchronize the time.
- SOFTWARE: This sets the software sources and what software groups or packages will be installed:
- Installation Source: This sets the source and software being installed
- Software Selection: This sets what software groups and packages are being installed
- SYSTEM: These are system-level parameters:
- Installation Destination: This is the destination for the install. This includes the initial filesystem layout.
- KDUMP: This allows you to set up kdump, a kernel crash dump tool that writes system information to disk for analysis later.
- Network & Host Name: This is where you set the hostname and network information.
- Security Policy: This enables a more secure installation, allowing you to start with a system that meets popular security standards such as STIG and PCI-DSS.
- USER SETTINGS: This is where you can set users, groups, and passwords:
- Root Password: This sets the initial root password
Generally, the first setting that is set is the network. This is key for not only network installations but also setting up NTP for time synchronization:
- To set up the network, select Network & Host Name:
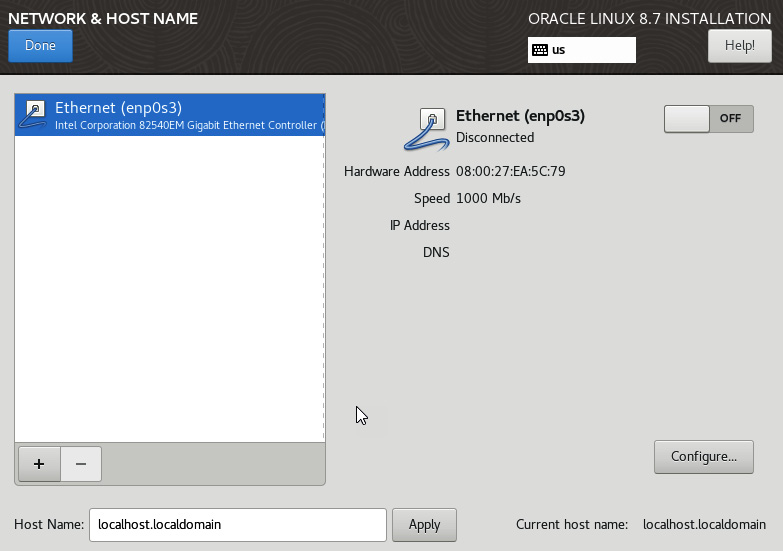
Figure 2.21 – Setting hostname and IP info
By default, the network port is not enabled and the hostname is not set. You can manually set the hostname. Don’t forget to use an FQDN when setting the hostname. This should include the name and the domain name. When you enable the network, the system will automatically grab DHCP IP info. If you want to manually configure this, click on Configure…:
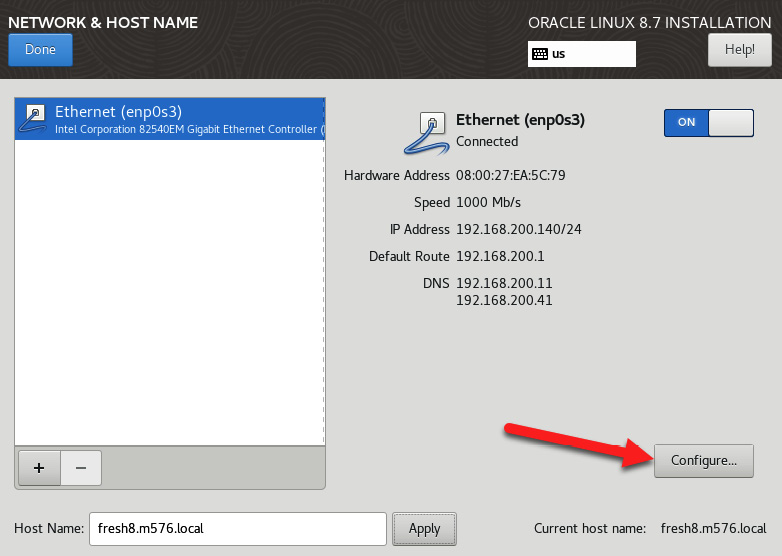
Figure 2.22 – Accessing manual network settings
- This will take you to the network details, where you can manually set the MTU, IP address, and other NIC-specific settings. You can also disable IPv6 if needed.
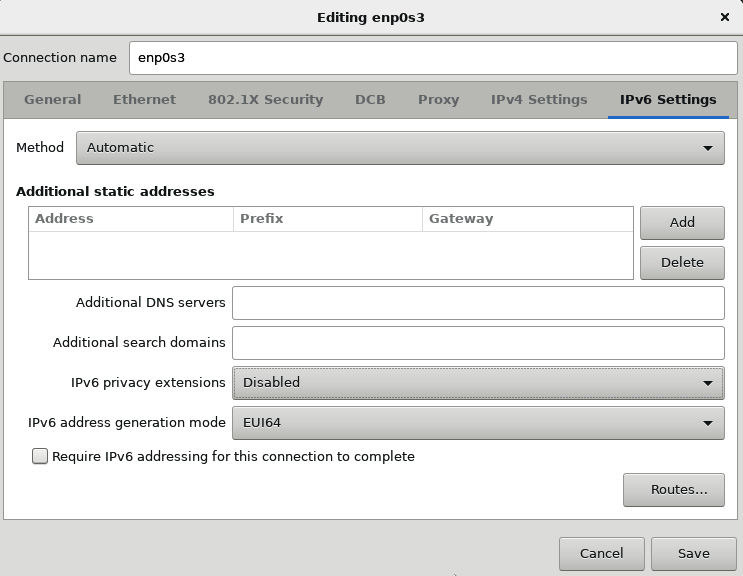
Figure 2.23 – Manual network settings
- Once the network is set, you can use network resources such as NTP servers to synchronize the clock. To do this, under TIME & DATE, click on the gears:
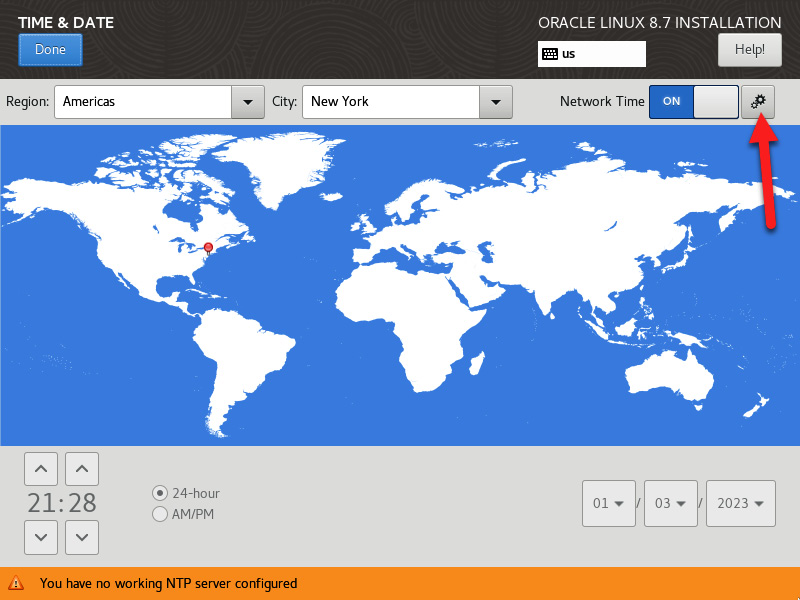
Figure 2.24 – Accessing NTP settings
- Then, you can add NTP servers. By default, a public server is used, but if you run local NTP servers, make sure you add those here.
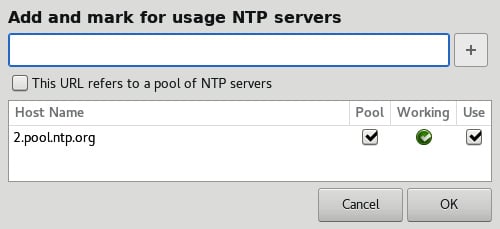
Figure 2.25 – NTP settings
- Next, additional software sources can be added under Installation Source as needed. This was done previously when doing a network install.
You can also set what RPM groups are installed, along with any additional software. This is done under SOFTWARE SELECTION:
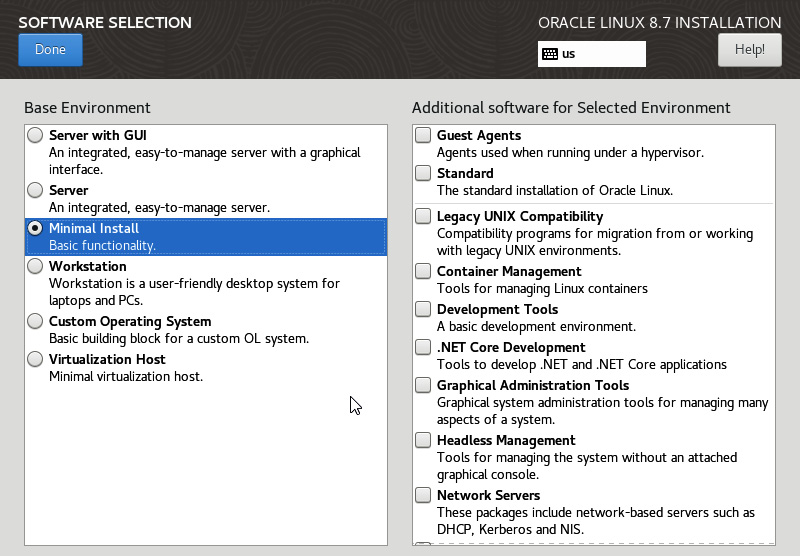
Figure 2.26 – Software Selection
- After setting Base Environment and adding any additional software, the next task is to set up the installation destination. This is done by clicking on Installation Destination.
From here, you should see the physical and logical drives available to the system. The default is to set Storage Configuration as Automatic, but let’s explore a different boot disk structure by selecting a custom configuration. Once Custom is selected, click on the Done button.
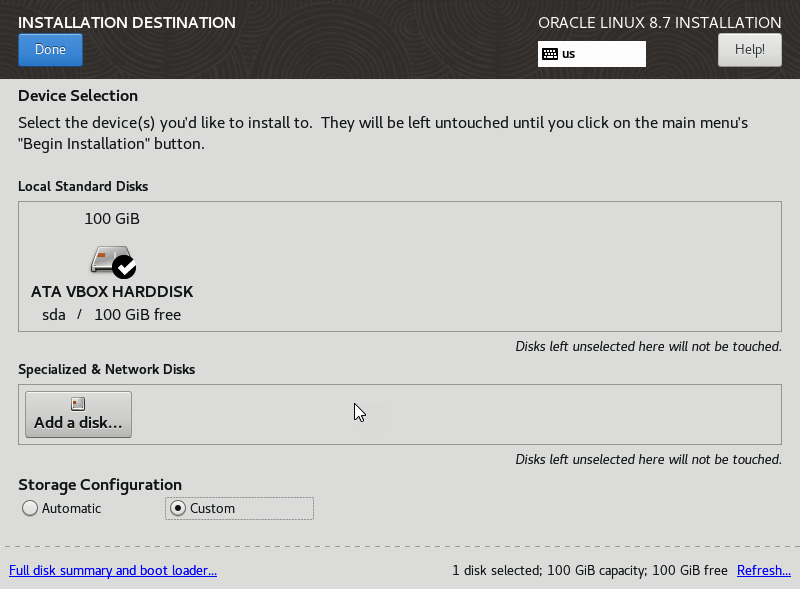
Figure 2.27 – Installation Destination
- From here, you can pick the default volume management strategy, as well as manually creating a new layout. Most systems will use an LVM install, as this gives you the flexibility to resize partitions down the road.
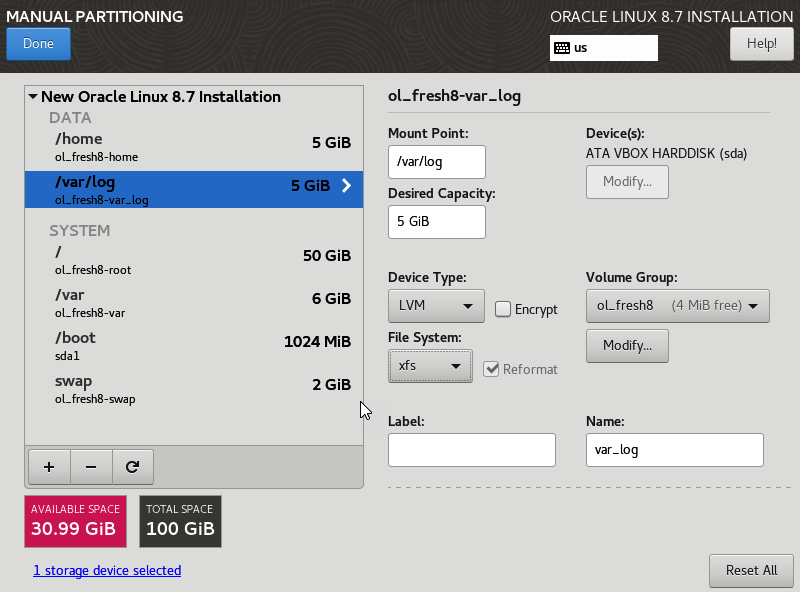
Figure 2.28 – Manual Partitioning
Don’t forget to click Done and accept all the changes to the layout.
- As a note, if you boot from a UEK-based install, you now have the option to use Btrfs as the root filesystem.
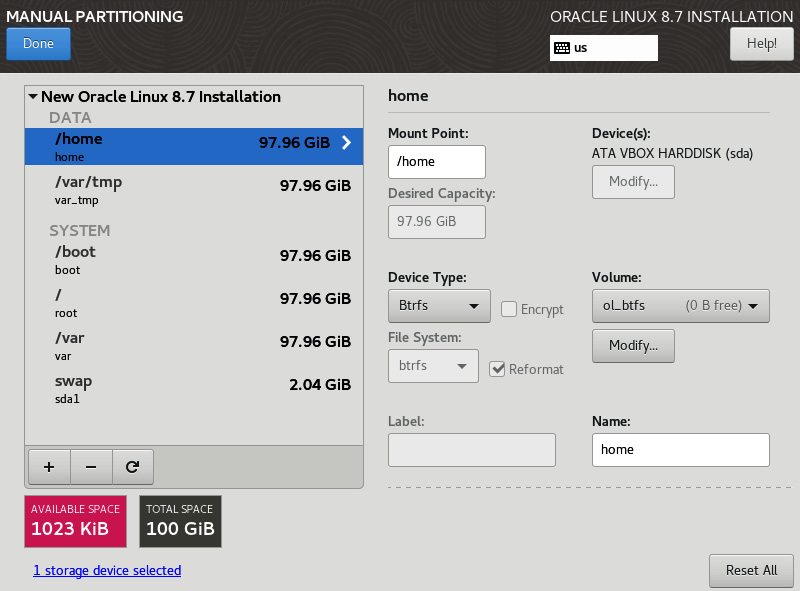
Figure 2.29 – Btfrs partitioning
Btrfs will look a little different, as the system combines the role of volume manager and filesystem into one system. This means at the time of installation, all of the filesystems will show all the space available. This can be updated after the OS is installed and a quota is set for each directory that needs to be limited. This is covered in the Btfrs recipes in Chapter 4.
You could finish up now by just giving root a password… but there is one more basic task, and that is to apply a security policy to the system. The security policy allows the installer to preconfigure the system to follow the policy set. This is very helpful when installing systems that support workloads such as HIPPA, PCI DSS for credit card processing, or STIG for public sector workloads.
- To set a policy, select Security Policy from Installation Summary:
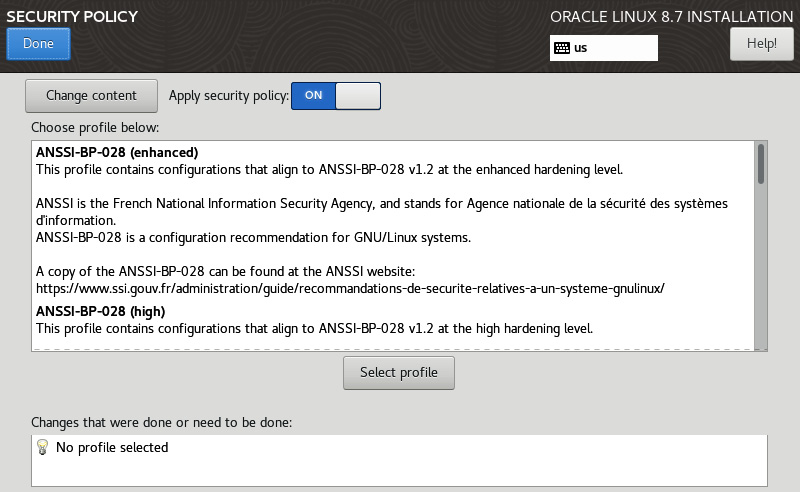
Figure 2.30 – Security Policy
- Once you know the policy you want to use, select it and click on Select profile:
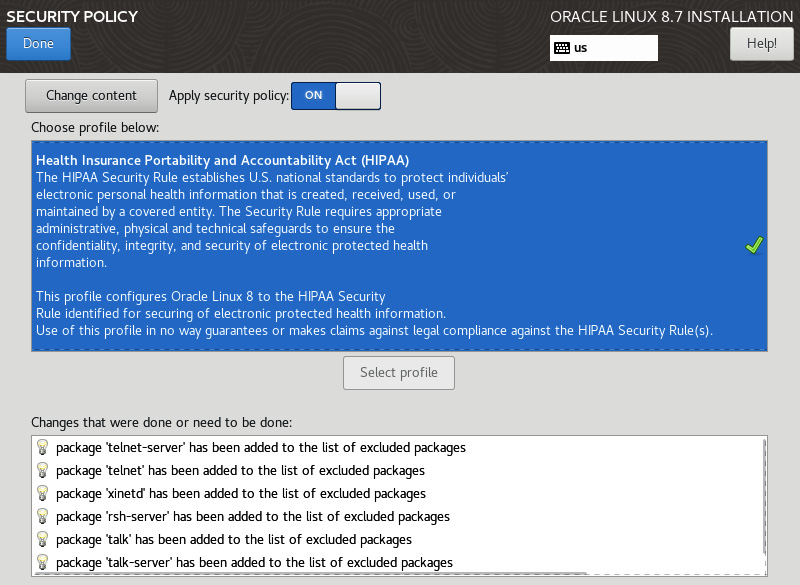
Figure 2.31 – Applying a security policy
You will now see the policy and a list of all the changes being made to the system. You will also see some changes that may need to be made to the filesystem layout. This is seen in policies such as STIG, where /var and /var/log need to be separate filesystems.
Once done, from the Installation Summary, click on Begin Installation to start the install.