Let's begin the process of installing Kali:
- Click on New in the upper left-hand corner of the screen:
Main VirtualBox screen
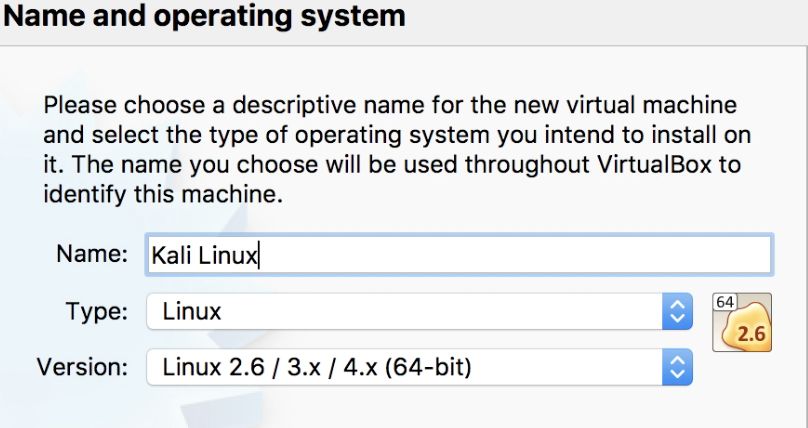
- Name your virtual machine Kali Linux, select type as Linux, and select the version as Linux 2.6 / 3.x / 4.x (64-bit). Press the Continue button when complete:
Name and operating system selection screen
- Memory size: You will be presented with a slider for memory size, with the ability to manually enter a value: in the box type in 4096. The 4 GB of memory will provide a smooth and responsive Kali install. Click on Continue.
- Hard disk: select Create a virtual hard disk now and press on Create.
You will note that on this screen, it will refer to a recommended hard disk size of 8 GB. Please note that this is not sufficient for a full Kali install, and we will be allowed to change it in a future step.
- Hard disk file type: take the default file type of VDI (VirtualBox Disk Image). Select Continue.
If you are interested in having easy compatibility with other hypervisors, you can select one of the other types available. Virtual Hard Disk (VHD) is widely used for Windows HyperV. Virtual Machine Disk (VMD) is widely used for VMware deployments.
- Regarding the storage on physical hard disk, leave the default of Dynamically allocated and click on Continue.
If you are running an older spinning disk versus a solid state drive and have the available space on the disk, the recommendation would be to use Fixed size.
- File location and size: leave the name and location with the default, and either move the slider or enter 25.00 GB directly into the box. Click on Create.
25 GB is a nice size for the install plus some extras. If you have limited space requirements please see our discussions of the various Kali image and installation options for more guidance in the introduction section of this recipe.
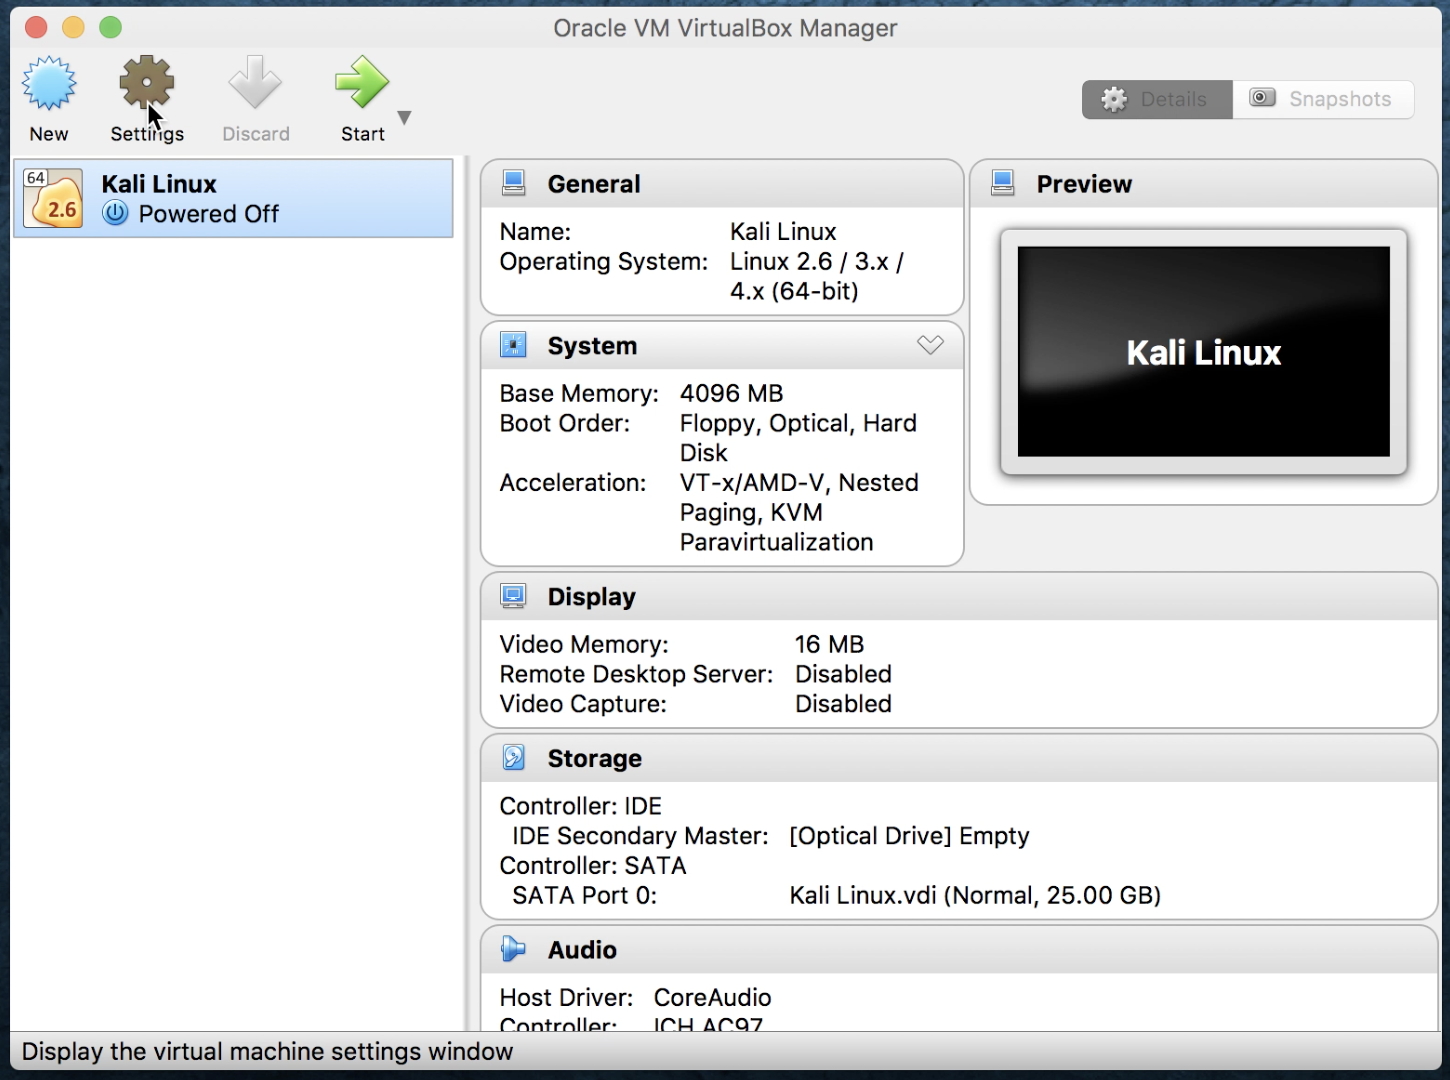
- Click on Kali Linux to highlight it; then click on Settings:
VirtualBox main screen - with Kali Linux VM shown
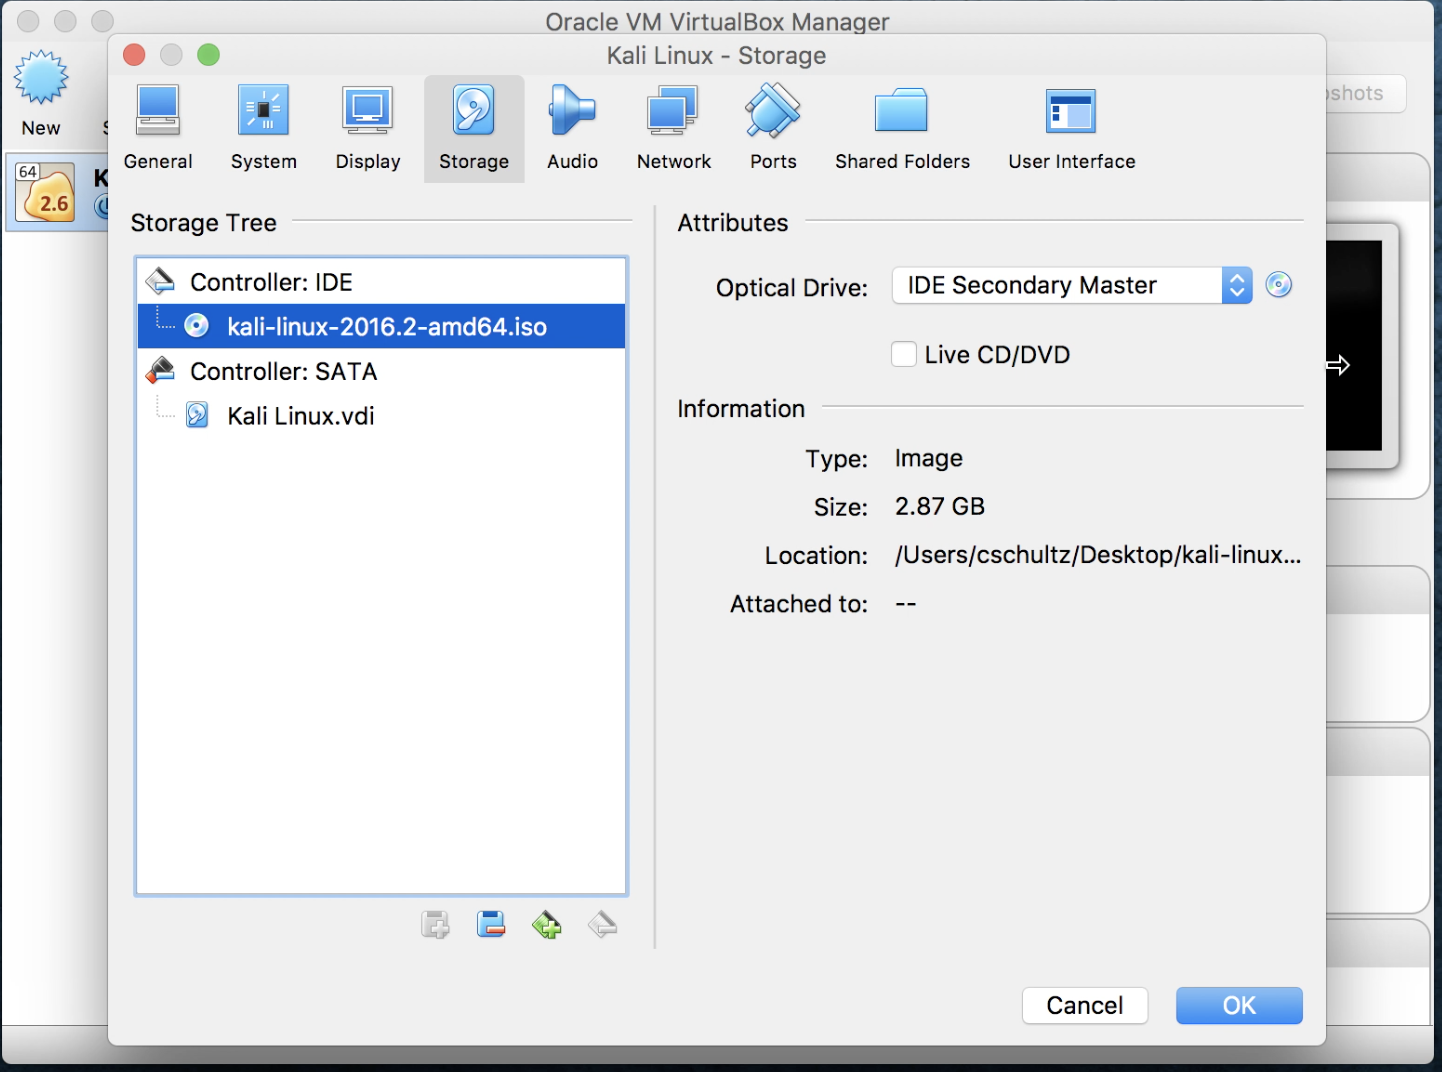
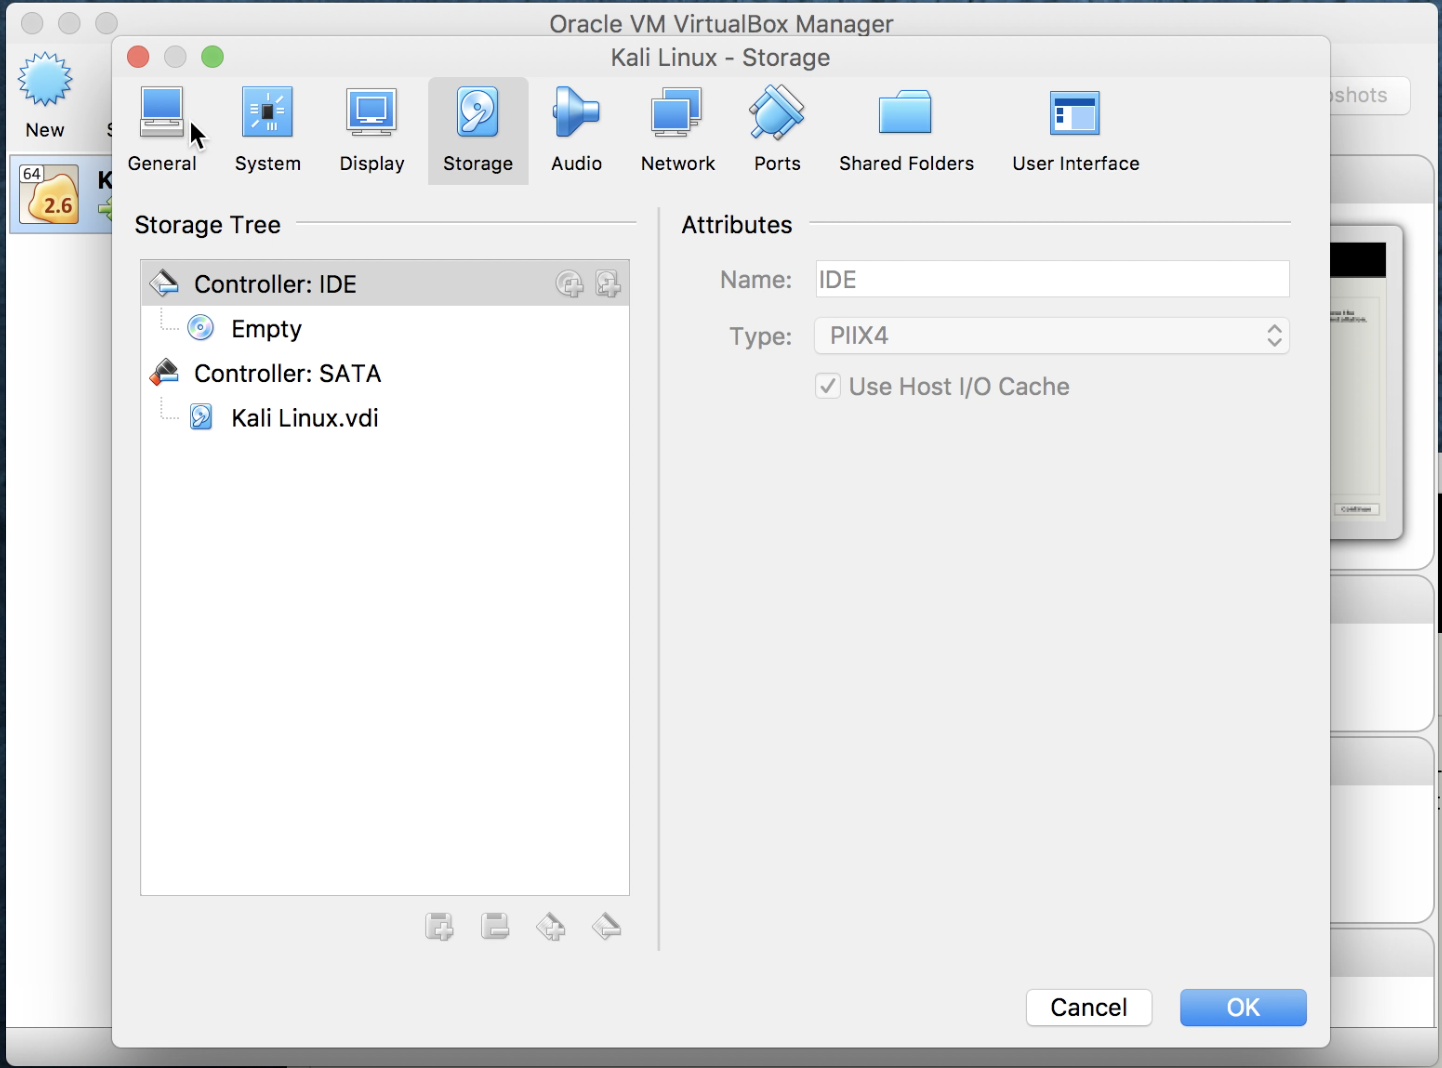
- From here, we will select the Storage option. Originally under Controller: IDE it will say Empty. Click to highlight Empty. Click on the circular disk icon to the right of IDE Secondary Master. An option dialog will be brought up, and select Choose Virtual Optical Disk File. This will bring up a file manager dialog, which will allow you to find and select the Kali image you downloaded previously. Once completed, your screen should look similar to the following:
Kali Linux VirtualBox settings storage option
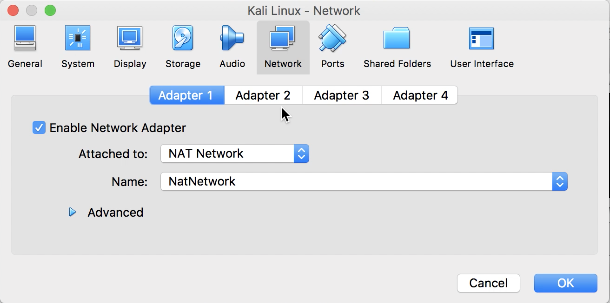
- Click on Network and verify that Adapter 1 shows attached to NAT Network with the name NatNetwork:
Kali Linux - network adapter 1
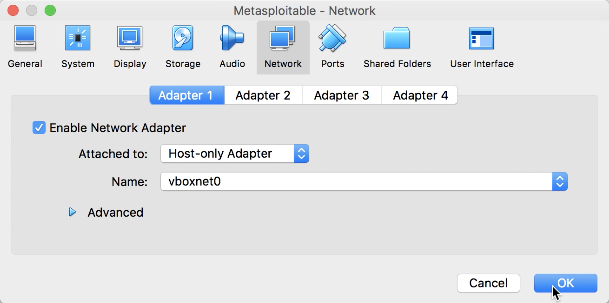
- Click on Adapter 2 and for Attached to select Host-only Adapter with the Name as vboxnet0, then click on OK:
Kali Linux - network adapter 2
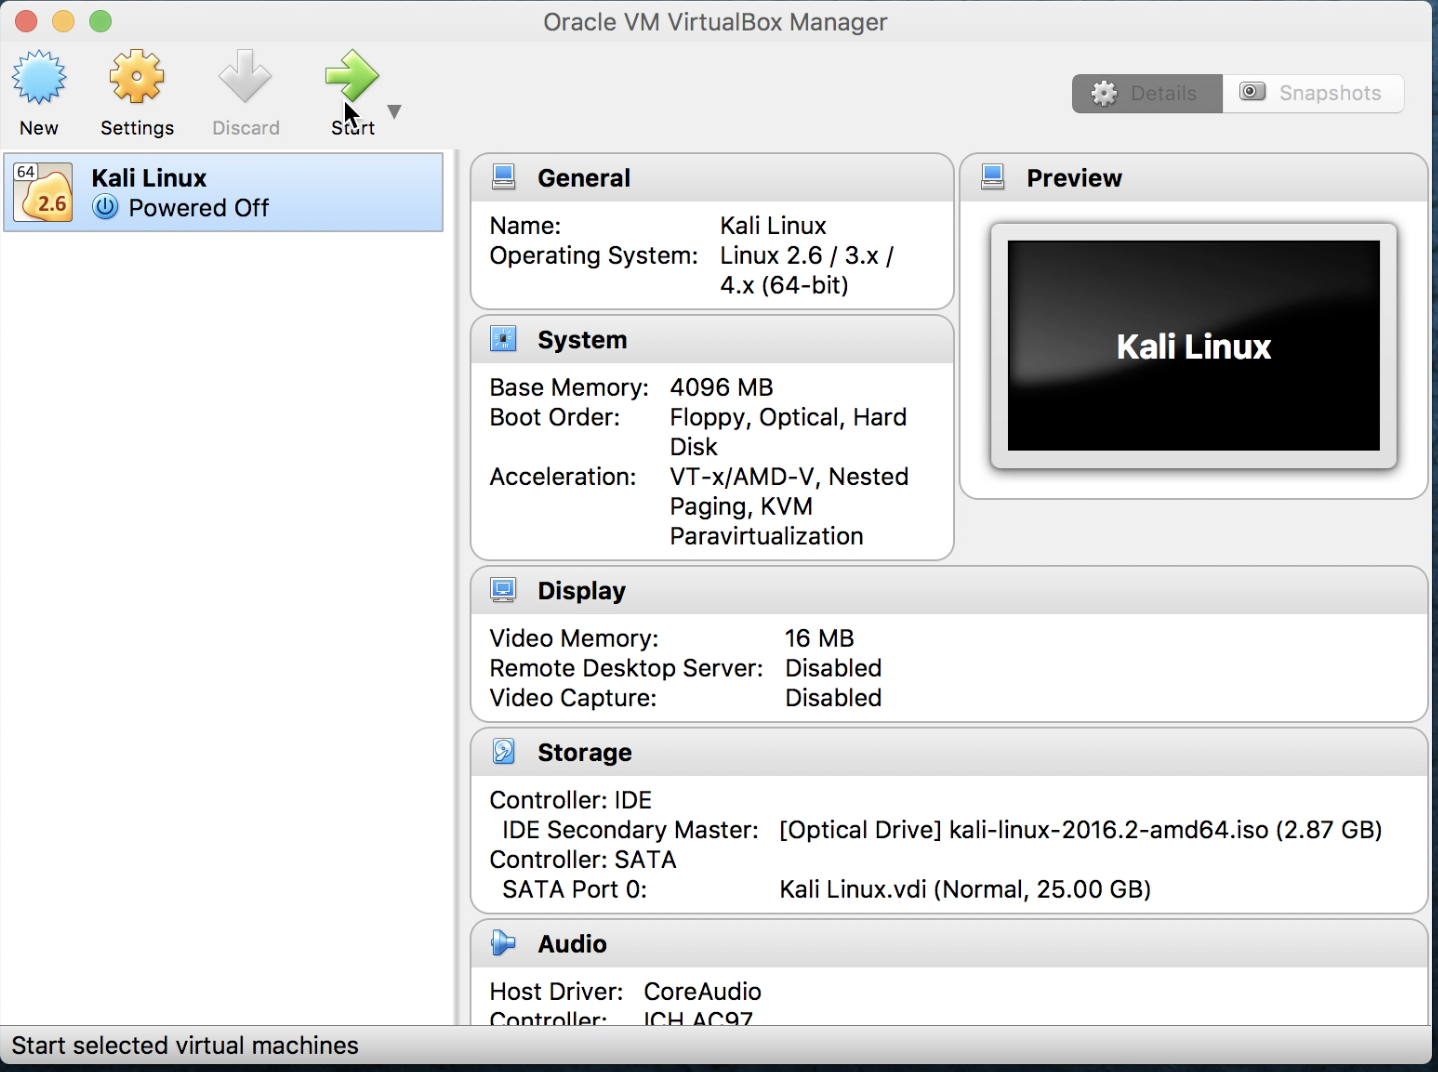
- We are brought back to the main manager screen. Let's click on Kali Linux to highlight it, and then click on Start:
VirtualBox manager screen
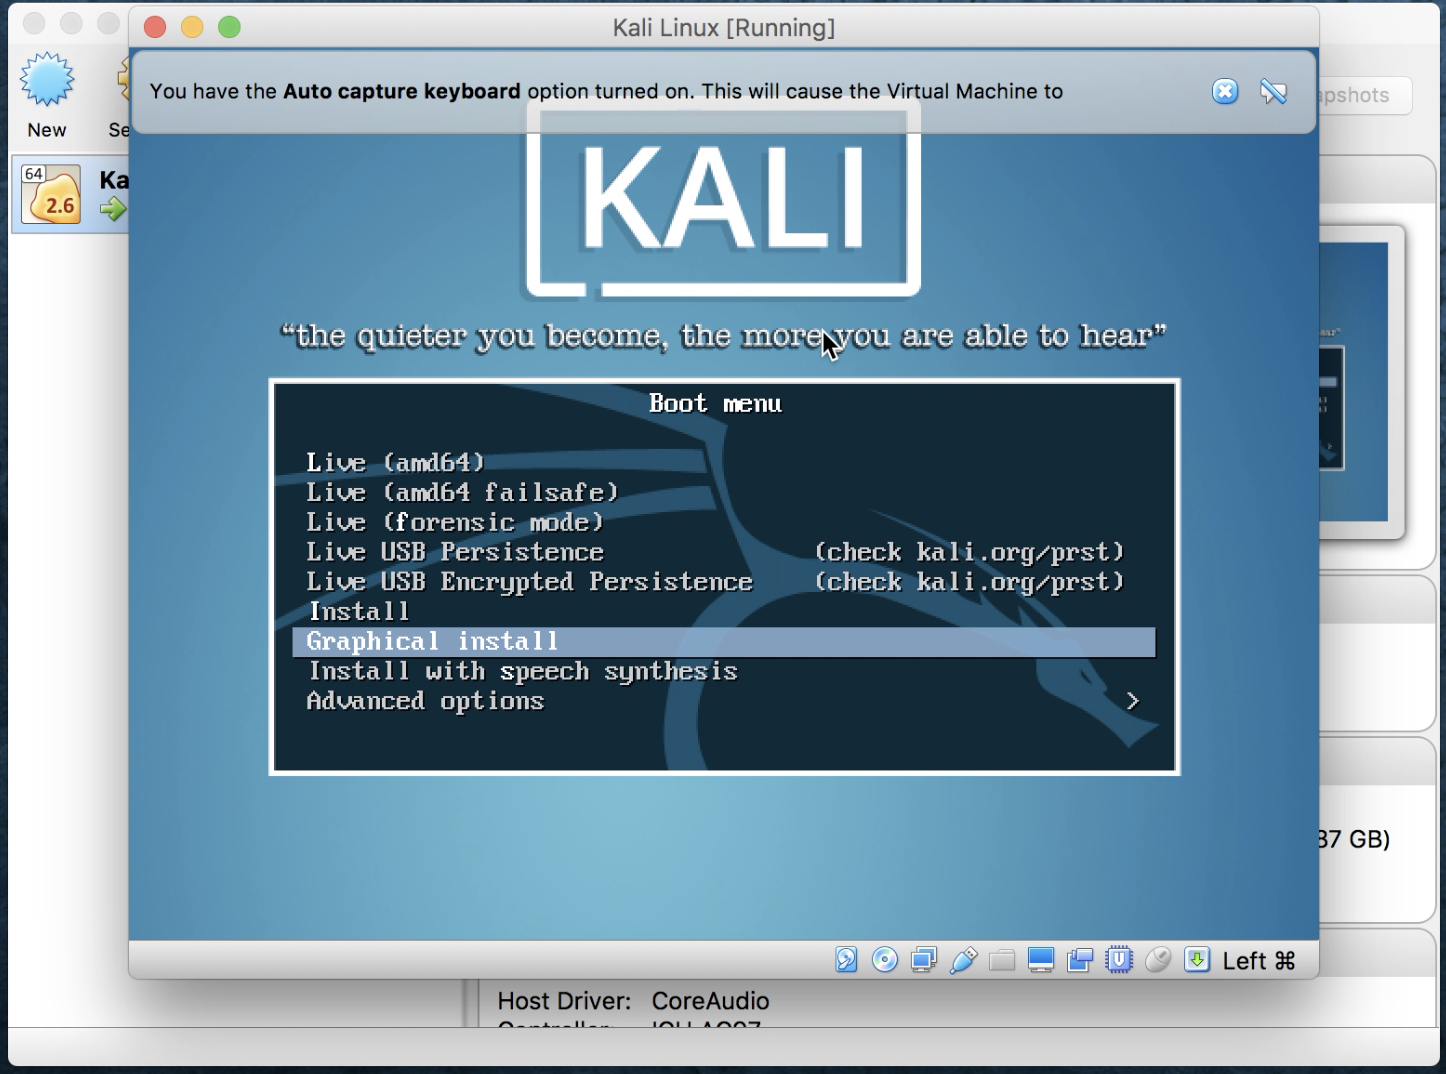
- We will now be brought to the main Kali installation screen. Let's click on Graphical install:
Kali main installation screen
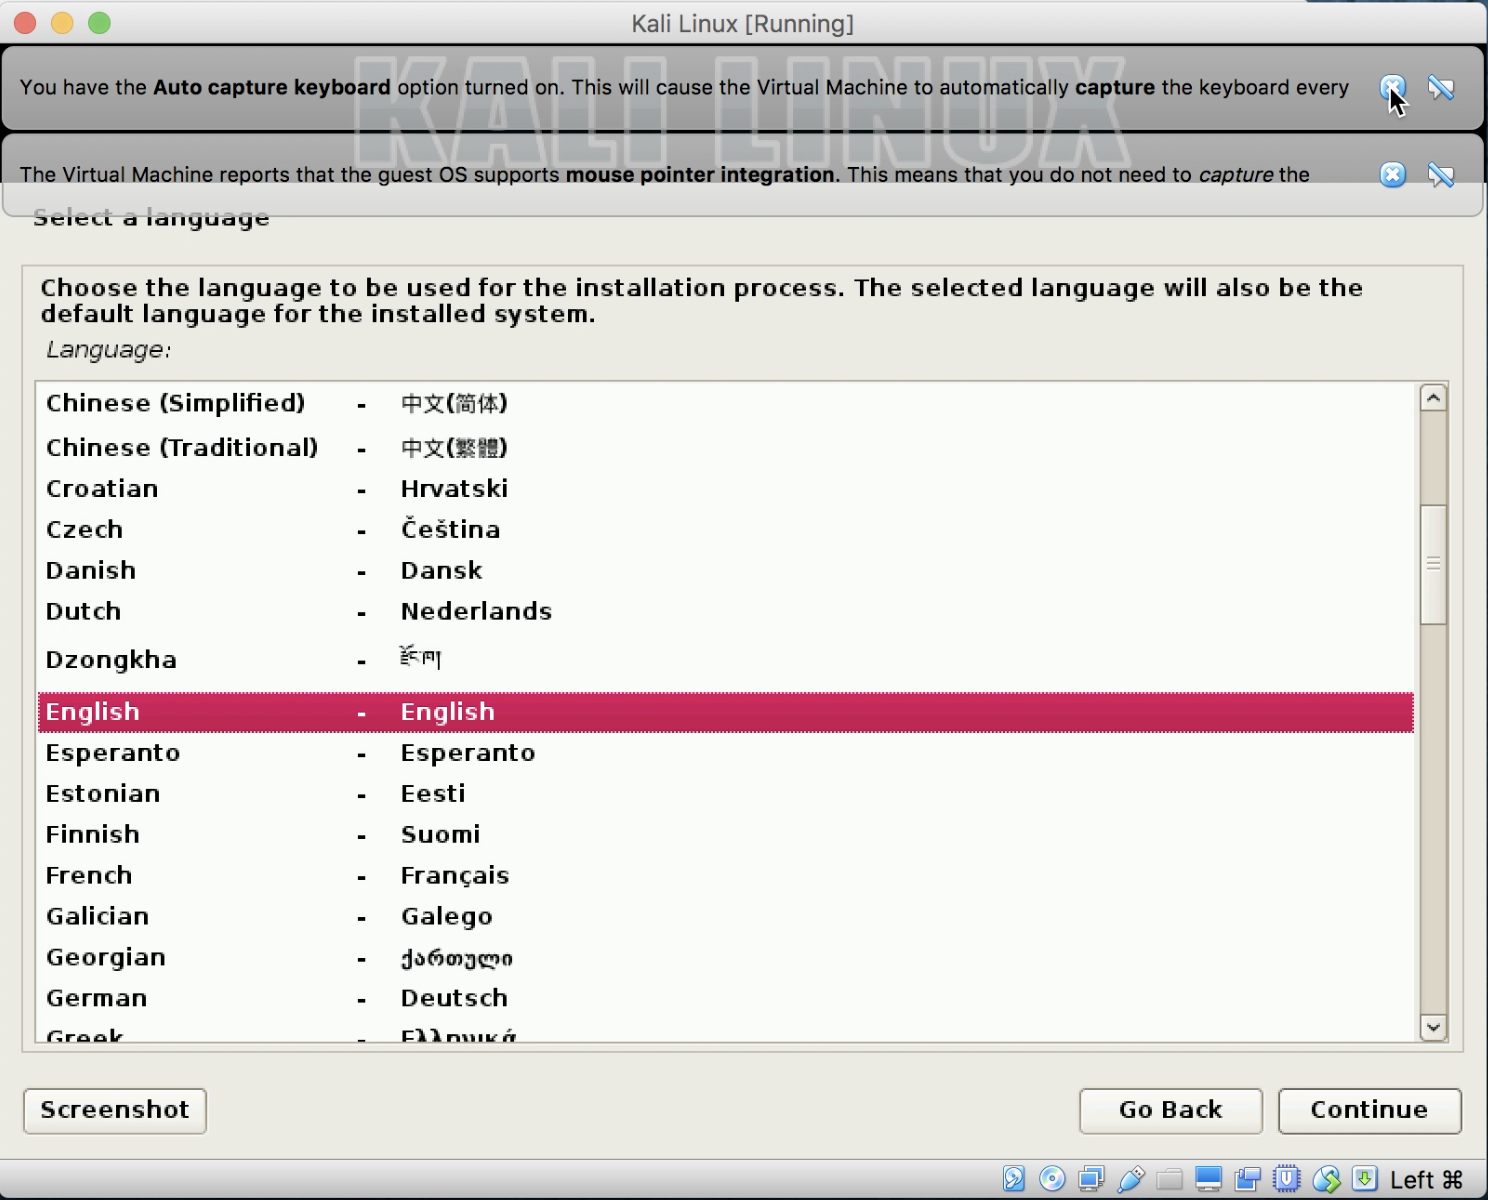
- Select an appropriate language; for our use, we will select English and click on Continue:
Select a language screen
You may click on X on the boxes at the top, if any, as they are only informational.
- Select the proper keymap for your region. For our purposes, we will select American English. Then, click on Continue. The VM will then start by loading installer components. This should only take a moment or two based on the performance of your device. It will also detect and connect to your network automatically.
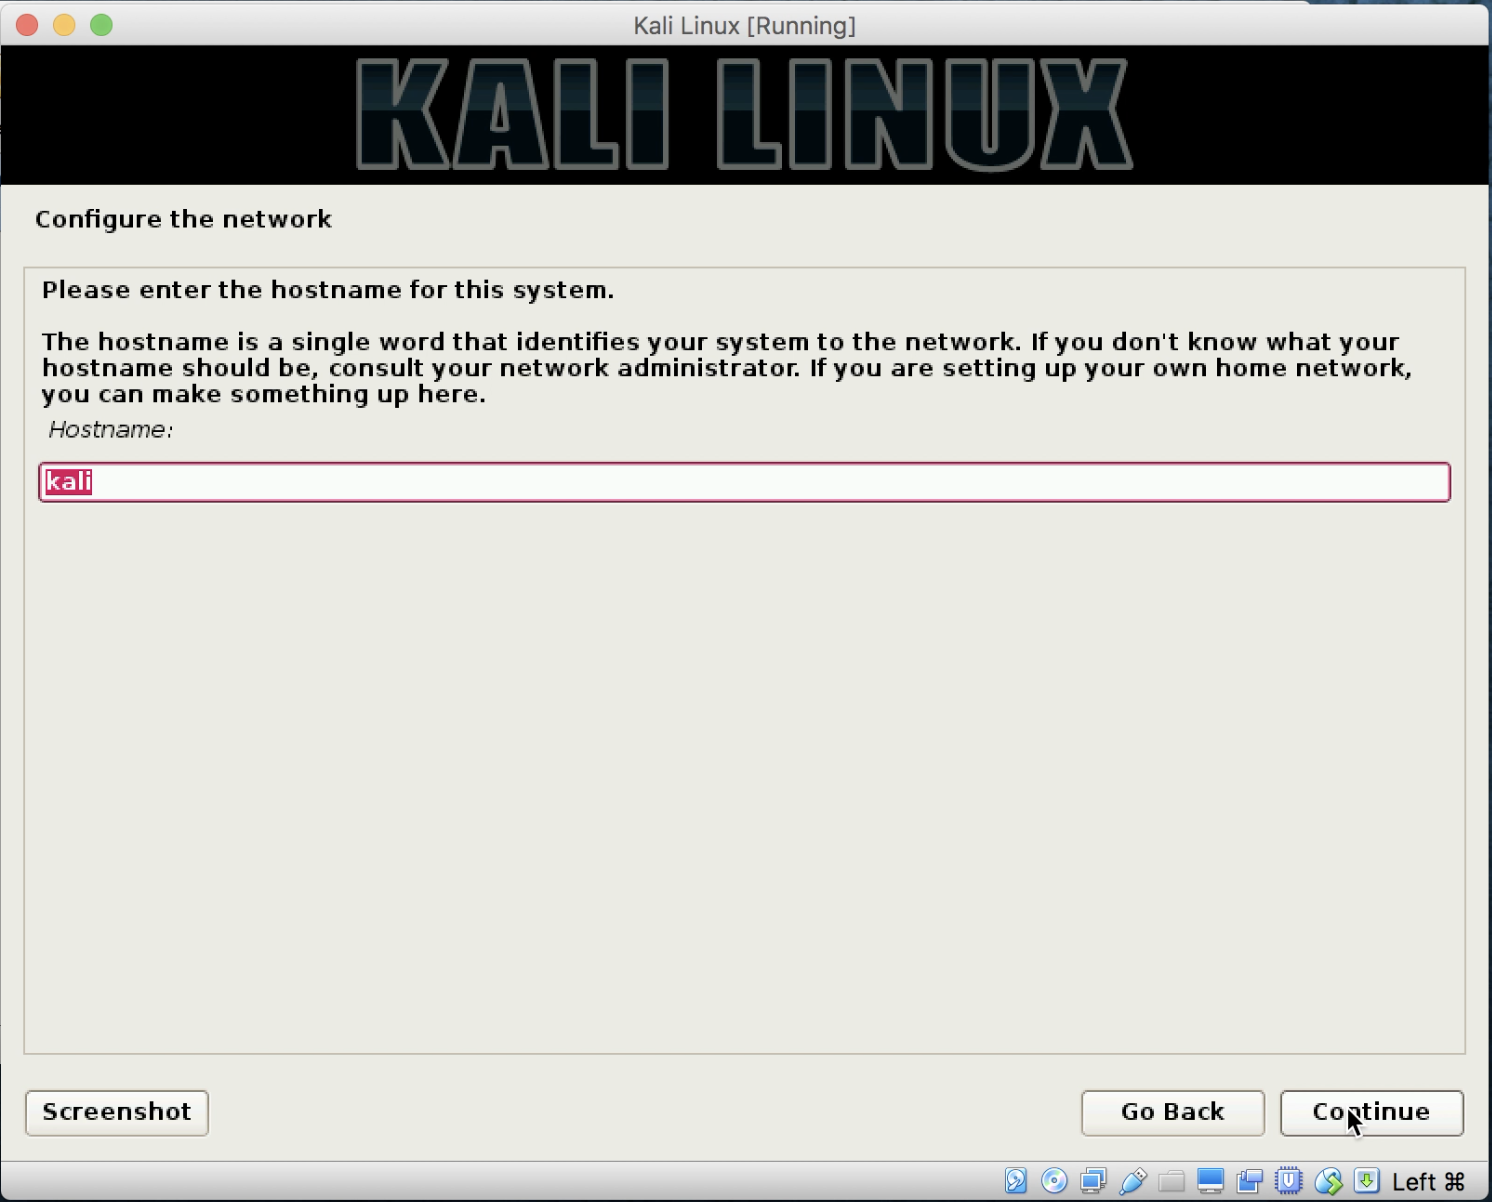
- You will be brought to a screen where you must enter the hostname. Let's simply call our install Kali and click on Continue:
Kali configure network screen
- The next screen will ask for your domain name. We will leave this blank, and simply click on Continue.
- Our next screen will ask us to enter a root password. Select a strong password. Enter it for a second time to validate it, and click on Continue. The install will continue through some further steps.
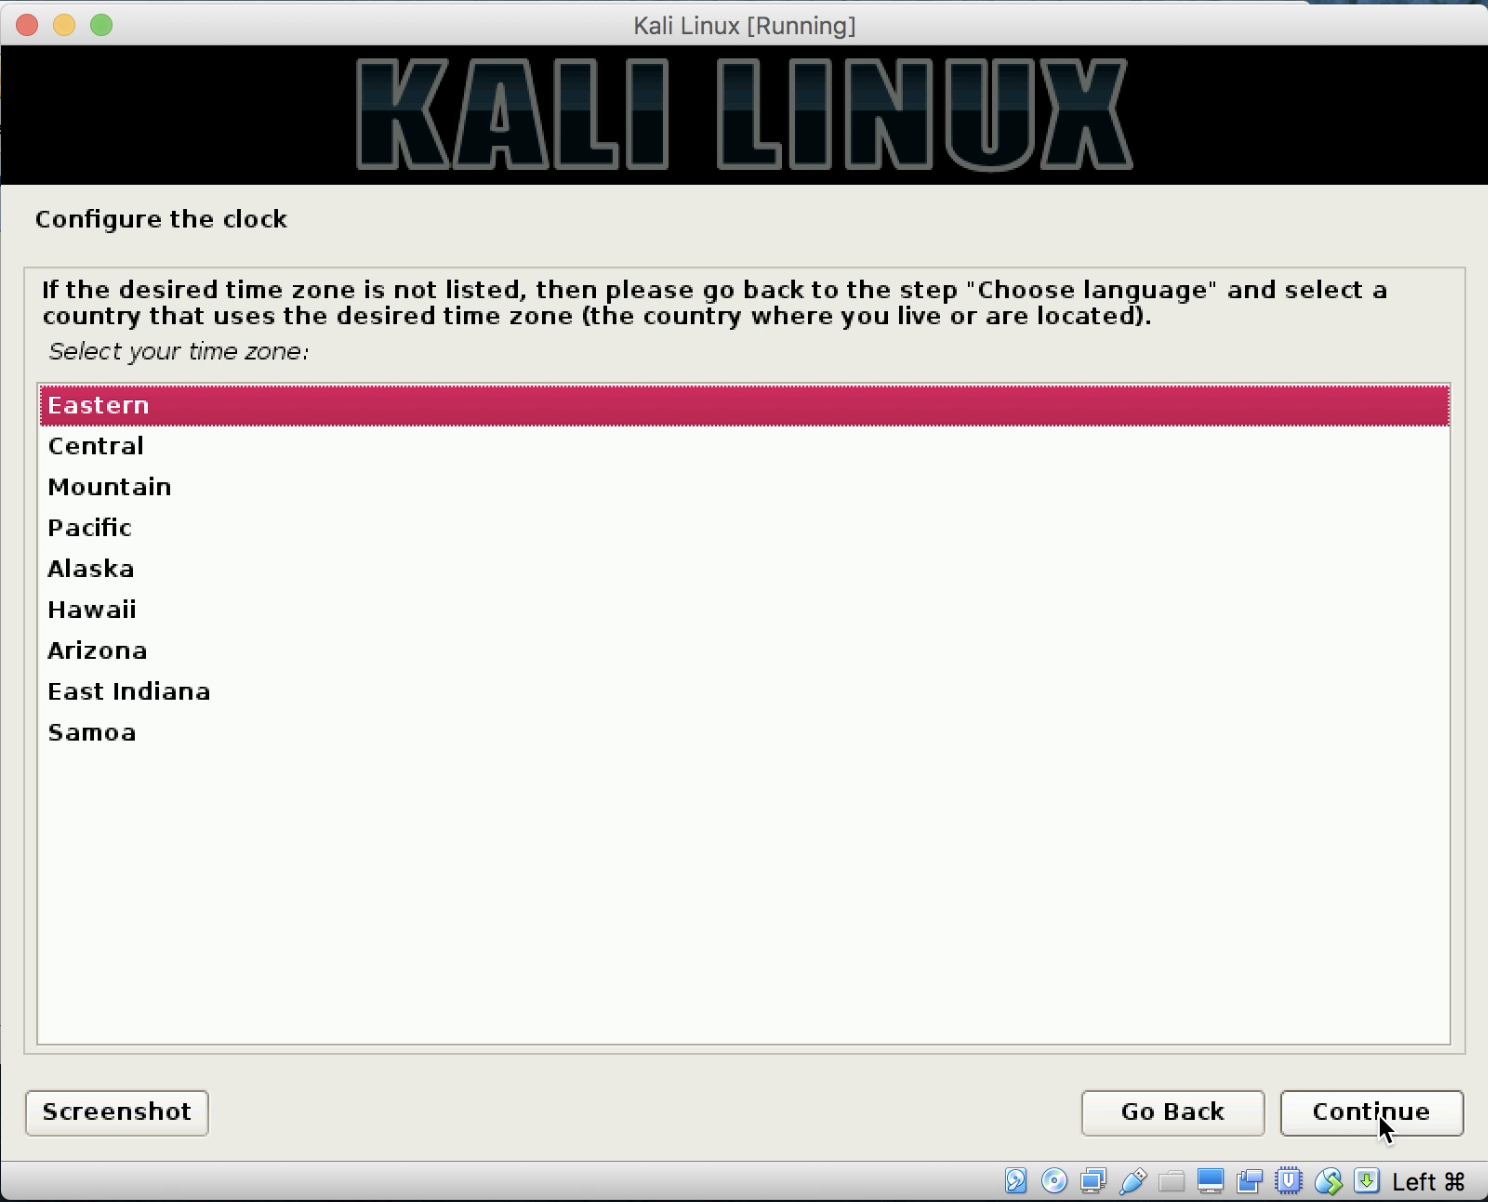
- Once completed, you will be brought to a configure clock screen. Select the appropriate time zone; for our purposes, we will select Eastern, then click on Continue:
Configure clock screen
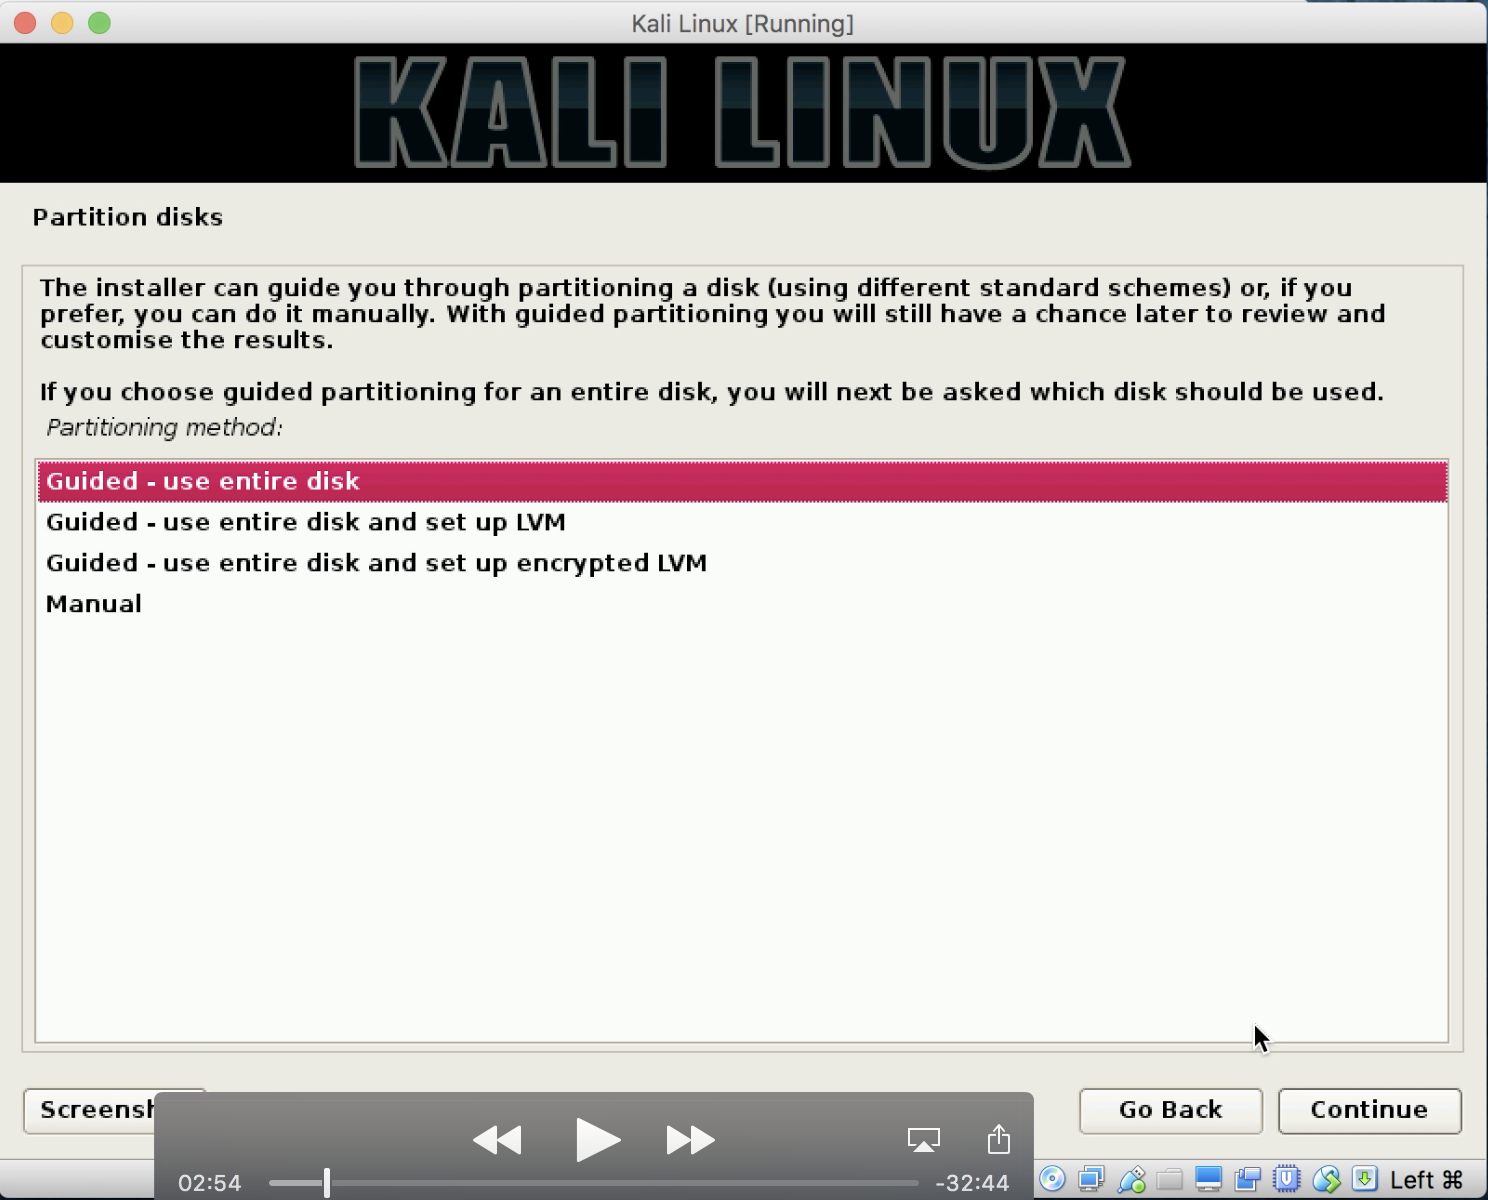
- Partitioning disks: for simplicity, we will select Guided - use entire disk, and click on Continue:
Partition disks
It's important to note that, for our example here, we want to just keep it straightforward. When actually setting this up for production testing, I have a dedicated laptop and use a fully encrypted LVM. This would be a recommendation when you move from working in a sandbox and go to actual engagements; as a pen tester, you need to protect your work as well as your client's information. Encryption, in that case, is paramount.
You may also want to keep in mind crossing borders with encrypted laptops and what the border security rights are. In the US, even for US citizens, they can ask for your passwords to get into the machines, remove them from your immediate control, and confiscate them. You may want to take situations like this into consideration; you can ship that encrypted laptop to and from the destination as needed, or complete your reports prior to leaving, and wipe the hard drive. Remember that deleting files is not securely wiping information - you can use a tool such as Darik's Boot and Nuke (DBAN) https://dban.org/ and use 5220.22-m wipe methods.
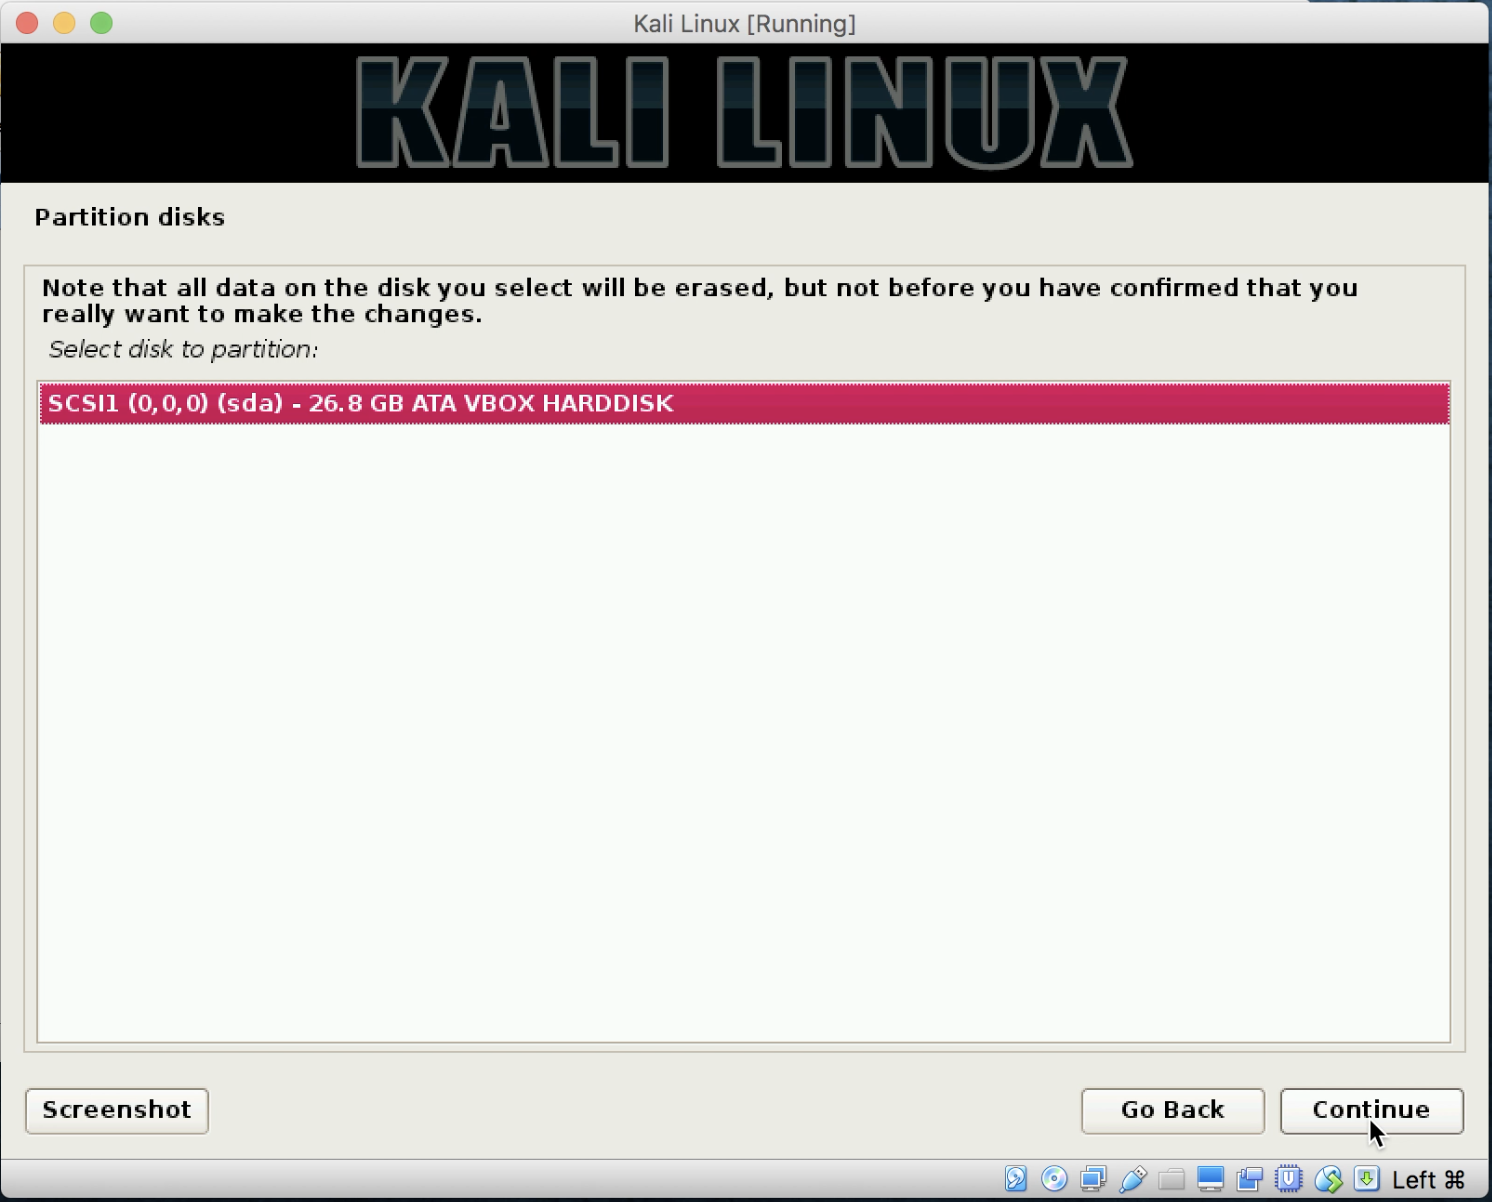
- You will be brought to a partition disks screen for confirmation. Click on the disk to highlight it, and click on Continue:
Partition disks
Please note that as you are inside a virtual machine when it references, your disk will be erased; it is only talking about the virtual partition and not your disk. If you have decided to load this on your PC as the native operating system, it will erase the entire drive.
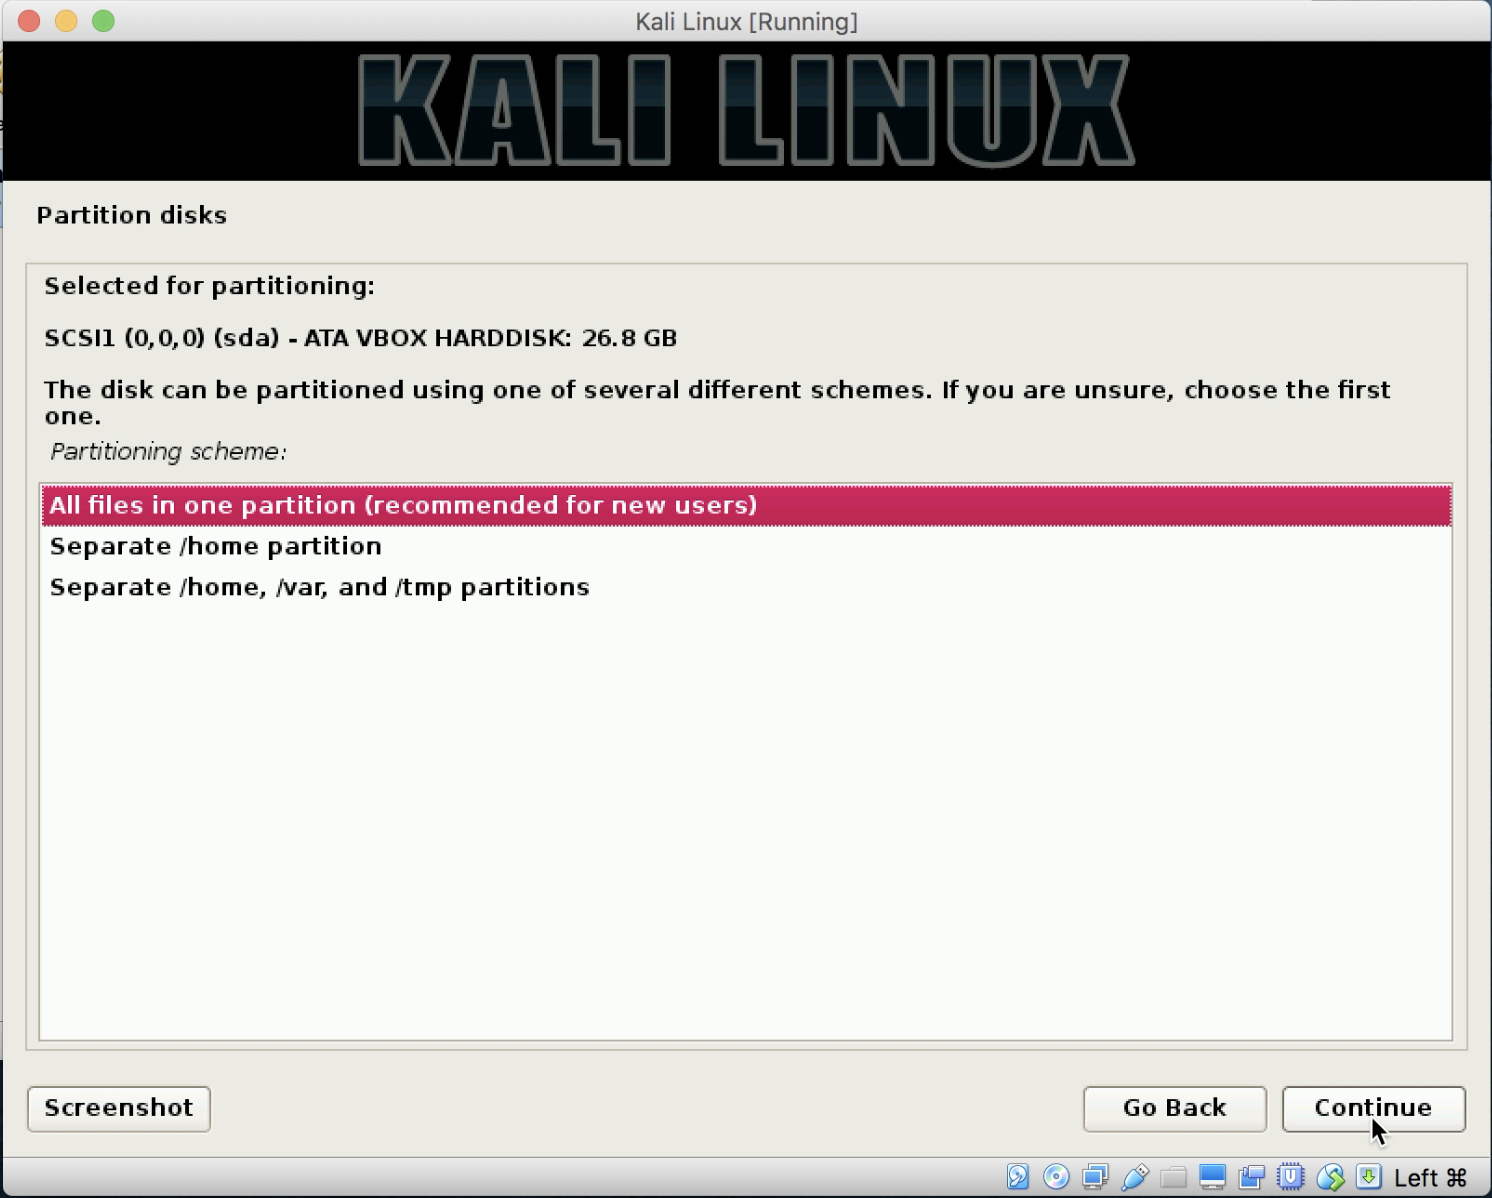
- Select All files in one partition (recommended for new users) and click on Continue:
Partition disks - screen 2
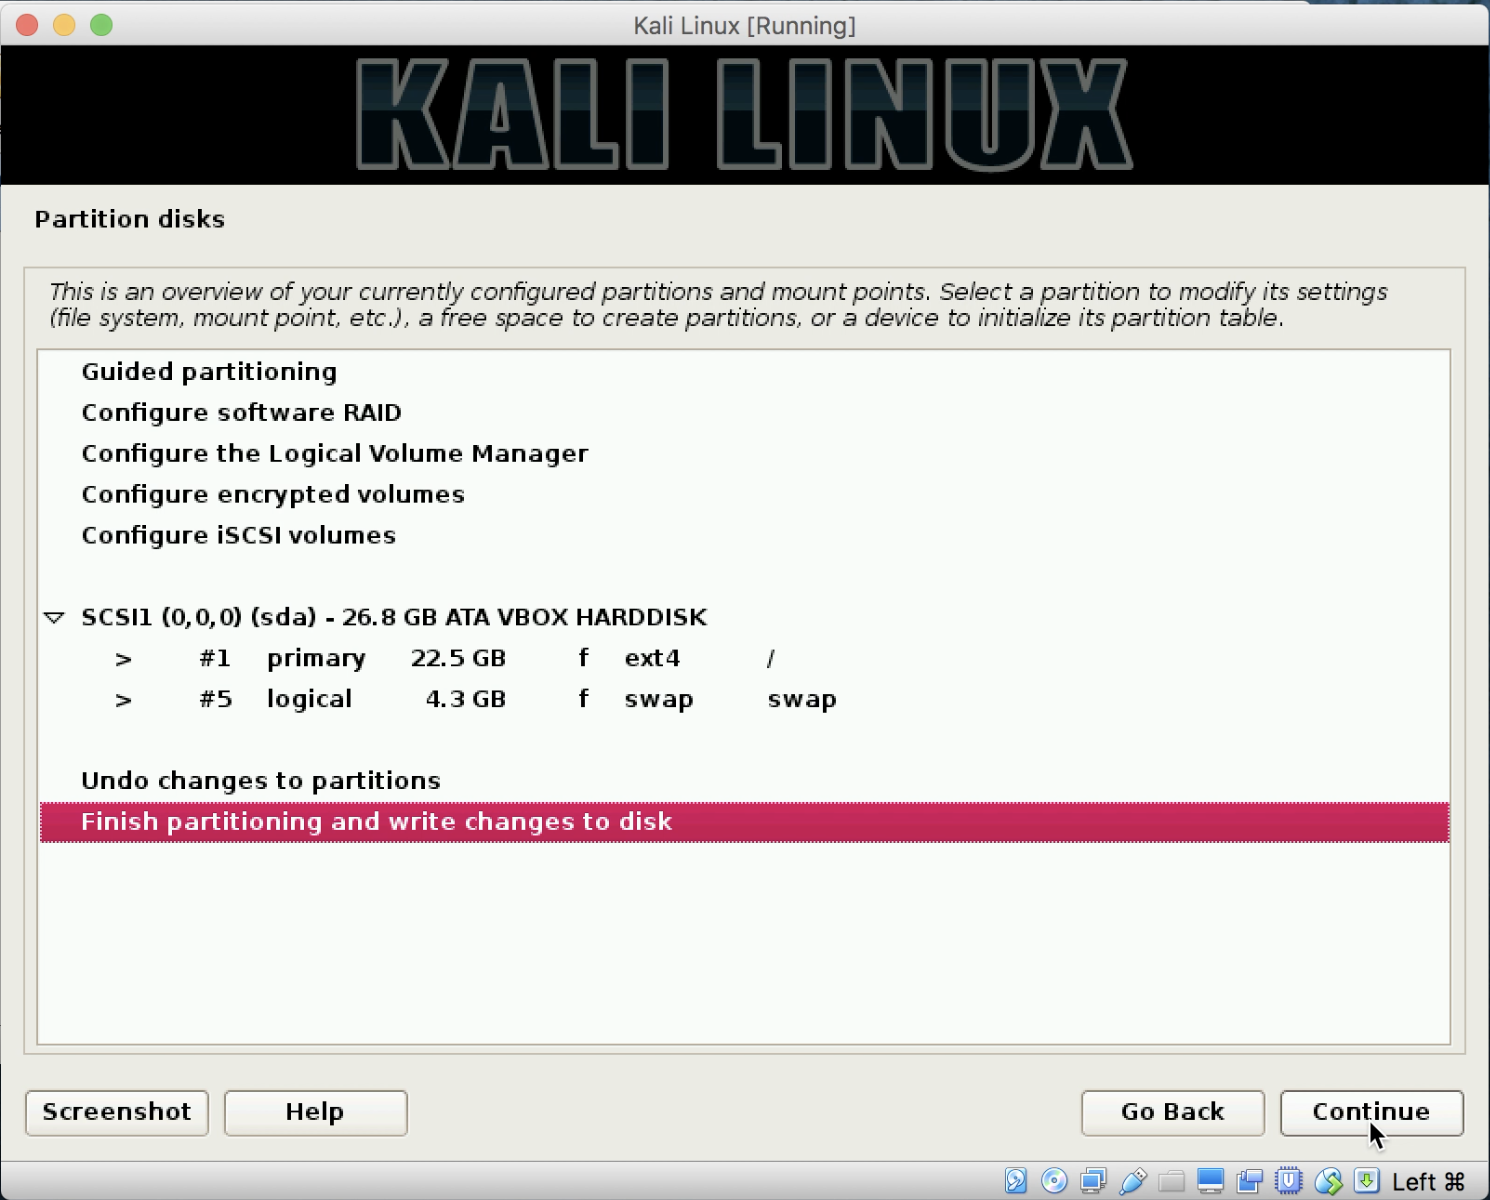
- Select Finish partitioning and write changes to disk. Click on Continue:
Partition disks - screen 3
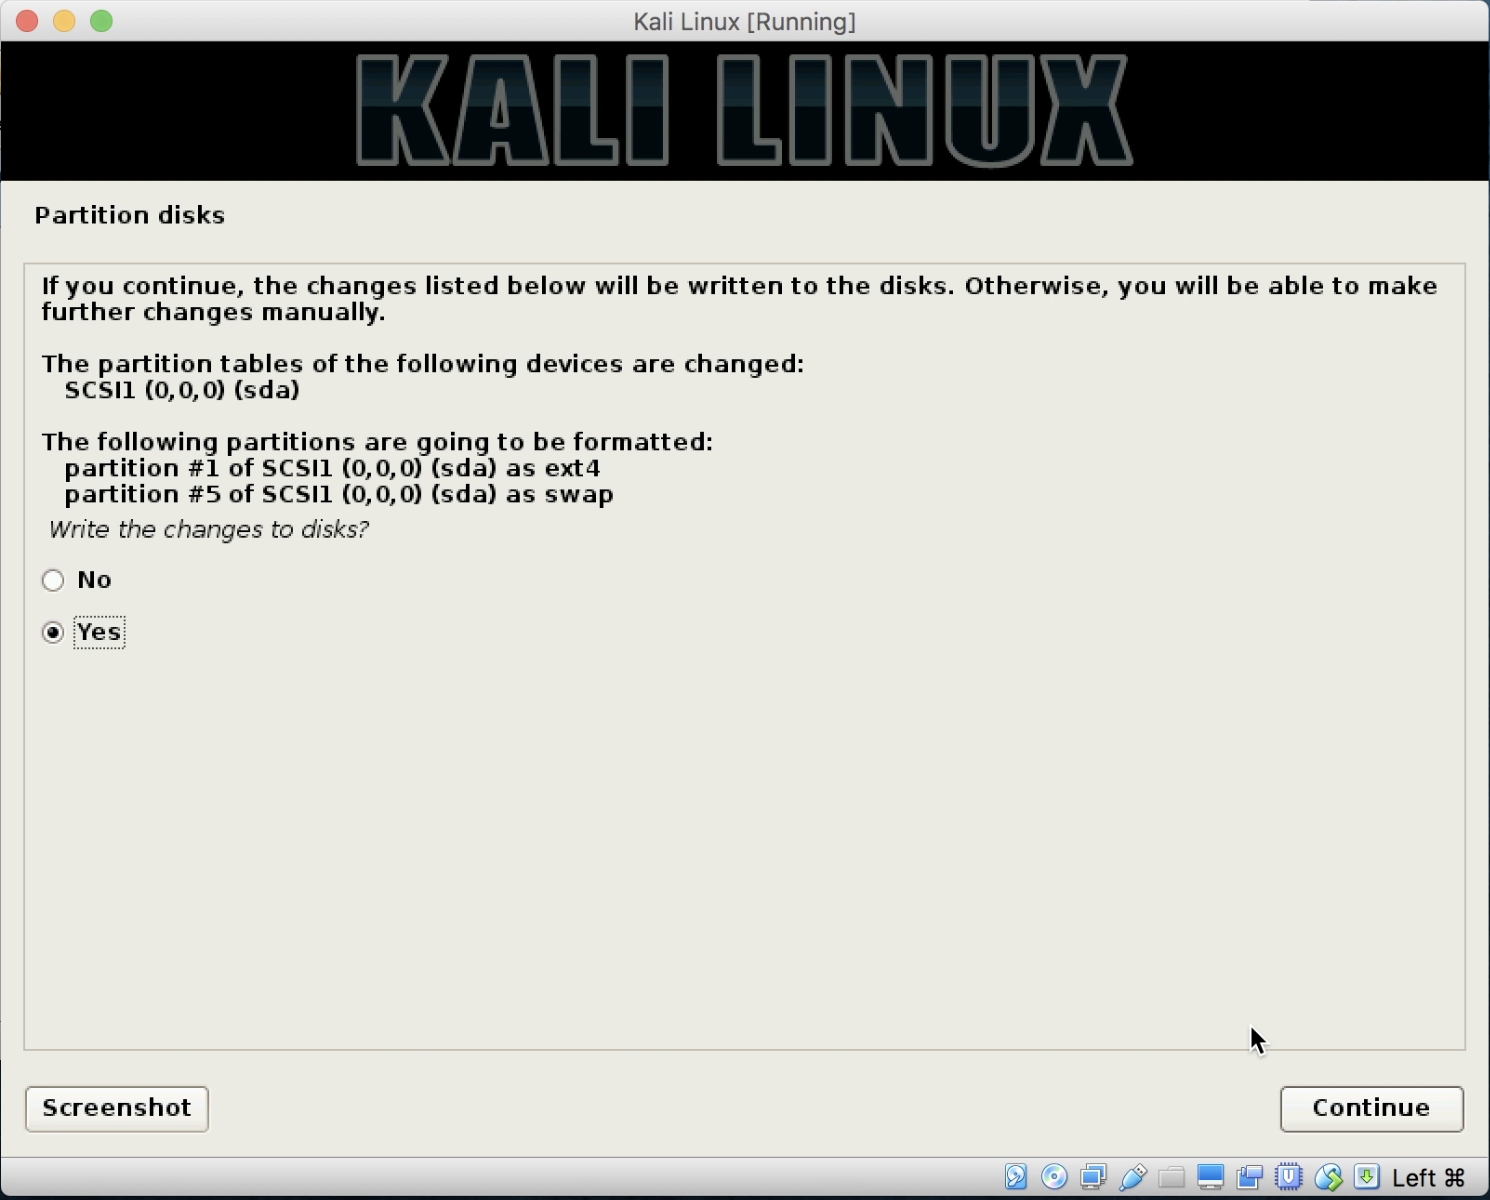
- Click on Yes to write changes to disk. Click on Continue:
Partition disks - screen 4
Your system will begin installing further. This process will take several minutes, so please be patient.
- Upon the completion of the install, you will be asked whether you want to use a Network Mirror for your package manager. Select Yes and click on Continue.
- You will be asked to enter a proxy server if needed. Please enter any required information (for most installs, you will leave this blank). Click on Continue. Kali will continue to install packages.
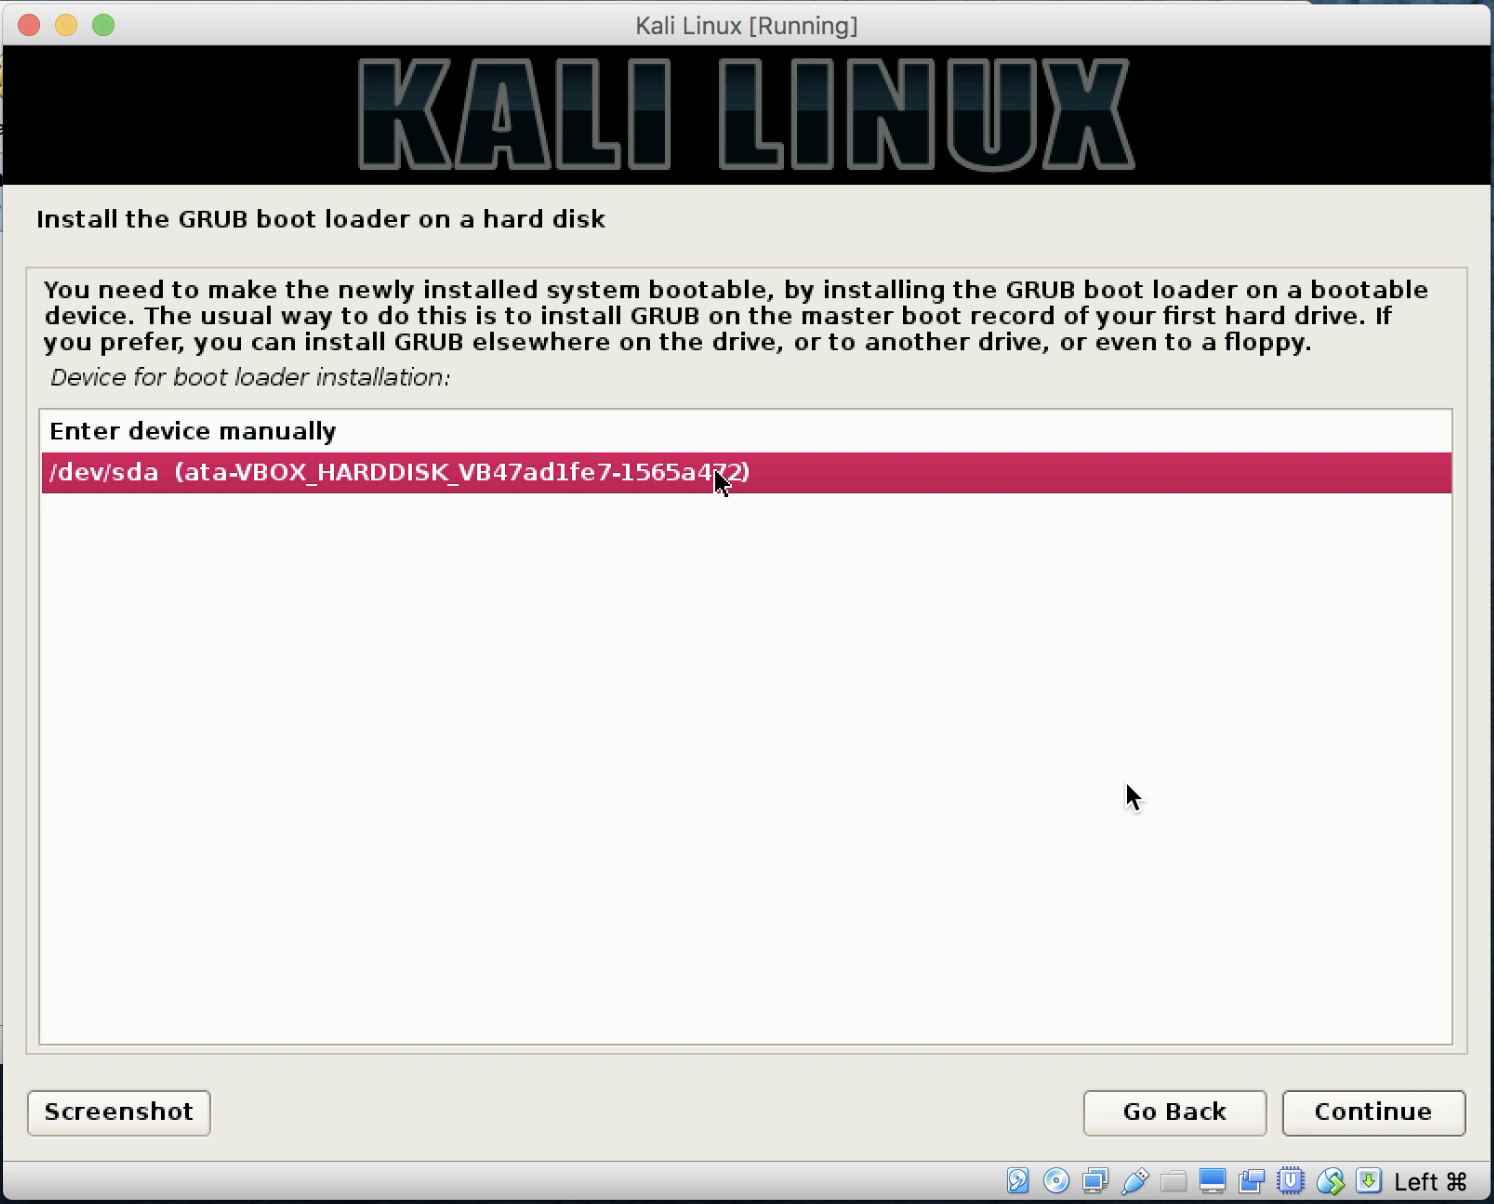
- Select Yes to install the GRUB boot loader and click on Continue.
- Select the single drive listed to highlight it, and then click on Continue. This will finish the installation:
Install GRUB boot loader
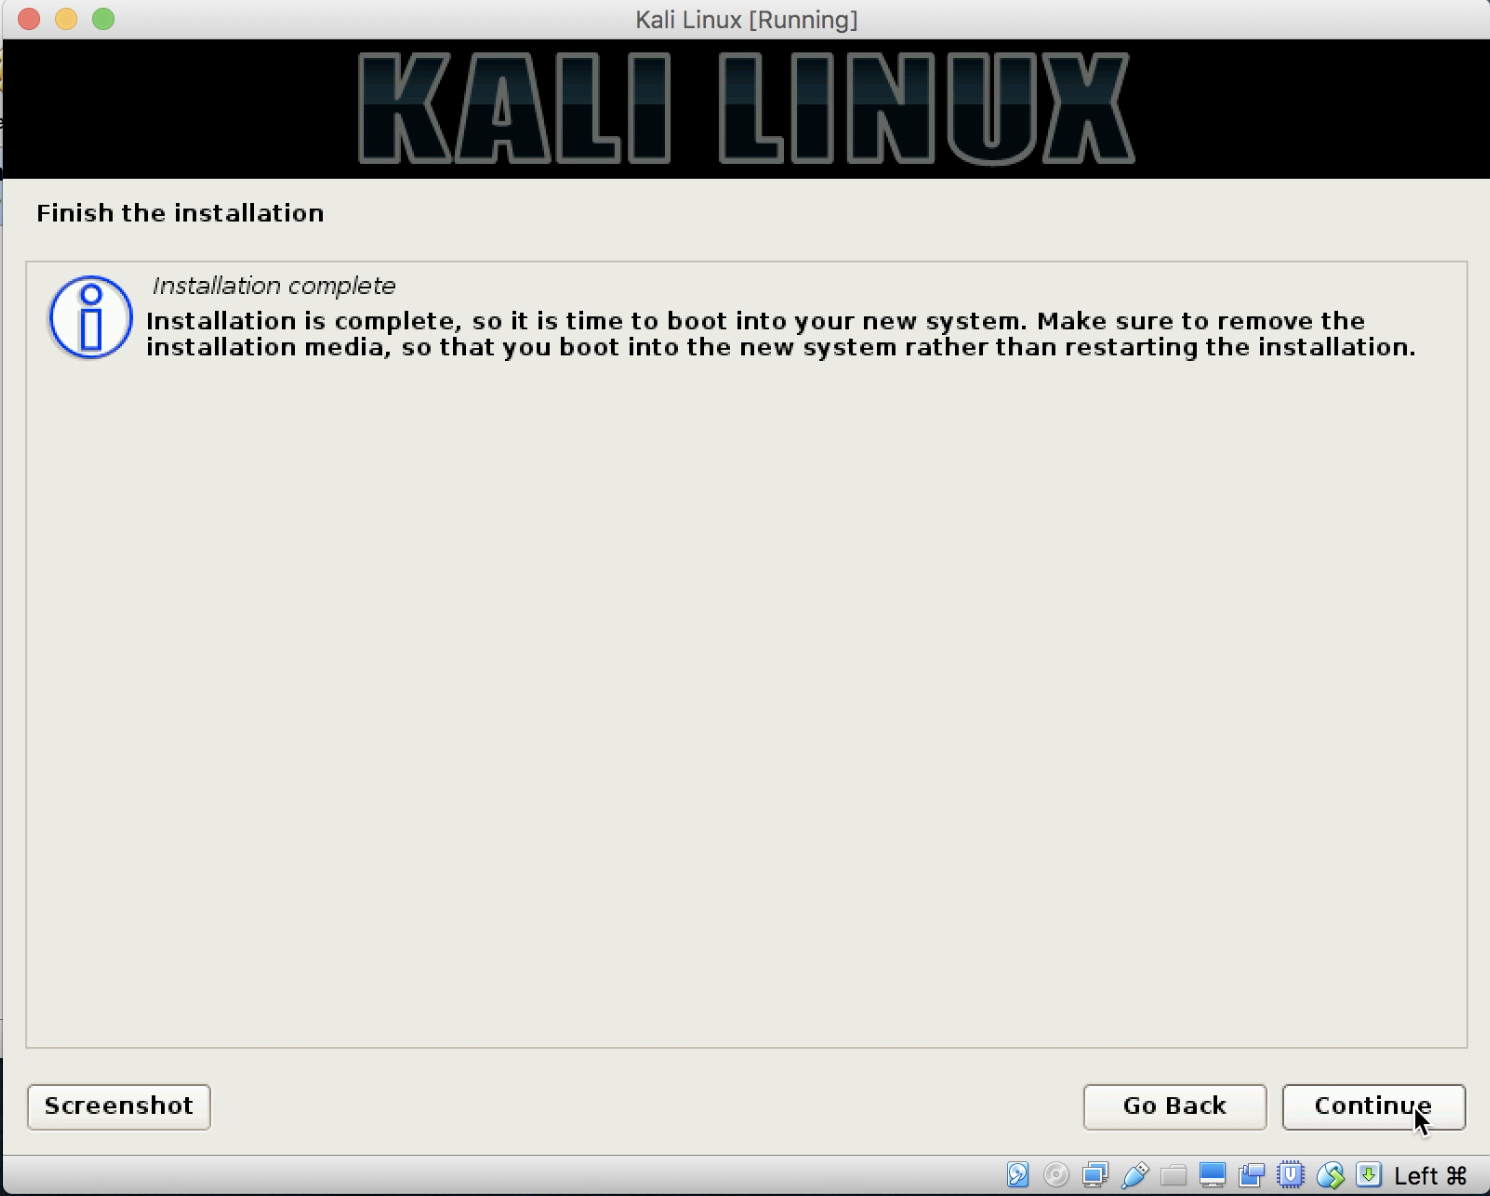
- After a short time, you will be brought back to the Finish the Installation screen. This will ask to boot your computer to ensure that you have removed the installation media. Under most circumstances, VirtualBox or other hypervisors will honor the disk eject command issued when Kali finishes installation, but we need to be sure. At this point in time, do nothing:
Kali Linux: finish the installation
- Move the installation windows to the side to expose the main VirtualBox manager screen. Click on to highlight the Kali Linux VM. Click on Settings, and next click on Storage. If under Controller: IDE, you do not see Empty, click on the install media shown to highlight it. Click on the icon at the far right that looks like a disk, and select Remove Disk from Virtual Drive. Click on OK:
VirtualBox manager
- Go back to the Kali Installation screen, and now click on Continue. It will finish a couple items up, and reboot the virtual machine bringing you to the login screen:
Kali Linux finish the installation
Remember that when logging into the system, your username is root and the password that you created during installation.