Chapter 1. Getting Started with After Effects
Welcome to this exciting journey into After Effects! In this chapter, I will give you a grand tour of this powerful program.
You will learn to navigate using After Effects and to locate your tools and effects. You will be introduced to the layer panel, the timeline, and key frames, and you will learn to import files. You will also learn to create, animate, and mask your layers.
We'll begin the chapter with the program's interface, to help you understand how to navigate. By the end of this chapter, you will know how to create a simple animated slideshow. The concepts we'll learn in this chapter are simple; however, the tools that we'll learn to use will be crucial to future projects (Illustration, photography, and all artistic content by David Dodds).
This chapter will cover the following topics:
- The After Effects interface
- Masking layers
- Creating a project
- Introducing layer properties
- Basic animation
- Creating an animation slideshow
Technical requirements
To use this book, you will need Photoshop, Illustrator, Character Animator, and After Effects CC. You need to have a good understanding of standard menus and commands. Some of the lessons in this book use Adobe-Character Animator, Adobe Bridge, Adobe Media Encoder, Adobe Illustrator, and Adobe Photoshop. You must install these applications from Adobe Cloud. Some knowledge of Adobe Photoshop and Illustrator will be helpful for performing the projects in this book.
Computer requirements
After Effects requires a minimum of 8 GB of RAM.
Exploring the interface
Now, let's take a look at the After Effects interface. When you first open After Effects, you will see a Start menu. Close this by clicking the red X in the upper right-hand top corner:

Start menu
This menu can be helpful if you need to locate a recently opened project. I find it best to close this and locate what we need in the program itself.
Resetting the layout
Your workspace is where all your panels and tools are located. This is the heart of the program. Your workspace can be configured in different ways; let's make sure it's set to the default state.
Go to Window | Workspace | Reset "Standard" to Saved Layout. This is the standard workspace:

Resetting the workspace
This way, everything is where it's supposed to be in our interface; nothing is out of place.
Saving your project
Saving a project is always a good practice. Let's start our project by creating a new file by saving it:
- Go up to the top-left tab, File. Choose Save As | Save As... and name the file
test. - Navigate to where you want to save your After Effect project. It's a good idea to number your projects. Let's name ours
projects_01.
We have started saving our first project. It's important to start saving things right away.
The project panel
The project panel is where you bring in all your assets. After Effects is often used in post-production. You are usually working from many different asset types. Your project can get very disorganized quickly. This is where you keep all your assets tidy. You will be very happy when your project gets more difficult and you have taken the time to keep things organized. It is easier to find things when you have a tidy project. It also helps you to work faster. The project panel has icons at the bottom of the panel. Choose the one called folder:

Creating a new folder
Let's learn how to create folders in our project panel by following these steps to create one:
- Click on the folder icon
- Name this
new comp-main comp
When you bring media into After Effects, be sure to organize all your media into the appropriate folders.
You can create the following folders:
MAINAUDIOPRECOMPImagesFootage
You should have five folders. Right-click on the folder to rename them.
The projects in this book will use these five folders. We have created them to organize everything properly.
Importing images
Let's import a large image (at least 1,920 x 1,080) by double-clicking the open area. This brings up your media folders. You can click anywhere in the area where I'm standing in the next screenshot:
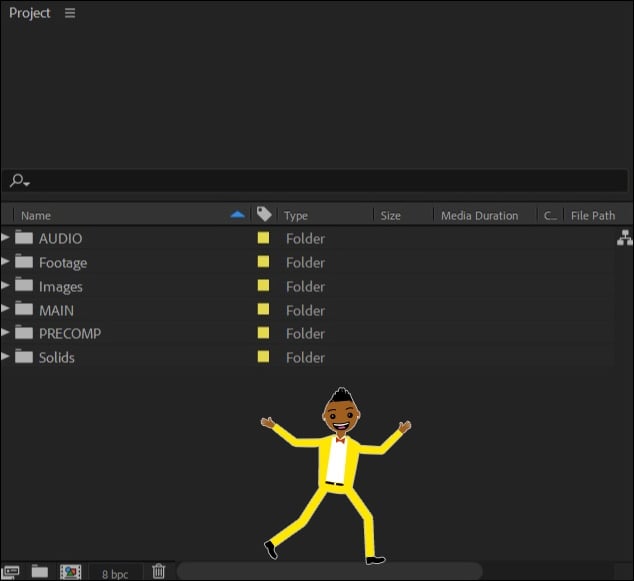
Project panel
Drag and move this image into the Images folder. You can rename your images by right-clicking on the layer.
After Effect references material. It doesn't actually keep anything in the project; it references things. You should never rename a file outside After Effects. When you import images into a Photoshop document, it saves a copy with the document. However, After Effects links to the assets you import into your project. You should always leave the name unchanged because After Effects will not be able to find the new name for its referencing, and you will receive an error message.
Rather than renaming or removing your files from After Effects, it's better to create a copy or not to move it. If you need to replace a file, you have to right-click on the layer and choose to replace or reload the footage:

Replace footage
Practice renaming and relinking your files a couple times, just to make sure you understand that concept.
If you need to delete anything, drag it into the trashcan; this is highlighted in the following screenshot:
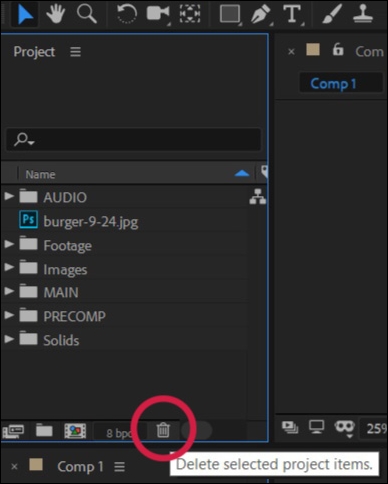
Trashcan
Preferences – Autosave
Now we will turn our attention to setting Auto-Save... for your projects. It's important to get that set up so your project will automatically save, even if you forget to do this. The following steps will show you how to set up autosave:
- Go to Edit | Preferences | Auto-Save....
- Set autosave at 20-minute intervals.
- You can adjust the maximum number of versions of your project to autosave. The default number is 5:

Autosaving projects
Setting up autosave can save your life. If your project crashes, you will be happy that you have a back-up copy saved in the autosave folder. This is located wherever you save your project.
Creating compositions
After Effects uses compositions to place and arrange your elements. Remember to consider design principles that help create a strong composition when you arrange your elements. In After Effects, these compositions are referred to as comps. I am going to create a comp by hitting the new composition icon. If you look closely at the icon, you will see that it looks like a composition symbol with shapes:
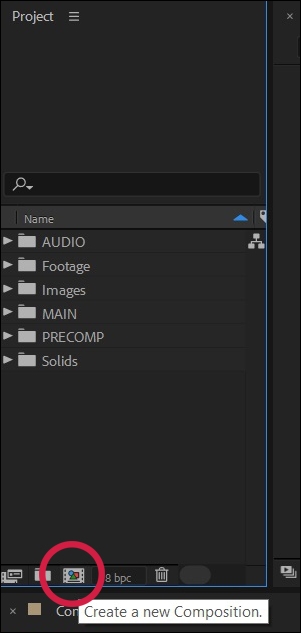
New composition
Leave all these settings as they are, but make the comp size 1,920 x 1,080, and make the time duration 0;04;00;00. Name the comp MAIN:

Composition settings
Drag the main comp into the MAIN comp folder:

Organizing a project
The timelines and the toolbar
Look at the lower-third of the screen. This is called the timeline panel. The timeline is the works space where you create key frames. This is where you make your layers animate across time. You also organize your layer-stacking order. This stacking order is similar to Photoshop. Layers at the top will appear on top of other layers:

Timeline panel
After briefly learning about the timeline panel, let's discuss how to bring layers into your composition.
Bringing layers into your composition
Bringing layers into your composition is easy. Layers are the basic building blocks for creating a movie. A layer can be an image, video footage, or an audio file.
Follow these steps:
- Go into the
IMAGEfolder. - Drag the image on to the timeline.
- If the image is 1,920 x 1,080, it will fit perfectly and fill up the screen. It will come into the comp centered:

Bringing an image into the timeline
Tool panel
Let's go over our tools! The tool panel is where you find all your tools to edit your layers. Here, you can find tools to move your layers and navigate around your composition:
- Selection Tool (V): Go to the top left side of the screen. This is called the tool bar:

Selection Tool
The arrow icon on the far left is called the Selection Tool.
- Hand Tool (H): The hand tool is to the right of the arrow tool. This tool lets you move around in your composition:

Hand Tool
Now select the hand tool or use the keyboard shortcut H. You can use the hand tool to move around in your view or navigate around in the comp.
- Zoom Tool (Z): The zoom tool is next to the hand tool. This tool will magnify your image in the composition. Select the zoom tool, or use the keyboard shortcut Z, and click on the image in the comp a few times:

Zoom Tool
- Rotate Tool (W): The rotate tool is the circular tool next to the zoom tool:

Rotate Tool
Let's explore how to use the rotate tool. The center of the screen where your image is displayed is called the composition window. At the bottom left is an icon called the Magnification ratio popup. Choose fit to 100%. This will zoom out so we can see what's happening:

Magnifying
Select the rotate tool, or use the keyboard shortcut W, and adjust the image:

Rotate
To undo an action, go to the top-left corner and choose Edit | Undo Rotate Object:

Undo
- Pan Behind (Anchor Point) Tool (Y): I'll skip the camera tool for now. Next to the camera tool is the pan behind tool. Use this to move your anchor point. Things animate along the anchor point in After Effects. It's useful to know how to move the anchor point around, as it gives you control over how things animate:

Pan behind tool
- Masking Tool: To the right are our masking tools. The first shape in the list is the rectangle tool. With these masking tools, you can click and drag to create a shape. Click on the triangle icon on the bottom-left of this tool's button. You will find the rounded Rectangle Tool, the Eclipse Tool, and the Star Tool:

Masking tool
- Pen Tool (G): Next to the rectangle tool is the pen tool. It is used to make custom shapes in After Effects.
- Type tool: To the right of the pen tool is the type tool.
- Brush tool: The next icon with the brush icon is the brush tool.
- Stamp tool: The icon with the stamp icon is the clone stamp tool.
We will go over more of these tools later.
Hopefully, you are starting to get used to the interface in After Effects. Poke around and experiment with these tools, to get comfortable with them. A little triangle next to a tool's button means you can access more options for that tool. If a tool is grayed out, just click on your comp and it will become active.
Preview panel
Let's go over the preview panel. This is located in the upper-right corner of your screen:

Preview panel
This preview panel gives you options such as moving through your movie. A project is made up of frames, just like in real video footage. In After Effects, moving within a project is referred to as moving down the timeline. This timeline is represented in units, such as frames, seconds, and minutes. This preview panel allows you to move forward or backward frame by frame. Pressing the play button lets you preview your project. You can also use the ram review, which gives you the ability to watch the project at a faster speed. You can also hit the space bar to preview your animation.
Composition window
At the bottom of the composition window, there are a few options. Let's go over some of them.
The icon in the lower right-hand corner of the composition is where you will find your guide options. These guide options are used to arrange your layers and to create compositionally strong images. However, these guides are not rendered; they are only for preview purposes:
- Guides: These are used for aligning and arranging layers. To remove guides, choose View | Clear guides.
- Title/Action Safe: These are video-safe zones, for standard video monitors.
- Rulers: This is used to drag guides to the composition to align and arrange layers to.
- Grid: This is a modular grid that helps you organize your layers and create strong compositions:

Guides
A little further over to the right is the resolution button. You can reduce the quality down to Quarter. This gives you the ability to look at it and play it back even faster, but at a lower quality:
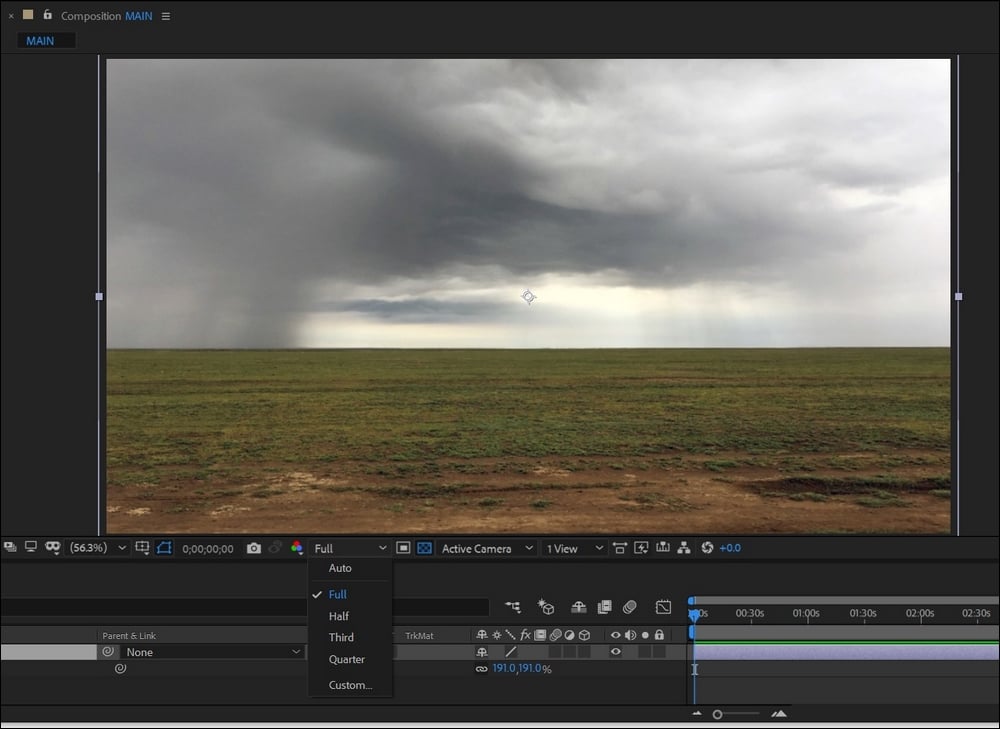
Resolution
Next, we will go over our Effects & Presets panel. The effects panel is a major toolbox full of effects to make your video look amazing! This panel gives you access to hundreds of effects that can help you create animation, correct the color, or fix any number of problems with video or images.
Effects panel
The effects panel is located to the far-right, below the preview panel. A lot of these effects are the same as those used in Photoshop. You may be familiar with Brightness, Contrast, Curves, and so on. Make sure your layer is selected in the timeline, before clicking on an effect.
You can add an effect to a layer by doing the following:
- Twirl the category name
dow - Click on the effect with the layer selected, or you can type in the name of the effect
- Double-click on the effect, while your layer is selected
Let's type the effect (auto levels) into the search bar. Double-click the effect to add to our layer:

Effects & Presets
You can adjust this effects in the effects control panel. This panel is nested right next to your main project panel:

Auto levels
The main difference between these effects and Photoshop is that you can animate them across the timeline, which we will get into in the next sections. You can also add multiple effects to a layer, to create complex visual images.
Resetting the layout
Your workspace is where all your panels and tools are located. This is the heart of the program. Your workspace can be configured in different ways; let's make sure it's set to the default state.
Go to Window | Workspace | Reset "Standard" to Saved Layout. This is the standard workspace:

Resetting the workspace
This way, everything is where it's supposed to be in our interface; nothing is out of place.
Saving your project
Saving a project is always a good practice. Let's start our project by creating a new file by saving it:
- Go up to the top-left tab, File. Choose Save As | Save As... and name the file
test. - Navigate to where you want to save your After Effect project. It's a good idea to number your projects. Let's name ours
projects_01.
We have started saving our first project. It's important to start saving things right away.
The project panel
The project panel is where you bring in all your assets. After Effects is often used in post-production. You are usually working from many different asset types. Your project can get very disorganized quickly. This is where you keep all your assets tidy. You will be very happy when your project gets more difficult and you have taken the time to keep things organized. It is easier to find things when you have a tidy project. It also helps you to work faster. The project panel has icons at the bottom of the panel. Choose the one called folder:

Creating a new folder
Let's learn how to create folders in our project panel by following these steps to create one:
- Click on the folder icon
- Name this
new comp-main comp
When you bring media into After Effects, be sure to organize all your media into the appropriate folders.
You can create the following folders:
MAINAUDIOPRECOMPImagesFootage
You should have five folders. Right-click on the folder to rename them.
The projects in this book will use these five folders. We have created them to organize everything properly.
Importing images
Let's import a large image (at least 1,920 x 1,080) by double-clicking the open area. This brings up your media folders. You can click anywhere in the area where I'm standing in the next screenshot:

Project panel
Drag and move this image into the Images folder. You can rename your images by right-clicking on the layer.
After Effect references material. It doesn't actually keep anything in the project; it references things. You should never rename a file outside After Effects. When you import images into a Photoshop document, it saves a copy with the document. However, After Effects links to the assets you import into your project. You should always leave the name unchanged because After Effects will not be able to find the new name for its referencing, and you will receive an error message.
Rather than renaming or removing your files from After Effects, it's better to create a copy or not to move it. If you need to replace a file, you have to right-click on the layer and choose to replace or reload the footage:

Replace footage
Practice renaming and relinking your files a couple times, just to make sure you understand that concept.
If you need to delete anything, drag it into the trashcan; this is highlighted in the following screenshot:

Trashcan
Preferences – Autosave
Now we will turn our attention to setting Auto-Save... for your projects. It's important to get that set up so your project will automatically save, even if you forget to do this. The following steps will show you how to set up autosave:
- Go to Edit | Preferences | Auto-Save....
- Set autosave at 20-minute intervals.
- You can adjust the maximum number of versions of your project to autosave. The default number is 5:

Autosaving projects
Setting up autosave can save your life. If your project crashes, you will be happy that you have a back-up copy saved in the autosave folder. This is located wherever you save your project.
Creating compositions
After Effects uses compositions to place and arrange your elements. Remember to consider design principles that help create a strong composition when you arrange your elements. In After Effects, these compositions are referred to as comps. I am going to create a comp by hitting the new composition icon. If you look closely at the icon, you will see that it looks like a composition symbol with shapes:

New composition
Leave all these settings as they are, but make the comp size 1,920 x 1,080, and make the time duration 0;04;00;00. Name the comp MAIN:

Composition settings
Drag the main comp into the MAIN comp folder:

Organizing a project
The timelines and the toolbar
Look at the lower-third of the screen. This is called the timeline panel. The timeline is the works space where you create key frames. This is where you make your layers animate across time. You also organize your layer-stacking order. This stacking order is similar to Photoshop. Layers at the top will appear on top of other layers:

Timeline panel
After briefly learning about the timeline panel, let's discuss how to bring layers into your composition.
Bringing layers into your composition
Bringing layers into your composition is easy. Layers are the basic building blocks for creating a movie. A layer can be an image, video footage, or an audio file.
Follow these steps:
- Go into the
IMAGEfolder. - Drag the image on to the timeline.
- If the image is 1,920 x 1,080, it will fit perfectly and fill up the screen. It will come into the comp centered:

Bringing an image into the timeline
Tool panel
Let's go over our tools! The tool panel is where you find all your tools to edit your layers. Here, you can find tools to move your layers and navigate around your composition:
- Selection Tool (V): Go to the top left side of the screen. This is called the tool bar:

Selection Tool
The arrow icon on the far left is called the Selection Tool.
- Hand Tool (H): The hand tool is to the right of the arrow tool. This tool lets you move around in your composition:

Hand Tool
Now select the hand tool or use the keyboard shortcut H. You can use the hand tool to move around in your view or navigate around in the comp.
- Zoom Tool (Z): The zoom tool is next to the hand tool. This tool will magnify your image in the composition. Select the zoom tool, or use the keyboard shortcut Z, and click on the image in the comp a few times:

Zoom Tool
- Rotate Tool (W): The rotate tool is the circular tool next to the zoom tool:

Rotate Tool
Let's explore how to use the rotate tool. The center of the screen where your image is displayed is called the composition window. At the bottom left is an icon called the Magnification ratio popup. Choose fit to 100%. This will zoom out so we can see what's happening:

Magnifying
Select the rotate tool, or use the keyboard shortcut W, and adjust the image:

Rotate
To undo an action, go to the top-left corner and choose Edit | Undo Rotate Object:

Undo
- Pan Behind (Anchor Point) Tool (Y): I'll skip the camera tool for now. Next to the camera tool is the pan behind tool. Use this to move your anchor point. Things animate along the anchor point in After Effects. It's useful to know how to move the anchor point around, as it gives you control over how things animate:

Pan behind tool
- Masking Tool: To the right are our masking tools. The first shape in the list is the rectangle tool. With these masking tools, you can click and drag to create a shape. Click on the triangle icon on the bottom-left of this tool's button. You will find the rounded Rectangle Tool, the Eclipse Tool, and the Star Tool:

Masking tool
- Pen Tool (G): Next to the rectangle tool is the pen tool. It is used to make custom shapes in After Effects.
- Type tool: To the right of the pen tool is the type tool.
- Brush tool: The next icon with the brush icon is the brush tool.
- Stamp tool: The icon with the stamp icon is the clone stamp tool.
We will go over more of these tools later.
Hopefully, you are starting to get used to the interface in After Effects. Poke around and experiment with these tools, to get comfortable with them. A little triangle next to a tool's button means you can access more options for that tool. If a tool is grayed out, just click on your comp and it will become active.
Preview panel
Let's go over the preview panel. This is located in the upper-right corner of your screen:

Preview panel
This preview panel gives you options such as moving through your movie. A project is made up of frames, just like in real video footage. In After Effects, moving within a project is referred to as moving down the timeline. This timeline is represented in units, such as frames, seconds, and minutes. This preview panel allows you to move forward or backward frame by frame. Pressing the play button lets you preview your project. You can also use the ram review, which gives you the ability to watch the project at a faster speed. You can also hit the space bar to preview your animation.
Composition window
At the bottom of the composition window, there are a few options. Let's go over some of them.
The icon in the lower right-hand corner of the composition is where you will find your guide options. These guide options are used to arrange your layers and to create compositionally strong images. However, these guides are not rendered; they are only for preview purposes:
- Guides: These are used for aligning and arranging layers. To remove guides, choose View | Clear guides.
- Title/Action Safe: These are video-safe zones, for standard video monitors.
- Rulers: This is used to drag guides to the composition to align and arrange layers to.
- Grid: This is a modular grid that helps you organize your layers and create strong compositions:

Guides
A little further over to the right is the resolution button. You can reduce the quality down to Quarter. This gives you the ability to look at it and play it back even faster, but at a lower quality:

Resolution
Next, we will go over our Effects & Presets panel. The effects panel is a major toolbox full of effects to make your video look amazing! This panel gives you access to hundreds of effects that can help you create animation, correct the color, or fix any number of problems with video or images.
Effects panel
The effects panel is located to the far-right, below the preview panel. A lot of these effects are the same as those used in Photoshop. You may be familiar with Brightness, Contrast, Curves, and so on. Make sure your layer is selected in the timeline, before clicking on an effect.
You can add an effect to a layer by doing the following:
- Twirl the category name
dow - Click on the effect with the layer selected, or you can type in the name of the effect
- Double-click on the effect, while your layer is selected
Let's type the effect (auto levels) into the search bar. Double-click the effect to add to our layer:

Effects & Presets
You can adjust this effects in the effects control panel. This panel is nested right next to your main project panel:

Auto levels
The main difference between these effects and Photoshop is that you can animate them across the timeline, which we will get into in the next sections. You can also add multiple effects to a layer, to create complex visual images.
Saving your project
Saving a project is always a good practice. Let's start our project by creating a new file by saving it:
- Go up to the top-left tab, File. Choose Save As | Save As... and name the file
test. - Navigate to where you want to save your After Effect project. It's a good idea to number your projects. Let's name ours
projects_01.
We have started saving our first project. It's important to start saving things right away.
The project panel
The project panel is where you bring in all your assets. After Effects is often used in post-production. You are usually working from many different asset types. Your project can get very disorganized quickly. This is where you keep all your assets tidy. You will be very happy when your project gets more difficult and you have taken the time to keep things organized. It is easier to find things when you have a tidy project. It also helps you to work faster. The project panel has icons at the bottom of the panel. Choose the one called folder:

Creating a new folder
Let's learn how to create folders in our project panel by following these steps to create one:
- Click on the folder icon
- Name this
new comp-main comp
When you bring media into After Effects, be sure to organize all your media into the appropriate folders.
You can create the following folders:
MAINAUDIOPRECOMPImagesFootage
You should have five folders. Right-click on the folder to rename them.
The projects in this book will use these five folders. We have created them to organize everything properly.
Importing images
Let's import a large image (at least 1,920 x 1,080) by double-clicking the open area. This brings up your media folders. You can click anywhere in the area where I'm standing in the next screenshot:

Project panel
Drag and move this image into the Images folder. You can rename your images by right-clicking on the layer.
After Effect references material. It doesn't actually keep anything in the project; it references things. You should never rename a file outside After Effects. When you import images into a Photoshop document, it saves a copy with the document. However, After Effects links to the assets you import into your project. You should always leave the name unchanged because After Effects will not be able to find the new name for its referencing, and you will receive an error message.
Rather than renaming or removing your files from After Effects, it's better to create a copy or not to move it. If you need to replace a file, you have to right-click on the layer and choose to replace or reload the footage:

Replace footage
Practice renaming and relinking your files a couple times, just to make sure you understand that concept.
If you need to delete anything, drag it into the trashcan; this is highlighted in the following screenshot:

Trashcan
Preferences – Autosave
Now we will turn our attention to setting Auto-Save... for your projects. It's important to get that set up so your project will automatically save, even if you forget to do this. The following steps will show you how to set up autosave:
- Go to Edit | Preferences | Auto-Save....
- Set autosave at 20-minute intervals.
- You can adjust the maximum number of versions of your project to autosave. The default number is 5:

Autosaving projects
Setting up autosave can save your life. If your project crashes, you will be happy that you have a back-up copy saved in the autosave folder. This is located wherever you save your project.
Creating compositions
After Effects uses compositions to place and arrange your elements. Remember to consider design principles that help create a strong composition when you arrange your elements. In After Effects, these compositions are referred to as comps. I am going to create a comp by hitting the new composition icon. If you look closely at the icon, you will see that it looks like a composition symbol with shapes:

New composition
Leave all these settings as they are, but make the comp size 1,920 x 1,080, and make the time duration 0;04;00;00. Name the comp MAIN:

Composition settings
Drag the main comp into the MAIN comp folder:

Organizing a project
The timelines and the toolbar
Look at the lower-third of the screen. This is called the timeline panel. The timeline is the works space where you create key frames. This is where you make your layers animate across time. You also organize your layer-stacking order. This stacking order is similar to Photoshop. Layers at the top will appear on top of other layers:

Timeline panel
After briefly learning about the timeline panel, let's discuss how to bring layers into your composition.
Bringing layers into your composition
Bringing layers into your composition is easy. Layers are the basic building blocks for creating a movie. A layer can be an image, video footage, or an audio file.
Follow these steps:
- Go into the
IMAGEfolder. - Drag the image on to the timeline.
- If the image is 1,920 x 1,080, it will fit perfectly and fill up the screen. It will come into the comp centered:

Bringing an image into the timeline
Tool panel
Let's go over our tools! The tool panel is where you find all your tools to edit your layers. Here, you can find tools to move your layers and navigate around your composition:
- Selection Tool (V): Go to the top left side of the screen. This is called the tool bar:

Selection Tool
The arrow icon on the far left is called the Selection Tool.
- Hand Tool (H): The hand tool is to the right of the arrow tool. This tool lets you move around in your composition:

Hand Tool
Now select the hand tool or use the keyboard shortcut H. You can use the hand tool to move around in your view or navigate around in the comp.
- Zoom Tool (Z): The zoom tool is next to the hand tool. This tool will magnify your image in the composition. Select the zoom tool, or use the keyboard shortcut Z, and click on the image in the comp a few times:

Zoom Tool
- Rotate Tool (W): The rotate tool is the circular tool next to the zoom tool:

Rotate Tool
Let's explore how to use the rotate tool. The center of the screen where your image is displayed is called the composition window. At the bottom left is an icon called the Magnification ratio popup. Choose fit to 100%. This will zoom out so we can see what's happening:

Magnifying
Select the rotate tool, or use the keyboard shortcut W, and adjust the image:

Rotate
To undo an action, go to the top-left corner and choose Edit | Undo Rotate Object:

Undo
- Pan Behind (Anchor Point) Tool (Y): I'll skip the camera tool for now. Next to the camera tool is the pan behind tool. Use this to move your anchor point. Things animate along the anchor point in After Effects. It's useful to know how to move the anchor point around, as it gives you control over how things animate:

Pan behind tool
- Masking Tool: To the right are our masking tools. The first shape in the list is the rectangle tool. With these masking tools, you can click and drag to create a shape. Click on the triangle icon on the bottom-left of this tool's button. You will find the rounded Rectangle Tool, the Eclipse Tool, and the Star Tool:

Masking tool
- Pen Tool (G): Next to the rectangle tool is the pen tool. It is used to make custom shapes in After Effects.
- Type tool: To the right of the pen tool is the type tool.
- Brush tool: The next icon with the brush icon is the brush tool.
- Stamp tool: The icon with the stamp icon is the clone stamp tool.
We will go over more of these tools later.
Hopefully, you are starting to get used to the interface in After Effects. Poke around and experiment with these tools, to get comfortable with them. A little triangle next to a tool's button means you can access more options for that tool. If a tool is grayed out, just click on your comp and it will become active.
Preview panel
Let's go over the preview panel. This is located in the upper-right corner of your screen:

Preview panel
This preview panel gives you options such as moving through your movie. A project is made up of frames, just like in real video footage. In After Effects, moving within a project is referred to as moving down the timeline. This timeline is represented in units, such as frames, seconds, and minutes. This preview panel allows you to move forward or backward frame by frame. Pressing the play button lets you preview your project. You can also use the ram review, which gives you the ability to watch the project at a faster speed. You can also hit the space bar to preview your animation.
Composition window
At the bottom of the composition window, there are a few options. Let's go over some of them.
The icon in the lower right-hand corner of the composition is where you will find your guide options. These guide options are used to arrange your layers and to create compositionally strong images. However, these guides are not rendered; they are only for preview purposes:
- Guides: These are used for aligning and arranging layers. To remove guides, choose View | Clear guides.
- Title/Action Safe: These are video-safe zones, for standard video monitors.
- Rulers: This is used to drag guides to the composition to align and arrange layers to.
- Grid: This is a modular grid that helps you organize your layers and create strong compositions:

Guides
A little further over to the right is the resolution button. You can reduce the quality down to Quarter. This gives you the ability to look at it and play it back even faster, but at a lower quality:

Resolution
Next, we will go over our Effects & Presets panel. The effects panel is a major toolbox full of effects to make your video look amazing! This panel gives you access to hundreds of effects that can help you create animation, correct the color, or fix any number of problems with video or images.
Effects panel
The effects panel is located to the far-right, below the preview panel. A lot of these effects are the same as those used in Photoshop. You may be familiar with Brightness, Contrast, Curves, and so on. Make sure your layer is selected in the timeline, before clicking on an effect.
You can add an effect to a layer by doing the following:
- Twirl the category name
dow - Click on the effect with the layer selected, or you can type in the name of the effect
- Double-click on the effect, while your layer is selected
Let's type the effect (auto levels) into the search bar. Double-click the effect to add to our layer:

Effects & Presets
You can adjust this effects in the effects control panel. This panel is nested right next to your main project panel:

Auto levels
The main difference between these effects and Photoshop is that you can animate them across the timeline, which we will get into in the next sections. You can also add multiple effects to a layer, to create complex visual images.
The project panel
The project panel is where you bring in all your assets. After Effects is often used in post-production. You are usually working from many different asset types. Your project can get very disorganized quickly. This is where you keep all your assets tidy. You will be very happy when your project gets more difficult and you have taken the time to keep things organized. It is easier to find things when you have a tidy project. It also helps you to work faster. The project panel has icons at the bottom of the panel. Choose the one called folder:

Creating a new folder
Let's learn how to create folders in our project panel by following these steps to create one:
- Click on the folder icon
- Name this
new comp-main comp
When you bring media into After Effects, be sure to organize all your media into the appropriate folders.
You can create the following folders:
MAINAUDIOPRECOMPImagesFootage
You should have five folders. Right-click on the folder to rename them.
The projects in this book will use these five folders. We have created them to organize everything properly.
Importing images
Let's import a large image (at least 1,920 x 1,080) by double-clicking the open area. This brings up your media folders. You can click anywhere in the area where I'm standing in the next screenshot:

Project panel
Drag and move this image into the Images folder. You can rename your images by right-clicking on the layer.
After Effect references material. It doesn't actually keep anything in the project; it references things. You should never rename a file outside After Effects. When you import images into a Photoshop document, it saves a copy with the document. However, After Effects links to the assets you import into your project. You should always leave the name unchanged because After Effects will not be able to find the new name for its referencing, and you will receive an error message.
Rather than renaming or removing your files from After Effects, it's better to create a copy or not to move it. If you need to replace a file, you have to right-click on the layer and choose to replace or reload the footage:

Replace footage
Practice renaming and relinking your files a couple times, just to make sure you understand that concept.
If you need to delete anything, drag it into the trashcan; this is highlighted in the following screenshot:

Trashcan
Preferences – Autosave
Now we will turn our attention to setting Auto-Save... for your projects. It's important to get that set up so your project will automatically save, even if you forget to do this. The following steps will show you how to set up autosave:
- Go to Edit | Preferences | Auto-Save....
- Set autosave at 20-minute intervals.
- You can adjust the maximum number of versions of your project to autosave. The default number is 5:

Autosaving projects
Setting up autosave can save your life. If your project crashes, you will be happy that you have a back-up copy saved in the autosave folder. This is located wherever you save your project.
Creating compositions
After Effects uses compositions to place and arrange your elements. Remember to consider design principles that help create a strong composition when you arrange your elements. In After Effects, these compositions are referred to as comps. I am going to create a comp by hitting the new composition icon. If you look closely at the icon, you will see that it looks like a composition symbol with shapes:

New composition
Leave all these settings as they are, but make the comp size 1,920 x 1,080, and make the time duration 0;04;00;00. Name the comp MAIN:

Composition settings
Drag the main comp into the MAIN comp folder:

Organizing a project
The timelines and the toolbar
Look at the lower-third of the screen. This is called the timeline panel. The timeline is the works space where you create key frames. This is where you make your layers animate across time. You also organize your layer-stacking order. This stacking order is similar to Photoshop. Layers at the top will appear on top of other layers:

Timeline panel
After briefly learning about the timeline panel, let's discuss how to bring layers into your composition.
Bringing layers into your composition
Bringing layers into your composition is easy. Layers are the basic building blocks for creating a movie. A layer can be an image, video footage, or an audio file.
Follow these steps:
- Go into the
IMAGEfolder. - Drag the image on to the timeline.
- If the image is 1,920 x 1,080, it will fit perfectly and fill up the screen. It will come into the comp centered:

Bringing an image into the timeline
Tool panel
Let's go over our tools! The tool panel is where you find all your tools to edit your layers. Here, you can find tools to move your layers and navigate around your composition:
- Selection Tool (V): Go to the top left side of the screen. This is called the tool bar:

Selection Tool
The arrow icon on the far left is called the Selection Tool.
- Hand Tool (H): The hand tool is to the right of the arrow tool. This tool lets you move around in your composition:

Hand Tool
Now select the hand tool or use the keyboard shortcut H. You can use the hand tool to move around in your view or navigate around in the comp.
- Zoom Tool (Z): The zoom tool is next to the hand tool. This tool will magnify your image in the composition. Select the zoom tool, or use the keyboard shortcut Z, and click on the image in the comp a few times:

Zoom Tool
- Rotate Tool (W): The rotate tool is the circular tool next to the zoom tool:

Rotate Tool
Let's explore how to use the rotate tool. The center of the screen where your image is displayed is called the composition window. At the bottom left is an icon called the Magnification ratio popup. Choose fit to 100%. This will zoom out so we can see what's happening:

Magnifying
Select the rotate tool, or use the keyboard shortcut W, and adjust the image:

Rotate
To undo an action, go to the top-left corner and choose Edit | Undo Rotate Object:

Undo
- Pan Behind (Anchor Point) Tool (Y): I'll skip the camera tool for now. Next to the camera tool is the pan behind tool. Use this to move your anchor point. Things animate along the anchor point in After Effects. It's useful to know how to move the anchor point around, as it gives you control over how things animate:

Pan behind tool
- Masking Tool: To the right are our masking tools. The first shape in the list is the rectangle tool. With these masking tools, you can click and drag to create a shape. Click on the triangle icon on the bottom-left of this tool's button. You will find the rounded Rectangle Tool, the Eclipse Tool, and the Star Tool:

Masking tool
- Pen Tool (G): Next to the rectangle tool is the pen tool. It is used to make custom shapes in After Effects.
- Type tool: To the right of the pen tool is the type tool.
- Brush tool: The next icon with the brush icon is the brush tool.
- Stamp tool: The icon with the stamp icon is the clone stamp tool.
We will go over more of these tools later.
Hopefully, you are starting to get used to the interface in After Effects. Poke around and experiment with these tools, to get comfortable with them. A little triangle next to a tool's button means you can access more options for that tool. If a tool is grayed out, just click on your comp and it will become active.
Preview panel
Let's go over the preview panel. This is located in the upper-right corner of your screen:

Preview panel
This preview panel gives you options such as moving through your movie. A project is made up of frames, just like in real video footage. In After Effects, moving within a project is referred to as moving down the timeline. This timeline is represented in units, such as frames, seconds, and minutes. This preview panel allows you to move forward or backward frame by frame. Pressing the play button lets you preview your project. You can also use the ram review, which gives you the ability to watch the project at a faster speed. You can also hit the space bar to preview your animation.
Composition window
At the bottom of the composition window, there are a few options. Let's go over some of them.
The icon in the lower right-hand corner of the composition is where you will find your guide options. These guide options are used to arrange your layers and to create compositionally strong images. However, these guides are not rendered; they are only for preview purposes:
- Guides: These are used for aligning and arranging layers. To remove guides, choose View | Clear guides.
- Title/Action Safe: These are video-safe zones, for standard video monitors.
- Rulers: This is used to drag guides to the composition to align and arrange layers to.
- Grid: This is a modular grid that helps you organize your layers and create strong compositions:

Guides
A little further over to the right is the resolution button. You can reduce the quality down to Quarter. This gives you the ability to look at it and play it back even faster, but at a lower quality:

Resolution
Next, we will go over our Effects & Presets panel. The effects panel is a major toolbox full of effects to make your video look amazing! This panel gives you access to hundreds of effects that can help you create animation, correct the color, or fix any number of problems with video or images.
Effects panel
The effects panel is located to the far-right, below the preview panel. A lot of these effects are the same as those used in Photoshop. You may be familiar with Brightness, Contrast, Curves, and so on. Make sure your layer is selected in the timeline, before clicking on an effect.
You can add an effect to a layer by doing the following:
- Twirl the category name
dow - Click on the effect with the layer selected, or you can type in the name of the effect
- Double-click on the effect, while your layer is selected
Let's type the effect (auto levels) into the search bar. Double-click the effect to add to our layer:

Effects & Presets
You can adjust this effects in the effects control panel. This panel is nested right next to your main project panel:

Auto levels
The main difference between these effects and Photoshop is that you can animate them across the timeline, which we will get into in the next sections. You can also add multiple effects to a layer, to create complex visual images.
Importing images
Let's import a large image (at least 1,920 x 1,080) by double-clicking the open area. This brings up your media folders. You can click anywhere in the area where I'm standing in the next screenshot:

Project panel
Drag and move this image into the Images folder. You can rename your images by right-clicking on the layer.
After Effect references material. It doesn't actually keep anything in the project; it references things. You should never rename a file outside After Effects. When you import images into a Photoshop document, it saves a copy with the document. However, After Effects links to the assets you import into your project. You should always leave the name unchanged because After Effects will not be able to find the new name for its referencing, and you will receive an error message.
Rather than renaming or removing your files from After Effects, it's better to create a copy or not to move it. If you need to replace a file, you have to right-click on the layer and choose to replace or reload the footage:

Replace footage
Practice renaming and relinking your files a couple times, just to make sure you understand that concept.
If you need to delete anything, drag it into the trashcan; this is highlighted in the following screenshot:

Trashcan
Preferences – Autosave
Now we will turn our attention to setting Auto-Save... for your projects. It's important to get that set up so your project will automatically save, even if you forget to do this. The following steps will show you how to set up autosave:
- Go to Edit | Preferences | Auto-Save....
- Set autosave at 20-minute intervals.
- You can adjust the maximum number of versions of your project to autosave. The default number is 5:

Autosaving projects
Setting up autosave can save your life. If your project crashes, you will be happy that you have a back-up copy saved in the autosave folder. This is located wherever you save your project.
Creating compositions
After Effects uses compositions to place and arrange your elements. Remember to consider design principles that help create a strong composition when you arrange your elements. In After Effects, these compositions are referred to as comps. I am going to create a comp by hitting the new composition icon. If you look closely at the icon, you will see that it looks like a composition symbol with shapes:

New composition
Leave all these settings as they are, but make the comp size 1,920 x 1,080, and make the time duration 0;04;00;00. Name the comp MAIN:

Composition settings
Drag the main comp into the MAIN comp folder:

Organizing a project
The timelines and the toolbar
Look at the lower-third of the screen. This is called the timeline panel. The timeline is the works space where you create key frames. This is where you make your layers animate across time. You also organize your layer-stacking order. This stacking order is similar to Photoshop. Layers at the top will appear on top of other layers:

Timeline panel
After briefly learning about the timeline panel, let's discuss how to bring layers into your composition.
Bringing layers into your composition
Bringing layers into your composition is easy. Layers are the basic building blocks for creating a movie. A layer can be an image, video footage, or an audio file.
Follow these steps:
- Go into the
IMAGEfolder. - Drag the image on to the timeline.
- If the image is 1,920 x 1,080, it will fit perfectly and fill up the screen. It will come into the comp centered:

Bringing an image into the timeline
Tool panel
Let's go over our tools! The tool panel is where you find all your tools to edit your layers. Here, you can find tools to move your layers and navigate around your composition:
- Selection Tool (V): Go to the top left side of the screen. This is called the tool bar:

Selection Tool
The arrow icon on the far left is called the Selection Tool.
- Hand Tool (H): The hand tool is to the right of the arrow tool. This tool lets you move around in your composition:

Hand Tool
Now select the hand tool or use the keyboard shortcut H. You can use the hand tool to move around in your view or navigate around in the comp.
- Zoom Tool (Z): The zoom tool is next to the hand tool. This tool will magnify your image in the composition. Select the zoom tool, or use the keyboard shortcut Z, and click on the image in the comp a few times:

Zoom Tool
- Rotate Tool (W): The rotate tool is the circular tool next to the zoom tool:

Rotate Tool
Let's explore how to use the rotate tool. The center of the screen where your image is displayed is called the composition window. At the bottom left is an icon called the Magnification ratio popup. Choose fit to 100%. This will zoom out so we can see what's happening:

Magnifying
Select the rotate tool, or use the keyboard shortcut W, and adjust the image:

Rotate
To undo an action, go to the top-left corner and choose Edit | Undo Rotate Object:

Undo
- Pan Behind (Anchor Point) Tool (Y): I'll skip the camera tool for now. Next to the camera tool is the pan behind tool. Use this to move your anchor point. Things animate along the anchor point in After Effects. It's useful to know how to move the anchor point around, as it gives you control over how things animate:

Pan behind tool
- Masking Tool: To the right are our masking tools. The first shape in the list is the rectangle tool. With these masking tools, you can click and drag to create a shape. Click on the triangle icon on the bottom-left of this tool's button. You will find the rounded Rectangle Tool, the Eclipse Tool, and the Star Tool:

Masking tool
- Pen Tool (G): Next to the rectangle tool is the pen tool. It is used to make custom shapes in After Effects.
- Type tool: To the right of the pen tool is the type tool.
- Brush tool: The next icon with the brush icon is the brush tool.
- Stamp tool: The icon with the stamp icon is the clone stamp tool.
We will go over more of these tools later.
Hopefully, you are starting to get used to the interface in After Effects. Poke around and experiment with these tools, to get comfortable with them. A little triangle next to a tool's button means you can access more options for that tool. If a tool is grayed out, just click on your comp and it will become active.
Preview panel
Let's go over the preview panel. This is located in the upper-right corner of your screen:

Preview panel
This preview panel gives you options such as moving through your movie. A project is made up of frames, just like in real video footage. In After Effects, moving within a project is referred to as moving down the timeline. This timeline is represented in units, such as frames, seconds, and minutes. This preview panel allows you to move forward or backward frame by frame. Pressing the play button lets you preview your project. You can also use the ram review, which gives you the ability to watch the project at a faster speed. You can also hit the space bar to preview your animation.
Composition window
At the bottom of the composition window, there are a few options. Let's go over some of them.
The icon in the lower right-hand corner of the composition is where you will find your guide options. These guide options are used to arrange your layers and to create compositionally strong images. However, these guides are not rendered; they are only for preview purposes:
- Guides: These are used for aligning and arranging layers. To remove guides, choose View | Clear guides.
- Title/Action Safe: These are video-safe zones, for standard video monitors.
- Rulers: This is used to drag guides to the composition to align and arrange layers to.
- Grid: This is a modular grid that helps you organize your layers and create strong compositions:

Guides
A little further over to the right is the resolution button. You can reduce the quality down to Quarter. This gives you the ability to look at it and play it back even faster, but at a lower quality:

Resolution
Next, we will go over our Effects & Presets panel. The effects panel is a major toolbox full of effects to make your video look amazing! This panel gives you access to hundreds of effects that can help you create animation, correct the color, or fix any number of problems with video or images.
Effects panel
The effects panel is located to the far-right, below the preview panel. A lot of these effects are the same as those used in Photoshop. You may be familiar with Brightness, Contrast, Curves, and so on. Make sure your layer is selected in the timeline, before clicking on an effect.
You can add an effect to a layer by doing the following:
- Twirl the category name
dow - Click on the effect with the layer selected, or you can type in the name of the effect
- Double-click on the effect, while your layer is selected
Let's type the effect (auto levels) into the search bar. Double-click the effect to add to our layer:

Effects & Presets
You can adjust this effects in the effects control panel. This panel is nested right next to your main project panel:

Auto levels
The main difference between these effects and Photoshop is that you can animate them across the timeline, which we will get into in the next sections. You can also add multiple effects to a layer, to create complex visual images.
Preferences – Autosave
Now we will turn our attention to setting Auto-Save... for your projects. It's important to get that set up so your project will automatically save, even if you forget to do this. The following steps will show you how to set up autosave:
- Go to Edit | Preferences | Auto-Save....
- Set autosave at 20-minute intervals.
- You can adjust the maximum number of versions of your project to autosave. The default number is 5:

Autosaving projects
Setting up autosave can save your life. If your project crashes, you will be happy that you have a back-up copy saved in the autosave folder. This is located wherever you save your project.
Creating compositions
After Effects uses compositions to place and arrange your elements. Remember to consider design principles that help create a strong composition when you arrange your elements. In After Effects, these compositions are referred to as comps. I am going to create a comp by hitting the new composition icon. If you look closely at the icon, you will see that it looks like a composition symbol with shapes:

New composition
Leave all these settings as they are, but make the comp size 1,920 x 1,080, and make the time duration 0;04;00;00. Name the comp MAIN:

Composition settings
Drag the main comp into the MAIN comp folder:

Organizing a project
The timelines and the toolbar
Look at the lower-third of the screen. This is called the timeline panel. The timeline is the works space where you create key frames. This is where you make your layers animate across time. You also organize your layer-stacking order. This stacking order is similar to Photoshop. Layers at the top will appear on top of other layers:

Timeline panel
After briefly learning about the timeline panel, let's discuss how to bring layers into your composition.
Bringing layers into your composition
Bringing layers into your composition is easy. Layers are the basic building blocks for creating a movie. A layer can be an image, video footage, or an audio file.
Follow these steps:
- Go into the
IMAGEfolder. - Drag the image on to the timeline.
- If the image is 1,920 x 1,080, it will fit perfectly and fill up the screen. It will come into the comp centered:

Bringing an image into the timeline
Tool panel
Let's go over our tools! The tool panel is where you find all your tools to edit your layers. Here, you can find tools to move your layers and navigate around your composition:
- Selection Tool (V): Go to the top left side of the screen. This is called the tool bar:

Selection Tool
The arrow icon on the far left is called the Selection Tool.
- Hand Tool (H): The hand tool is to the right of the arrow tool. This tool lets you move around in your composition:

Hand Tool
Now select the hand tool or use the keyboard shortcut H. You can use the hand tool to move around in your view or navigate around in the comp.
- Zoom Tool (Z): The zoom tool is next to the hand tool. This tool will magnify your image in the composition. Select the zoom tool, or use the keyboard shortcut Z, and click on the image in the comp a few times:

Zoom Tool
- Rotate Tool (W): The rotate tool is the circular tool next to the zoom tool:

Rotate Tool
Let's explore how to use the rotate tool. The center of the screen where your image is displayed is called the composition window. At the bottom left is an icon called the Magnification ratio popup. Choose fit to 100%. This will zoom out so we can see what's happening:

Magnifying
Select the rotate tool, or use the keyboard shortcut W, and adjust the image:

Rotate
To undo an action, go to the top-left corner and choose Edit | Undo Rotate Object:

Undo
- Pan Behind (Anchor Point) Tool (Y): I'll skip the camera tool for now. Next to the camera tool is the pan behind tool. Use this to move your anchor point. Things animate along the anchor point in After Effects. It's useful to know how to move the anchor point around, as it gives you control over how things animate:

Pan behind tool
- Masking Tool: To the right are our masking tools. The first shape in the list is the rectangle tool. With these masking tools, you can click and drag to create a shape. Click on the triangle icon on the bottom-left of this tool's button. You will find the rounded Rectangle Tool, the Eclipse Tool, and the Star Tool:

Masking tool
- Pen Tool (G): Next to the rectangle tool is the pen tool. It is used to make custom shapes in After Effects.
- Type tool: To the right of the pen tool is the type tool.
- Brush tool: The next icon with the brush icon is the brush tool.
- Stamp tool: The icon with the stamp icon is the clone stamp tool.
We will go over more of these tools later.
Hopefully, you are starting to get used to the interface in After Effects. Poke around and experiment with these tools, to get comfortable with them. A little triangle next to a tool's button means you can access more options for that tool. If a tool is grayed out, just click on your comp and it will become active.
Preview panel
Let's go over the preview panel. This is located in the upper-right corner of your screen:

Preview panel
This preview panel gives you options such as moving through your movie. A project is made up of frames, just like in real video footage. In After Effects, moving within a project is referred to as moving down the timeline. This timeline is represented in units, such as frames, seconds, and minutes. This preview panel allows you to move forward or backward frame by frame. Pressing the play button lets you preview your project. You can also use the ram review, which gives you the ability to watch the project at a faster speed. You can also hit the space bar to preview your animation.
Composition window
At the bottom of the composition window, there are a few options. Let's go over some of them.
The icon in the lower right-hand corner of the composition is where you will find your guide options. These guide options are used to arrange your layers and to create compositionally strong images. However, these guides are not rendered; they are only for preview purposes:
- Guides: These are used for aligning and arranging layers. To remove guides, choose View | Clear guides.
- Title/Action Safe: These are video-safe zones, for standard video monitors.
- Rulers: This is used to drag guides to the composition to align and arrange layers to.
- Grid: This is a modular grid that helps you organize your layers and create strong compositions:

Guides
A little further over to the right is the resolution button. You can reduce the quality down to Quarter. This gives you the ability to look at it and play it back even faster, but at a lower quality:

Resolution
Next, we will go over our Effects & Presets panel. The effects panel is a major toolbox full of effects to make your video look amazing! This panel gives you access to hundreds of effects that can help you create animation, correct the color, or fix any number of problems with video or images.
Effects panel
The effects panel is located to the far-right, below the preview panel. A lot of these effects are the same as those used in Photoshop. You may be familiar with Brightness, Contrast, Curves, and so on. Make sure your layer is selected in the timeline, before clicking on an effect.
You can add an effect to a layer by doing the following:
- Twirl the category name
dow - Click on the effect with the layer selected, or you can type in the name of the effect
- Double-click on the effect, while your layer is selected
Let's type the effect (auto levels) into the search bar. Double-click the effect to add to our layer:

Effects & Presets
You can adjust this effects in the effects control panel. This panel is nested right next to your main project panel:

Auto levels
The main difference between these effects and Photoshop is that you can animate them across the timeline, which we will get into in the next sections. You can also add multiple effects to a layer, to create complex visual images.
Creating compositions
After Effects uses compositions to place and arrange your elements. Remember to consider design principles that help create a strong composition when you arrange your elements. In After Effects, these compositions are referred to as comps. I am going to create a comp by hitting the new composition icon. If you look closely at the icon, you will see that it looks like a composition symbol with shapes:

New composition
Leave all these settings as they are, but make the comp size 1,920 x 1,080, and make the time duration 0;04;00;00. Name the comp MAIN:

Composition settings
Drag the main comp into the MAIN comp folder:

Organizing a project
The timelines and the toolbar
Look at the lower-third of the screen. This is called the timeline panel. The timeline is the works space where you create key frames. This is where you make your layers animate across time. You also organize your layer-stacking order. This stacking order is similar to Photoshop. Layers at the top will appear on top of other layers:

Timeline panel
After briefly learning about the timeline panel, let's discuss how to bring layers into your composition.
Bringing layers into your composition
Bringing layers into your composition is easy. Layers are the basic building blocks for creating a movie. A layer can be an image, video footage, or an audio file.
Follow these steps:
- Go into the
IMAGEfolder. - Drag the image on to the timeline.
- If the image is 1,920 x 1,080, it will fit perfectly and fill up the screen. It will come into the comp centered:

Bringing an image into the timeline
Tool panel
Let's go over our tools! The tool panel is where you find all your tools to edit your layers. Here, you can find tools to move your layers and navigate around your composition:
- Selection Tool (V): Go to the top left side of the screen. This is called the tool bar:

Selection Tool
The arrow icon on the far left is called the Selection Tool.
- Hand Tool (H): The hand tool is to the right of the arrow tool. This tool lets you move around in your composition:

Hand Tool
Now select the hand tool or use the keyboard shortcut H. You can use the hand tool to move around in your view or navigate around in the comp.
- Zoom Tool (Z): The zoom tool is next to the hand tool. This tool will magnify your image in the composition. Select the zoom tool, or use the keyboard shortcut Z, and click on the image in the comp a few times:

Zoom Tool
- Rotate Tool (W): The rotate tool is the circular tool next to the zoom tool:

Rotate Tool
Let's explore how to use the rotate tool. The center of the screen where your image is displayed is called the composition window. At the bottom left is an icon called the Magnification ratio popup. Choose fit to 100%. This will zoom out so we can see what's happening:

Magnifying
Select the rotate tool, or use the keyboard shortcut W, and adjust the image:

Rotate
To undo an action, go to the top-left corner and choose Edit | Undo Rotate Object:

Undo
- Pan Behind (Anchor Point) Tool (Y): I'll skip the camera tool for now. Next to the camera tool is the pan behind tool. Use this to move your anchor point. Things animate along the anchor point in After Effects. It's useful to know how to move the anchor point around, as it gives you control over how things animate:

Pan behind tool
- Masking Tool: To the right are our masking tools. The first shape in the list is the rectangle tool. With these masking tools, you can click and drag to create a shape. Click on the triangle icon on the bottom-left of this tool's button. You will find the rounded Rectangle Tool, the Eclipse Tool, and the Star Tool:

Masking tool
- Pen Tool (G): Next to the rectangle tool is the pen tool. It is used to make custom shapes in After Effects.
- Type tool: To the right of the pen tool is the type tool.
- Brush tool: The next icon with the brush icon is the brush tool.
- Stamp tool: The icon with the stamp icon is the clone stamp tool.
We will go over more of these tools later.
Hopefully, you are starting to get used to the interface in After Effects. Poke around and experiment with these tools, to get comfortable with them. A little triangle next to a tool's button means you can access more options for that tool. If a tool is grayed out, just click on your comp and it will become active.
Preview panel
Let's go over the preview panel. This is located in the upper-right corner of your screen:

Preview panel
This preview panel gives you options such as moving through your movie. A project is made up of frames, just like in real video footage. In After Effects, moving within a project is referred to as moving down the timeline. This timeline is represented in units, such as frames, seconds, and minutes. This preview panel allows you to move forward or backward frame by frame. Pressing the play button lets you preview your project. You can also use the ram review, which gives you the ability to watch the project at a faster speed. You can also hit the space bar to preview your animation.
Composition window
At the bottom of the composition window, there are a few options. Let's go over some of them.
The icon in the lower right-hand corner of the composition is where you will find your guide options. These guide options are used to arrange your layers and to create compositionally strong images. However, these guides are not rendered; they are only for preview purposes:
- Guides: These are used for aligning and arranging layers. To remove guides, choose View | Clear guides.
- Title/Action Safe: These are video-safe zones, for standard video monitors.
- Rulers: This is used to drag guides to the composition to align and arrange layers to.
- Grid: This is a modular grid that helps you organize your layers and create strong compositions:

Guides
A little further over to the right is the resolution button. You can reduce the quality down to Quarter. This gives you the ability to look at it and play it back even faster, but at a lower quality:

Resolution
Next, we will go over our Effects & Presets panel. The effects panel is a major toolbox full of effects to make your video look amazing! This panel gives you access to hundreds of effects that can help you create animation, correct the color, or fix any number of problems with video or images.
Effects panel
The effects panel is located to the far-right, below the preview panel. A lot of these effects are the same as those used in Photoshop. You may be familiar with Brightness, Contrast, Curves, and so on. Make sure your layer is selected in the timeline, before clicking on an effect.
You can add an effect to a layer by doing the following:
- Twirl the category name
dow - Click on the effect with the layer selected, or you can type in the name of the effect
- Double-click on the effect, while your layer is selected
Let's type the effect (auto levels) into the search bar. Double-click the effect to add to our layer:

Effects & Presets
You can adjust this effects in the effects control panel. This panel is nested right next to your main project panel:

Auto levels
The main difference between these effects and Photoshop is that you can animate them across the timeline, which we will get into in the next sections. You can also add multiple effects to a layer, to create complex visual images.
The timelines and the toolbar
Look at the lower-third of the screen. This is called the timeline panel. The timeline is the works space where you create key frames. This is where you make your layers animate across time. You also organize your layer-stacking order. This stacking order is similar to Photoshop. Layers at the top will appear on top of other layers:

Timeline panel
After briefly learning about the timeline panel, let's discuss how to bring layers into your composition.
Bringing layers into your composition
Bringing layers into your composition is easy. Layers are the basic building blocks for creating a movie. A layer can be an image, video footage, or an audio file.
Follow these steps:
- Go into the
IMAGEfolder. - Drag the image on to the timeline.
- If the image is 1,920 x 1,080, it will fit perfectly and fill up the screen. It will come into the comp centered:

Bringing an image into the timeline
Tool panel
Let's go over our tools! The tool panel is where you find all your tools to edit your layers. Here, you can find tools to move your layers and navigate around your composition:
- Selection Tool (V): Go to the top left side of the screen. This is called the tool bar:

Selection Tool
The arrow icon on the far left is called the Selection Tool.
- Hand Tool (H): The hand tool is to the right of the arrow tool. This tool lets you move around in your composition:

Hand Tool
Now select the hand tool or use the keyboard shortcut H. You can use the hand tool to move around in your view or navigate around in the comp.
- Zoom Tool (Z): The zoom tool is next to the hand tool. This tool will magnify your image in the composition. Select the zoom tool, or use the keyboard shortcut Z, and click on the image in the comp a few times:

Zoom Tool
- Rotate Tool (W): The rotate tool is the circular tool next to the zoom tool:

Rotate Tool
Let's explore how to use the rotate tool. The center of the screen where your image is displayed is called the composition window. At the bottom left is an icon called the Magnification ratio popup. Choose fit to 100%. This will zoom out so we can see what's happening:

Magnifying
Select the rotate tool, or use the keyboard shortcut W, and adjust the image:

Rotate
To undo an action, go to the top-left corner and choose Edit | Undo Rotate Object:

Undo
- Pan Behind (Anchor Point) Tool (Y): I'll skip the camera tool for now. Next to the camera tool is the pan behind tool. Use this to move your anchor point. Things animate along the anchor point in After Effects. It's useful to know how to move the anchor point around, as it gives you control over how things animate:

Pan behind tool
- Masking Tool: To the right are our masking tools. The first shape in the list is the rectangle tool. With these masking tools, you can click and drag to create a shape. Click on the triangle icon on the bottom-left of this tool's button. You will find the rounded Rectangle Tool, the Eclipse Tool, and the Star Tool:

Masking tool
- Pen Tool (G): Next to the rectangle tool is the pen tool. It is used to make custom shapes in After Effects.
- Type tool: To the right of the pen tool is the type tool.
- Brush tool: The next icon with the brush icon is the brush tool.
- Stamp tool: The icon with the stamp icon is the clone stamp tool.
We will go over more of these tools later.
Hopefully, you are starting to get used to the interface in After Effects. Poke around and experiment with these tools, to get comfortable with them. A little triangle next to a tool's button means you can access more options for that tool. If a tool is grayed out, just click on your comp and it will become active.
Preview panel
Let's go over the preview panel. This is located in the upper-right corner of your screen:

Preview panel
This preview panel gives you options such as moving through your movie. A project is made up of frames, just like in real video footage. In After Effects, moving within a project is referred to as moving down the timeline. This timeline is represented in units, such as frames, seconds, and minutes. This preview panel allows you to move forward or backward frame by frame. Pressing the play button lets you preview your project. You can also use the ram review, which gives you the ability to watch the project at a faster speed. You can also hit the space bar to preview your animation.
Composition window
At the bottom of the composition window, there are a few options. Let's go over some of them.
The icon in the lower right-hand corner of the composition is where you will find your guide options. These guide options are used to arrange your layers and to create compositionally strong images. However, these guides are not rendered; they are only for preview purposes:
- Guides: These are used for aligning and arranging layers. To remove guides, choose View | Clear guides.
- Title/Action Safe: These are video-safe zones, for standard video monitors.
- Rulers: This is used to drag guides to the composition to align and arrange layers to.
- Grid: This is a modular grid that helps you organize your layers and create strong compositions:

Guides
A little further over to the right is the resolution button. You can reduce the quality down to Quarter. This gives you the ability to look at it and play it back even faster, but at a lower quality:

Resolution
Next, we will go over our Effects & Presets panel. The effects panel is a major toolbox full of effects to make your video look amazing! This panel gives you access to hundreds of effects that can help you create animation, correct the color, or fix any number of problems with video or images.
Effects panel
The effects panel is located to the far-right, below the preview panel. A lot of these effects are the same as those used in Photoshop. You may be familiar with Brightness, Contrast, Curves, and so on. Make sure your layer is selected in the timeline, before clicking on an effect.
You can add an effect to a layer by doing the following:
- Twirl the category name
dow - Click on the effect with the layer selected, or you can type in the name of the effect
- Double-click on the effect, while your layer is selected
Let's type the effect (auto levels) into the search bar. Double-click the effect to add to our layer:

Effects & Presets
You can adjust this effects in the effects control panel. This panel is nested right next to your main project panel:

Auto levels
The main difference between these effects and Photoshop is that you can animate them across the timeline, which we will get into in the next sections. You can also add multiple effects to a layer, to create complex visual images.
Bringing layers into your composition
Bringing layers into your composition is easy. Layers are the basic building blocks for creating a movie. A layer can be an image, video footage, or an audio file.
Follow these steps:
- Go into the
IMAGEfolder. - Drag the image on to the timeline.
- If the image is 1,920 x 1,080, it will fit perfectly and fill up the screen. It will come into the comp centered:

Bringing an image into the timeline
Tool panel
Let's go over our tools! The tool panel is where you find all your tools to edit your layers. Here, you can find tools to move your layers and navigate around your composition:
- Selection Tool (V): Go to the top left side of the screen. This is called the tool bar:

Selection Tool
The arrow icon on the far left is called the Selection Tool.
- Hand Tool (H): The hand tool is to the right of the arrow tool. This tool lets you move around in your composition:

Hand Tool
Now select the hand tool or use the keyboard shortcut H. You can use the hand tool to move around in your view or navigate around in the comp.
- Zoom Tool (Z): The zoom tool is next to the hand tool. This tool will magnify your image in the composition. Select the zoom tool, or use the keyboard shortcut Z, and click on the image in the comp a few times:

Zoom Tool
- Rotate Tool (W): The rotate tool is the circular tool next to the zoom tool:

Rotate Tool
Let's explore how to use the rotate tool. The center of the screen where your image is displayed is called the composition window. At the bottom left is an icon called the Magnification ratio popup. Choose fit to 100%. This will zoom out so we can see what's happening:

Magnifying
Select the rotate tool, or use the keyboard shortcut W, and adjust the image:

Rotate
To undo an action, go to the top-left corner and choose Edit | Undo Rotate Object:

Undo
- Pan Behind (Anchor Point) Tool (Y): I'll skip the camera tool for now. Next to the camera tool is the pan behind tool. Use this to move your anchor point. Things animate along the anchor point in After Effects. It's useful to know how to move the anchor point around, as it gives you control over how things animate:

Pan behind tool
- Masking Tool: To the right are our masking tools. The first shape in the list is the rectangle tool. With these masking tools, you can click and drag to create a shape. Click on the triangle icon on the bottom-left of this tool's button. You will find the rounded Rectangle Tool, the Eclipse Tool, and the Star Tool:

Masking tool
- Pen Tool (G): Next to the rectangle tool is the pen tool. It is used to make custom shapes in After Effects.
- Type tool: To the right of the pen tool is the type tool.
- Brush tool: The next icon with the brush icon is the brush tool.
- Stamp tool: The icon with the stamp icon is the clone stamp tool.
We will go over more of these tools later.
Hopefully, you are starting to get used to the interface in After Effects. Poke around and experiment with these tools, to get comfortable with them. A little triangle next to a tool's button means you can access more options for that tool. If a tool is grayed out, just click on your comp and it will become active.
Preview panel
Let's go over the preview panel. This is located in the upper-right corner of your screen:

Preview panel
This preview panel gives you options such as moving through your movie. A project is made up of frames, just like in real video footage. In After Effects, moving within a project is referred to as moving down the timeline. This timeline is represented in units, such as frames, seconds, and minutes. This preview panel allows you to move forward or backward frame by frame. Pressing the play button lets you preview your project. You can also use the ram review, which gives you the ability to watch the project at a faster speed. You can also hit the space bar to preview your animation.
Composition window
At the bottom of the composition window, there are a few options. Let's go over some of them.
The icon in the lower right-hand corner of the composition is where you will find your guide options. These guide options are used to arrange your layers and to create compositionally strong images. However, these guides are not rendered; they are only for preview purposes:
- Guides: These are used for aligning and arranging layers. To remove guides, choose View | Clear guides.
- Title/Action Safe: These are video-safe zones, for standard video monitors.
- Rulers: This is used to drag guides to the composition to align and arrange layers to.
- Grid: This is a modular grid that helps you organize your layers and create strong compositions:

Guides
A little further over to the right is the resolution button. You can reduce the quality down to Quarter. This gives you the ability to look at it and play it back even faster, but at a lower quality:

Resolution
Next, we will go over our Effects & Presets panel. The effects panel is a major toolbox full of effects to make your video look amazing! This panel gives you access to hundreds of effects that can help you create animation, correct the color, or fix any number of problems with video or images.
Effects panel
The effects panel is located to the far-right, below the preview panel. A lot of these effects are the same as those used in Photoshop. You may be familiar with Brightness, Contrast, Curves, and so on. Make sure your layer is selected in the timeline, before clicking on an effect.
You can add an effect to a layer by doing the following:
- Twirl the category name
dow - Click on the effect with the layer selected, or you can type in the name of the effect
- Double-click on the effect, while your layer is selected
Let's type the effect (auto levels) into the search bar. Double-click the effect to add to our layer:

Effects & Presets
You can adjust this effects in the effects control panel. This panel is nested right next to your main project panel:

Auto levels
The main difference between these effects and Photoshop is that you can animate them across the timeline, which we will get into in the next sections. You can also add multiple effects to a layer, to create complex visual images.
Tool panel
Let's go over our tools! The tool panel is where you find all your tools to edit your layers. Here, you can find tools to move your layers and navigate around your composition:
- Selection Tool (V): Go to the top left side of the screen. This is called the tool bar:

Selection Tool
The arrow icon on the far left is called the Selection Tool.
- Hand Tool (H): The hand tool is to the right of the arrow tool. This tool lets you move around in your composition:

Hand Tool
Now select the hand tool or use the keyboard shortcut H. You can use the hand tool to move around in your view or navigate around in the comp.
- Zoom Tool (Z): The zoom tool is next to the hand tool. This tool will magnify your image in the composition. Select the zoom tool, or use the keyboard shortcut Z, and click on the image in the comp a few times:

Zoom Tool
- Rotate Tool (W): The rotate tool is the circular tool next to the zoom tool:

Rotate Tool
Let's explore how to use the rotate tool. The center of the screen where your image is displayed is called the composition window. At the bottom left is an icon called the Magnification ratio popup. Choose fit to 100%. This will zoom out so we can see what's happening:

Magnifying
Select the rotate tool, or use the keyboard shortcut W, and adjust the image:

Rotate
To undo an action, go to the top-left corner and choose Edit | Undo Rotate Object:

Undo
- Pan Behind (Anchor Point) Tool (Y): I'll skip the camera tool for now. Next to the camera tool is the pan behind tool. Use this to move your anchor point. Things animate along the anchor point in After Effects. It's useful to know how to move the anchor point around, as it gives you control over how things animate:

Pan behind tool
- Masking Tool: To the right are our masking tools. The first shape in the list is the rectangle tool. With these masking tools, you can click and drag to create a shape. Click on the triangle icon on the bottom-left of this tool's button. You will find the rounded Rectangle Tool, the Eclipse Tool, and the Star Tool:

Masking tool
- Pen Tool (G): Next to the rectangle tool is the pen tool. It is used to make custom shapes in After Effects.
- Type tool: To the right of the pen tool is the type tool.
- Brush tool: The next icon with the brush icon is the brush tool.
- Stamp tool: The icon with the stamp icon is the clone stamp tool.
We will go over more of these tools later.
Hopefully, you are starting to get used to the interface in After Effects. Poke around and experiment with these tools, to get comfortable with them. A little triangle next to a tool's button means you can access more options for that tool. If a tool is grayed out, just click on your comp and it will become active.
Preview panel
Let's go over the preview panel. This is located in the upper-right corner of your screen:

Preview panel
This preview panel gives you options such as moving through your movie. A project is made up of frames, just like in real video footage. In After Effects, moving within a project is referred to as moving down the timeline. This timeline is represented in units, such as frames, seconds, and minutes. This preview panel allows you to move forward or backward frame by frame. Pressing the play button lets you preview your project. You can also use the ram review, which gives you the ability to watch the project at a faster speed. You can also hit the space bar to preview your animation.
Composition window
At the bottom of the composition window, there are a few options. Let's go over some of them.
The icon in the lower right-hand corner of the composition is where you will find your guide options. These guide options are used to arrange your layers and to create compositionally strong images. However, these guides are not rendered; they are only for preview purposes:
- Guides: These are used for aligning and arranging layers. To remove guides, choose View | Clear guides.
- Title/Action Safe: These are video-safe zones, for standard video monitors.
- Rulers: This is used to drag guides to the composition to align and arrange layers to.
- Grid: This is a modular grid that helps you organize your layers and create strong compositions:

Guides
A little further over to the right is the resolution button. You can reduce the quality down to Quarter. This gives you the ability to look at it and play it back even faster, but at a lower quality:

Resolution
Next, we will go over our Effects & Presets panel. The effects panel is a major toolbox full of effects to make your video look amazing! This panel gives you access to hundreds of effects that can help you create animation, correct the color, or fix any number of problems with video or images.
Effects panel
The effects panel is located to the far-right, below the preview panel. A lot of these effects are the same as those used in Photoshop. You may be familiar with Brightness, Contrast, Curves, and so on. Make sure your layer is selected in the timeline, before clicking on an effect.
You can add an effect to a layer by doing the following:
- Twirl the category name
dow - Click on the effect with the layer selected, or you can type in the name of the effect
- Double-click on the effect, while your layer is selected
Let's type the effect (auto levels) into the search bar. Double-click the effect to add to our layer:

Effects & Presets
You can adjust this effects in the effects control panel. This panel is nested right next to your main project panel:

Auto levels
The main difference between these effects and Photoshop is that you can animate them across the timeline, which we will get into in the next sections. You can also add multiple effects to a layer, to create complex visual images.
Preview panel
Let's go over the preview panel. This is located in the upper-right corner of your screen:

Preview panel
This preview panel gives you options such as moving through your movie. A project is made up of frames, just like in real video footage. In After Effects, moving within a project is referred to as moving down the timeline. This timeline is represented in units, such as frames, seconds, and minutes. This preview panel allows you to move forward or backward frame by frame. Pressing the play button lets you preview your project. You can also use the ram review, which gives you the ability to watch the project at a faster speed. You can also hit the space bar to preview your animation.
Composition window
At the bottom of the composition window, there are a few options. Let's go over some of them.
The icon in the lower right-hand corner of the composition is where you will find your guide options. These guide options are used to arrange your layers and to create compositionally strong images. However, these guides are not rendered; they are only for preview purposes:
- Guides: These are used for aligning and arranging layers. To remove guides, choose View | Clear guides.
- Title/Action Safe: These are video-safe zones, for standard video monitors.
- Rulers: This is used to drag guides to the composition to align and arrange layers to.
- Grid: This is a modular grid that helps you organize your layers and create strong compositions:

Guides
A little further over to the right is the resolution button. You can reduce the quality down to Quarter. This gives you the ability to look at it and play it back even faster, but at a lower quality:

Resolution
Next, we will go over our Effects & Presets panel. The effects panel is a major toolbox full of effects to make your video look amazing! This panel gives you access to hundreds of effects that can help you create animation, correct the color, or fix any number of problems with video or images.
Effects panel
The effects panel is located to the far-right, below the preview panel. A lot of these effects are the same as those used in Photoshop. You may be familiar with Brightness, Contrast, Curves, and so on. Make sure your layer is selected in the timeline, before clicking on an effect.
You can add an effect to a layer by doing the following:
- Twirl the category name
dow - Click on the effect with the layer selected, or you can type in the name of the effect
- Double-click on the effect, while your layer is selected
Let's type the effect (auto levels) into the search bar. Double-click the effect to add to our layer:

Effects & Presets
You can adjust this effects in the effects control panel. This panel is nested right next to your main project panel:

Auto levels
The main difference between these effects and Photoshop is that you can animate them across the timeline, which we will get into in the next sections. You can also add multiple effects to a layer, to create complex visual images.
Composition window
At the bottom of the composition window, there are a few options. Let's go over some of them.
The icon in the lower right-hand corner of the composition is where you will find your guide options. These guide options are used to arrange your layers and to create compositionally strong images. However, these guides are not rendered; they are only for preview purposes:
- Guides: These are used for aligning and arranging layers. To remove guides, choose View | Clear guides.
- Title/Action Safe: These are video-safe zones, for standard video monitors.
- Rulers: This is used to drag guides to the composition to align and arrange layers to.
- Grid: This is a modular grid that helps you organize your layers and create strong compositions:

Guides
A little further over to the right is the resolution button. You can reduce the quality down to Quarter. This gives you the ability to look at it and play it back even faster, but at a lower quality:

Resolution
Next, we will go over our Effects & Presets panel. The effects panel is a major toolbox full of effects to make your video look amazing! This panel gives you access to hundreds of effects that can help you create animation, correct the color, or fix any number of problems with video or images.
Effects panel
The effects panel is located to the far-right, below the preview panel. A lot of these effects are the same as those used in Photoshop. You may be familiar with Brightness, Contrast, Curves, and so on. Make sure your layer is selected in the timeline, before clicking on an effect.
You can add an effect to a layer by doing the following:
- Twirl the category name
dow - Click on the effect with the layer selected, or you can type in the name of the effect
- Double-click on the effect, while your layer is selected
Let's type the effect (auto levels) into the search bar. Double-click the effect to add to our layer:

Effects & Presets
You can adjust this effects in the effects control panel. This panel is nested right next to your main project panel:

Auto levels
The main difference between these effects and Photoshop is that you can animate them across the timeline, which we will get into in the next sections. You can also add multiple effects to a layer, to create complex visual images.
Effects panel
The effects panel is located to the far-right, below the preview panel. A lot of these effects are the same as those used in Photoshop. You may be familiar with Brightness, Contrast, Curves, and so on. Make sure your layer is selected in the timeline, before clicking on an effect.
You can add an effect to a layer by doing the following:
- Twirl the category name
dow - Click on the effect with the layer selected, or you can type in the name of the effect
- Double-click on the effect, while your layer is selected
Let's type the effect (auto levels) into the search bar. Double-click the effect to add to our layer:

Effects & Presets
You can adjust this effects in the effects control panel. This panel is nested right next to your main project panel:

Auto levels
The main difference between these effects and Photoshop is that you can animate them across the timeline, which we will get into in the next sections. You can also add multiple effects to a layer, to create complex visual images.
Introducing layer properties
Duplicating layers is an essential tool that you need to master very quickly. This is helpful because you can reuse layers in your project:
- Select your layer.
- You can either hit Ctrl + D/command + D on Windows or macOS, respectively, or just choose Edit | Duplicate from the menu:

Duplicating an image
When you follow this process, your layer is duplicated. This duplicated layer is an exact copy of the layer. Look closely at your layer and find the triangle to the far right. Click on this triangle. This is called twirling down:

Twirling down properties
Twirling down your layer will reveal the Transform properties. Twirl down the triangle icon to the left of the word Transform. You will see the Transform properties: Scale, Rotation, Opacity, and Position. All of these have shortcuts.
Here are the shortcuts for your layer transform properties:
- The shortcut for the scale is S
- The shortcut for rotation is R
- For opacity, the shortcut is T
- For position, the shortcut is.. yep, you guessed it, P
These shortcuts are easy to remember. The only shortcut that's not self-explanatory is T for opacity. An easy way to remember that is to think of T for transparency, or that T is the last syllable of opacity (opaci-T):

Transform properties
To select anything in After Effects, you need to have the selection tool selected. Navigate to that tool in the upper left-hand corner of your screen in the tool bar. Choose the top layer of the timeline:

Selecting the top layer
With this layer selected, we are going to select our scale property. To use the shortcut, simply hit the letter S. You will see that this reveals the scale property only. Let's adjust the scale parameter. To the far right of the word scale, you will see two numbers. Scrub either one of those parameters to the left. This will shrink this layer down in size:
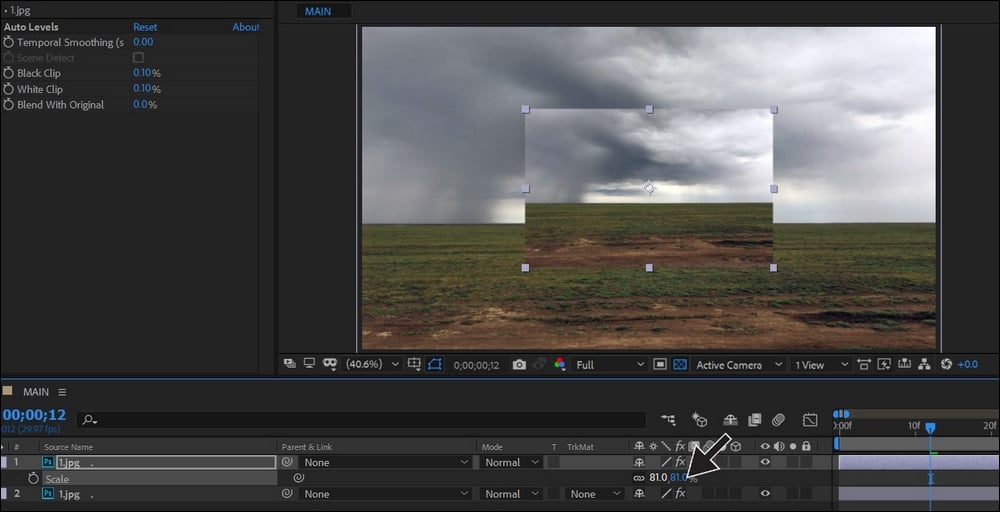
Scaling down the image
As you can see, this layer scales down in the center of the screen.
Layer panel
Now I will talk to you about our layers and our timeline. It's very important to know your way around this part of the interface. This layer panel is how you control the way your images move. This is where you can see, at a glance, what's going on in your movie. This panel is similar to Photoshop's layer panel. Each one of these icons to the right of the layer has an important function. If you hover your selection arrow over any of these icons, a description will appear on the screen:

Layer panel
Let's take a closer look some of the buttons and switches of the layer panel:
- The animation stopwatch
- The shy button
- The continuously rasterized button
- The visual effects button
- Motion blur
- The 3D button
- The hide switch
- The audio switch
- The solo button
- The lock switch
- The parenting pick whip
- The shy switch
- Motion blur
- Graph editor
- Current time editor
- The zoom-in timeline
- Workspace
Looking at all these buttons and switches can be overwhelming. Let's look at handful of switches that you will find helpful for organizing your layers:
- #7 The eyeball switch: This is to the far right of your layer. Turning off the eyeball next to the layer determines whether that layer is seen.
- #9 The solo switch: The circle icon to the far right of your layer is called the solo switch. The solo switch will isolate a layer that has that solo turned on.
- #10 The lock switch: This is for locking your layers.
- #12 The shy switch: If this is turned on in both of these locations, you will not see that layer.
- #13 The motion blur switch: This also needs to be activated in both of these locations (#5 and #13); this will enable motion blur.
The footage panel
The footage panel is used for previewing your footage. There are also some tools that work only in the footage panel.
To access the footage panel, double-click on the layer. However, this panel is often accessed by accident. It's accessed when double-clicking on a layer. You can tell you're in this panel when you see the white bar at the bottom. There are specific things you can do in this layer, but we usually don't need to be in this panel. Here is a screenshot of the footage panel:

Footage panel
You will find this is a mistake that happens frequently. To get out of this panel, go to the top of that panel and choose the name of your main comp. Or you can reset the workspace area back to the saved layout:

Resetting layout
Resetting this will not change anything in your project. It simply restores your workspace area to the default standard layout.
The timeline panel
Let's talk about time. The timeline panel is one of the main things that differentiates After Effects from Photoshop. Unlike Photoshop, After Effects has the ability to make things happen across time. Another big difference between After Effects and Photoshop is 3D space. You can create compositions with 3D depth. After Effect movies are comprised of frames, just like real films.
The timeline lifespan
Think of the timeline like a lifespan. The beginning is the timeline's birth and at the end of your work area, that's considered the death or the end of the lifespan.
Zooming into the timeline
You can zoom into any point of the timeline with the button at the lower-center of the timeline. Or you can zoom into your timeline by moving the slider. If you look closely, you can you can see (F), which stands for frames:

Zooming into the slider
The timeline is measured with time codes. The F next to the numbers on the timeline stands for frames.
Navigating in the timeline
The timeline is always moving from left to right:
- Use the Page Up key as a shortcut to navigate forward in the timeline, frame by frame, and Page Down to navigate backward in the timeline, frame by frame.
- A shortcut for moving down one frame in the timeline is Page Down or Ctrl + the right arrow (on a PC) or Page Down or command + the right arrow (on macOS). You can also use the arrows in the preview panel:

Preview panel
The f on the timeline stands for frames; the numbers represent the number of frames:
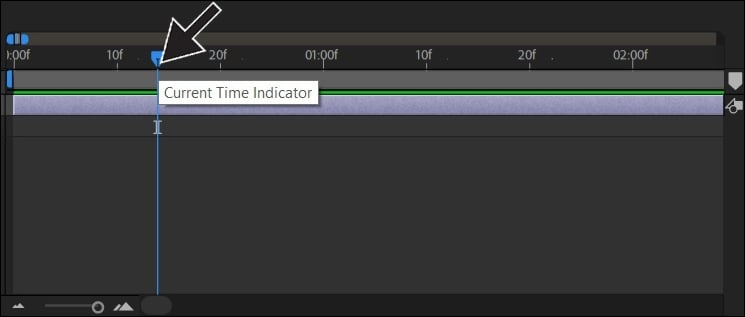
Frames
Go to the beginning of the timeline. The shortcut is for this is pressing the home button on the numeric keypad.
Current time indicator
This guitar pick-shaped object highlighted in the following screenshot is called the current time indicator icon. Moving this time indicator is another way to navigate through the timeline:

Current time indicator
The workspace area
The timeline is the entire length of your composition. Your workspace area is the length of your movie. This is also called the rendering area. When I hit the play button for previewing my movie, it happens within that space. This can be trimmed and edited. To trim your workspace area, perform the following steps:
- Move your time indicator to the desired spot on the timeline
- Press the letter N to activate the shortcut to trim the work area
There is usually more than one way to do something in After Effects. To manually trim your workspace, perform the following steps:
- Move your mouse to the beginning the timeline and hover over the blue bar. This is the start of your workspace area.
- Drag this bar to the right, to trim your work area.
You can drag either the start or the end or the workspace area. Trimming this shortens the duration of the comp. This is useful for previewing your movie or previewing a small section of your movie. Remember when you export or render your movie, this workspace needs to be trimmed, to reflect exactly what you want exported. The duration of the workspace is the only thing that will be exported or rendered:

Trimming the workspace area
Trimming layers
You can edit the duration of your layers by trimming them. Trimming your layers will give you control when your layers appear in your movie:

Trimming layers
To trim your layer, perform the following steps:
- Move your time indicator to the desired spot on the timeline
- Press Alt + [ or Option + [ on macOS to activate the shortcut to trim your layer
To manually trim your layer, perform the following steps:
- Move your time indicator to the desired spot on the timeline.
- Bring your selection tool to the very beginning of the layer and hover over the start of the layer. You will see the trim layer icon represented by two arrows. (You must see this or your dragging you're layers, which is different to trimming them.) Use this to drag and trim your layer.
You can trim any type of layer using the preceding methods. This layer will be trimmed exactly where the time indicator is. Move your time indicator back and forth in the timeline across this trimmed layer. See how the layer appears where the image is trimmed to? This is how layers can appear across time.
Creating composition markers on your timeline
You can further organize your timeline by adding information to the timeline. You can also create markers, notes, and metadata on your timeline. These markers can also be used to align layers to a point in the timeline. The following are the steps for creating a composition marker:
- Hit Shift and a number.
- Double-click that number to enter a note:

Composition markers
These markers and notes can be particularly helpful when organizing your project and writing notes from clients and team members.
Animating a property
Animating a property is essentially marking a parameter in time and adjusting that property further down the timeline. We create animation by creating at least two key frames. The steps to animate a property are simple. But you need to be sure you follow these steps each time. When you want to animate any property, you need to perform the following steps:
- First hit the stopwatch, which will automatically create a key frame for you.
- Move down the timeline, and change the Transform property to whatever you want it to be. That will automatically create a blue diamond key frame for you. But you have to be sure and press the stopwatch first.
After you have created key frames, you're free to move and adjust those key frames. Later, I will get into a lot more detail regarding adjusting key frames.
Animating scale
You can animate your scale parameter to make your layer change in scale over time. Follow these steps to begin your animation journey:
- Press the keyboard shortcut S for the scale parameter to come up.
- Indicate in the timeline where you want the animation to begin.
- Hit the stopwatch for scale.
- Page down to the right, getting closer to the end of this animation.
- Scrub the scale parameter. This will automatically create a blue diamond key frame.
Let's preview that. If I want to give my layer a little bit of blur, I'll hit the blur icon. Look in the timeline:
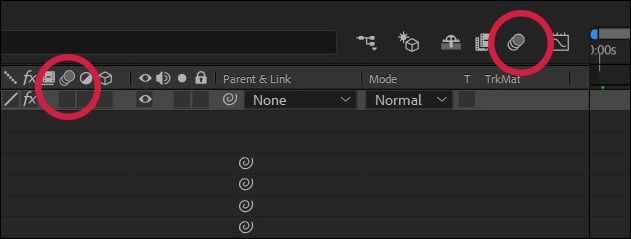
Motion blur
This is an effect that has to be turned on in two places. It has to be turned on in the timeline, just above the timeline. If you hit the preview button, you will see how it gives it a nice blur. That's how things move in real life. There is always some sort of blur when things move fast.
Layer panel
Now I will talk to you about our layers and our timeline. It's very important to know your way around this part of the interface. This layer panel is how you control the way your images move. This is where you can see, at a glance, what's going on in your movie. This panel is similar to Photoshop's layer panel. Each one of these icons to the right of the layer has an important function. If you hover your selection arrow over any of these icons, a description will appear on the screen:

Layer panel
Let's take a closer look some of the buttons and switches of the layer panel:
- The animation stopwatch
- The shy button
- The continuously rasterized button
- The visual effects button
- Motion blur
- The 3D button
- The hide switch
- The audio switch
- The solo button
- The lock switch
- The parenting pick whip
- The shy switch
- Motion blur
- Graph editor
- Current time editor
- The zoom-in timeline
- Workspace
Looking at all these buttons and switches can be overwhelming. Let's look at handful of switches that you will find helpful for organizing your layers:
- #7 The eyeball switch: This is to the far right of your layer. Turning off the eyeball next to the layer determines whether that layer is seen.
- #9 The solo switch: The circle icon to the far right of your layer is called the solo switch. The solo switch will isolate a layer that has that solo turned on.
- #10 The lock switch: This is for locking your layers.
- #12 The shy switch: If this is turned on in both of these locations, you will not see that layer.
- #13 The motion blur switch: This also needs to be activated in both of these locations (#5 and #13); this will enable motion blur.
The footage panel
The footage panel is used for previewing your footage. There are also some tools that work only in the footage panel.
To access the footage panel, double-click on the layer. However, this panel is often accessed by accident. It's accessed when double-clicking on a layer. You can tell you're in this panel when you see the white bar at the bottom. There are specific things you can do in this layer, but we usually don't need to be in this panel. Here is a screenshot of the footage panel:

Footage panel
You will find this is a mistake that happens frequently. To get out of this panel, go to the top of that panel and choose the name of your main comp. Or you can reset the workspace area back to the saved layout:

Resetting layout
Resetting this will not change anything in your project. It simply restores your workspace area to the default standard layout.
The timeline panel
Let's talk about time. The timeline panel is one of the main things that differentiates After Effects from Photoshop. Unlike Photoshop, After Effects has the ability to make things happen across time. Another big difference between After Effects and Photoshop is 3D space. You can create compositions with 3D depth. After Effect movies are comprised of frames, just like real films.
The timeline lifespan
Think of the timeline like a lifespan. The beginning is the timeline's birth and at the end of your work area, that's considered the death or the end of the lifespan.
Zooming into the timeline
You can zoom into any point of the timeline with the button at the lower-center of the timeline. Or you can zoom into your timeline by moving the slider. If you look closely, you can you can see (F), which stands for frames:

Zooming into the slider
The timeline is measured with time codes. The F next to the numbers on the timeline stands for frames.
Navigating in the timeline
The timeline is always moving from left to right:
- Use the Page Up key as a shortcut to navigate forward in the timeline, frame by frame, and Page Down to navigate backward in the timeline, frame by frame.
- A shortcut for moving down one frame in the timeline is Page Down or Ctrl + the right arrow (on a PC) or Page Down or command + the right arrow (on macOS). You can also use the arrows in the preview panel:

Preview panel
The f on the timeline stands for frames; the numbers represent the number of frames:

Frames
Go to the beginning of the timeline. The shortcut is for this is pressing the home button on the numeric keypad.
Current time indicator
This guitar pick-shaped object highlighted in the following screenshot is called the current time indicator icon. Moving this time indicator is another way to navigate through the timeline:

Current time indicator
The workspace area
The timeline is the entire length of your composition. Your workspace area is the length of your movie. This is also called the rendering area. When I hit the play button for previewing my movie, it happens within that space. This can be trimmed and edited. To trim your workspace area, perform the following steps:
- Move your time indicator to the desired spot on the timeline
- Press the letter N to activate the shortcut to trim the work area
There is usually more than one way to do something in After Effects. To manually trim your workspace, perform the following steps:
- Move your mouse to the beginning the timeline and hover over the blue bar. This is the start of your workspace area.
- Drag this bar to the right, to trim your work area.
You can drag either the start or the end or the workspace area. Trimming this shortens the duration of the comp. This is useful for previewing your movie or previewing a small section of your movie. Remember when you export or render your movie, this workspace needs to be trimmed, to reflect exactly what you want exported. The duration of the workspace is the only thing that will be exported or rendered:

Trimming the workspace area
Trimming layers
You can edit the duration of your layers by trimming them. Trimming your layers will give you control when your layers appear in your movie:

Trimming layers
To trim your layer, perform the following steps:
- Move your time indicator to the desired spot on the timeline
- Press Alt + [ or Option + [ on macOS to activate the shortcut to trim your layer
To manually trim your layer, perform the following steps:
- Move your time indicator to the desired spot on the timeline.
- Bring your selection tool to the very beginning of the layer and hover over the start of the layer. You will see the trim layer icon represented by two arrows. (You must see this or your dragging you're layers, which is different to trimming them.) Use this to drag and trim your layer.
You can trim any type of layer using the preceding methods. This layer will be trimmed exactly where the time indicator is. Move your time indicator back and forth in the timeline across this trimmed layer. See how the layer appears where the image is trimmed to? This is how layers can appear across time.
Creating composition markers on your timeline
You can further organize your timeline by adding information to the timeline. You can also create markers, notes, and metadata on your timeline. These markers can also be used to align layers to a point in the timeline. The following are the steps for creating a composition marker:
- Hit Shift and a number.
- Double-click that number to enter a note:

Composition markers
These markers and notes can be particularly helpful when organizing your project and writing notes from clients and team members.
Animating a property
Animating a property is essentially marking a parameter in time and adjusting that property further down the timeline. We create animation by creating at least two key frames. The steps to animate a property are simple. But you need to be sure you follow these steps each time. When you want to animate any property, you need to perform the following steps:
- First hit the stopwatch, which will automatically create a key frame for you.
- Move down the timeline, and change the Transform property to whatever you want it to be. That will automatically create a blue diamond key frame for you. But you have to be sure and press the stopwatch first.
After you have created key frames, you're free to move and adjust those key frames. Later, I will get into a lot more detail regarding adjusting key frames.
Animating scale
You can animate your scale parameter to make your layer change in scale over time. Follow these steps to begin your animation journey:
- Press the keyboard shortcut S for the scale parameter to come up.
- Indicate in the timeline where you want the animation to begin.
- Hit the stopwatch for scale.
- Page down to the right, getting closer to the end of this animation.
- Scrub the scale parameter. This will automatically create a blue diamond key frame.
Let's preview that. If I want to give my layer a little bit of blur, I'll hit the blur icon. Look in the timeline:

Motion blur
This is an effect that has to be turned on in two places. It has to be turned on in the timeline, just above the timeline. If you hit the preview button, you will see how it gives it a nice blur. That's how things move in real life. There is always some sort of blur when things move fast.
The footage panel
The footage panel is used for previewing your footage. There are also some tools that work only in the footage panel.
To access the footage panel, double-click on the layer. However, this panel is often accessed by accident. It's accessed when double-clicking on a layer. You can tell you're in this panel when you see the white bar at the bottom. There are specific things you can do in this layer, but we usually don't need to be in this panel. Here is a screenshot of the footage panel:

Footage panel
You will find this is a mistake that happens frequently. To get out of this panel, go to the top of that panel and choose the name of your main comp. Or you can reset the workspace area back to the saved layout:

Resetting layout
Resetting this will not change anything in your project. It simply restores your workspace area to the default standard layout.
The timeline panel
Let's talk about time. The timeline panel is one of the main things that differentiates After Effects from Photoshop. Unlike Photoshop, After Effects has the ability to make things happen across time. Another big difference between After Effects and Photoshop is 3D space. You can create compositions with 3D depth. After Effect movies are comprised of frames, just like real films.
The timeline lifespan
Think of the timeline like a lifespan. The beginning is the timeline's birth and at the end of your work area, that's considered the death or the end of the lifespan.
Zooming into the timeline
You can zoom into any point of the timeline with the button at the lower-center of the timeline. Or you can zoom into your timeline by moving the slider. If you look closely, you can you can see (F), which stands for frames:

Zooming into the slider
The timeline is measured with time codes. The F next to the numbers on the timeline stands for frames.
Navigating in the timeline
The timeline is always moving from left to right:
- Use the Page Up key as a shortcut to navigate forward in the timeline, frame by frame, and Page Down to navigate backward in the timeline, frame by frame.
- A shortcut for moving down one frame in the timeline is Page Down or Ctrl + the right arrow (on a PC) or Page Down or command + the right arrow (on macOS). You can also use the arrows in the preview panel:

Preview panel
The f on the timeline stands for frames; the numbers represent the number of frames:

Frames
Go to the beginning of the timeline. The shortcut is for this is pressing the home button on the numeric keypad.
Current time indicator
This guitar pick-shaped object highlighted in the following screenshot is called the current time indicator icon. Moving this time indicator is another way to navigate through the timeline:

Current time indicator
The workspace area
The timeline is the entire length of your composition. Your workspace area is the length of your movie. This is also called the rendering area. When I hit the play button for previewing my movie, it happens within that space. This can be trimmed and edited. To trim your workspace area, perform the following steps:
- Move your time indicator to the desired spot on the timeline
- Press the letter N to activate the shortcut to trim the work area
There is usually more than one way to do something in After Effects. To manually trim your workspace, perform the following steps:
- Move your mouse to the beginning the timeline and hover over the blue bar. This is the start of your workspace area.
- Drag this bar to the right, to trim your work area.
You can drag either the start or the end or the workspace area. Trimming this shortens the duration of the comp. This is useful for previewing your movie or previewing a small section of your movie. Remember when you export or render your movie, this workspace needs to be trimmed, to reflect exactly what you want exported. The duration of the workspace is the only thing that will be exported or rendered:

Trimming the workspace area
Trimming layers
You can edit the duration of your layers by trimming them. Trimming your layers will give you control when your layers appear in your movie:

Trimming layers
To trim your layer, perform the following steps:
- Move your time indicator to the desired spot on the timeline
- Press Alt + [ or Option + [ on macOS to activate the shortcut to trim your layer
To manually trim your layer, perform the following steps:
- Move your time indicator to the desired spot on the timeline.
- Bring your selection tool to the very beginning of the layer and hover over the start of the layer. You will see the trim layer icon represented by two arrows. (You must see this or your dragging you're layers, which is different to trimming them.) Use this to drag and trim your layer.
You can trim any type of layer using the preceding methods. This layer will be trimmed exactly where the time indicator is. Move your time indicator back and forth in the timeline across this trimmed layer. See how the layer appears where the image is trimmed to? This is how layers can appear across time.
Creating composition markers on your timeline
You can further organize your timeline by adding information to the timeline. You can also create markers, notes, and metadata on your timeline. These markers can also be used to align layers to a point in the timeline. The following are the steps for creating a composition marker:
- Hit Shift and a number.
- Double-click that number to enter a note:

Composition markers
These markers and notes can be particularly helpful when organizing your project and writing notes from clients and team members.
Animating a property
Animating a property is essentially marking a parameter in time and adjusting that property further down the timeline. We create animation by creating at least two key frames. The steps to animate a property are simple. But you need to be sure you follow these steps each time. When you want to animate any property, you need to perform the following steps:
- First hit the stopwatch, which will automatically create a key frame for you.
- Move down the timeline, and change the Transform property to whatever you want it to be. That will automatically create a blue diamond key frame for you. But you have to be sure and press the stopwatch first.
After you have created key frames, you're free to move and adjust those key frames. Later, I will get into a lot more detail regarding adjusting key frames.
Animating scale
You can animate your scale parameter to make your layer change in scale over time. Follow these steps to begin your animation journey:
- Press the keyboard shortcut S for the scale parameter to come up.
- Indicate in the timeline where you want the animation to begin.
- Hit the stopwatch for scale.
- Page down to the right, getting closer to the end of this animation.
- Scrub the scale parameter. This will automatically create a blue diamond key frame.
Let's preview that. If I want to give my layer a little bit of blur, I'll hit the blur icon. Look in the timeline:

Motion blur
This is an effect that has to be turned on in two places. It has to be turned on in the timeline, just above the timeline. If you hit the preview button, you will see how it gives it a nice blur. That's how things move in real life. There is always some sort of blur when things move fast.
The timeline panel
Let's talk about time. The timeline panel is one of the main things that differentiates After Effects from Photoshop. Unlike Photoshop, After Effects has the ability to make things happen across time. Another big difference between After Effects and Photoshop is 3D space. You can create compositions with 3D depth. After Effect movies are comprised of frames, just like real films.
The timeline lifespan
Think of the timeline like a lifespan. The beginning is the timeline's birth and at the end of your work area, that's considered the death or the end of the lifespan.
Zooming into the timeline
You can zoom into any point of the timeline with the button at the lower-center of the timeline. Or you can zoom into your timeline by moving the slider. If you look closely, you can you can see (F), which stands for frames:

Zooming into the slider
The timeline is measured with time codes. The F next to the numbers on the timeline stands for frames.
Navigating in the timeline
The timeline is always moving from left to right:
- Use the Page Up key as a shortcut to navigate forward in the timeline, frame by frame, and Page Down to navigate backward in the timeline, frame by frame.
- A shortcut for moving down one frame in the timeline is Page Down or Ctrl + the right arrow (on a PC) or Page Down or command + the right arrow (on macOS). You can also use the arrows in the preview panel:

Preview panel
The f on the timeline stands for frames; the numbers represent the number of frames:

Frames
Go to the beginning of the timeline. The shortcut is for this is pressing the home button on the numeric keypad.
Current time indicator
This guitar pick-shaped object highlighted in the following screenshot is called the current time indicator icon. Moving this time indicator is another way to navigate through the timeline:

Current time indicator
The workspace area
The timeline is the entire length of your composition. Your workspace area is the length of your movie. This is also called the rendering area. When I hit the play button for previewing my movie, it happens within that space. This can be trimmed and edited. To trim your workspace area, perform the following steps:
- Move your time indicator to the desired spot on the timeline
- Press the letter N to activate the shortcut to trim the work area
There is usually more than one way to do something in After Effects. To manually trim your workspace, perform the following steps:
- Move your mouse to the beginning the timeline and hover over the blue bar. This is the start of your workspace area.
- Drag this bar to the right, to trim your work area.
You can drag either the start or the end or the workspace area. Trimming this shortens the duration of the comp. This is useful for previewing your movie or previewing a small section of your movie. Remember when you export or render your movie, this workspace needs to be trimmed, to reflect exactly what you want exported. The duration of the workspace is the only thing that will be exported or rendered:

Trimming the workspace area
Trimming layers
You can edit the duration of your layers by trimming them. Trimming your layers will give you control when your layers appear in your movie:

Trimming layers
To trim your layer, perform the following steps:
- Move your time indicator to the desired spot on the timeline
- Press Alt + [ or Option + [ on macOS to activate the shortcut to trim your layer
To manually trim your layer, perform the following steps:
- Move your time indicator to the desired spot on the timeline.
- Bring your selection tool to the very beginning of the layer and hover over the start of the layer. You will see the trim layer icon represented by two arrows. (You must see this or your dragging you're layers, which is different to trimming them.) Use this to drag and trim your layer.
You can trim any type of layer using the preceding methods. This layer will be trimmed exactly where the time indicator is. Move your time indicator back and forth in the timeline across this trimmed layer. See how the layer appears where the image is trimmed to? This is how layers can appear across time.
Creating composition markers on your timeline
You can further organize your timeline by adding information to the timeline. You can also create markers, notes, and metadata on your timeline. These markers can also be used to align layers to a point in the timeline. The following are the steps for creating a composition marker:
- Hit Shift and a number.
- Double-click that number to enter a note:

Composition markers
These markers and notes can be particularly helpful when organizing your project and writing notes from clients and team members.
Animating a property
Animating a property is essentially marking a parameter in time and adjusting that property further down the timeline. We create animation by creating at least two key frames. The steps to animate a property are simple. But you need to be sure you follow these steps each time. When you want to animate any property, you need to perform the following steps:
- First hit the stopwatch, which will automatically create a key frame for you.
- Move down the timeline, and change the Transform property to whatever you want it to be. That will automatically create a blue diamond key frame for you. But you have to be sure and press the stopwatch first.
After you have created key frames, you're free to move and adjust those key frames. Later, I will get into a lot more detail regarding adjusting key frames.
Animating scale
You can animate your scale parameter to make your layer change in scale over time. Follow these steps to begin your animation journey:
- Press the keyboard shortcut S for the scale parameter to come up.
- Indicate in the timeline where you want the animation to begin.
- Hit the stopwatch for scale.
- Page down to the right, getting closer to the end of this animation.
- Scrub the scale parameter. This will automatically create a blue diamond key frame.
Let's preview that. If I want to give my layer a little bit of blur, I'll hit the blur icon. Look in the timeline:

Motion blur
This is an effect that has to be turned on in two places. It has to be turned on in the timeline, just above the timeline. If you hit the preview button, you will see how it gives it a nice blur. That's how things move in real life. There is always some sort of blur when things move fast.
The timeline lifespan
Think of the timeline like a lifespan. The beginning is the timeline's birth and at the end of your work area, that's considered the death or the end of the lifespan.
Zooming into the timeline
You can zoom into any point of the timeline with the button at the lower-center of the timeline. Or you can zoom into your timeline by moving the slider. If you look closely, you can you can see (F), which stands for frames:

Zooming into the slider
The timeline is measured with time codes. The F next to the numbers on the timeline stands for frames.
The timeline is always moving from left to right:
- Use the Page Up key as a shortcut to navigate forward in the timeline, frame by frame, and Page Down to navigate backward in the timeline, frame by frame.
- A shortcut for moving down one frame in the timeline is Page Down or Ctrl + the right arrow (on a PC) or Page Down or command + the right arrow (on macOS). You can also use the arrows in the preview panel:

Preview panel
The f on the timeline stands for frames; the numbers represent the number of frames:

Frames
Go to the beginning of the timeline. The shortcut is for this is pressing the home button on the numeric keypad.
This guitar pick-shaped object highlighted in the following screenshot is called the current time indicator icon. Moving this time indicator is another way to navigate through the timeline:

Current time indicator
The timeline is the entire length of your composition. Your workspace area is the length of your movie. This is also called the rendering area. When I hit the play button for previewing my movie, it happens within that space. This can be trimmed and edited. To trim your workspace area, perform the following steps:
- Move your time indicator to the desired spot on the timeline
- Press the letter N to activate the shortcut to trim the work area
There is usually more than one way to do something in After Effects. To manually trim your workspace, perform the following steps:
- Move your mouse to the beginning the timeline and hover over the blue bar. This is the start of your workspace area.
- Drag this bar to the right, to trim your work area.
You can drag either the start or the end or the workspace area. Trimming this shortens the duration of the comp. This is useful for previewing your movie or previewing a small section of your movie. Remember when you export or render your movie, this workspace needs to be trimmed, to reflect exactly what you want exported. The duration of the workspace is the only thing that will be exported or rendered:

Trimming the workspace area
You can edit the duration of your layers by trimming them. Trimming your layers will give you control when your layers appear in your movie:

Trimming layers
To trim your layer, perform the following steps:
- Move your time indicator to the desired spot on the timeline
- Press Alt + [ or Option + [ on macOS to activate the shortcut to trim your layer
To manually trim your layer, perform the following steps:
- Move your time indicator to the desired spot on the timeline.
- Bring your selection tool to the very beginning of the layer and hover over the start of the layer. You will see the trim layer icon represented by two arrows. (You must see this or your dragging you're layers, which is different to trimming them.) Use this to drag and trim your layer.
You can trim any type of layer using the preceding methods. This layer will be trimmed exactly where the time indicator is. Move your time indicator back and forth in the timeline across this trimmed layer. See how the layer appears where the image is trimmed to? This is how layers can appear across time.
You can further organize your timeline by adding information to the timeline. You can also create markers, notes, and metadata on your timeline. These markers can also be used to align layers to a point in the timeline. The following are the steps for creating a composition marker:
- Hit Shift and a number.
- Double-click that number to enter a note:

Composition markers
These markers and notes can be particularly helpful when organizing your project and writing notes from clients and team members.
Animating a property is essentially marking a parameter in time and adjusting that property further down the timeline. We create animation by creating at least two key frames. The steps to animate a property are simple. But you need to be sure you follow these steps each time. When you want to animate any property, you need to perform the following steps:
- First hit the stopwatch, which will automatically create a key frame for you.
- Move down the timeline, and change the Transform property to whatever you want it to be. That will automatically create a blue diamond key frame for you. But you have to be sure and press the stopwatch first.
After you have created key frames, you're free to move and adjust those key frames. Later, I will get into a lot more detail regarding adjusting key frames.
You can animate your scale parameter to make your layer change in scale over time. Follow these steps to begin your animation journey:
- Press the keyboard shortcut S for the scale parameter to come up.
- Indicate in the timeline where you want the animation to begin.
- Hit the stopwatch for scale.
- Page down to the right, getting closer to the end of this animation.
- Scrub the scale parameter. This will automatically create a blue diamond key frame.
Let's preview that. If I want to give my layer a little bit of blur, I'll hit the blur icon. Look in the timeline:

Motion blur
This is an effect that has to be turned on in two places. It has to be turned on in the timeline, just above the timeline. If you hit the preview button, you will see how it gives it a nice blur. That's how things move in real life. There is always some sort of blur when things move fast.
Zooming into the timeline
You can zoom into any point of the timeline with the button at the lower-center of the timeline. Or you can zoom into your timeline by moving the slider. If you look closely, you can you can see (F), which stands for frames:

Zooming into the slider
The timeline is measured with time codes. The F next to the numbers on the timeline stands for frames.
The timeline is always moving from left to right:
- Use the Page Up key as a shortcut to navigate forward in the timeline, frame by frame, and Page Down to navigate backward in the timeline, frame by frame.
- A shortcut for moving down one frame in the timeline is Page Down or Ctrl + the right arrow (on a PC) or Page Down or command + the right arrow (on macOS). You can also use the arrows in the preview panel:

Preview panel
The f on the timeline stands for frames; the numbers represent the number of frames:

Frames
Go to the beginning of the timeline. The shortcut is for this is pressing the home button on the numeric keypad.
This guitar pick-shaped object highlighted in the following screenshot is called the current time indicator icon. Moving this time indicator is another way to navigate through the timeline:

Current time indicator
The timeline is the entire length of your composition. Your workspace area is the length of your movie. This is also called the rendering area. When I hit the play button for previewing my movie, it happens within that space. This can be trimmed and edited. To trim your workspace area, perform the following steps:
- Move your time indicator to the desired spot on the timeline
- Press the letter N to activate the shortcut to trim the work area
There is usually more than one way to do something in After Effects. To manually trim your workspace, perform the following steps:
- Move your mouse to the beginning the timeline and hover over the blue bar. This is the start of your workspace area.
- Drag this bar to the right, to trim your work area.
You can drag either the start or the end or the workspace area. Trimming this shortens the duration of the comp. This is useful for previewing your movie or previewing a small section of your movie. Remember when you export or render your movie, this workspace needs to be trimmed, to reflect exactly what you want exported. The duration of the workspace is the only thing that will be exported or rendered:

Trimming the workspace area
You can edit the duration of your layers by trimming them. Trimming your layers will give you control when your layers appear in your movie:

Trimming layers
To trim your layer, perform the following steps:
- Move your time indicator to the desired spot on the timeline
- Press Alt + [ or Option + [ on macOS to activate the shortcut to trim your layer
To manually trim your layer, perform the following steps:
- Move your time indicator to the desired spot on the timeline.
- Bring your selection tool to the very beginning of the layer and hover over the start of the layer. You will see the trim layer icon represented by two arrows. (You must see this or your dragging you're layers, which is different to trimming them.) Use this to drag and trim your layer.
You can trim any type of layer using the preceding methods. This layer will be trimmed exactly where the time indicator is. Move your time indicator back and forth in the timeline across this trimmed layer. See how the layer appears where the image is trimmed to? This is how layers can appear across time.
You can further organize your timeline by adding information to the timeline. You can also create markers, notes, and metadata on your timeline. These markers can also be used to align layers to a point in the timeline. The following are the steps for creating a composition marker:
- Hit Shift and a number.
- Double-click that number to enter a note:

Composition markers
These markers and notes can be particularly helpful when organizing your project and writing notes from clients and team members.
Animating a property is essentially marking a parameter in time and adjusting that property further down the timeline. We create animation by creating at least two key frames. The steps to animate a property are simple. But you need to be sure you follow these steps each time. When you want to animate any property, you need to perform the following steps:
- First hit the stopwatch, which will automatically create a key frame for you.
- Move down the timeline, and change the Transform property to whatever you want it to be. That will automatically create a blue diamond key frame for you. But you have to be sure and press the stopwatch first.
After you have created key frames, you're free to move and adjust those key frames. Later, I will get into a lot more detail regarding adjusting key frames.
You can animate your scale parameter to make your layer change in scale over time. Follow these steps to begin your animation journey:
- Press the keyboard shortcut S for the scale parameter to come up.
- Indicate in the timeline where you want the animation to begin.
- Hit the stopwatch for scale.
- Page down to the right, getting closer to the end of this animation.
- Scrub the scale parameter. This will automatically create a blue diamond key frame.
Let's preview that. If I want to give my layer a little bit of blur, I'll hit the blur icon. Look in the timeline:

Motion blur
This is an effect that has to be turned on in two places. It has to be turned on in the timeline, just above the timeline. If you hit the preview button, you will see how it gives it a nice blur. That's how things move in real life. There is always some sort of blur when things move fast.
Navigating in the timeline
The timeline is always moving from left to right:
- Use the Page Up key as a shortcut to navigate forward in the timeline, frame by frame, and Page Down to navigate backward in the timeline, frame by frame.
- A shortcut for moving down one frame in the timeline is Page Down or Ctrl + the right arrow (on a PC) or Page Down or command + the right arrow (on macOS). You can also use the arrows in the preview panel:

Preview panel
The f on the timeline stands for frames; the numbers represent the number of frames:

Frames
Go to the beginning of the timeline. The shortcut is for this is pressing the home button on the numeric keypad.
Current time indicator
This guitar pick-shaped object highlighted in the following screenshot is called the current time indicator icon. Moving this time indicator is another way to navigate through the timeline:

Current time indicator
The workspace area
The timeline is the entire length of your composition. Your workspace area is the length of your movie. This is also called the rendering area. When I hit the play button for previewing my movie, it happens within that space. This can be trimmed and edited. To trim your workspace area, perform the following steps:
- Move your time indicator to the desired spot on the timeline
- Press the letter N to activate the shortcut to trim the work area
There is usually more than one way to do something in After Effects. To manually trim your workspace, perform the following steps:
- Move your mouse to the beginning the timeline and hover over the blue bar. This is the start of your workspace area.
- Drag this bar to the right, to trim your work area.
You can drag either the start or the end or the workspace area. Trimming this shortens the duration of the comp. This is useful for previewing your movie or previewing a small section of your movie. Remember when you export or render your movie, this workspace needs to be trimmed, to reflect exactly what you want exported. The duration of the workspace is the only thing that will be exported or rendered:

Trimming the workspace area
Trimming layers
You can edit the duration of your layers by trimming them. Trimming your layers will give you control when your layers appear in your movie:

Trimming layers
To trim your layer, perform the following steps:
- Move your time indicator to the desired spot on the timeline
- Press Alt + [ or Option + [ on macOS to activate the shortcut to trim your layer
To manually trim your layer, perform the following steps:
- Move your time indicator to the desired spot on the timeline.
- Bring your selection tool to the very beginning of the layer and hover over the start of the layer. You will see the trim layer icon represented by two arrows. (You must see this or your dragging you're layers, which is different to trimming them.) Use this to drag and trim your layer.
You can trim any type of layer using the preceding methods. This layer will be trimmed exactly where the time indicator is. Move your time indicator back and forth in the timeline across this trimmed layer. See how the layer appears where the image is trimmed to? This is how layers can appear across time.
Creating composition markers on your timeline
You can further organize your timeline by adding information to the timeline. You can also create markers, notes, and metadata on your timeline. These markers can also be used to align layers to a point in the timeline. The following are the steps for creating a composition marker:
- Hit Shift and a number.
- Double-click that number to enter a note:

Composition markers
These markers and notes can be particularly helpful when organizing your project and writing notes from clients and team members.
Animating a property
Animating a property is essentially marking a parameter in time and adjusting that property further down the timeline. We create animation by creating at least two key frames. The steps to animate a property are simple. But you need to be sure you follow these steps each time. When you want to animate any property, you need to perform the following steps:
- First hit the stopwatch, which will automatically create a key frame for you.
- Move down the timeline, and change the Transform property to whatever you want it to be. That will automatically create a blue diamond key frame for you. But you have to be sure and press the stopwatch first.
After you have created key frames, you're free to move and adjust those key frames. Later, I will get into a lot more detail regarding adjusting key frames.
Animating scale
You can animate your scale parameter to make your layer change in scale over time. Follow these steps to begin your animation journey:
- Press the keyboard shortcut S for the scale parameter to come up.
- Indicate in the timeline where you want the animation to begin.
- Hit the stopwatch for scale.
- Page down to the right, getting closer to the end of this animation.
- Scrub the scale parameter. This will automatically create a blue diamond key frame.
Let's preview that. If I want to give my layer a little bit of blur, I'll hit the blur icon. Look in the timeline:

Motion blur
This is an effect that has to be turned on in two places. It has to be turned on in the timeline, just above the timeline. If you hit the preview button, you will see how it gives it a nice blur. That's how things move in real life. There is always some sort of blur when things move fast.
Current time indicator
This guitar pick-shaped object highlighted in the following screenshot is called the current time indicator icon. Moving this time indicator is another way to navigate through the timeline:

Current time indicator
The workspace area
The timeline is the entire length of your composition. Your workspace area is the length of your movie. This is also called the rendering area. When I hit the play button for previewing my movie, it happens within that space. This can be trimmed and edited. To trim your workspace area, perform the following steps:
- Move your time indicator to the desired spot on the timeline
- Press the letter N to activate the shortcut to trim the work area
There is usually more than one way to do something in After Effects. To manually trim your workspace, perform the following steps:
- Move your mouse to the beginning the timeline and hover over the blue bar. This is the start of your workspace area.
- Drag this bar to the right, to trim your work area.
You can drag either the start or the end or the workspace area. Trimming this shortens the duration of the comp. This is useful for previewing your movie or previewing a small section of your movie. Remember when you export or render your movie, this workspace needs to be trimmed, to reflect exactly what you want exported. The duration of the workspace is the only thing that will be exported or rendered:

Trimming the workspace area
Trimming layers
You can edit the duration of your layers by trimming them. Trimming your layers will give you control when your layers appear in your movie:

Trimming layers
To trim your layer, perform the following steps:
- Move your time indicator to the desired spot on the timeline
- Press Alt + [ or Option + [ on macOS to activate the shortcut to trim your layer
To manually trim your layer, perform the following steps:
- Move your time indicator to the desired spot on the timeline.
- Bring your selection tool to the very beginning of the layer and hover over the start of the layer. You will see the trim layer icon represented by two arrows. (You must see this or your dragging you're layers, which is different to trimming them.) Use this to drag and trim your layer.
You can trim any type of layer using the preceding methods. This layer will be trimmed exactly where the time indicator is. Move your time indicator back and forth in the timeline across this trimmed layer. See how the layer appears where the image is trimmed to? This is how layers can appear across time.
Creating composition markers on your timeline
You can further organize your timeline by adding information to the timeline. You can also create markers, notes, and metadata on your timeline. These markers can also be used to align layers to a point in the timeline. The following are the steps for creating a composition marker:
- Hit Shift and a number.
- Double-click that number to enter a note:

Composition markers
These markers and notes can be particularly helpful when organizing your project and writing notes from clients and team members.
Animating a property
Animating a property is essentially marking a parameter in time and adjusting that property further down the timeline. We create animation by creating at least two key frames. The steps to animate a property are simple. But you need to be sure you follow these steps each time. When you want to animate any property, you need to perform the following steps:
- First hit the stopwatch, which will automatically create a key frame for you.
- Move down the timeline, and change the Transform property to whatever you want it to be. That will automatically create a blue diamond key frame for you. But you have to be sure and press the stopwatch first.
After you have created key frames, you're free to move and adjust those key frames. Later, I will get into a lot more detail regarding adjusting key frames.
Animating scale
You can animate your scale parameter to make your layer change in scale over time. Follow these steps to begin your animation journey:
- Press the keyboard shortcut S for the scale parameter to come up.
- Indicate in the timeline where you want the animation to begin.
- Hit the stopwatch for scale.
- Page down to the right, getting closer to the end of this animation.
- Scrub the scale parameter. This will automatically create a blue diamond key frame.
Let's preview that. If I want to give my layer a little bit of blur, I'll hit the blur icon. Look in the timeline:

Motion blur
This is an effect that has to be turned on in two places. It has to be turned on in the timeline, just above the timeline. If you hit the preview button, you will see how it gives it a nice blur. That's how things move in real life. There is always some sort of blur when things move fast.
The workspace area
The timeline is the entire length of your composition. Your workspace area is the length of your movie. This is also called the rendering area. When I hit the play button for previewing my movie, it happens within that space. This can be trimmed and edited. To trim your workspace area, perform the following steps:
- Move your time indicator to the desired spot on the timeline
- Press the letter N to activate the shortcut to trim the work area
There is usually more than one way to do something in After Effects. To manually trim your workspace, perform the following steps:
- Move your mouse to the beginning the timeline and hover over the blue bar. This is the start of your workspace area.
- Drag this bar to the right, to trim your work area.
You can drag either the start or the end or the workspace area. Trimming this shortens the duration of the comp. This is useful for previewing your movie or previewing a small section of your movie. Remember when you export or render your movie, this workspace needs to be trimmed, to reflect exactly what you want exported. The duration of the workspace is the only thing that will be exported or rendered:

Trimming the workspace area
Trimming layers
You can edit the duration of your layers by trimming them. Trimming your layers will give you control when your layers appear in your movie:

Trimming layers
To trim your layer, perform the following steps:
- Move your time indicator to the desired spot on the timeline
- Press Alt + [ or Option + [ on macOS to activate the shortcut to trim your layer
To manually trim your layer, perform the following steps:
- Move your time indicator to the desired spot on the timeline.
- Bring your selection tool to the very beginning of the layer and hover over the start of the layer. You will see the trim layer icon represented by two arrows. (You must see this or your dragging you're layers, which is different to trimming them.) Use this to drag and trim your layer.
You can trim any type of layer using the preceding methods. This layer will be trimmed exactly where the time indicator is. Move your time indicator back and forth in the timeline across this trimmed layer. See how the layer appears where the image is trimmed to? This is how layers can appear across time.
Creating composition markers on your timeline
You can further organize your timeline by adding information to the timeline. You can also create markers, notes, and metadata on your timeline. These markers can also be used to align layers to a point in the timeline. The following are the steps for creating a composition marker:
- Hit Shift and a number.
- Double-click that number to enter a note:

Composition markers
These markers and notes can be particularly helpful when organizing your project and writing notes from clients and team members.
Animating a property
Animating a property is essentially marking a parameter in time and adjusting that property further down the timeline. We create animation by creating at least two key frames. The steps to animate a property are simple. But you need to be sure you follow these steps each time. When you want to animate any property, you need to perform the following steps:
- First hit the stopwatch, which will automatically create a key frame for you.
- Move down the timeline, and change the Transform property to whatever you want it to be. That will automatically create a blue diamond key frame for you. But you have to be sure and press the stopwatch first.
After you have created key frames, you're free to move and adjust those key frames. Later, I will get into a lot more detail regarding adjusting key frames.
Animating scale
You can animate your scale parameter to make your layer change in scale over time. Follow these steps to begin your animation journey:
- Press the keyboard shortcut S for the scale parameter to come up.
- Indicate in the timeline where you want the animation to begin.
- Hit the stopwatch for scale.
- Page down to the right, getting closer to the end of this animation.
- Scrub the scale parameter. This will automatically create a blue diamond key frame.
Let's preview that. If I want to give my layer a little bit of blur, I'll hit the blur icon. Look in the timeline:

Motion blur
This is an effect that has to be turned on in two places. It has to be turned on in the timeline, just above the timeline. If you hit the preview button, you will see how it gives it a nice blur. That's how things move in real life. There is always some sort of blur when things move fast.
Trimming layers
You can edit the duration of your layers by trimming them. Trimming your layers will give you control when your layers appear in your movie:

Trimming layers
To trim your layer, perform the following steps:
- Move your time indicator to the desired spot on the timeline
- Press Alt + [ or Option + [ on macOS to activate the shortcut to trim your layer
To manually trim your layer, perform the following steps:
- Move your time indicator to the desired spot on the timeline.
- Bring your selection tool to the very beginning of the layer and hover over the start of the layer. You will see the trim layer icon represented by two arrows. (You must see this or your dragging you're layers, which is different to trimming them.) Use this to drag and trim your layer.
You can trim any type of layer using the preceding methods. This layer will be trimmed exactly where the time indicator is. Move your time indicator back and forth in the timeline across this trimmed layer. See how the layer appears where the image is trimmed to? This is how layers can appear across time.
Creating composition markers on your timeline
You can further organize your timeline by adding information to the timeline. You can also create markers, notes, and metadata on your timeline. These markers can also be used to align layers to a point in the timeline. The following are the steps for creating a composition marker:
- Hit Shift and a number.
- Double-click that number to enter a note:

Composition markers
These markers and notes can be particularly helpful when organizing your project and writing notes from clients and team members.
Animating a property
Animating a property is essentially marking a parameter in time and adjusting that property further down the timeline. We create animation by creating at least two key frames. The steps to animate a property are simple. But you need to be sure you follow these steps each time. When you want to animate any property, you need to perform the following steps:
- First hit the stopwatch, which will automatically create a key frame for you.
- Move down the timeline, and change the Transform property to whatever you want it to be. That will automatically create a blue diamond key frame for you. But you have to be sure and press the stopwatch first.
After you have created key frames, you're free to move and adjust those key frames. Later, I will get into a lot more detail regarding adjusting key frames.
Animating scale
You can animate your scale parameter to make your layer change in scale over time. Follow these steps to begin your animation journey:
- Press the keyboard shortcut S for the scale parameter to come up.
- Indicate in the timeline where you want the animation to begin.
- Hit the stopwatch for scale.
- Page down to the right, getting closer to the end of this animation.
- Scrub the scale parameter. This will automatically create a blue diamond key frame.
Let's preview that. If I want to give my layer a little bit of blur, I'll hit the blur icon. Look in the timeline:

Motion blur
This is an effect that has to be turned on in two places. It has to be turned on in the timeline, just above the timeline. If you hit the preview button, you will see how it gives it a nice blur. That's how things move in real life. There is always some sort of blur when things move fast.
Creating composition markers on your timeline
You can further organize your timeline by adding information to the timeline. You can also create markers, notes, and metadata on your timeline. These markers can also be used to align layers to a point in the timeline. The following are the steps for creating a composition marker:
- Hit Shift and a number.
- Double-click that number to enter a note:

Composition markers
These markers and notes can be particularly helpful when organizing your project and writing notes from clients and team members.
Animating a property
Animating a property is essentially marking a parameter in time and adjusting that property further down the timeline. We create animation by creating at least two key frames. The steps to animate a property are simple. But you need to be sure you follow these steps each time. When you want to animate any property, you need to perform the following steps:
- First hit the stopwatch, which will automatically create a key frame for you.
- Move down the timeline, and change the Transform property to whatever you want it to be. That will automatically create a blue diamond key frame for you. But you have to be sure and press the stopwatch first.
After you have created key frames, you're free to move and adjust those key frames. Later, I will get into a lot more detail regarding adjusting key frames.
Animating scale
You can animate your scale parameter to make your layer change in scale over time. Follow these steps to begin your animation journey:
- Press the keyboard shortcut S for the scale parameter to come up.
- Indicate in the timeline where you want the animation to begin.
- Hit the stopwatch for scale.
- Page down to the right, getting closer to the end of this animation.
- Scrub the scale parameter. This will automatically create a blue diamond key frame.
Let's preview that. If I want to give my layer a little bit of blur, I'll hit the blur icon. Look in the timeline:

Motion blur
This is an effect that has to be turned on in two places. It has to be turned on in the timeline, just above the timeline. If you hit the preview button, you will see how it gives it a nice blur. That's how things move in real life. There is always some sort of blur when things move fast.
Animating a property
Animating a property is essentially marking a parameter in time and adjusting that property further down the timeline. We create animation by creating at least two key frames. The steps to animate a property are simple. But you need to be sure you follow these steps each time. When you want to animate any property, you need to perform the following steps:
- First hit the stopwatch, which will automatically create a key frame for you.
- Move down the timeline, and change the Transform property to whatever you want it to be. That will automatically create a blue diamond key frame for you. But you have to be sure and press the stopwatch first.
After you have created key frames, you're free to move and adjust those key frames. Later, I will get into a lot more detail regarding adjusting key frames.
Animating scale
You can animate your scale parameter to make your layer change in scale over time. Follow these steps to begin your animation journey:
- Press the keyboard shortcut S for the scale parameter to come up.
- Indicate in the timeline where you want the animation to begin.
- Hit the stopwatch for scale.
- Page down to the right, getting closer to the end of this animation.
- Scrub the scale parameter. This will automatically create a blue diamond key frame.
Let's preview that. If I want to give my layer a little bit of blur, I'll hit the blur icon. Look in the timeline:

Motion blur
This is an effect that has to be turned on in two places. It has to be turned on in the timeline, just above the timeline. If you hit the preview button, you will see how it gives it a nice blur. That's how things move in real life. There is always some sort of blur when things move fast.
Animating scale
You can animate your scale parameter to make your layer change in scale over time. Follow these steps to begin your animation journey:
- Press the keyboard shortcut S for the scale parameter to come up.
- Indicate in the timeline where you want the animation to begin.
- Hit the stopwatch for scale.
- Page down to the right, getting closer to the end of this animation.
- Scrub the scale parameter. This will automatically create a blue diamond key frame.
Let's preview that. If I want to give my layer a little bit of blur, I'll hit the blur icon. Look in the timeline:

Motion blur
This is an effect that has to be turned on in two places. It has to be turned on in the timeline, just above the timeline. If you hit the preview button, you will see how it gives it a nice blur. That's how things move in real life. There is always some sort of blur when things move fast.
Solid layers and masking
Solid layers are basic colored layers. These can be used to give your video a solid color in the background. We can also use solid layers to create more complex masks. Let's spend more time with basic solid layers. Solid layers are simple color layers that can be edited with masking tools. You will learn how to create solids, edit them, and mask them:
- Create a new comp.
- Make the composition dimensions 1,920 x 1,080.
- Name this comp
solids test. - Move this composition into the main
compfolder. - Create a basic solid layer, Layer | New | Solid, or you can hit the shortcut Ctrl + Y or command + Y on macOS.
- Click on the color box and change the color to yellow:

Solid settings
Good job! You have created your first solid layer. Notice that when you create a solid layer, After Effects creates a folder named solids in your project window. Whenever you create a new solid, it will automatically go into that folder. Right now, you have only one layer in your comp. It gets complicated when there are many layers in your composition. Let's create more layers to get used to working with more than one layer:
- Create another solid, or use a shortcut Ctrl + Y or command+ Y for macOS.
- Make this solid orange.
- Move this new orange layer to the lower-right corner.
- Create another solid, or use the shortcut Ctrl + Y or command + Y for macOS.
- Make this solid blue. Move this layer to the upper-left corner.
Remember that the stacking order is really important in After Effects. You will see what is on top first, followed by what is on the bottom, which is on the background. This composition is created with layers stacked on top of one another. You can see what's underneath that layer. You can see there are other things in the background. There is a solid underneath that layer. At this point, you should see all your different-colored layers: some in front of the others, and some at the back. This is a good visual representation of the stacking order. Look in the timeline; you can see how the stacking order correlates to what you see in your composition:

Stacking order
Let's look at the transparency parameters for our solid layers. You can access this by pressing the letter T. Scrub this parameter to reduce the opacity, and then lower the opacity. Notice you can still see the other layers through it:
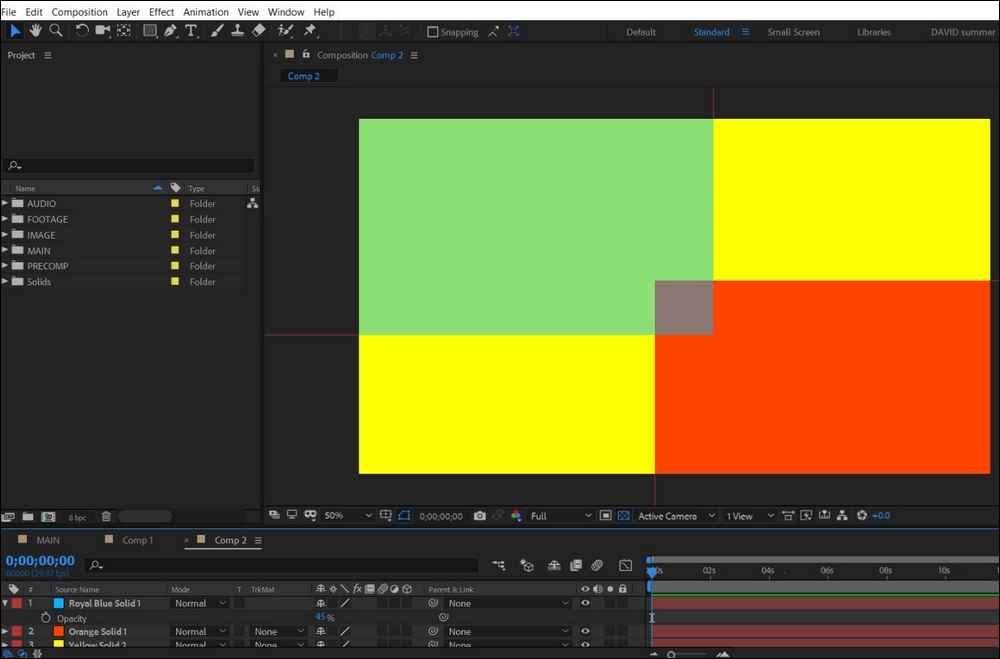
Transparancy
Now that you have learned how to change your layer opacity, let's learn how to duplicate layers.
Duplicating layers
In After Effects, duplicating your layers will create an exact copy of your layers and any key frames and effects you have on them. To duplicate your layer, perform the following steps:
- First, select the layer, duplicating your latest layer
- Press Ctrl + D, or command + D for macOS
- To change the setting for your solid layer, press Shift + Ctrl + Y or Shift + command + Y for macOS
Note
Your shortcut may be different if you have macOS. Refer to tab at the right of the After Effects panels, | Help | Keyboard Shortcuts...:

Keyboard shortcuts
If you find anything you're doing a lot, find the shortcut for it. Learning these shortcuts will greatly speed up your workflow in After Effects.
Identifying and turning off your layers
When you get more advanced with After Effects, you will have many layers in your timeline. One way to identify a layer is to turn off all the other layers. Another reason to temporarily turn off a layer is to see how your composition looks without that layer. These eyeball icons are for turning off your layers:

Eyeball icon
Remember when the eyeball is visible, it means that the layer is visible. When it's not visible, the layer will not be seen in the composition.
Solo layers
Soloing your layer can be a life-saver. This will help you temporarily show one single layer or many single layers at a time. What makes this switch so important is that it's easy to turn on and off without changing any of your original layers. It's also easy to tell which layers you have soloed, making it easy to turn off the solo switch when you need to. To activate the solo switch, simply turn on the solo button. If you solo something, you will see the grid behind it, and this grid means that it is a transparent background. Turn off the solo switch to return the layer to its original condition. This becomes really helpful when you have a lot of layers and you want to locate and identify and work with just one layer; you can solo it:

Solo layer
Understanding how to solo your layers will help you quickly turn on and off hundreds of layers with no fear of ruining anything. Try practicing with the solo button on a layer.
Tagging your layers
Tagging your layers can be especially helpful for identifying and organizing your layers in the timeline. You can change these tags to be any color you want. When you need to quickly edit something, sometimes you can select it, but sometimes it can be really hard to find it. Identifying layers is an important part of After Effects. When you have a very complicated project, it's very important to be able to identify your layers. This is when naming and tagging your layers correctly becomes very important. Organization is very important:

Tags
In After Effects, your composition window is like a stage. You can see images outside the frame or stage. You can also drag things into or out of the main stage area. This is helpful when you want to start your animation off-screen and end up on-screen.
Looking at transform properties
Your layers have transform properties, which are the heart and soul of animation. Anything that has a stopwatch next to it can be animated. All these parameters can be overwhelming at first glance. Let's go over each property shortcut to familiarize yourself with them all. Twirl word transform down to see all the properties:
- Anchor Point: The shortcut is Y
- Position: The shortcut is P
- Scale: The shortcut is S
- Rotation: The shortcut is R
- Opacity: The shortcut is T
- Reveal all key frames: The shortcut is U
Pressing any of these keyboard shortcuts while your layer is selected will bring up that parameter:

Transform properties
All these transform properties can be animated across time. All such properties appear with the icon of a stopwatch, which indicates the feature of animating them in the timeline.
Rulers and guides
After Effects comes with different guides you can use to create more precise alignments of your objects. If you look at the top-right of your tool panel, you can enable Snapping:

Snapping
This will make your objects snap to your guides. In the Guides section, you will find a variety of guides and grids to go beyond the guesswork of lining up your object in After Effects. The guide Title/Action Safe is used for video monitors. These guides can be accessed at the bottom of the composition window by clicking the grid icon:

Guides
If you choose the Rulers option, you have access to guides that you can drag across your composition and align objects to the guides:

Custom guides
Guides can be a great help to layout your composition and arrange text precisely.
Duplicating layers
In After Effects, duplicating your layers will create an exact copy of your layers and any key frames and effects you have on them. To duplicate your layer, perform the following steps:
- First, select the layer, duplicating your latest layer
- Press Ctrl + D, or command + D for macOS
- To change the setting for your solid layer, press Shift + Ctrl + Y or Shift + command + Y for macOS
Note
Your shortcut may be different if you have macOS. Refer to tab at the right of the After Effects panels, | Help | Keyboard Shortcuts...:

Keyboard shortcuts
If you find anything you're doing a lot, find the shortcut for it. Learning these shortcuts will greatly speed up your workflow in After Effects.
Identifying and turning off your layers
When you get more advanced with After Effects, you will have many layers in your timeline. One way to identify a layer is to turn off all the other layers. Another reason to temporarily turn off a layer is to see how your composition looks without that layer. These eyeball icons are for turning off your layers:

Eyeball icon
Remember when the eyeball is visible, it means that the layer is visible. When it's not visible, the layer will not be seen in the composition.
Solo layers
Soloing your layer can be a life-saver. This will help you temporarily show one single layer or many single layers at a time. What makes this switch so important is that it's easy to turn on and off without changing any of your original layers. It's also easy to tell which layers you have soloed, making it easy to turn off the solo switch when you need to. To activate the solo switch, simply turn on the solo button. If you solo something, you will see the grid behind it, and this grid means that it is a transparent background. Turn off the solo switch to return the layer to its original condition. This becomes really helpful when you have a lot of layers and you want to locate and identify and work with just one layer; you can solo it:

Solo layer
Understanding how to solo your layers will help you quickly turn on and off hundreds of layers with no fear of ruining anything. Try practicing with the solo button on a layer.
Tagging your layers
Tagging your layers can be especially helpful for identifying and organizing your layers in the timeline. You can change these tags to be any color you want. When you need to quickly edit something, sometimes you can select it, but sometimes it can be really hard to find it. Identifying layers is an important part of After Effects. When you have a very complicated project, it's very important to be able to identify your layers. This is when naming and tagging your layers correctly becomes very important. Organization is very important:

Tags
In After Effects, your composition window is like a stage. You can see images outside the frame or stage. You can also drag things into or out of the main stage area. This is helpful when you want to start your animation off-screen and end up on-screen.
Looking at transform properties
Your layers have transform properties, which are the heart and soul of animation. Anything that has a stopwatch next to it can be animated. All these parameters can be overwhelming at first glance. Let's go over each property shortcut to familiarize yourself with them all. Twirl word transform down to see all the properties:
- Anchor Point: The shortcut is Y
- Position: The shortcut is P
- Scale: The shortcut is S
- Rotation: The shortcut is R
- Opacity: The shortcut is T
- Reveal all key frames: The shortcut is U
Pressing any of these keyboard shortcuts while your layer is selected will bring up that parameter:

Transform properties
All these transform properties can be animated across time. All such properties appear with the icon of a stopwatch, which indicates the feature of animating them in the timeline.
Rulers and guides
After Effects comes with different guides you can use to create more precise alignments of your objects. If you look at the top-right of your tool panel, you can enable Snapping:

Snapping
This will make your objects snap to your guides. In the Guides section, you will find a variety of guides and grids to go beyond the guesswork of lining up your object in After Effects. The guide Title/Action Safe is used for video monitors. These guides can be accessed at the bottom of the composition window by clicking the grid icon:

Guides
If you choose the Rulers option, you have access to guides that you can drag across your composition and align objects to the guides:

Custom guides
Guides can be a great help to layout your composition and arrange text precisely.
Identifying and turning off your layers
When you get more advanced with After Effects, you will have many layers in your timeline. One way to identify a layer is to turn off all the other layers. Another reason to temporarily turn off a layer is to see how your composition looks without that layer. These eyeball icons are for turning off your layers:

Eyeball icon
Remember when the eyeball is visible, it means that the layer is visible. When it's not visible, the layer will not be seen in the composition.
Solo layers
Soloing your layer can be a life-saver. This will help you temporarily show one single layer or many single layers at a time. What makes this switch so important is that it's easy to turn on and off without changing any of your original layers. It's also easy to tell which layers you have soloed, making it easy to turn off the solo switch when you need to. To activate the solo switch, simply turn on the solo button. If you solo something, you will see the grid behind it, and this grid means that it is a transparent background. Turn off the solo switch to return the layer to its original condition. This becomes really helpful when you have a lot of layers and you want to locate and identify and work with just one layer; you can solo it:

Solo layer
Understanding how to solo your layers will help you quickly turn on and off hundreds of layers with no fear of ruining anything. Try practicing with the solo button on a layer.
Tagging your layers
Tagging your layers can be especially helpful for identifying and organizing your layers in the timeline. You can change these tags to be any color you want. When you need to quickly edit something, sometimes you can select it, but sometimes it can be really hard to find it. Identifying layers is an important part of After Effects. When you have a very complicated project, it's very important to be able to identify your layers. This is when naming and tagging your layers correctly becomes very important. Organization is very important:

Tags
In After Effects, your composition window is like a stage. You can see images outside the frame or stage. You can also drag things into or out of the main stage area. This is helpful when you want to start your animation off-screen and end up on-screen.
Looking at transform properties
Your layers have transform properties, which are the heart and soul of animation. Anything that has a stopwatch next to it can be animated. All these parameters can be overwhelming at first glance. Let's go over each property shortcut to familiarize yourself with them all. Twirl word transform down to see all the properties:
- Anchor Point: The shortcut is Y
- Position: The shortcut is P
- Scale: The shortcut is S
- Rotation: The shortcut is R
- Opacity: The shortcut is T
- Reveal all key frames: The shortcut is U
Pressing any of these keyboard shortcuts while your layer is selected will bring up that parameter:

Transform properties
All these transform properties can be animated across time. All such properties appear with the icon of a stopwatch, which indicates the feature of animating them in the timeline.
Rulers and guides
After Effects comes with different guides you can use to create more precise alignments of your objects. If you look at the top-right of your tool panel, you can enable Snapping:

Snapping
This will make your objects snap to your guides. In the Guides section, you will find a variety of guides and grids to go beyond the guesswork of lining up your object in After Effects. The guide Title/Action Safe is used for video monitors. These guides can be accessed at the bottom of the composition window by clicking the grid icon:

Guides
If you choose the Rulers option, you have access to guides that you can drag across your composition and align objects to the guides:

Custom guides
Guides can be a great help to layout your composition and arrange text precisely.
Solo layers
Soloing your layer can be a life-saver. This will help you temporarily show one single layer or many single layers at a time. What makes this switch so important is that it's easy to turn on and off without changing any of your original layers. It's also easy to tell which layers you have soloed, making it easy to turn off the solo switch when you need to. To activate the solo switch, simply turn on the solo button. If you solo something, you will see the grid behind it, and this grid means that it is a transparent background. Turn off the solo switch to return the layer to its original condition. This becomes really helpful when you have a lot of layers and you want to locate and identify and work with just one layer; you can solo it:

Solo layer
Understanding how to solo your layers will help you quickly turn on and off hundreds of layers with no fear of ruining anything. Try practicing with the solo button on a layer.
Tagging your layers
Tagging your layers can be especially helpful for identifying and organizing your layers in the timeline. You can change these tags to be any color you want. When you need to quickly edit something, sometimes you can select it, but sometimes it can be really hard to find it. Identifying layers is an important part of After Effects. When you have a very complicated project, it's very important to be able to identify your layers. This is when naming and tagging your layers correctly becomes very important. Organization is very important:

Tags
In After Effects, your composition window is like a stage. You can see images outside the frame or stage. You can also drag things into or out of the main stage area. This is helpful when you want to start your animation off-screen and end up on-screen.
Looking at transform properties
Your layers have transform properties, which are the heart and soul of animation. Anything that has a stopwatch next to it can be animated. All these parameters can be overwhelming at first glance. Let's go over each property shortcut to familiarize yourself with them all. Twirl word transform down to see all the properties:
- Anchor Point: The shortcut is Y
- Position: The shortcut is P
- Scale: The shortcut is S
- Rotation: The shortcut is R
- Opacity: The shortcut is T
- Reveal all key frames: The shortcut is U
Pressing any of these keyboard shortcuts while your layer is selected will bring up that parameter:

Transform properties
All these transform properties can be animated across time. All such properties appear with the icon of a stopwatch, which indicates the feature of animating them in the timeline.
Rulers and guides
After Effects comes with different guides you can use to create more precise alignments of your objects. If you look at the top-right of your tool panel, you can enable Snapping:

Snapping
This will make your objects snap to your guides. In the Guides section, you will find a variety of guides and grids to go beyond the guesswork of lining up your object in After Effects. The guide Title/Action Safe is used for video monitors. These guides can be accessed at the bottom of the composition window by clicking the grid icon:

Guides
If you choose the Rulers option, you have access to guides that you can drag across your composition and align objects to the guides:

Custom guides
Guides can be a great help to layout your composition and arrange text precisely.
Tagging your layers
Tagging your layers can be especially helpful for identifying and organizing your layers in the timeline. You can change these tags to be any color you want. When you need to quickly edit something, sometimes you can select it, but sometimes it can be really hard to find it. Identifying layers is an important part of After Effects. When you have a very complicated project, it's very important to be able to identify your layers. This is when naming and tagging your layers correctly becomes very important. Organization is very important:

Tags
In After Effects, your composition window is like a stage. You can see images outside the frame or stage. You can also drag things into or out of the main stage area. This is helpful when you want to start your animation off-screen and end up on-screen.
Looking at transform properties
Your layers have transform properties, which are the heart and soul of animation. Anything that has a stopwatch next to it can be animated. All these parameters can be overwhelming at first glance. Let's go over each property shortcut to familiarize yourself with them all. Twirl word transform down to see all the properties:
- Anchor Point: The shortcut is Y
- Position: The shortcut is P
- Scale: The shortcut is S
- Rotation: The shortcut is R
- Opacity: The shortcut is T
- Reveal all key frames: The shortcut is U
Pressing any of these keyboard shortcuts while your layer is selected will bring up that parameter:

Transform properties
All these transform properties can be animated across time. All such properties appear with the icon of a stopwatch, which indicates the feature of animating them in the timeline.
Rulers and guides
After Effects comes with different guides you can use to create more precise alignments of your objects. If you look at the top-right of your tool panel, you can enable Snapping:

Snapping
This will make your objects snap to your guides. In the Guides section, you will find a variety of guides and grids to go beyond the guesswork of lining up your object in After Effects. The guide Title/Action Safe is used for video monitors. These guides can be accessed at the bottom of the composition window by clicking the grid icon:

Guides
If you choose the Rulers option, you have access to guides that you can drag across your composition and align objects to the guides:

Custom guides
Guides can be a great help to layout your composition and arrange text precisely.
Looking at transform properties
Your layers have transform properties, which are the heart and soul of animation. Anything that has a stopwatch next to it can be animated. All these parameters can be overwhelming at first glance. Let's go over each property shortcut to familiarize yourself with them all. Twirl word transform down to see all the properties:
- Anchor Point: The shortcut is Y
- Position: The shortcut is P
- Scale: The shortcut is S
- Rotation: The shortcut is R
- Opacity: The shortcut is T
- Reveal all key frames: The shortcut is U
Pressing any of these keyboard shortcuts while your layer is selected will bring up that parameter:

Transform properties
All these transform properties can be animated across time. All such properties appear with the icon of a stopwatch, which indicates the feature of animating them in the timeline.
Rulers and guides
After Effects comes with different guides you can use to create more precise alignments of your objects. If you look at the top-right of your tool panel, you can enable Snapping:

Snapping
This will make your objects snap to your guides. In the Guides section, you will find a variety of guides and grids to go beyond the guesswork of lining up your object in After Effects. The guide Title/Action Safe is used for video monitors. These guides can be accessed at the bottom of the composition window by clicking the grid icon:

Guides
If you choose the Rulers option, you have access to guides that you can drag across your composition and align objects to the guides:

Custom guides
Guides can be a great help to layout your composition and arrange text precisely.
Rulers and guides
After Effects comes with different guides you can use to create more precise alignments of your objects. If you look at the top-right of your tool panel, you can enable Snapping:

Snapping
This will make your objects snap to your guides. In the Guides section, you will find a variety of guides and grids to go beyond the guesswork of lining up your object in After Effects. The guide Title/Action Safe is used for video monitors. These guides can be accessed at the bottom of the composition window by clicking the grid icon:

Guides
If you choose the Rulers option, you have access to guides that you can drag across your composition and align objects to the guides:

Custom guides
Guides can be a great help to layout your composition and arrange text precisely.
Editing masks
In this section, we are going to discuss masking and editing layers and solids. We are going to mask off or cut out parts of the solids to create a shape. The following steps will illustrate how to do it:
- Create a 1,920 x 1,080 comp.
- Create a new solid layer layer, | New solid, or Ctrl + Y or command + Y for macOS.
- Make the solid yellow.
Look at the top-right of your tool bar. Under the Rectangle Tool, you have a variety of masking shapes to edit your solid. These are the masking tools that shape with After Effects. You can choose a Rectangle Tool, a Rounded Rectangle Tool, an Ellipse Tool, a Polygon Tool, or a Star Tool:

Mask tools
We are going to practice using an ellipse tool to cut out our shape:
- Choose Ellipse Tool
- Choose where you want to create your shape
- Click and drag
When dragging these tools, the mask may stretch. If you don't want that, hit Shift while dragging. That will create a perfect shape.
Editing your mask shape
Click once on one of the squares in the bounding box, and insert an image of the masking solid:

Selecting a single point
The square will fill and you will get bezier handles. This enables you to edit one single mask point:

Editing a single point
To edit the entire mask:
- Double-click one of these squares.
- You will get a square bounding box.
- Drag this bounding box to edit all the points at the same time:

Masking a bounding box
This is masking off the rest of the solid. Under the properties for masking, there is a mask column where you can choose other parameters. This will hide your mask or give you different masking options.
Editing masks
You can take these basic shapes and make other more complex shapes. You can also change the color of the mask by clicking on the color box in the mask. After Effects also has other parameters that you can work with. Clicking on the mask gives you other parameters that can be edited. You can edit this mask by adjusting the feathering parameter. Adjusting the feathering amount means the outside of the mask will be feathered. Of course, the feathering is able to be key-framed. You can expand the mask as well. The expansion can also go the opposite direction, so you'll actually be eating into the mask in the negative direction. I'd like for you to experiment with all these mask-editing parameters.
Using the subtract-masking feature
Masking is a very powerful tool used for roto scoping and creating shapes. You have control over how your mask will behave, and you can choose to add or subtract from your mask shape. We will focus on the subtract feature:
- Drag another shape on top of the current solid shape.
- Find the new mask parameter on that solid in the lower-left side of the timeline.
- To the right of the mask is a tab called Add with an arrow pointing down. Click on that.
- Choose Subtract from that list:

Subtract mask
See how it cuts that shape out? This is how you can create interesting shapes in After Effects. Have a lot of fun with this; there's so much you can do with it—the sky's the limit! Masking becomes very important when you need to cut layers, videos, images, and so on. Think of layers as scissors to cut out what you don't want to see. I'd like for you guys to play with these shapes. Start editing these mask points. You can create complex interesting shapes with these techniques.
Editing your mask shape
Click once on one of the squares in the bounding box, and insert an image of the masking solid:

Selecting a single point
The square will fill and you will get bezier handles. This enables you to edit one single mask point:

Editing a single point
To edit the entire mask:
- Double-click one of these squares.
- You will get a square bounding box.
- Drag this bounding box to edit all the points at the same time:

Masking a bounding box
This is masking off the rest of the solid. Under the properties for masking, there is a mask column where you can choose other parameters. This will hide your mask or give you different masking options.
Editing masks
You can take these basic shapes and make other more complex shapes. You can also change the color of the mask by clicking on the color box in the mask. After Effects also has other parameters that you can work with. Clicking on the mask gives you other parameters that can be edited. You can edit this mask by adjusting the feathering parameter. Adjusting the feathering amount means the outside of the mask will be feathered. Of course, the feathering is able to be key-framed. You can expand the mask as well. The expansion can also go the opposite direction, so you'll actually be eating into the mask in the negative direction. I'd like for you to experiment with all these mask-editing parameters.
Using the subtract-masking feature
Masking is a very powerful tool used for roto scoping and creating shapes. You have control over how your mask will behave, and you can choose to add or subtract from your mask shape. We will focus on the subtract feature:
- Drag another shape on top of the current solid shape.
- Find the new mask parameter on that solid in the lower-left side of the timeline.
- To the right of the mask is a tab called Add with an arrow pointing down. Click on that.
- Choose Subtract from that list:

Subtract mask
See how it cuts that shape out? This is how you can create interesting shapes in After Effects. Have a lot of fun with this; there's so much you can do with it—the sky's the limit! Masking becomes very important when you need to cut layers, videos, images, and so on. Think of layers as scissors to cut out what you don't want to see. I'd like for you guys to play with these shapes. Start editing these mask points. You can create complex interesting shapes with these techniques.
Editing masks
You can take these basic shapes and make other more complex shapes. You can also change the color of the mask by clicking on the color box in the mask. After Effects also has other parameters that you can work with. Clicking on the mask gives you other parameters that can be edited. You can edit this mask by adjusting the feathering parameter. Adjusting the feathering amount means the outside of the mask will be feathered. Of course, the feathering is able to be key-framed. You can expand the mask as well. The expansion can also go the opposite direction, so you'll actually be eating into the mask in the negative direction. I'd like for you to experiment with all these mask-editing parameters.
Using the subtract-masking feature
Masking is a very powerful tool used for roto scoping and creating shapes. You have control over how your mask will behave, and you can choose to add or subtract from your mask shape. We will focus on the subtract feature:
- Drag another shape on top of the current solid shape.
- Find the new mask parameter on that solid in the lower-left side of the timeline.
- To the right of the mask is a tab called Add with an arrow pointing down. Click on that.
- Choose Subtract from that list:

Subtract mask
See how it cuts that shape out? This is how you can create interesting shapes in After Effects. Have a lot of fun with this; there's so much you can do with it—the sky's the limit! Masking becomes very important when you need to cut layers, videos, images, and so on. Think of layers as scissors to cut out what you don't want to see. I'd like for you guys to play with these shapes. Start editing these mask points. You can create complex interesting shapes with these techniques.
Using the subtract-masking feature
Masking is a very powerful tool used for roto scoping and creating shapes. You have control over how your mask will behave, and you can choose to add or subtract from your mask shape. We will focus on the subtract feature:
- Drag another shape on top of the current solid shape.
- Find the new mask parameter on that solid in the lower-left side of the timeline.
- To the right of the mask is a tab called Add with an arrow pointing down. Click on that.
- Choose Subtract from that list:

Subtract mask
See how it cuts that shape out? This is how you can create interesting shapes in After Effects. Have a lot of fun with this; there's so much you can do with it—the sky's the limit! Masking becomes very important when you need to cut layers, videos, images, and so on. Think of layers as scissors to cut out what you don't want to see. I'd like for you guys to play with these shapes. Start editing these mask points. You can create complex interesting shapes with these techniques.
Creating an animated slideshow
After all the knowledge we have acquired so far, it is imperative that we put it to use. Let's make a simple animated slideshow, using the tips and tricks we have learned so far in this chapter. Follow these steps:
- Create a 1,920 x 1,080 comp and call it
slideshow. Make the comp 20 seconds long. - Move into the main
compfolder. - Import four photos (each with 1,920 x 1,080 dimensions).
- Put the photos into the
imagefolder. - Make a new solid: Layer | New solid. Call this back, and make the color black.
- Bring your first image into the timeline.
- Hit S to get your scale. Adjust this so your image fits in the frame.
- Spend some time adjusting your image in the comp. You may not need to adjust the scale. However, if you need to adjust the size of your image, press S to get the scale parameter.
- Scrub the scale parameter to get the desired size:

Scaling an image
Let's add additional images to our slide show project. Follow these steps for adding images to your composition:
- Bring in a second image
- Adjust the scale
- Repeat these steps for the remaining images
- Select these layers and trim them so they are 3 seconds long
We are going trim our layers in the timeline. This will ensure that each image will be seen in the slide show for a certain amount of time:

Trimming layers
Let's follow these steps to trim the layers:
- Select all layers to go to 3 second in the timeline
- Select Alt + R bracket/option + R bracket (macOS) to trim the layers, or you can drag the layers to trim them
It's important to understand how to trim your layers for this project and other projects we will work on. Make sure your layers are lined up and trimmed:

Lining up the layers
After Effects has different types of assistance to help you with animation functions. We are going to use sequence layers. This will sort our layers across time. You can find this animation assistance on the top animation tab of your project window:

Sequence layers
Select All layers | Animation | Keyframe Assistance | Sequence Layers....
Notice that After Effects takes your layers and sequences them across your timeline evenly! The next step for our slideshow is at the end:

End of layer
The next step is to go 20 frames from the end of your layers (count backward from the end of the layer):

20 key frames
Next we are going to create a fadeout animation for our images:
- Press T for the opacity parameter.
- Click on the stop watch for opacity. This creates a key frame, which is the first step of any animation.
- Go forward 20 key frames. Turn the opacity down to
0.
Your timeline should have two key frames. The first key frame is 100% opacity, and the last one will be 0% opacity.
You can test the animation by dragging the time indicator over the key frames. The image should be fading out:

Opacity
To make the layer beneath this image fade on as the top image is fading off, we need to adjust this second image:
- Select the layer beneath the top layer.
- Drag your bottom layer, or choose Alt + L bracket to trim your layer to that point.
The top layer will begin to fade out as the layer shown next will appear or fade on:

Adjusting the second layer
The goal is to have each photo fade into the next layer. This will happen over the course of 20 frames. It will be a slow fade. Repeat the preceding steps for each layer, and then proceed as follows:
- Add a black solid layer, for the background
- Move this layer to the bottom of the layers
One of the most common things that new After Effects users forget to do is trim the work area at the end of a project:

Slideshow trim work area
- Drag the blue bar over from the right.
- Drag this to the end of your layers, or move your time indicator at the end of your last layer and press the keyboard shortcut N, to trim the work area.
The final step is to preview your slideshow. Look for anything you'd like to adjust. You can always tweak any of the settings after creating a project.
Congratulations! You've created your first animated project in this book!
Press the space bar to preview your animated slideshow!
Summary
I hope you enjoyed your grand tour of After Effects. We learned about the interface and how to import, edit, and mask layers. Most importantly, we learned how to animate! The basics of animation is key as you work on projects. Grasping these fundamentals will propel you forward to understanding even more complex tools and concepts. Learning the interface and the basic animation are basic but important blocks for building your amazing future with motion graphics!
In Chapter 2, Creating a Lower Third for a Television Show, we will animate using the Easy Ease assistant. We will also work with null objects to animate a lower-third project. We will use masking and animation tools introduced in this chapter. You will also learn how to create type and how to use precomps.
Questions
- What are the steps for creating an animation?
- How do you trim or extend a layer in the timeline?
- How do you trim or extend the workspace area?
- Where are the safe guides located?
- How do you advance one key frame down the timeline?
- How do you preview your movie?
- How do you create a solid layer?
- Where are your masking shapes located?
- How do you edit one single masking point?
- How do you edit all the masking points at once?
- How do you apply the subtract masking?
- What is a key frame?
- How are key frames represented on the timeline?
- How are seconds represented on the timeline?
Further reading
- To understand more about guides and using views, check out the following: https://helpx.adobe.com/after-effects/using/modifying-using-views.html
- To understand more about the timeline in After Effects, click on this link: https://helpx.adobe.com/after-effects/using/composition-basics.html#timeline_panel
- More information about masking tools can be found here: https://helpx.adobe.com/after-effects/using/creating-shapes-masks.html#create_a_shape_or_mask_by_dragging_with_shape_tools
- imation, follow this link: https://helpx.adobe.com/after-effects/using/setting-selecting-deleting-keyframes.html#Whatarekeyframes


