In this chapter, we will get you familiar with Python and how you can use the GPIOs on this device. To do this, go ahead and click on the Raspberry icon in the top left-hand corner. You will see the Python console 3.0. There could be an older version of Python as well. We will be using the newer version in this book.
Once the window opens, you will see the playground where you would be doing the coding. So now we are ready to write the first code for Python Robotics. Now let's see how it's done.
The first thing we will write is:
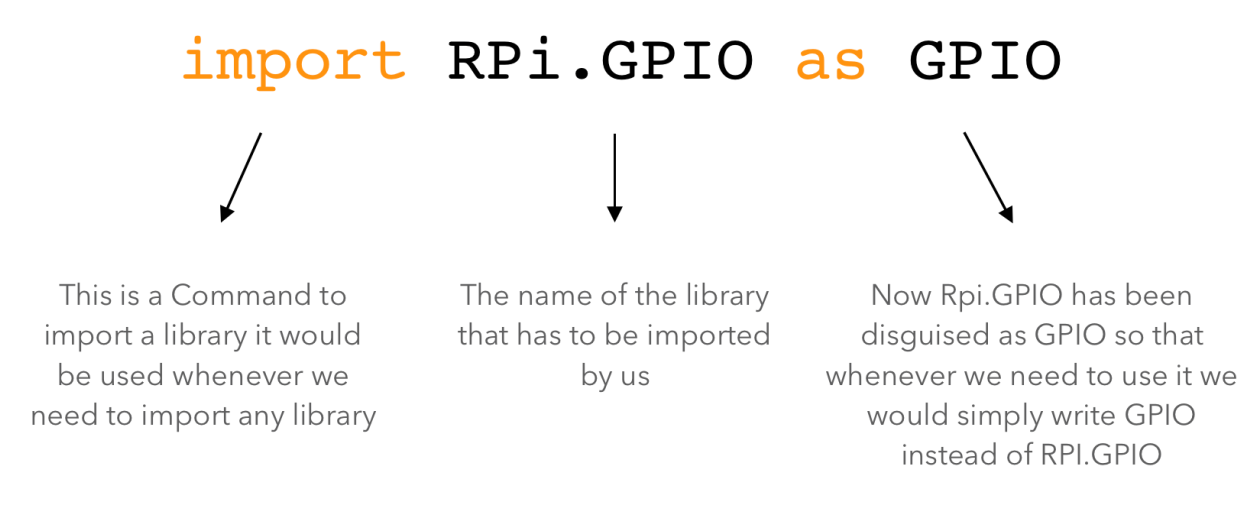
Almost all of the time when we start writing a program, we will start by writing the preceding line. Now, before we understand what it does, we need to understand libraries. Often while we are writing code, we will have to write the code again and again in multiple places. This takes a lot of time and certainly is not cool!
So, to solve this problem, we created functions. A function is a miniature program that we might think would be used over and over again. In this miniature program itself, we also mention what it would be called.
Let's say that there is a code in which we need to multiply two numbers again and again. So, what we do is we write the code once and make it a function. We also name this function Multiply.
So now, whenever we need to multiply two numbers, we don't have to write its code again; rather, we simply have to call the function to do it for us instead of writing the code to multiply. The problem is, how do we tell which number has to be multiplied?
There is a solution to that as well. As you might see later, whenever a function is called we put opening and closing brackets after it, such as multiply().
If the brackets are empty that means no user input has been given. If, for example, we have to multiply 2 and 3 we simply write Multiply(2,3).
We are giving the input as 2 and 3. The position of the input in the brackets is also important as the position in the brackets will define where in the program it will go.
Now, let's say you make functions such as:
- Add
- Subtract
- Multiply
- Divide
Say you stack them together. Then the pile of functions grouped together will be called a library. These libraries can have hundreds of functions. There are some functions which are already in the Python language so that the job is made simpler for the programmers. Others can be defined as open source or developed by you at your convenience.
Now, getting back to the point. We are calling the library RPi.GPIO; this is a library defined by Raspberry Pi. This will have functions that will make your life easier when it comes to programming Raspberry Pi. So, in the program, once we call the library, all the functions are at your disposal and ready to be used.
In the next line, we write Import.time. As you must have guessed, this is used to import a library time. What it does we will learn shortly.
The next line of code would be as follows:
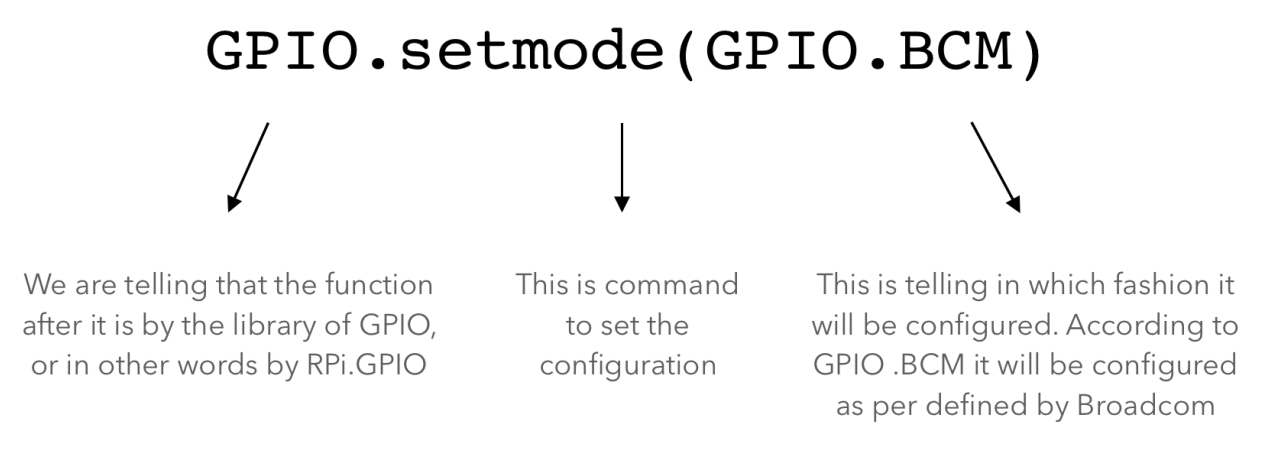
Before we understand what it does, let's learn a bit more about GPIOs. These pins are hard numbered according to their physical positions in Raspberry Pi. However, we can change the numbering of the pins in the software for our understanding and convenience. But in this code, we will not be playing around with this and will set it do the default set by Broadcom, which is the manufacturer of the microcontroller of Raspberry Pi.
This line uses a function of the RPi.GPIO library called setmode. What this function does is that it sets the pin configuration of the setmode to (GPIO.BCM)—BCM is further a function of GPIO.
Now we can use the base pin configuration. Further to this, a specialty of the GPIO pins is that it can be used both as input and output. But the only condition is that we have to specify whether it has to be used as input or output in the program itself. It cannot do both functions at the same time. Here is how it is done:
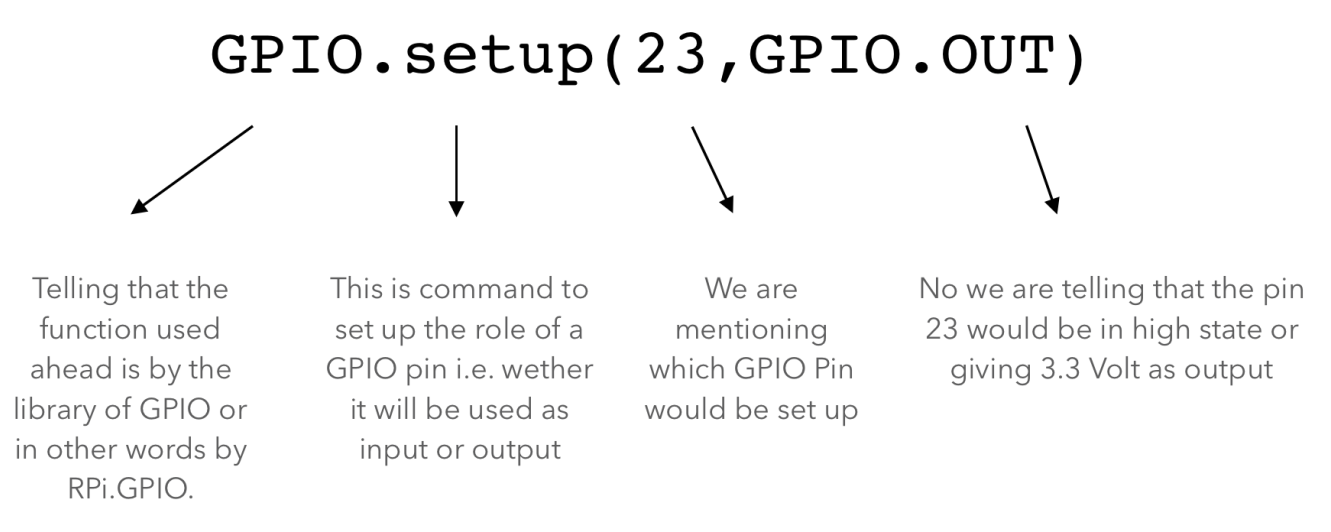
The next line of code will be as follows:
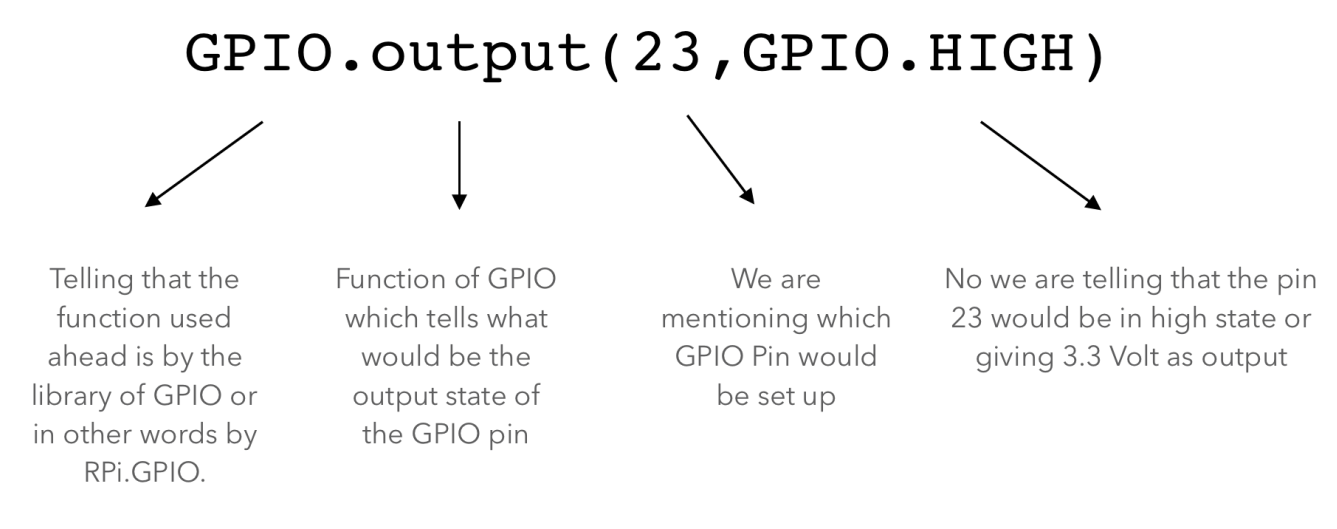
Again, we are using a function of the library GPIO called output. What this does is that it sets up a specific pin of the board in a state which we want. So, here we have mentioned that the pin number 23 has to be set high. Just for the sake of clarity, high means on and low means off.
The next line of code will be as follows:
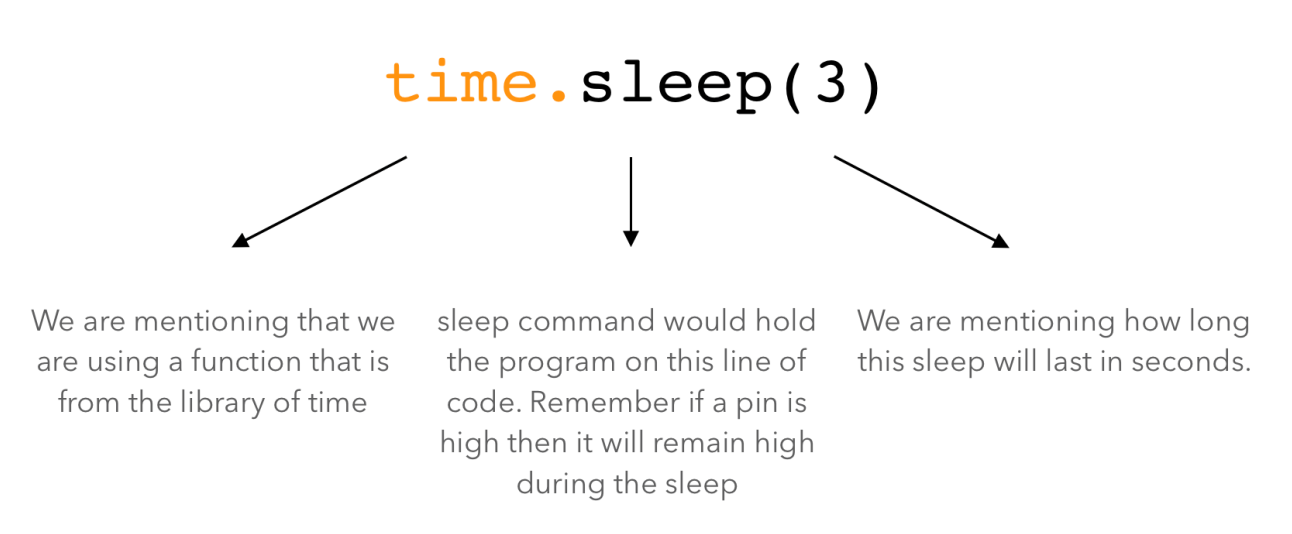
In this line, we are using a function from the library time. The function sleep basically freezes the state of all the GPIO pins. So, for example, if the pin 23 is high then it will remain high until the time the function sleep is executed. In the function sleep, we have defined the value as 3 seconds.
Hence, for 3 seconds, the pin state of Raspberry Pi will remain as it was before this line of code.
Finally, the last line of the code will be:
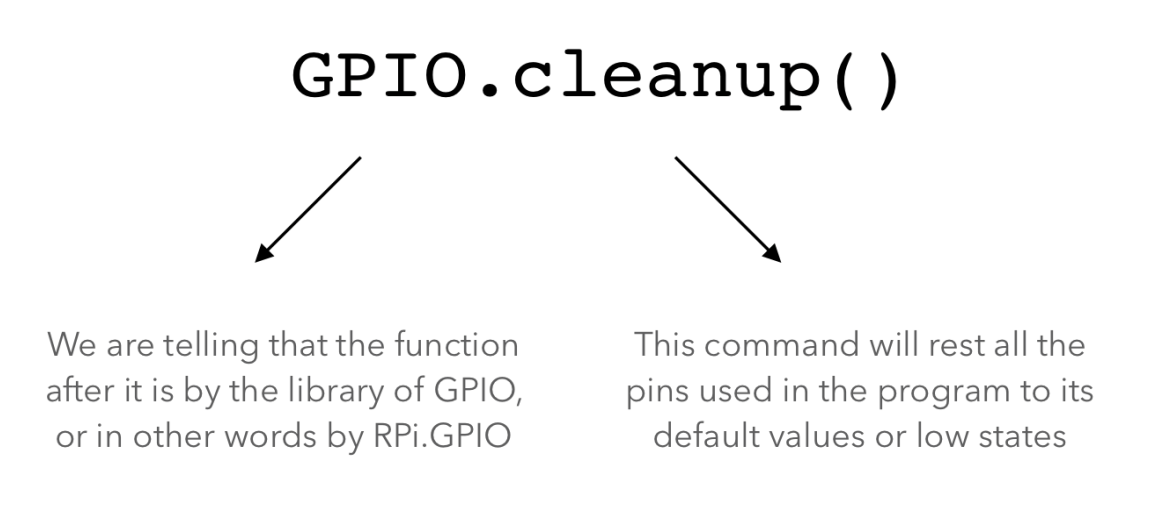
This will be a common sight after every program. This function of the GPIO library will reset the state of every pin that has been used in the program—the state of all the pins will be low. Remember, it will only affect the pins that are used in the program and not any other pins. So, for example, we have used the pin 23 in the program, so it will only affect pin 23 and not any other pin in Raspberry Pi.
Finally, your program will look something like this:
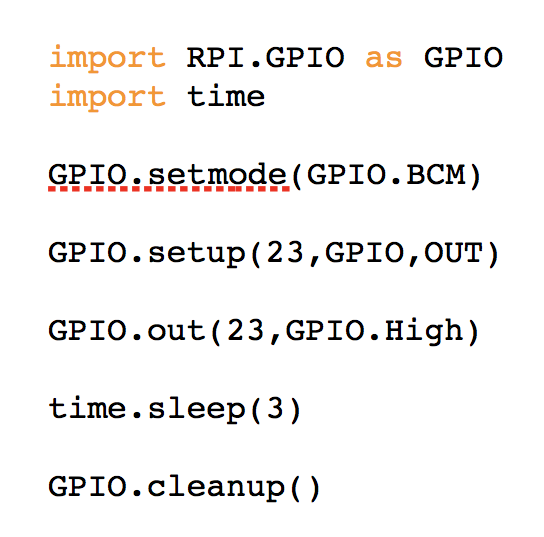
Now, one thing that you must remember is that whatever code we are writing will be executed one line after the other. So, let's say we keep import RPI.GPIO as GPIO at the bottom, then the whole program will not work. Why? Because as soon as it goes to GPIO.setmode(GPIO.BCM) it will not understand what GPIO is, neither will it understand what setmode is. Hence, we always import the libraries as soon as we start writing the code.
Now, working on the same concept, it will execute the program in the following way:
- GPIO.out(23,GPIO.High): It will turn pin 23 high/on
- time.sleep(3): It will wait for 3 seconds while pin is still high
- GPIO.cleanup(): Finally, it will set the state of the pin 23 to low
Now, to see whether the program is working, let's attach some hardware to check whether what we have written is actually happening.
Now go ahead and connect the LED on breadboard, then connect the ground of the LED to the ground pin in Raspberry Pi, and set the positive/VCC to pin number 23 (refer the pin diagram).
You can also refer to the following diagram:
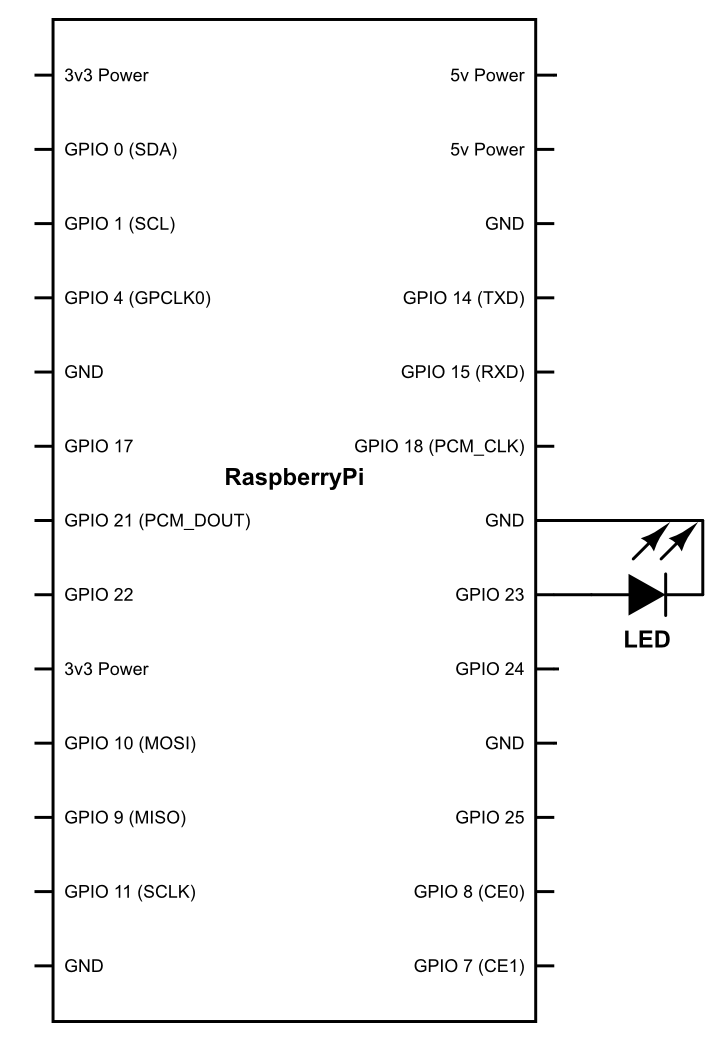
Once you are done, go ahead run the code and see what happens!
The LED will glow for 3 seconds and then turn back off again, exactly as we expected it to do. Now let's just play around with the code and do a slight modification. This time, we will add a few more lines marked in bold:
import RPi.GPIO as GPIO
from time
import sleep
GPIO.setmode(GPIO.BOARD)
GPIO.setup(23, GPIO.OUT)
while True:
  for i in range(3):
  GPIO.output(23, GPIO.HIGH)
sleep(.5)
GPIO.output(23, GPIO.LOW)
sleep(.5)
sleep(1)
GPIO.cleanup()
Before understanding what's inside the code, you will notice that not every line is aligned, they have been intended. What does this mean ?
A line indented together with other lines of code is called a block. So for example if you have a statement such as
while True:
  for i in range(3):
  GPIO.output(23, GPIO.HIGH)
sleep(.5)
GPIO.output(23, GPIO.LOW)
sleep(.5)
sleep(1)
GPIO.cleanup()
Now in this line lets see how the code will run.
- A while true loop would run, this will run the code that is inside it i.e.
for i in range(3):
  GPIO.output(23, GPIO.HIGH)
sleep(.5)
GPIO.output(23, GPIO.LOW)
sleep(.5)
sleep(1)
- Thereafter the code for I in range (3): would run. It will run the code inside the for loop until the value of I is in range, Hence the code below would run.
GPIO.output(23, GPIO.HIGH)
sleep(.5)
GPIO.output(23, GPIO.LOW)
sleep(.5)
The above code can be referred to a block of code, which is inside the for loop. The block of code can be made by indenting the code.
Now, let's see what it does. While True is a loop, it will run the for loop inside it again and again until the time the condition is not false. The condition we are using here is:
for i in range(3):
The maximum range is 3 and every time the statement runs it increments the value of the i by +1. So it basically acts as a counter. Let's see what the program will actually do.
It will check for the value of i and increment it by 1 thereafter. As the code progresses, it will glow the LED high for 0.5 seconds and then shut it off for 0.5 seconds. And then it will wait for 1 second. This will repeat until the while loop is false, as in the value of i becomes greater than 3 where it would get out of the program and terminate. Run the program and see if it actually happens.
By now, you understand how easy the programming is in Raspberry Pi. To go a step further, we will make another program and make some changes to the hardware.
We will be connecting five more LEDs from pin numbers 7 through to 12. We will make them switch on and off in a pattern.
Once connected, we will write the code as follows:
import RPi.GPIO as GPIO
from time
import sleep
GPIO.setmode(GPIO.BOARD)
GPIO.setup(7, GPIO.OUT)
GPIO.setup(8, GPIO.OUTPUT)
GPIO.setup(9, GPIO.OUTPUT)
GPIO.setup(10, GPIO.OUTPUT)
GPIO.setup(11, GPIO.OUTPUT)
while True:
  for i in range(7, 12):
  GPIO.output(i, GPIO.HIGH)
sleep(1)
GPIO.cleanup()
Now the code is fairly simple. Let's see what it means:
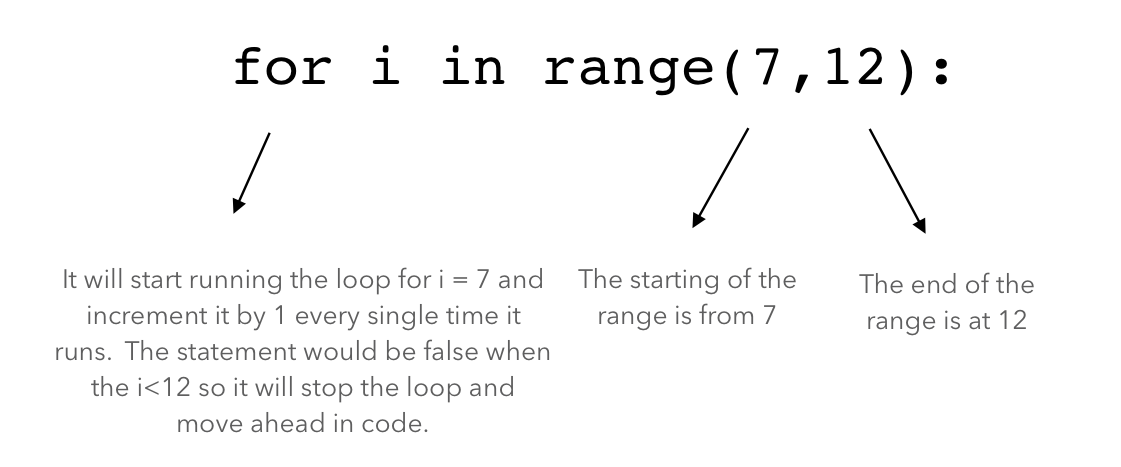
Before I tell you something more about the code, let's go ahead and run it.
When you run it, you will understand that as per the statement it is addressing the pins one by one and switching them to high after every 1 second.


