Technical requirements
Which software to use to run a project locally can be a matter of taste or a best practice enforced by a team (or an organization). In this section, we’re going to install a selection of software that is free (at least for personal use) and, if possible, open source.
The following selection is not mandatory but it will simplify reading the rest of the book because all the screenshots and examples are based on the platforms mentioned.
Git
Git is a distributed version control system that helps developers manage their source code changes over time. It tracks changes in code and allows multiple developers to collaborate on a project simultaneously. Git allows developers to work on their own copy of the code, experiment with different changes, and merge those changes back into the main code base when they're ready. It also allows for backup and recovery of code in case of system crashes or data loss. Git is widely used in software development and other collaborative projects.
The code used in this book is hosted in a Git repository provided by a company called GitHub. From that remote repository, you can obtain (clone) a copy of the code. A Git client is available by default on Linux and macOS systems; on Windows, you must use the WSL 2 subsystem.
You usually interact with Git using the command line, but different tools exist to provide a graphical user interface (one of these is Visual Studio Code, which we’ll install later).
Docker
Docker is a technology used to replicate the same software stack everywhere, independently of the host operating system. This is mandatory to keep consistency between all the developers in a team who may individually use different operating systems. Docker is also useful for replicating as much as possible the configuration of the production environment or having multiple stacks on the same local machine, each one with different software versions and configurations. Maybe you’re working on an old Drupal 7 website that requires PHP 7.*, and a shiny new Drupal 10 website that requires PHP 8.1.
Docker can be installed in different ways, but here we’ll use the simplest one: Docker Desktop.
Docker Desktop is a commercial application developed by the Docker team itself and it’s free for use unless you’re in a large enterprise (more than 250 employees or more than 10 million USD in annual revenue) or some government entity.
Detailed instructions on how to install it can be found at https://docs.docker.com/get-docker/. In the next examples, we’ll use macOS, but the setup and usage are the same on Windows and Linux.
After the installation, you may need to set up Docker Desktop to match your system. Here’s how to do that:
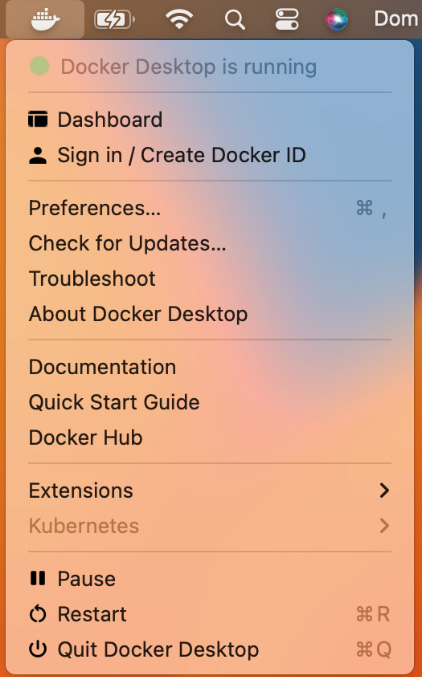
- To run Docker, simply click on its icon in the applications list. Once it's up and running, you'll see the Docker icon appear on the top right of your screen. Clicking on the icon will open a menu where you can easily check if Docker Desktop is running smoothly or if there are any issues to address.

Figure 1.1 – Docker Desktop menu
- Click on the Preferences link to open the Preferences window.
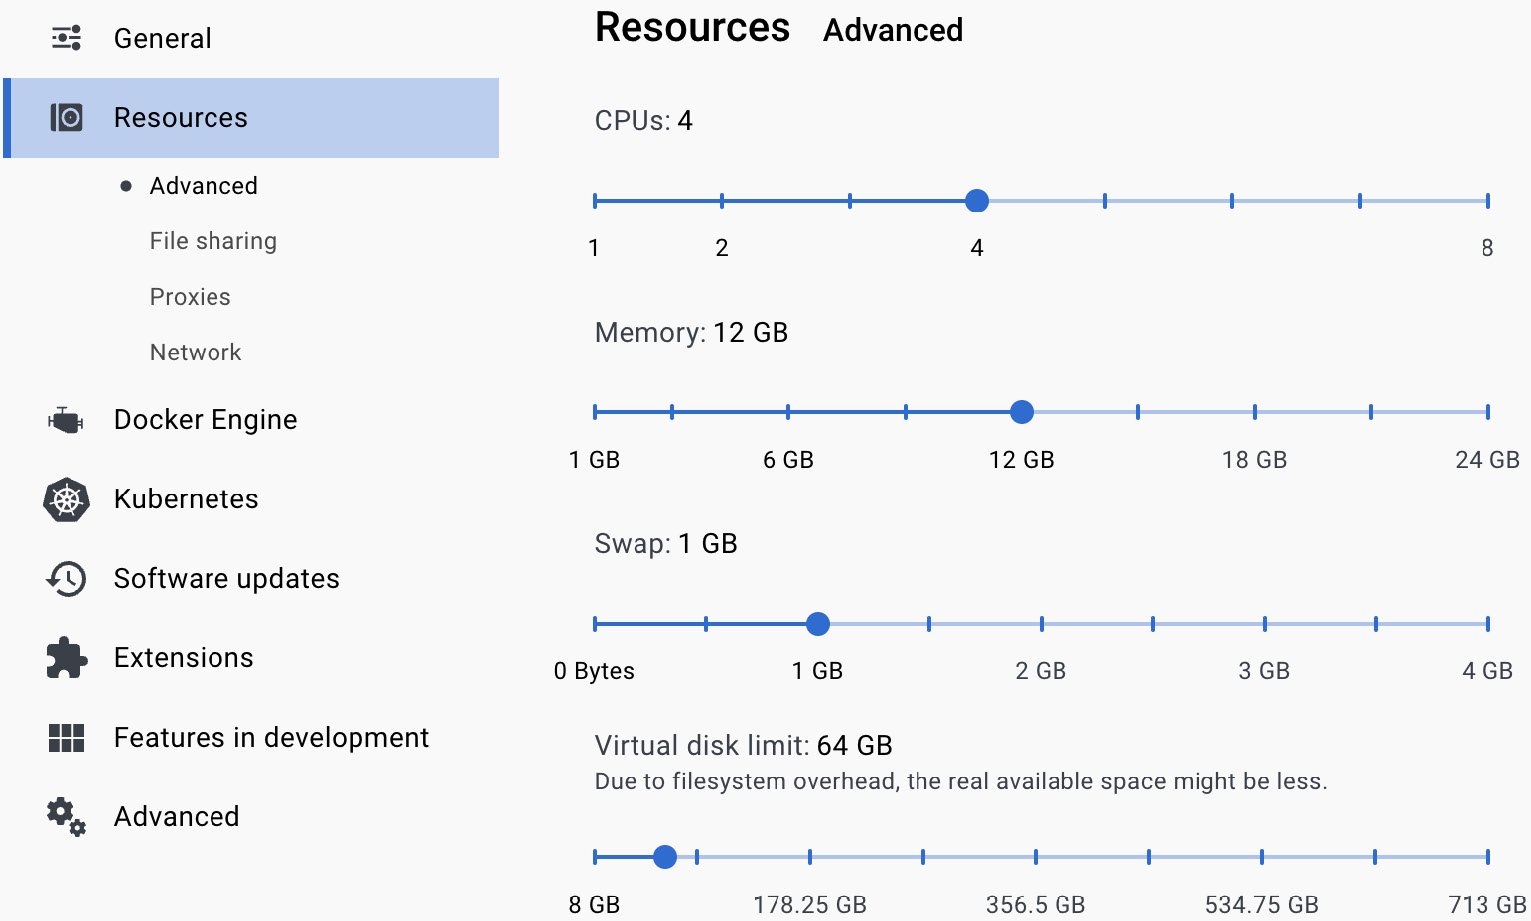
- Click on the Resources | Advanced section to tweak how many of your system resources Docker can consume. On the right pane, you can select how many CPUs and how much memory, swap, and disk size Docker can use:

Figure 1.2 – The Advanced section of Docker Desktop
In this case, I’ve set my system to grant Docker up to 4 CPUs and 12 GB of memory. Usually, you’ll want to choose half of the resources of your system.
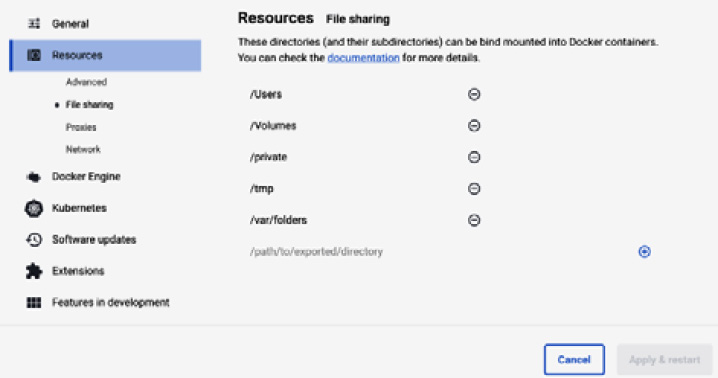
- Click on the Resource | File sharing section to configure which directories can be bind-mounted into Docker containers:

Figure 1.3 – The File sharing section of Docker Desktop
In a production environment, you will have a Docker image that contains both the PHP interpreter and the code of the website, but in a local environment, to speed things up, the code stays on the host (your local machine) and is then mounted (made accessible) to the Docker container using a volume. Docker Desktop allows only for a subset of your computer filesystem to be mounted to a Docker container (for security and performance); you can set which directory to include in the File sharing section of the Preferences pane. The /Users directory is included by default, so you can just clone the demo repository somewhere inside this folder.
To be sure everything is clear, here you can find a list of base Docker concepts as a reference:
- Docker engine: The core system that allows you to build and run containers.
- Image: Contains a list of instructions used to build a container.
- Container: This is the executable image that contains everything needed to run an application.
- Volume: This is the system used by Docker to persist a container’s data between executions. So, container data stored in a volume will be preserved even if the container itself is stopped or removed. Furthermore, the same volume can be attached to multiple containers.
- Compose: This is a tool that allows a set of containers to work together in the same network.
To run a Drupal website, we need at least two containers—one with a web server and one with a database server. Other containers can be useful during development, such as one to explore the database data and one to catch sent emails (for debugging purposes).
Of course, you can set up your stack from scratch, choose which images to use (or build some custom ones), configure them, find a way to orchestrate them, and so on. Because this is a book on Drupal and not Docker, we’ll use a tool that does everything we need for free.
DDEV
DDEV is an open source tool to speed up local PHP development. It uses Docker to configure and run everything that is required to work on a Drupal (or other PHP-based) website. It also provides a lot of commands to interact with the stack.
DDEV configurations can be added to Git and shared with all developers in the team. In this way, whoever clones and spins up the project will have exactly the same environment.
Again, the installation procedure depends on your computer's operating system. You can find all the details on the project website: https://ddev.readthedocs.io.
Note
Pay attention to the installation procedure—one required step is about installing and configuring mkcert (https://github.com/FiloSottile/mkcert). mkcert allows you to visit any DDEV-managed website using HTTPS just as it will be in production.
DDEV doesn’t have a graphical interface; everything is managed through the command line. To see a list of all available DDEV commands, you can simply type ddev on your terminal:
ddev
The demo code you’ll download in the next section contains a ready-to-use DDEV setup, located in the .ddev folder in the root of the repository.
Visual Studio Code
More than just a code editor, we need a full IDE to support our work with different kinds of files. Here, we have a lot of choices, which are mainly driven by personal taste and budget. One IDE that is free but very powerful is Visual Studio Code.
Visual Studio Code is a free application that runs nearly everywhere, from every operating system through the web (it’s the IDE that powers https://github.dev and https://www.gitpod.io, for example).
Note
You can find detailed instructions about how to download and install Visual Studio Code at https://code.visualstudio.com/docs.
Visual Studio Code's features can be enriched by installing extensions; we’ll need some of them to speed up our work, including the following:
- PHP Intelephense
- PHP Debug
- Tailwind CSS IntelliSense
- Twig Language 2
- Prettier (a code formatter)
To install an extension, follow these steps:
- Open Visual Studio Code.
- Click on the View | Extensions menu item to open the extensions view.
- Use the search engine to find the extension to add.
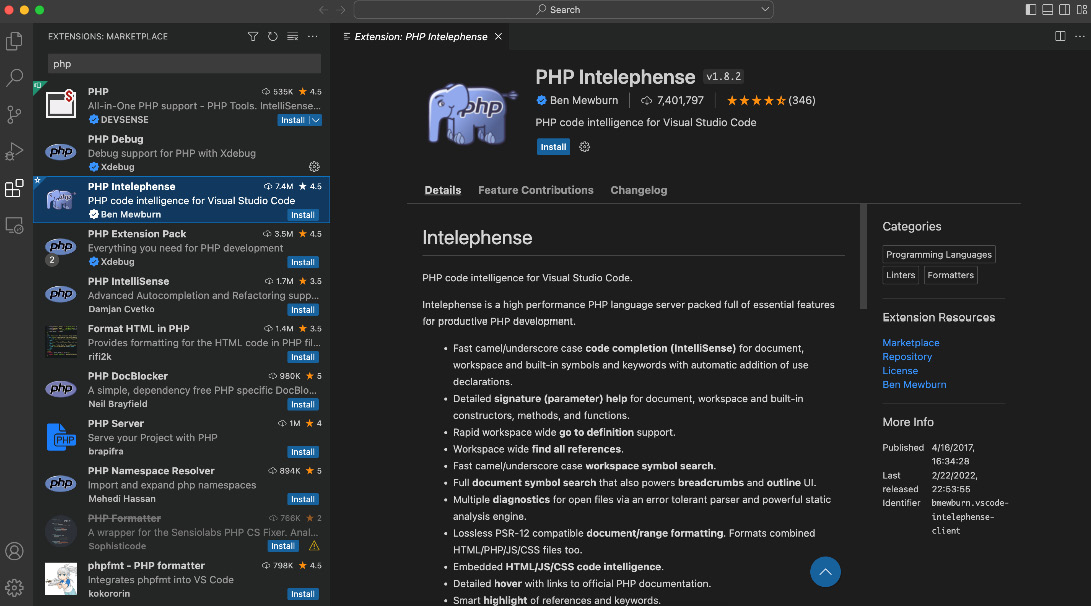
- Click on the Install button under the extension name in the right pane:

Figure 1.4 – PHP Intelephense is one of the most complete plugins for working on PHP with Visual Studio Code
Our local stack is ready to be used. In the next section, we’ll use it to set up and run the demo website.


